Some businesses are born offline and then, once they are firmed up, business owners want to put them online. In most cases, they have a database in spreadsheets, which needs to be exported or synchronized with a specific software. Our use case is about this:
- An owner of a sandwich bar uses Airtable as a database to store the data about products.
- To sell sandwiches online, she connected Airtable to Glide apps to create a mobile app.
Here is how it looks:

The best thing is that everyone can build a similar app for their needs without writing a single line of code! Read on to learn how you can do this.
Steps to connect Airtable to Glide apps
Glide Apps supports two data sources by default:
- Glide Tables (a built-in data source)
- Google Sheets
And what if you use another solution as a database, such as Airtable, as in our example? In this case, you need to integrate your data source with Google Sheets using a specialized tool – Coupler.io. It will let you synchronize your database with Google Sheets on a custom schedule so that your Glide app will use up-to-date records.
With that in mind, here are the steps you’ll need to complete to set up an Airtable with Glide apps integration:
- Connect Airtable to Google Sheets
- Create a Glide app from the exported data
In our case, the route will look like this:
Airtable → Google Sheets → Glide
And there you go!
Link Airtable with Glide Apps via Google Sheets
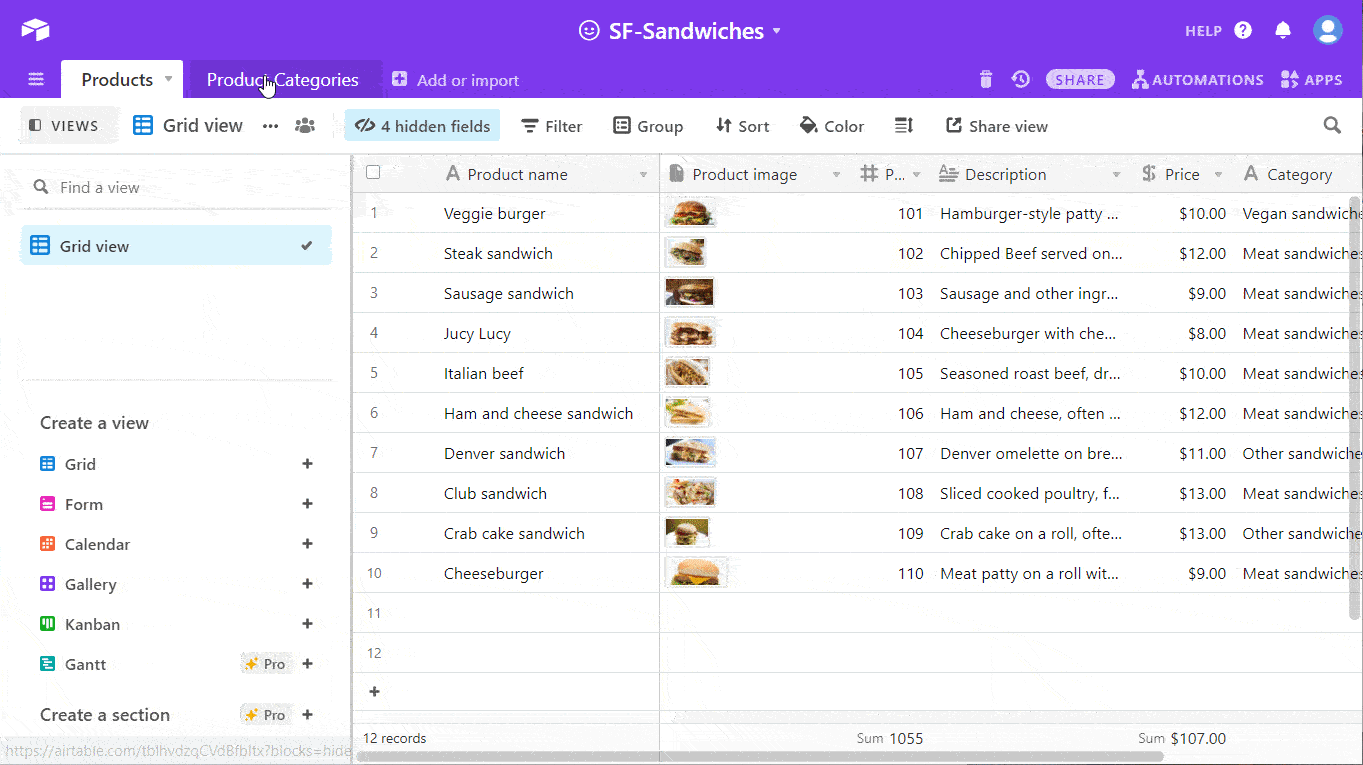
Our Airtable database includes two tabs:
- Products – list of all products available for sale
- Product categories – categories to group the products by
The simplest and no-code way to connect Airtable with Google Sheets is to use Coupler.io. It is a solution for importing data into Google Sheets from different sources on a schedule. In addition to Airtable, you can import data from Shopify, Xero, BigQuery, Slack, and other data sources.
You need to sign up to Coupler.io for free, click Add new importer, and complete these three steps:
- Set up Source – where you’ll be exporting data from
- Set up Destination – where you’ll be importing data to
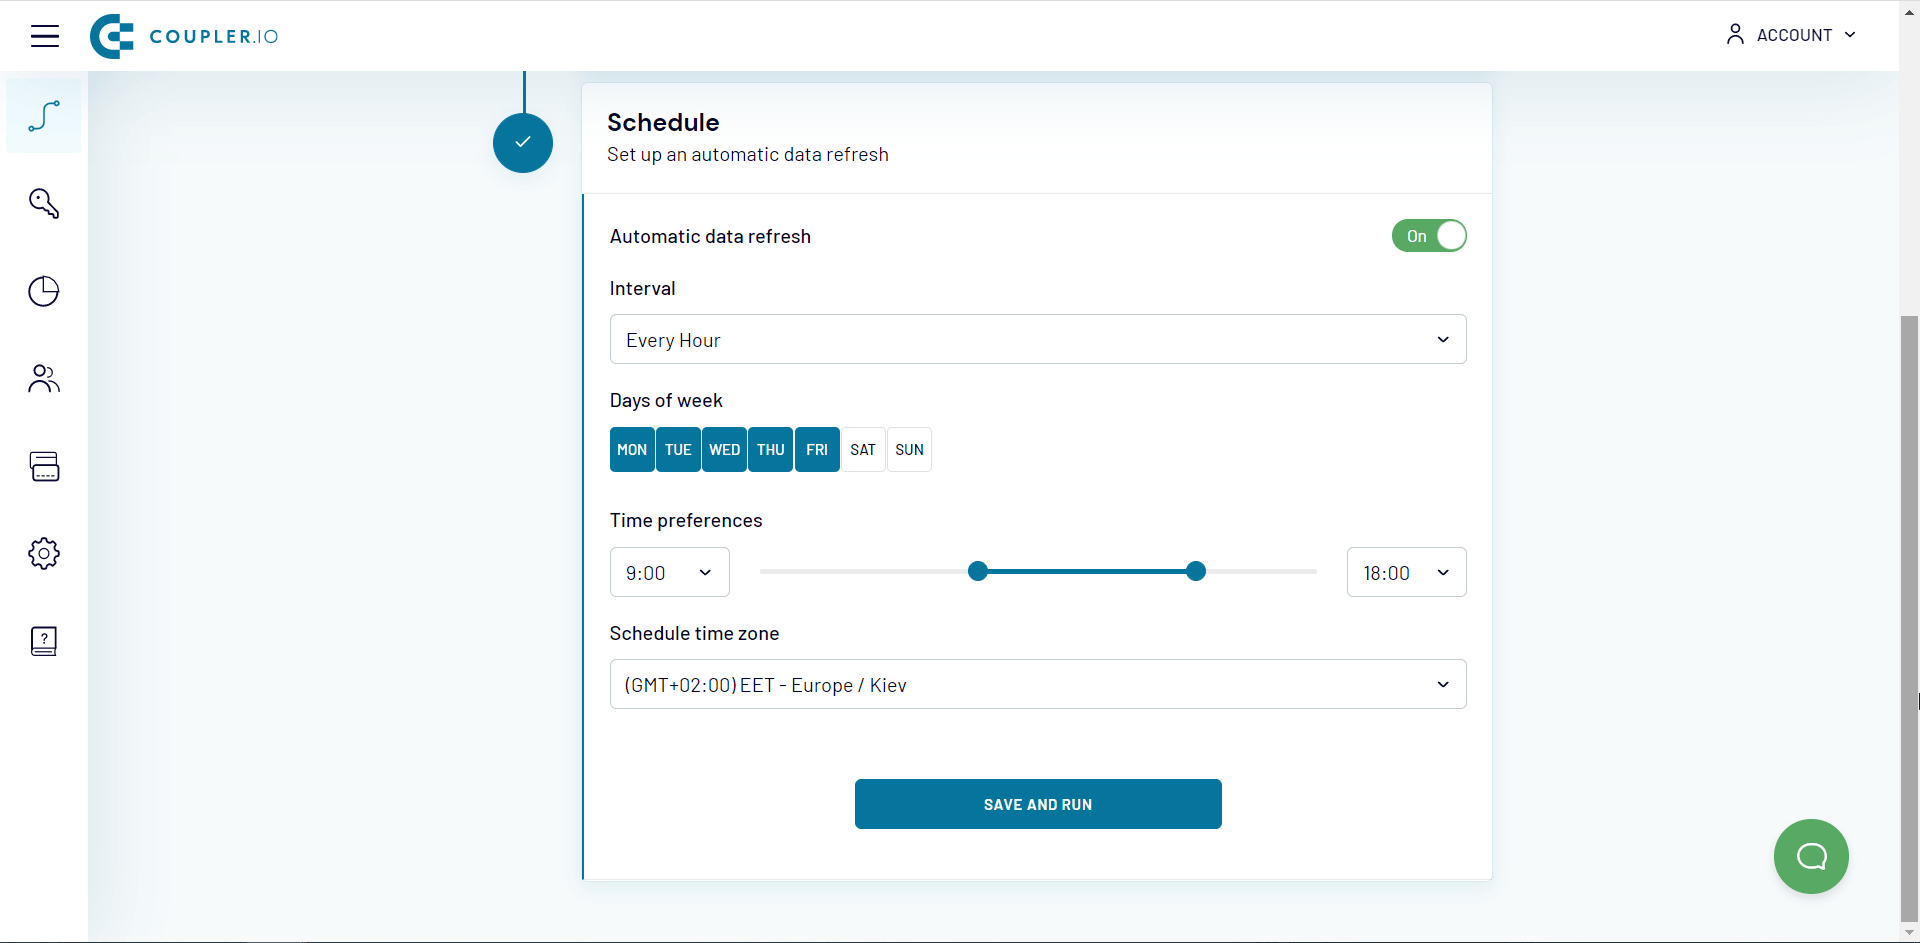
- Set up Schedule – customize the frequency of data refresh
The Destination and Schedule sections are the same for all importers available, but the Source will differ depending on the source application you choose. For example, here is the Source configuration for exporting data from Airtable.
- Source application – choose Airtable and click “Continue“.

- Shared URL – insert the Airtable view share link and click “Proceed to Destination Settings“.
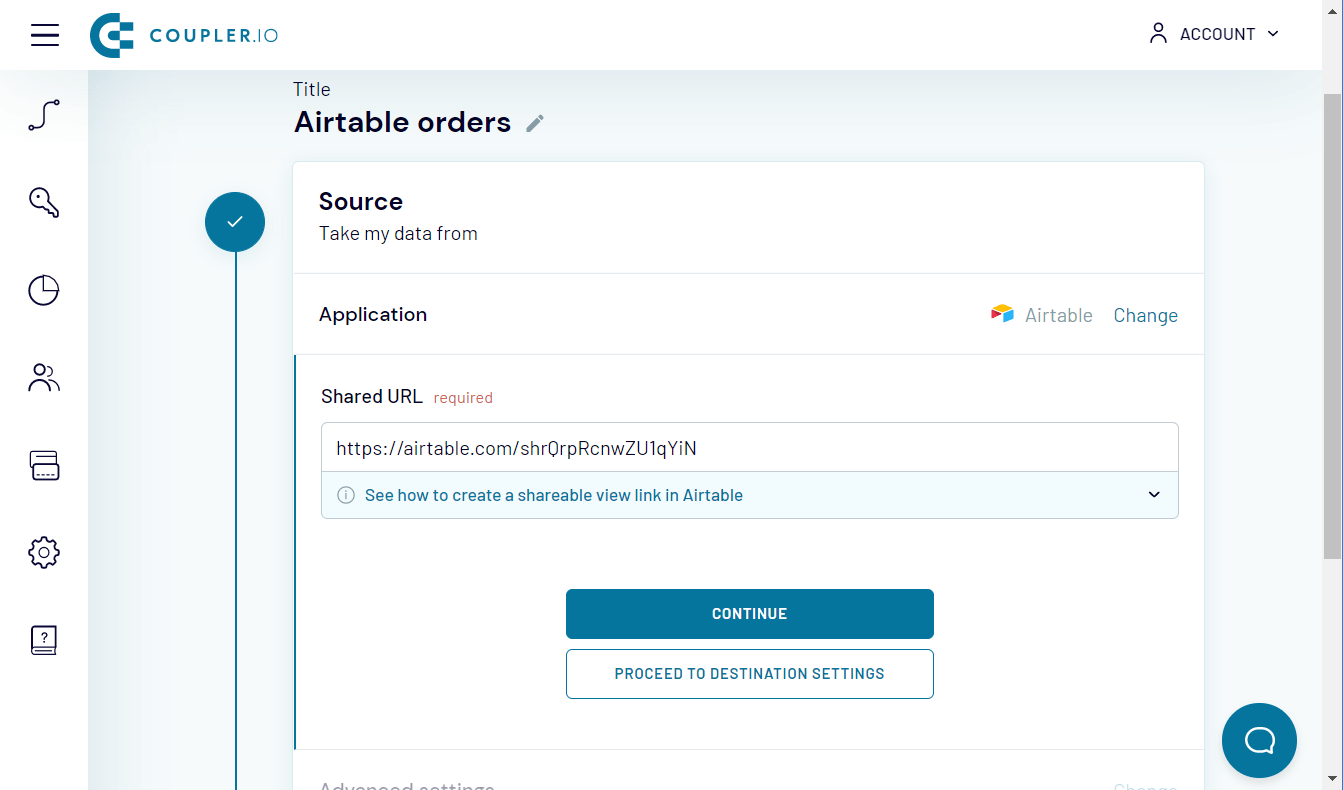
Note: If your Airtable view is password protected, then click “Continue” and insert the password in the respective field. After that, you can proceed to Destination settings.
In the Destination section, you’ll need to connect to your Google account and specify the spreadsheet and the sheet to import data to.

In the Schedule section, you can enable the automatic data refresh. This will pull your data from Airtable to Google Sheets on a schedule you can customize.
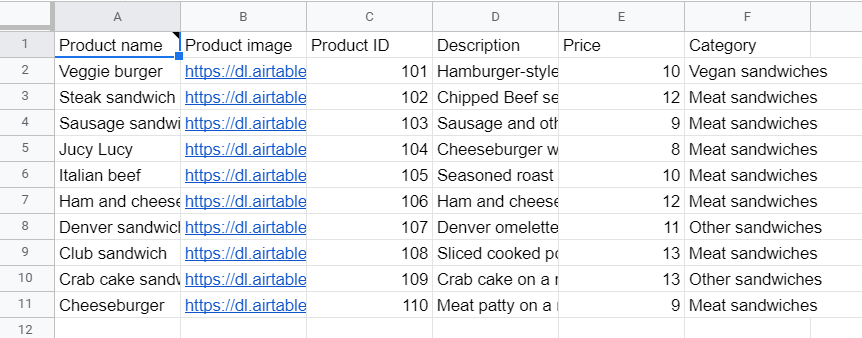
The final action here is to click “Save and Run” => this will make the first import of data and schedule the automatic imports. Here is how the Products tab exported from Airtable to Google Sheets looks:
To export the Product Categories tab from Airtable, you’ll need to set up a separate Airtable importer as explained above.
We connected the Airtable database to Google Sheets, which means that we can connect Airtable to Glide apps.
Create a Glide app using Airtable as a data source
Sign up to Glide and click “New App“.
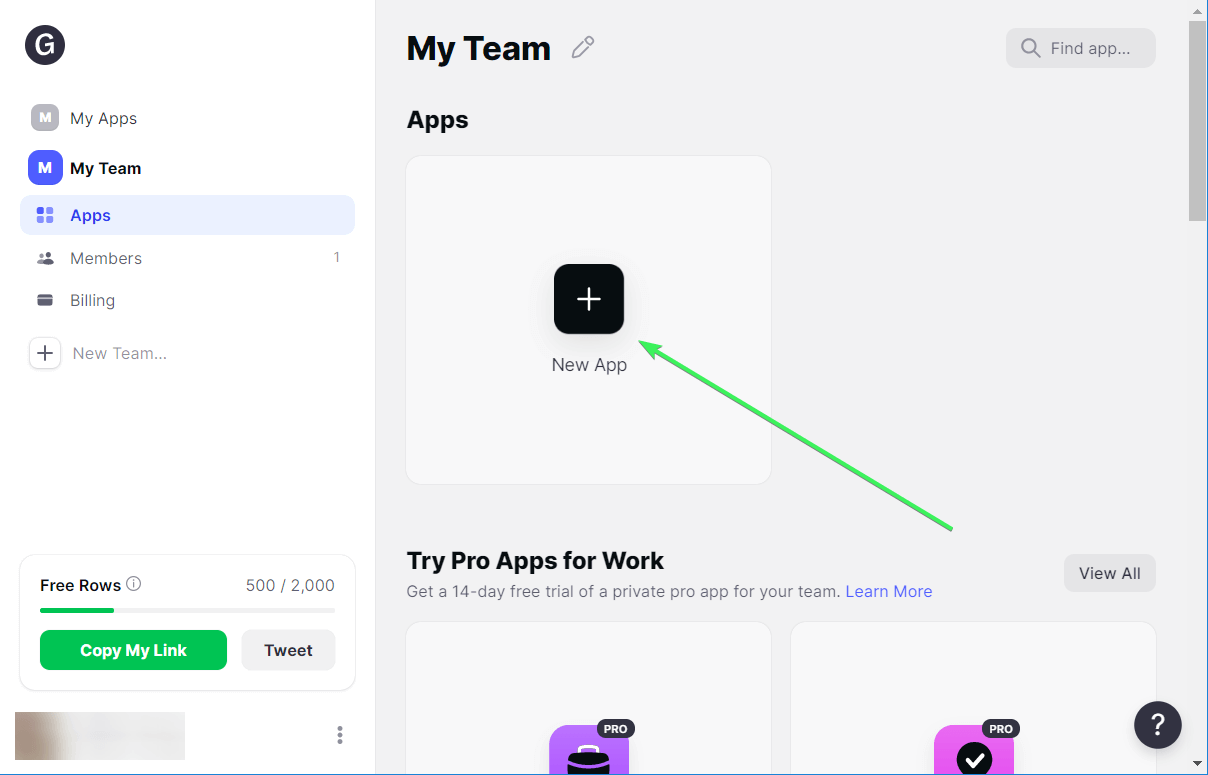
Then you’ll need to select Google Sheets as a source. Click “Continue“.

Select the spreadsheet with data from your Google Drive and let the magic begin!
Set up the app’s tabs
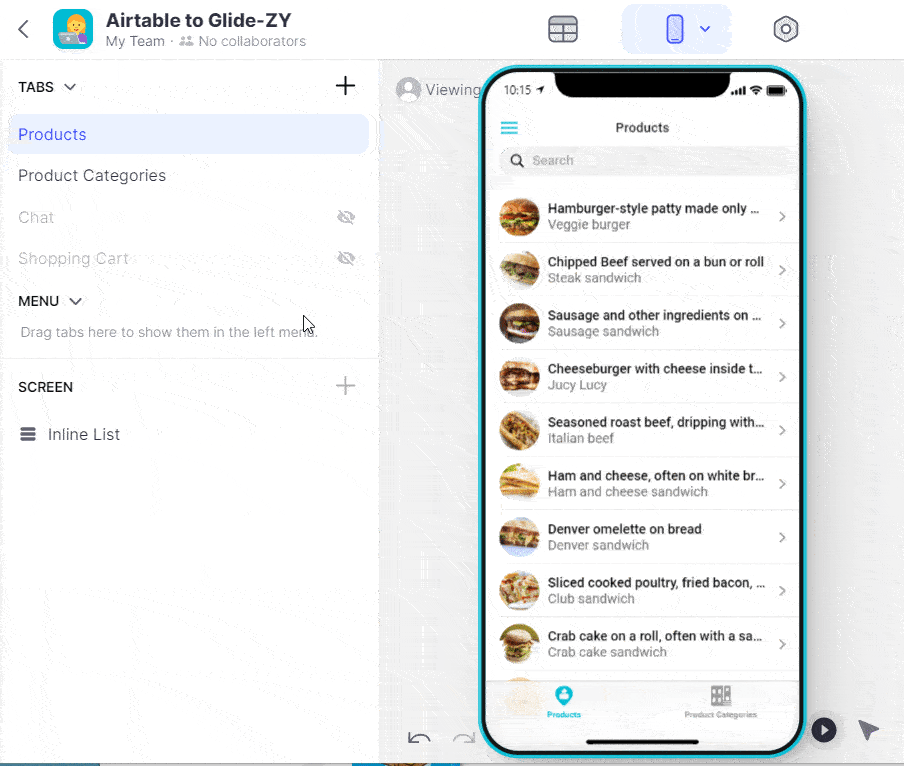
From the outset, your app looks like this:

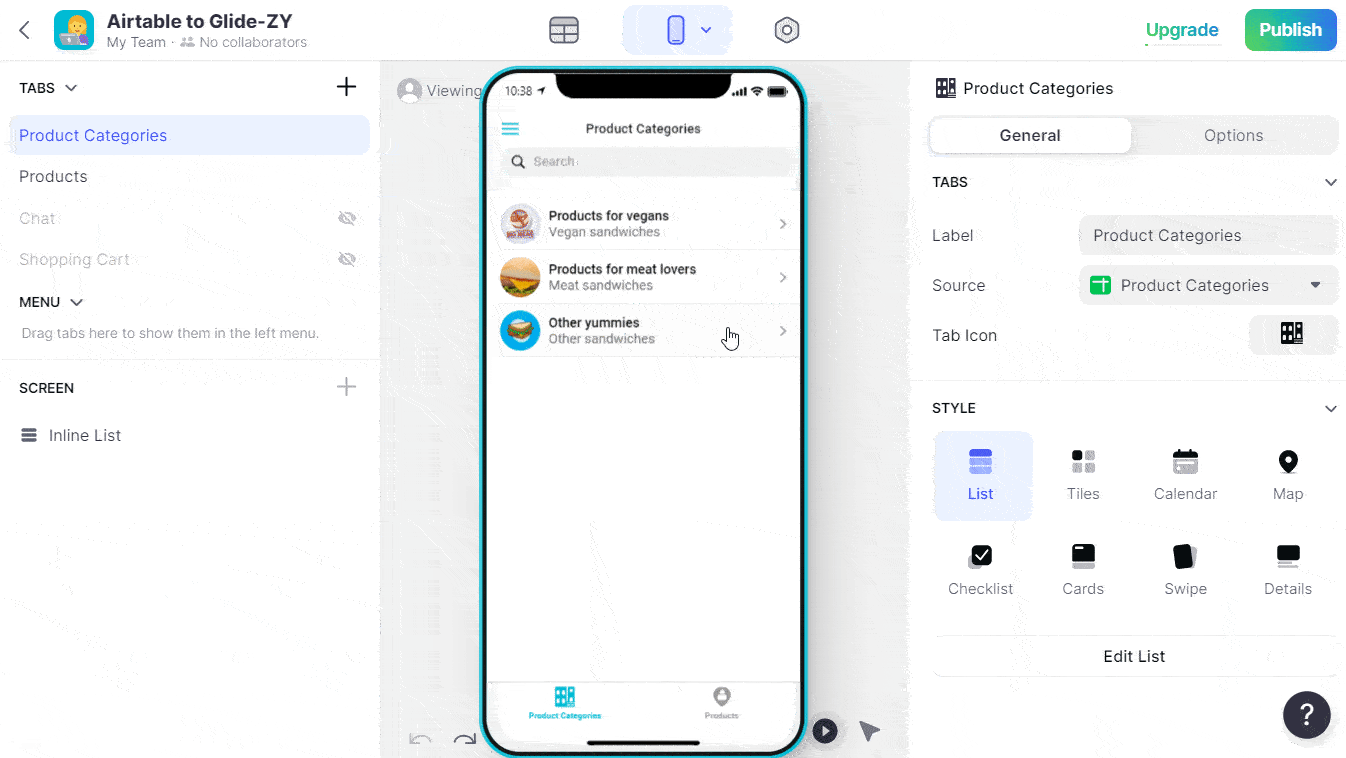
It’s a no-go! We want the customer to see the Product Categories tab first, which will expand the list of products. To do this, drag the Product Categories tab above the Product tab.
Then we need to set up relations between our tabs – this will expand the Product Categories tab and show Products in the chosen category when the user clicks on it. It’s a tricky step, so be careful and do the following:
- Go to your records by clicking the spreadsheet button
- Click the plus button to add a new column
- Choose Relation as the Column type
- Specify the source column (column on the current sheet) and the target column (column on another sheet to set up a relation with)
- Check the Match multiple checkbox

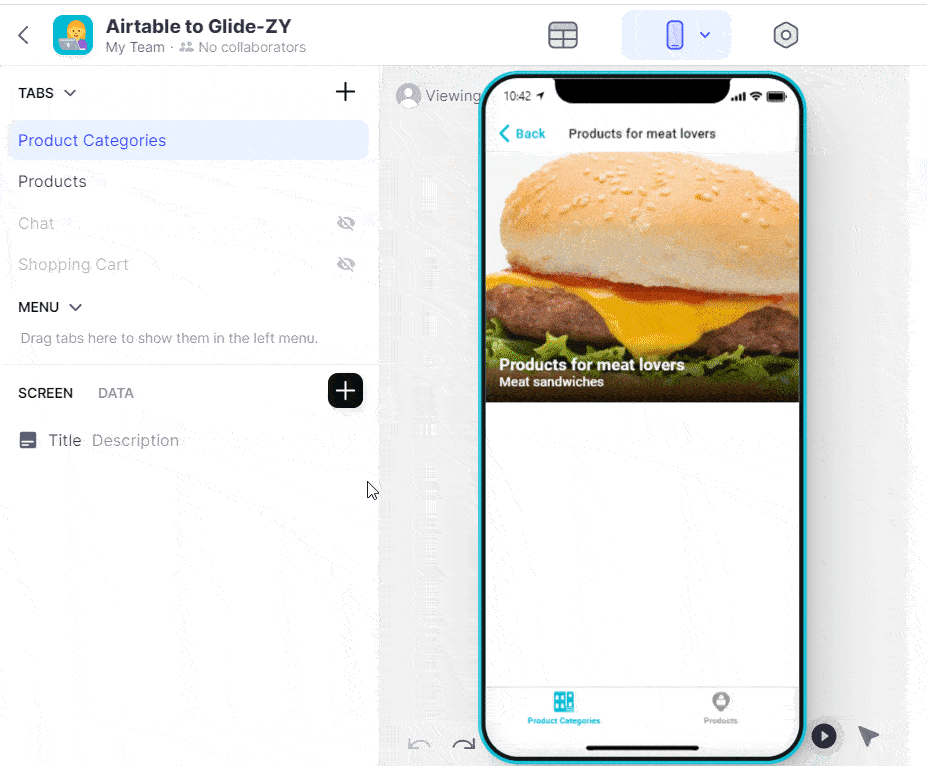
After that, go to your app and click on any category -> it won’t expand the products as needed. 🙁
To enable this behavior, you need to replace Title Description with Inline List in the Screen section on the left, as follows:
Feel free to customize the data of your products you want to be displayed, as well as the appearance of it:

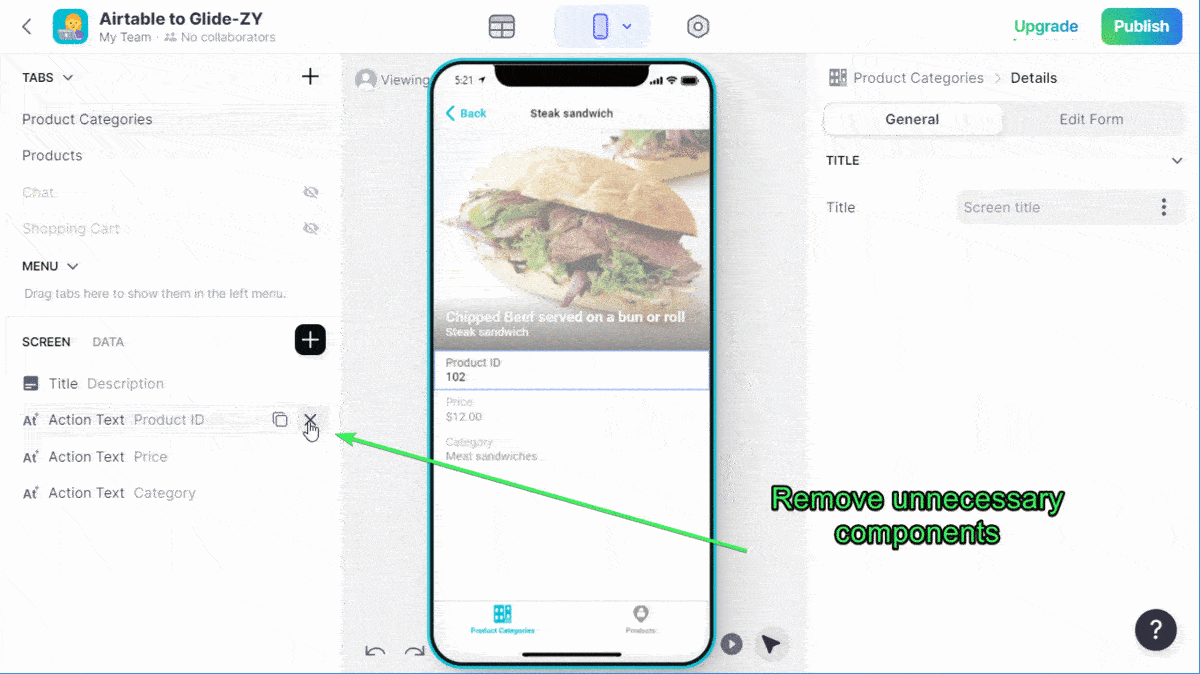
Click on any product in your application – you’ll see Title + Description, as well as Product ID, Price, and Category on the screen.
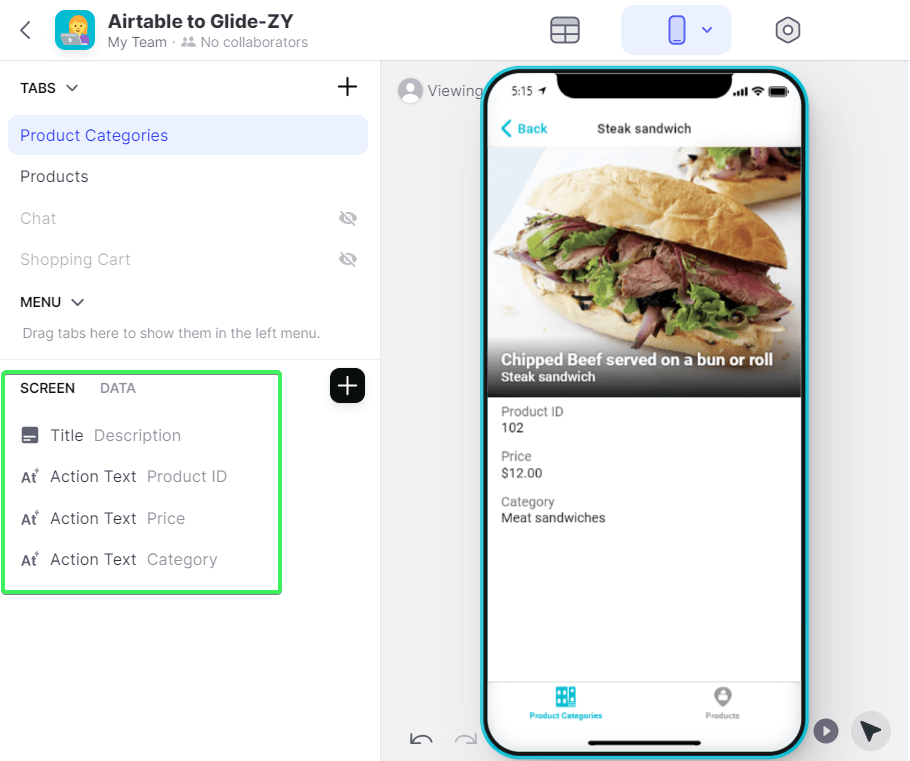
Let’s remove Product ID since our customers do not need this information. Also, we will add two more components, Button and Number Entry, as follows:
Now we need to configure both of these components.
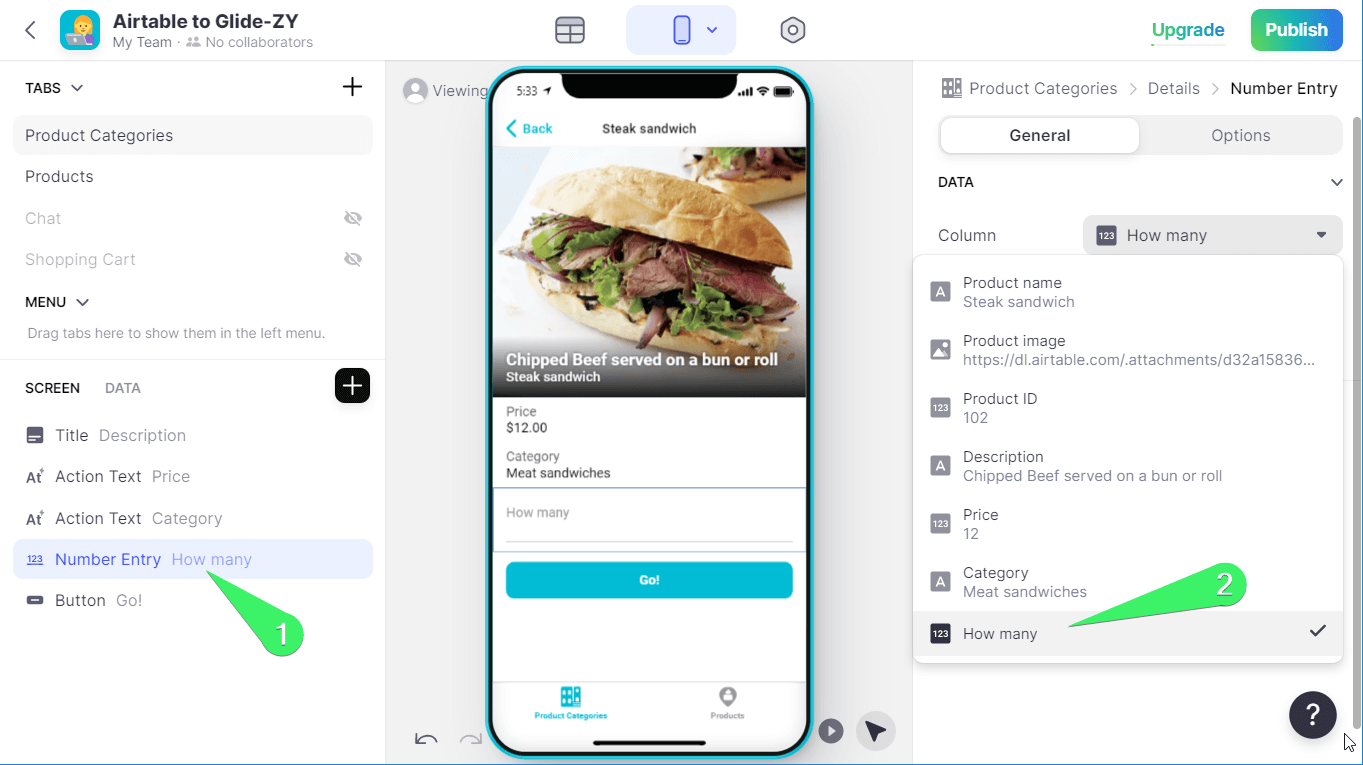
Number entry component
- Go to your records by clicking the spreadsheet button.
- Choose the Products sheet and click the plus button to add a new column.
- Choose Number as a column type and name the column “How many“.
- Click “Done” and go back to the app.
- Click the Number Entry component and select “How many” as a column for it.
Button component
- Select the Products tab, click “Data“, and then the plus button to add a new column.

- Select the “Math” column and configure it as follows:
- Label – Total
- Configuration – How many * Price
- Units – $
Click “Done”.

After that, you need to leave Glide for a while and go to your Google Sheets spreadsheet to create a separate sheet. Name it “Orders“. Create five columns in this new sheet: Order ID, Order Date, User email, Amount, and Total price.
Once the sheet is ready, go back to Glide and click the refresh button next to your spreadsheet. This will synchronize Google Sheets with Glide.

After that, click the Button component in your app and configure it as follows:
- Change the Title to “Order your sandwich“
- Select “Add row” as an action
- Select “Orders” as a sheet
- Select “Unique identifier” as Order ID
- Select “Current date/time” as Order Date
- Select “User’s email address” as User email
- Select “How many” as Amount
- Select “Total” as Total price

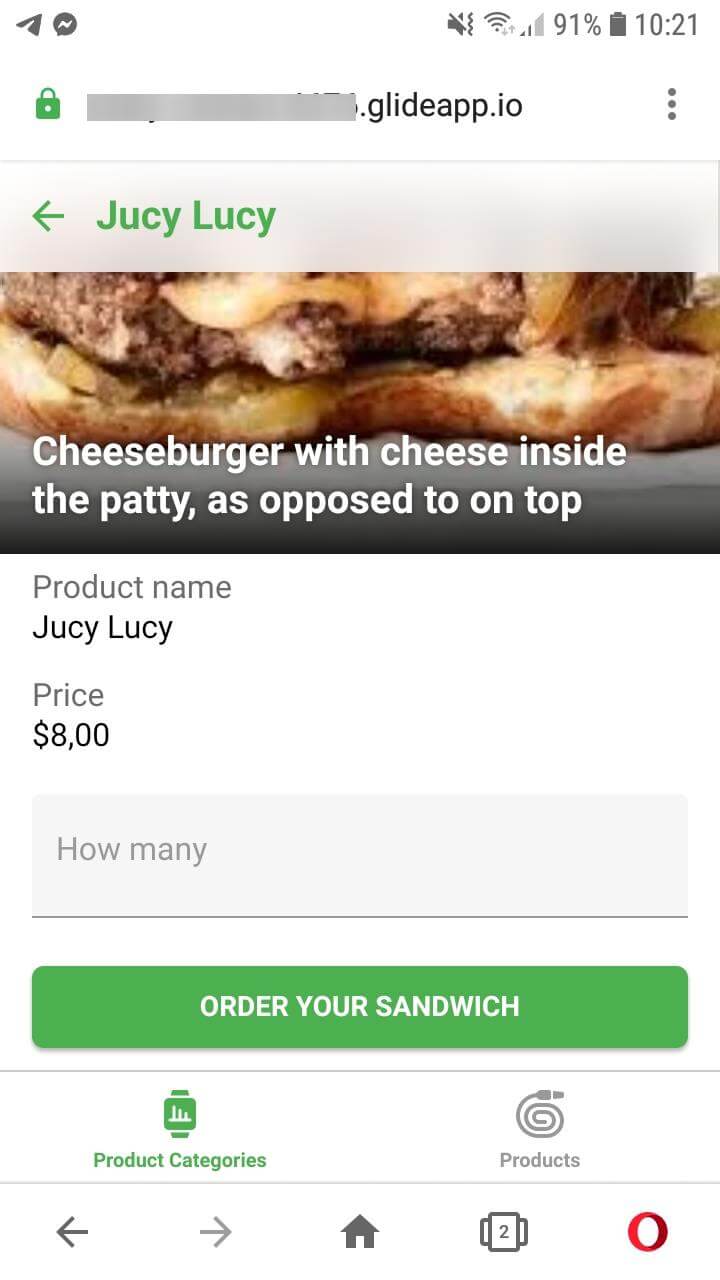
Now, when a client enters the number of sandwiches to their order and clicks the order button, data about this order will land as a new row in your Orders sheet. Here is how it looks:

Change the app’s icon
If you go to the Settings => App info, you can upload the icon for your app.
Publish your Glide app
This is it! Time to make your app publicly available. Click the “Publish” button and confirm your intent by clicking “Publish app“.

After that, you’ll get the confirmation that your app is published and a QR code to install it to your mobile device.

Does your Glide app work?
Once I scanned the code, I opened a link and logged in to get access to the app. Everything looks great. With Coupler.io, I’m sure that the data about products available for sale will keep updating every day from Airtable to Google Sheets (this is the schedule I set up for my needs). The data about orders keeps getting into the sheet we created. Here is how the app looks on my old Android device:
Get data from Airtable or other source to Glide Apps for building actionable applications
The Airtable with Glide apps integration that we set up above is a simple use case. You can use the same mechanics to create more advanced apps and connections. Maybe you want to create an app that shows vaccination levels by country? You can do this by feeding data in from open public sources to Glide. For example, one guy built an app to track Valorants top players using Coupler.io and Glide.
Or you can retrieve financial data from Yahoo Finance API to your Glide app for tracking some trends on the markets. If the source you need is not yet supported by Coupler.io, you may try to connect to it via the API using the JSON Client. The Coupler.io team is constantly working on new sources, so yours may appear on the list one day. Good luck with your data!


