

Airtable lets you store information in tables, which are a part of bases and workspaces. Over time, this database can expand significantly, making it harder to track and analyze data within the platform. That’s where you can use business intelligence and data visualization tools like Power BI.
While there’s no native integration between the two platforms, Coupler.io provides a no-code solution to connect Airtable to Power BI and keep your reports and dashboard up-to-date.
Connect Airtable to Power BI using Coupler.io
Coupler.io is a no-code data integration platform that supports over 400 apps and sources. It allows you to export, transform, and load data to spreadsheets, BI tools, data warehouses, and even AI integrations.
The platform has delivered strong results for businesses building production-ready dashboards. For example, ULTRA\OPS, a digital consultancy, chose Coupler.io to connect a client’s custom Airtable campaign-management app to visualization tools for advanced analytics. They completed the entire integration in just one day, which is 10 times faster than building a custom API solution.
To set up the Power BI connector by Coupler.io to keep your Airtable data-based reports up to date, complete the following steps:
1. Connect to Airtable
Click the Proceed button in the widget below to create a data flow right away. It’s preset for an Airtable to Power BI export and will only require you to sign up to Coupler.io for free with no credit card required.

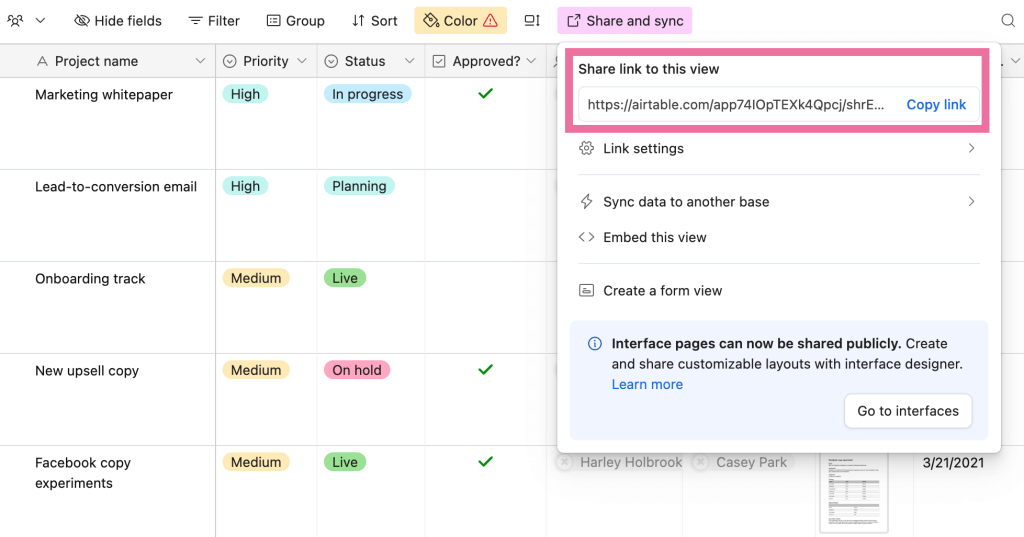
Then, open the Airtable view you want to export and click Share and sync in the top panel to get its link.

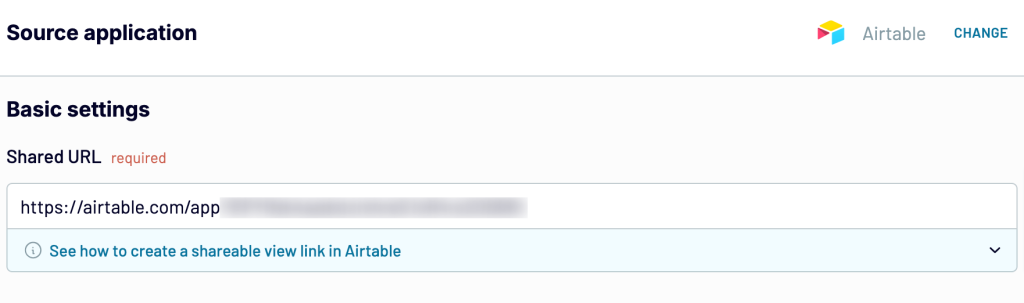
Paste the URL into the importer, and click Finish and Proceed.
Optionally, if the view is private, you can provide its password.

Repeat these steps if you want to add several Airtable data views. You will need to connect each view as a separate importer. Alternatively, you can include other views into the same importer as an additional data source. In this case, you will be able to combine data from different views in one dataset. Once done, proceed to data transformation.
2. Organize the data set
Coupler.io will display a preview of the data. Here, you can transform the data and make it analysis-ready:
- Hide unwanted columns
- Filter or sort data
- Add new columns using formulas
One of the key benefits of using Coupler.io for Airtable exports is that it automatically syncs field names to Power BI. Other tools require manually mapping each field, which gets tedious. With Coupler.io, your field structure carries over directly when you share a view, saving setup time and reducing mapping mistakes.
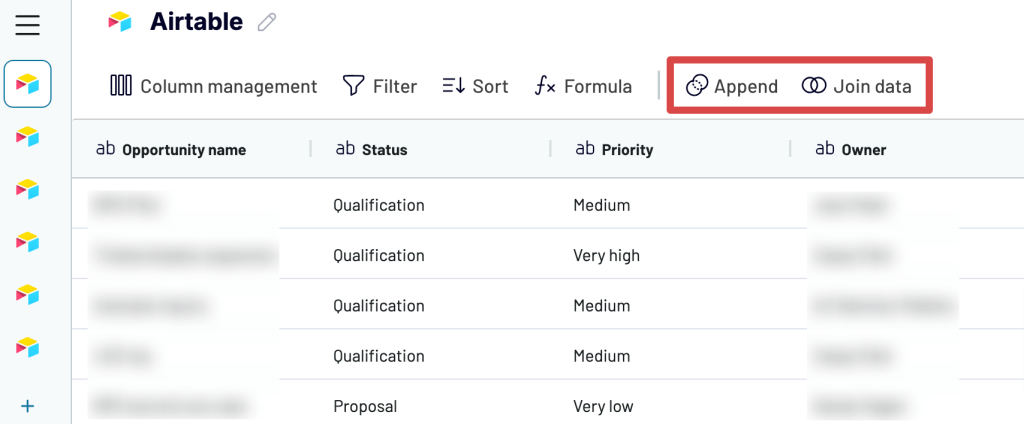
If you’ve connected multiple Airtable views, there are two ways to combine them into a single report. The first is Append, which you’ll use when your views share matching field (column) names. The other is Join, which applies when your views have different structures but at least one matching field name to merge them.

Once you’re satisfied with the transformations, continue to the next step.
3. Load data to Power BI and schedule refreshes
Follow the onscreen instructions to generate an integration URL and copy it. You’ll need it to import data into Power BI. You can actually use this URL to access data in JSON format. At the same time, Coupler.io lets you export data from Airtable to JSON as a separate destination.
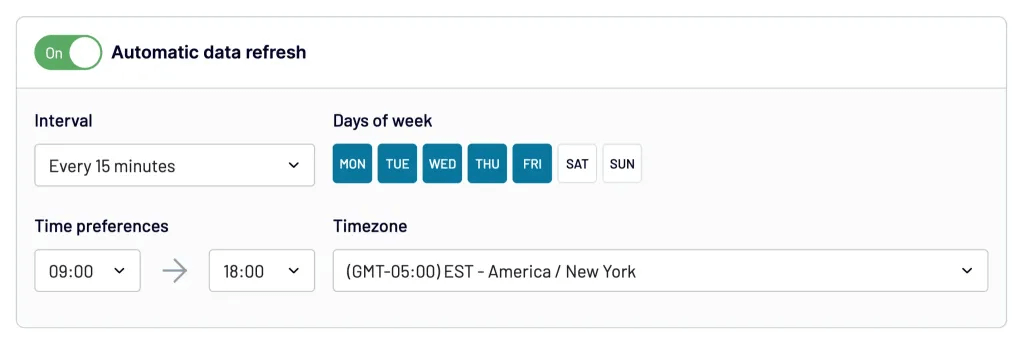
Now, set up a schedule and choose how often and when to auto-refresh data by transferring the latest changes from Airtable to Power BI. For example, you can set it to “every 15 minutes” to sync the platforms in almost real-time. Then, save and run the importer.

Open Power BI Desktop, go to Get Data > From Web, and use the copied integration URL.
The Airtable data will be loaded into your report. Now you can start adding visuals.

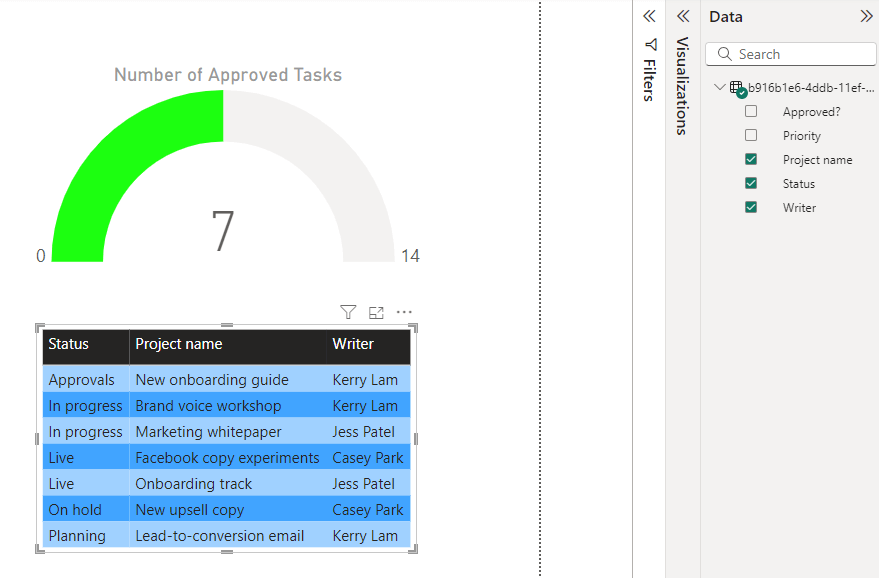
Coupler.io will refresh data automatically as scheduled so that reports always show the latest metrics. This is the easiest method to set up an Airtable Power BI integration and build self-updating dashboards without scripting.
You can also use Coupler.io to easily export your Airtable data to other destinations, such as Airtable to Excel, Looker Studio, and BigQuery, for further analysis.
Other, not that effective options to send Airtable data to Power BI
Besides the Coupler.io connector, there are other methods for getting Airtable data into Power BI. These approaches vary in complexity and suitability depending on your technical skills and use case.
- Manual CSV download and upload. This is the simplest two-step approach: 1. Download Airtable data as a CSV file; 2. Manually import it into Power BI. It works if you need a one-time data snapshot, but it’s impractical for ongoing reporting since you’ll need to repeat the process every time data changes.
- Using the Airtable API with Power Query. This method involves calling the Airtable API directly in Power BI by writing custom Power Query scripts. You’ll need your personal access token, base ID, and table ID for each dataset you want to export. The main challenge is that you must create a separate script for every table. It’s best suited for technical users comfortable with APIs and M Query syntax.
- Airtable Automations to Google Sheets. You can use the Airtable Automations feature to export data on specific triggers to Google Sheets. Then, connect the sheet to Power BI as a data source. This method works well for small datasets but becomes cumbersome with multiple tables or frequent updates.
I won’t be showing the layman’s manual CSV option, but explain the other two below.
Use Power Query to get Airtable data in Power BI
You can create and run a Power Query script to call the Airtable API. For this, you’ll need the API key and other details from Airtable to prepare the query. Here’s the step-by-step guide to transferring Airtable data using Power Query:
Get the Access Token, Base ID and Table ID
The Airtable personal access token is required for API call authentication. You’ll also need the base ID and table ID for the dataset to export.
Here are the steps to generate a personal access token:
- Go to airtable.com/create/tokens and click Create token.
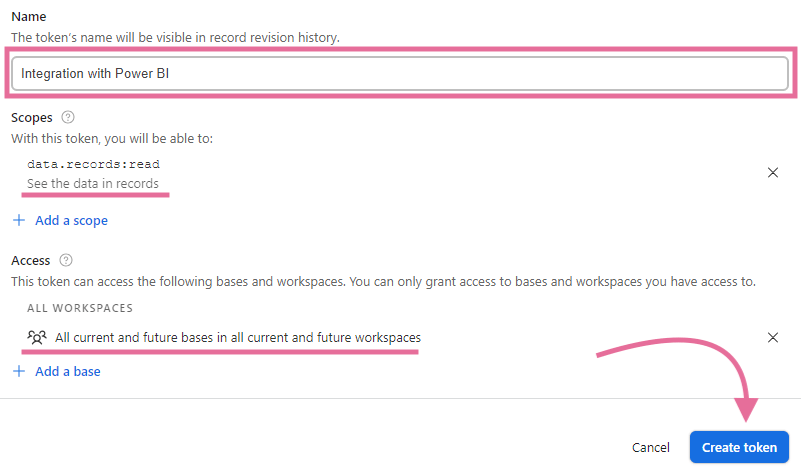
- Now, enter a name for the access token, e.g., “Integration with Power BI”. Under the Scopes, add data.records:read to allow it to read the data and grant access to the workspace/base you’re working with. Click the Create token button.

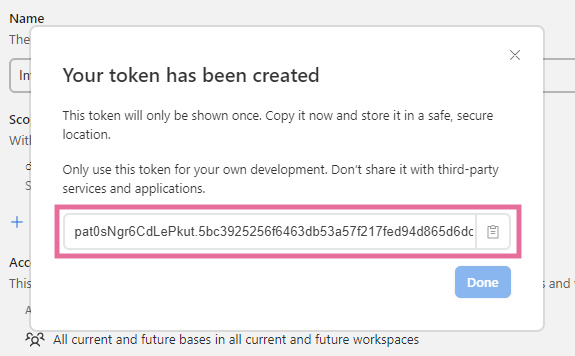
- The personal access token (API key) will be displayed. Copy and save it.

Open Airtable and navigate to the data you want to export. Look at your address bar — it will contain both base ID (starts with app) and table ID (starts with tbl), as shown below.


Prepare a query script
Copy and paste the following template script into Notepad or any other text editor.
let
    BASE_ID = "Insert your base ID here",
    TABLE_ID = "Insert your table ID here",
    PERSONAL_ACCESS_TOKEN = "Insert your personal access token here",

    Pagination = List.Skip(
        List.Generate(
            () => [Page_Key = "init", Counter=0],
            each [Page_Key] <> null,
            each [
                Page_Key = try if [Counter]<1 then ""
                else [WebCall][Value][offset] otherwise null,
                WebCall = try if [Counter]<1
                then Json.Document(Web.Contents("https://api.airtable.com",
                    [RelativePath="v0/"&BASE_ID&"/"&TABLE_ID,
                    Headers=[Authorization="Bearer "&PERSONAL_ACCESS_TOKEN]]))
                else Json.Document(Web.Contents("https://api.airtable.com",
                    [RelativePath="v0/"&BASE_ID&"/"&TABLE_ID&"?offset="&[WebCall][Value][offset],
                    Headers=[Authorization="Bearer "&PERSONAL_ACCESS_TOKEN]])),
                Counter = [Counter]+1
            ],
            each [WebCall]
        ),1),
    #"Converted to Table" = Table.FromList(
        Pagination, Splitter.SplitByNothing(), null, null, ExtraValues.Error),
    #"Expanded Column1" = Table.ExpandRecordColumn(
        #"Converted to Table", "Column1", {"Value"}, {"Column1.Value"}),
    #"Expanded Column1.Value" = Table.ExpandRecordColumn(
        #"Expanded Column1", "Column1.Value", {"records"}, {"Column1.Value.records"}),
    #"Expanded Column1.Value.records" = Table.ExpandListColumn(
        #"Expanded Column1.Value", "Column1.Value.records"),
    #"Expanded Column1.Value.records1" = Table.ExpandRecordColumn(
        #"Expanded Column1.Value.records", "Column1.Value.records",
        {"id", "fields", "createdTime"},
        {"Column1.Value.records.id", "Column1.Value.records.fields", "Column1.Value.records.createdTime"}),
    #"Renamed Columns" = Table.RenameColumns(
        #"Expanded Column1.Value.records1",
        {{"Column1.Value.records.id", "_airtableRecordId"},
        {"Column1.Value.records.createdTime", "_airtableRecordCreatedAt"},
        {"Column1.Value.records.fields", "_airtableRecordFields"}}),
    #"Reordered Columns" = Table.ReorderColumns(
        #"Renamed Columns",
        {"_airtableRecordId", "_airtableRecordCreatedAt", "_airtableRecordFields"}),
    #"Expanded Record Fields" = Table.ExpandRecordColumn(
        #"Reordered Columns", "_airtableRecordFields",
        Record.FieldNames(#"Reordered Columns"{0}[_airtableRecordFields]),
        Record.FieldNames(#"Reordered Columns"{0}[_airtableRecordFields]))
in
    #"Expanded Record Fields"
In the above script, replace the placeholders with your Airtable personal access token, base ID, and table ID.
Run query in Power BI
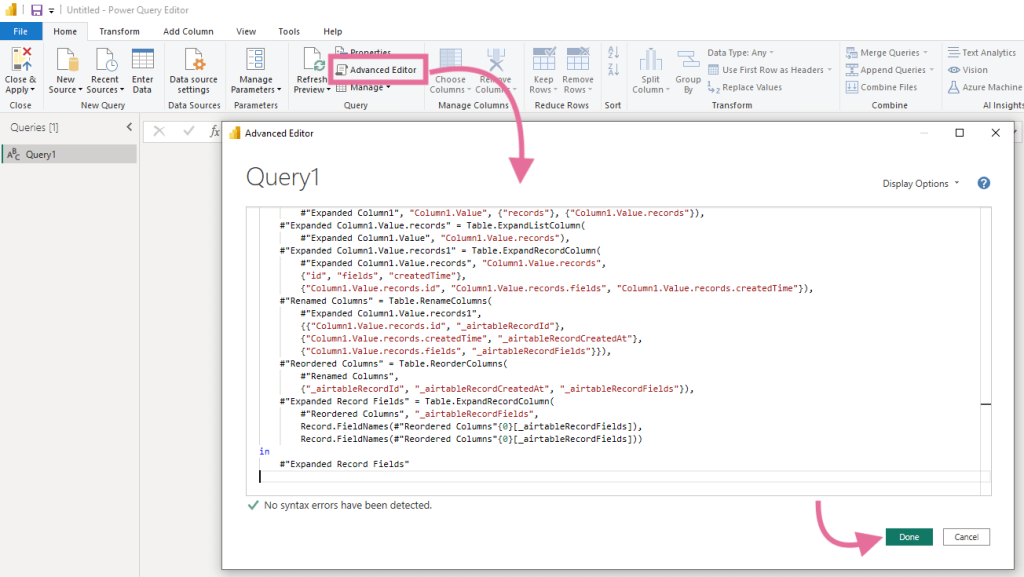
Open the Power BI report and navigate to Get Data > Blank Query.
In the top menu, click the Advanced Editor option. Paste the query you prepared in the previous step and click Done.

The Power Query Editor will display a preview of Airtable records. Here, you can transform the data if required. Finally, click Close & Apply to connect the data source.
Similarly, you can export other tables and views by modifying the base ID and table ID values in the query. However, you’ll need to create a separate query (data source) for each table, which can get challenging to manage over time.
As you can see, this option to export data from Airtable can be somewhat complicated.
Indirect connection via Airtable Automations to Google Sheets
Using Airtable Automations, you can export data to Google Sheets based on specific events or a schedule. Then, you can use this sheet as a Power BI data source for building reports.
In the Airtable base, select Automations in the top menu bar and create a new trigger by clicking the +Add trigger button.

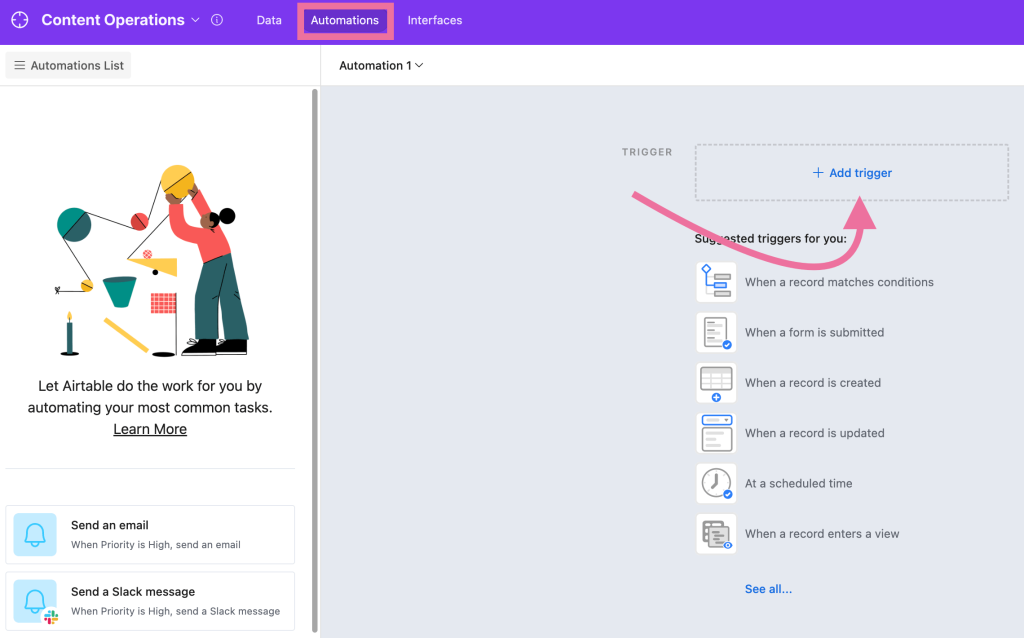
Here, you can choose from various event-based and time-based triggers. For example, we have selected the When record update trigger that will fire when there is any change in the Airtable tables.

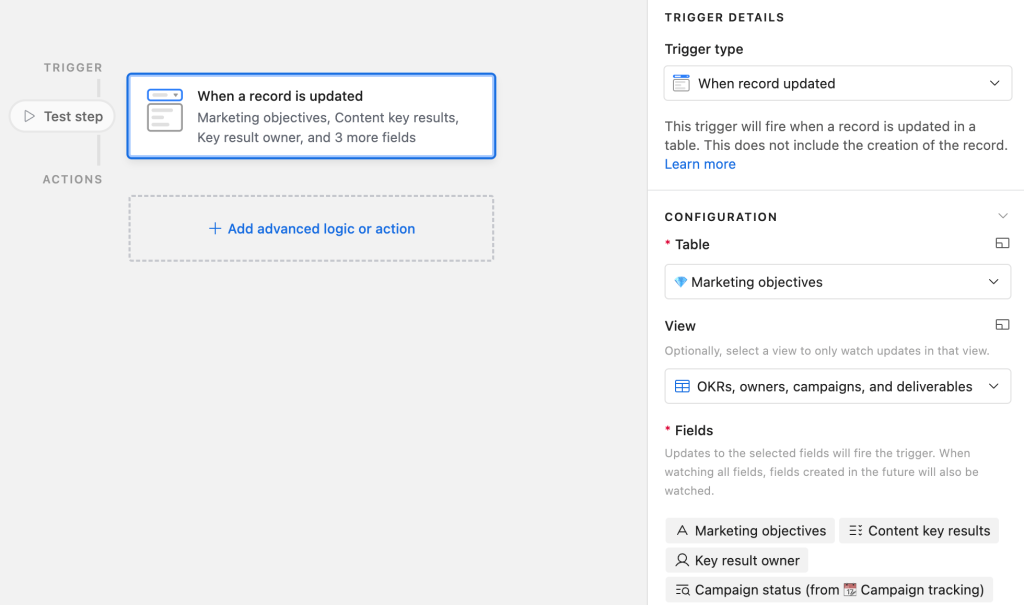
Add a new action to the workflow by selecting Add advanced logic or action > Google Sheets > Append row.
Connect your Google account and select the spreadsheet and sheet for the data export. It should contain column headers that we’ll use as a reference.
In Row Data, map the Airtable fields one by one with sheet header names.


After that, test the connection and see the results in the Google Sheets. If everything looks good, enable the automation.
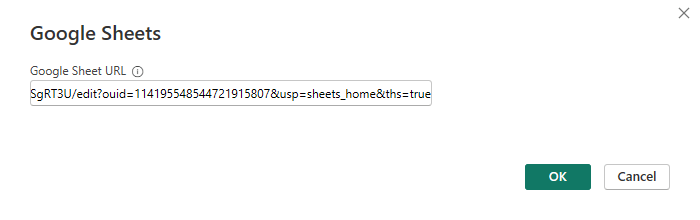
Open the Power BI report to which you want to export Airtable data. Go to Get data > More > Google Sheets and enter the URL of the Google Sheets connected with Airtable.

Sign in to your Google account and authorize access to Power BI. Once connected, the Google Sheets dataset will connect to Power BI.
What’s the best option for Airtable Power BI integration?
For technical users, Power Query may sound like a good option. But remember, you’ll need to write a script for every table you want to export. This process is prone to human errors and could also affect the reporting performance. You can use Google Sheets to export a few columns, but it’s not efficient when working with large datasets.
However, the integration does not need to be that complicated. Coupler.io offers an easier and more convenient way to connect Airtable to Power BI. It also supports data transformation and automation, which helps you get fresh and analysis-ready data from Airtable. If you need an even simpler way of visualizing your Airtable data, check out our guide on how to connect Airtable to Tableau.
In any case, sign up for Coupler.io now and start analyzing data from 400+ apps.