If your team relies on Amplitude, chances are you’ve exported data more times than you’d like to admit. Weekly reports, updating dashboards, sharing insights with stakeholders, or blending product analytics with marketing, and this list can seem never-ending. And while exporting data is crucial, doing it manually is… less than ideal. It’s time-consuming, repetitive, and error-prone.
The good news? Coupler.io is a game-changer: no technical expertise or SDK needed, just simpler workflows and cleaner reports with updated data on the specified schedule.
How to export data from Amplitude with Coupler.io
Coupler.io is a data integration platform that helps you automatically export data from Amplitude on a regular schedule without writing code or dealing with manual CSV downloads. It uses the Amplitude connector to pull your analytics data and send it to destinations like Google Sheets, Excel, BigQuery, or BI tools.
Amplitude is already chosen as the data source in the setup form below. Just select the destination for your data and click Proceed.

To automatically export Amplitude data on the specified schedule, follow the detailed guidelines below:
Step 1: Collect Amplitude data
First, sign up for coupler.io for free. Then, connect your amplitude.com account to it. To do this, you won’t need any user ID or Amplitude ID, only an API key and a Secret key.

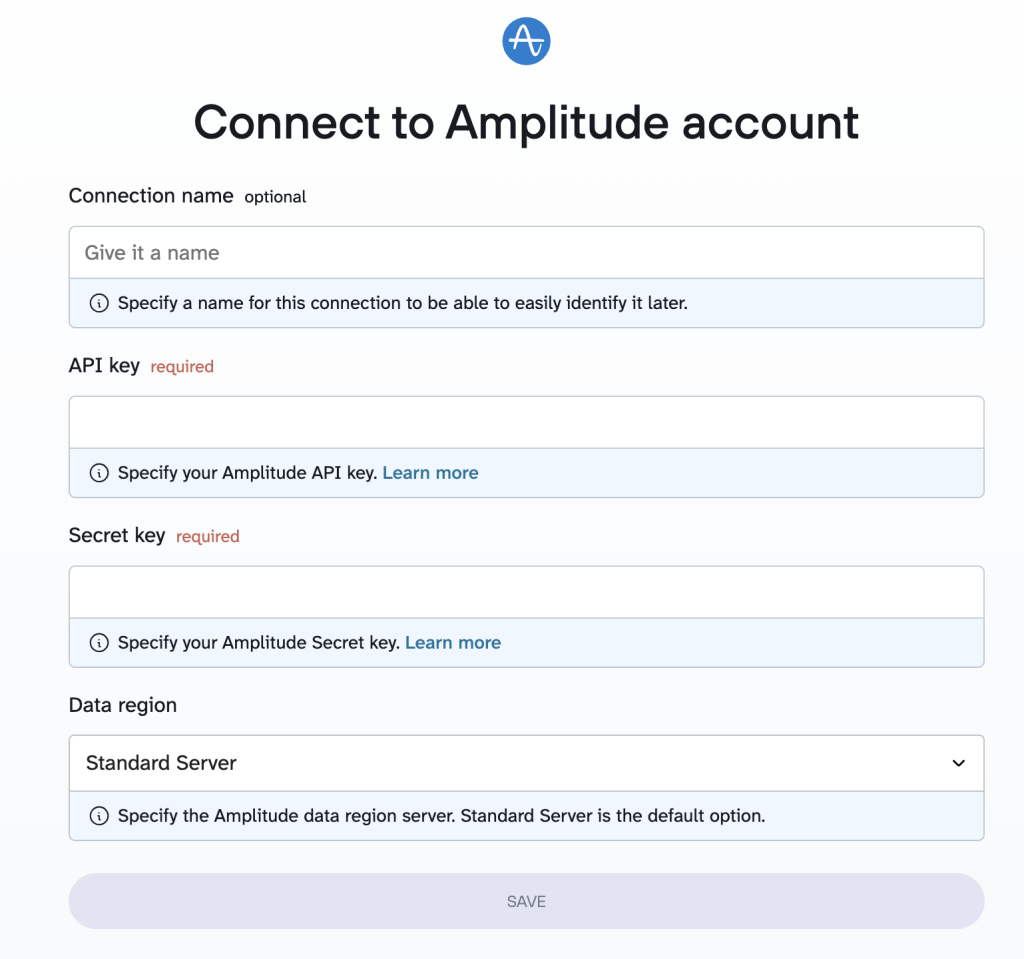
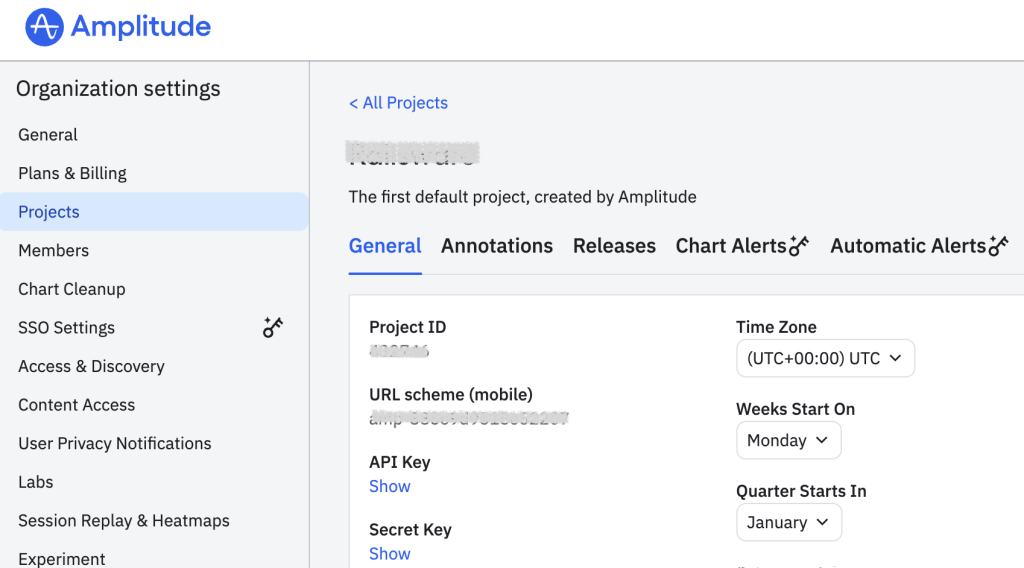
Find them in your Amplitude organization settings, in the Amplitude Projects section. Copy the keys to the respective fields and save the changes.

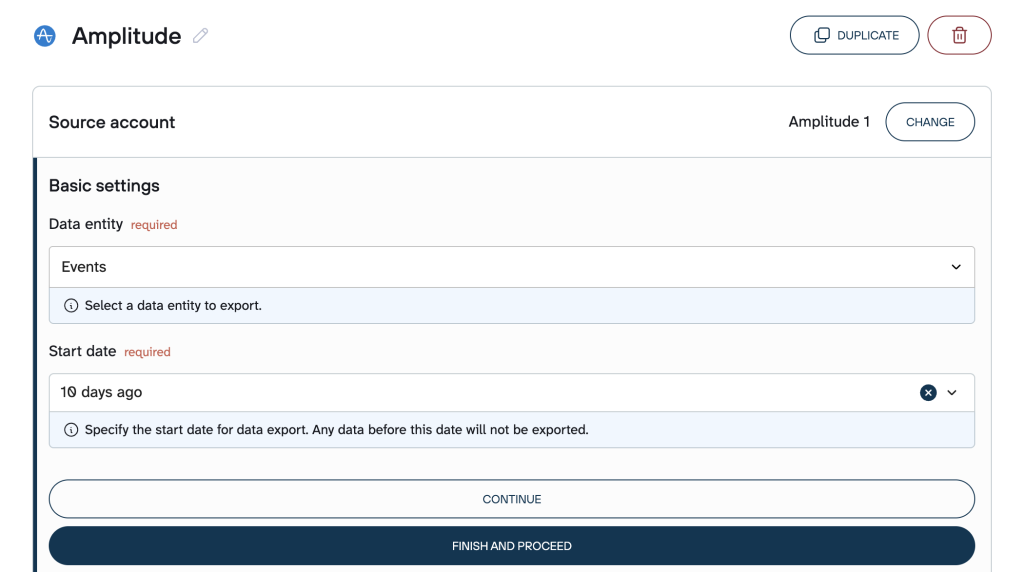
Next, configure the source settings. In the Basic settings, open the dropdown list and select the type of data. For example, you can export events and set the start date.

Head over to the Data sets tab to customize and organize your data before it reaches destination apps. During this step, you can automatically collect data from multiple entities or different sources within one data flow.
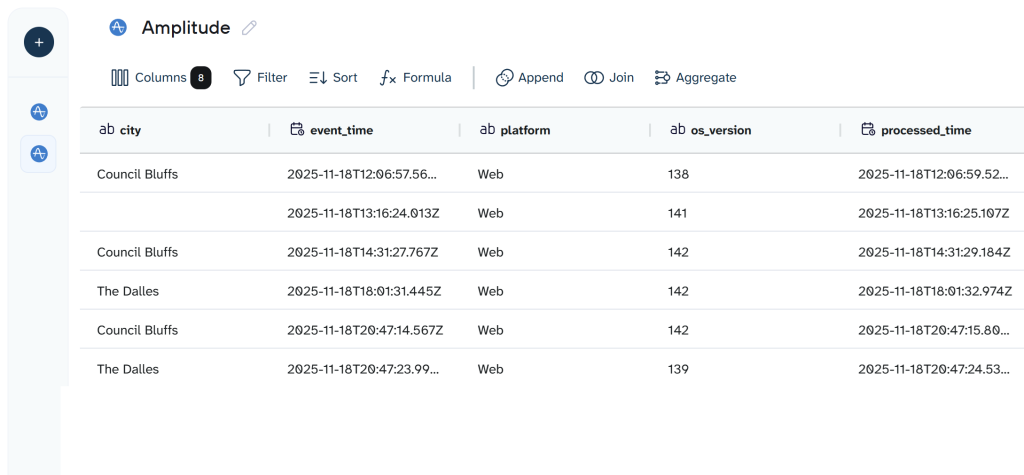
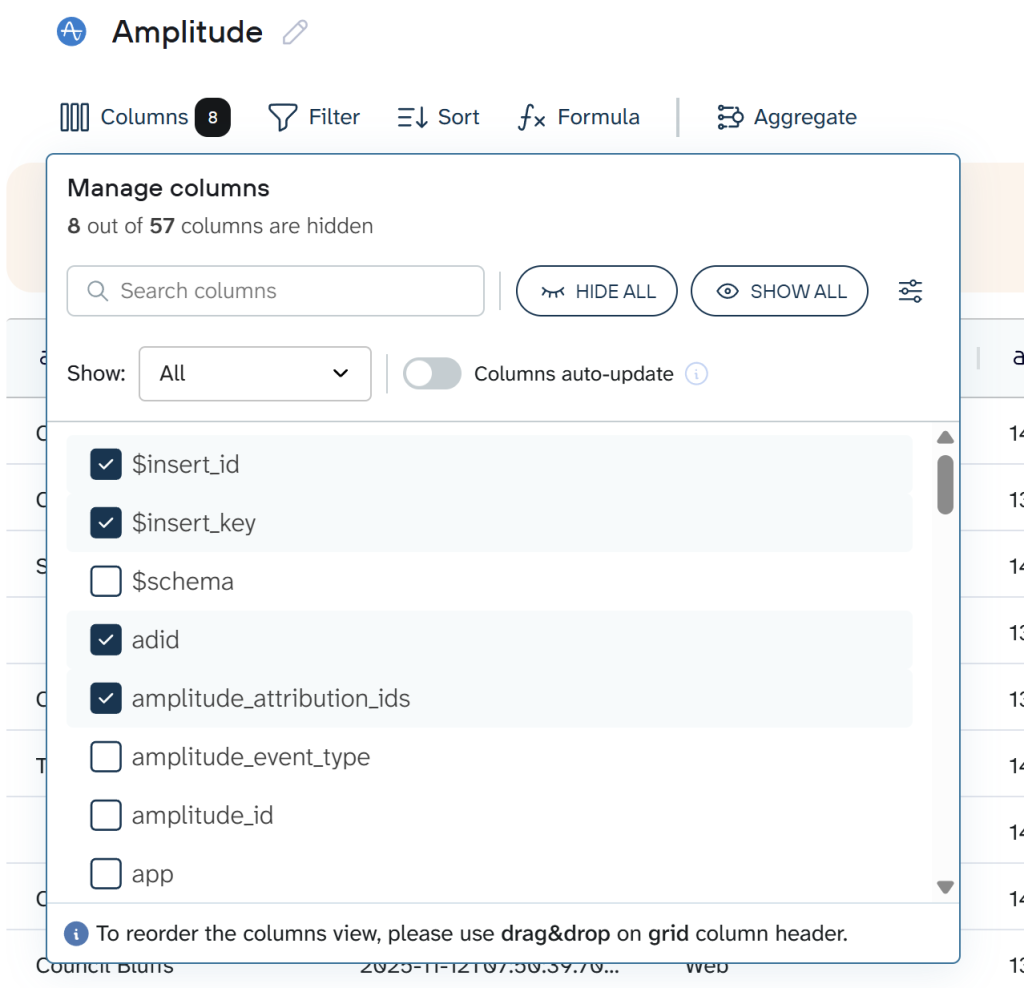
Step 2: Organize data sets
In this section, you can make your data well-structured. The options provided allow you to simplify smoother integration and ensure more efficient analysis.
Here’s what you can accomplish:
- Rename, reorder, hide, or add columns (e.g., change header names, specify event types, etc.) to tailor the table layout to your specific requirements.
- Sort data alphabetically, numerically, or by date to identify patterns and key information more quickly.
- Apply filters to export only the rows that meet your criteria, such as particular user properties, events, or time ranges, keeping datasets focused and relevant.
- Create new columns using custom formulas to calculate additional metrics and gain deeper insights.
- Blend data from multiple platforms through joins and combine Amplitude events with external sources for a comprehensive, cross-platform view.

Step 3: Connect the destination
On this tab, you can select or change the destination to export data from Amplitude from the list of available destination options. Coupler.io provides a wide range of tools to choose from, including integrations with AI.

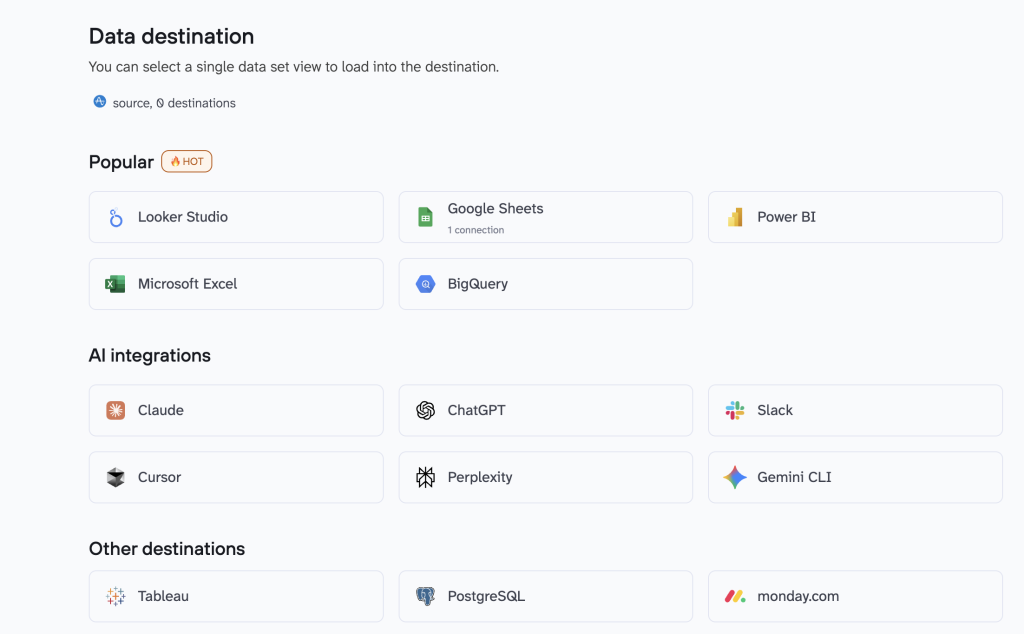
Follow the in-app instructions to load or integrate the Amplitude data set with the chosen tool.
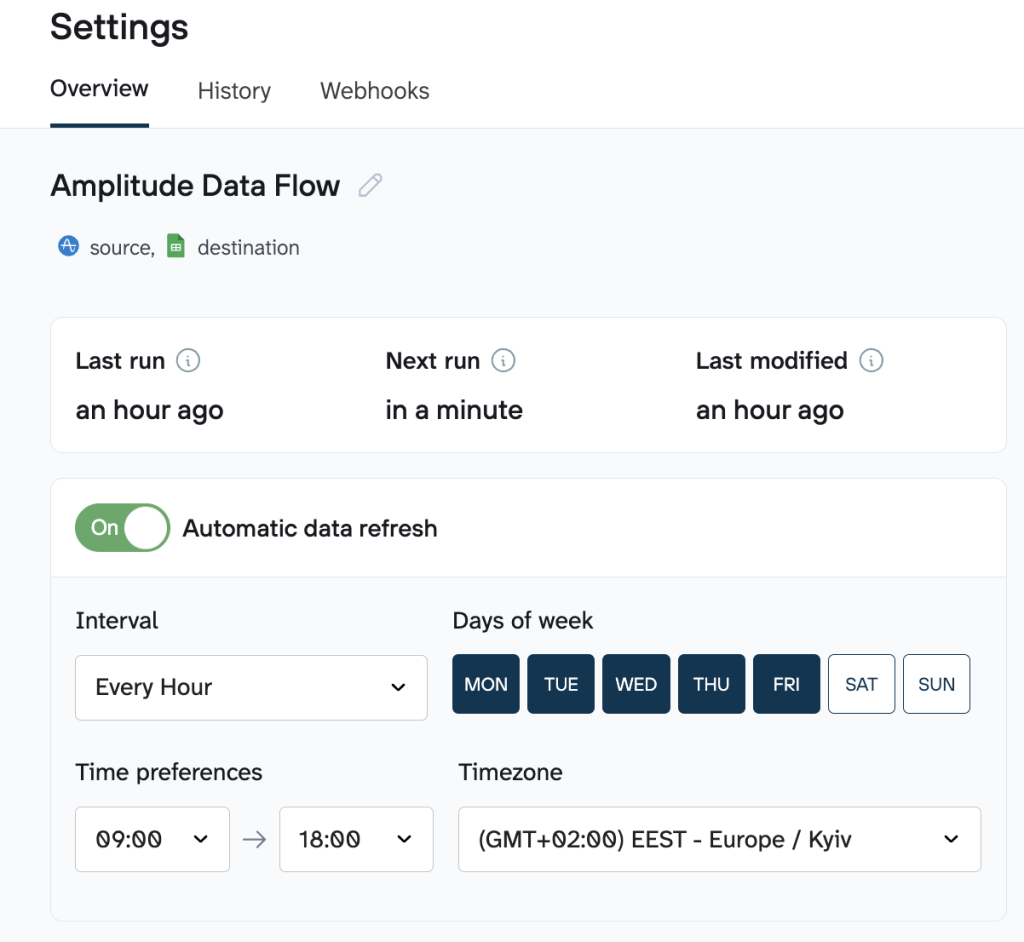
Step 4: Automate data refresh
Set up your data to refresh automatically on the schedule you need. Drag the toggle from Off to On, and your automatic scheduled data export will be enabled. The following options are available:
- Interval: Set how often you want your Amplitude data to be refreshed.
- Days of the week: Select only the days you need, like just weekdays for regular business reports.
- Time preferences: Choose the exact hour and minute you want the export to run.
- Timezone: Make sure it matches your local time or your team’s timezone.

What data you can export from Amplitude with Coupler.io
With Coupler.io, you can export a wide variety of other data types from Amplitude to build clearer reports, track trends, and blend your product analytics with other tools:
- Annotations: Notes that mark important moments or changes in your product.
- Cohorts: Groups of users you want to analyze or compare.
- Average session length: How long users typically spend in your product.
- Active users: A quick view of the basic user data, namely, how many people are using your product over time.
- Event lists: An overview of the full number of events you track in Amplitude.
- Events: The detailed, raw actions your users take inside your product.
Automate Amplitude data export with Coupler.io
Get started for freeAmplitude export raw data: alternative ways
While Coupler.io offers a simple, no-code way to schedule Amplitude data exports, there are several native alternatives built right into Amplitude. Choose depending on your level of technical expertise and how often you need the data refreshed. These include manual downloads from the UI, using the Export API for programmatic access, or setting up direct exports to warehouses. However, each of them comes with real trade-offs depending on your setup.
1. Manual export
You can download data directly from the Amplitude interface as CSV or JSON files. This includes things like event properties, charts, and schema exports from your tracking plan. It’s handy for quick, one-off reports or small datasets without writing any code.
Drawback: It’s fully manual and not scalable. There’s no way to export raw data for specific charts or selected events, and it quickly becomes tedious for frequent or large-volume needs.
2. API export
Amplitude’s Export API lets you programmatically pull raw event data over a specified time range in JSON format. This is ideal if you want automated access to large amounts of event data or plan to build custom integrations with scripts or data pipelines.
Drawback: A certain level of technical expertise (like basic understanding of HTTP requests and APIs) is required. Besides, API export has strict limits (like a 4GB max per request and potential timeouts for very large datasets), data isn’t available in real-time (at least a 2-hour delay), and you’ll need to handle zipped files and scripting yourself.
3. Warehouse/S3 export
Amplitude can automatically send your raw event data to cloud warehouses like Snowflake, BigQuery, or Amazon S3. This allows you to run SQL queries in your own environment, join the data with other sources, and use it in BI tools without needing manual exports.
Drawback: Raw, unstructured data format and limited number of destination options. Also, exports are hourly on a best-effort basis (they might bundle multiple hours or run less frequently), and it’s typically available only on paid plans with potential additional costs for storage and setup.
Which Amplitude data export method should you choose?
To pick the right way to export Amplitude data out the door, think about your goals: Do you need it automated and hassle-free, or are you okay with some setup for more control? Here’s a breakdown of common situations to help you pick the best fit, with key criteria and real-world considerations for each.
Situation # 1: “I want self-updating reports or dashboards every day.”
If you’re a marketer or analyst who needs fresh Amplitude data flowing into tools like Google Sheets or Looker Studio without lifting a finger after setup, go with Coupler.io scheduled export. This no-code tool connects directly to Amplitude, lets you select specific reports or events, and refreshes them on your schedule (daily, hourly, or even more often) to keep your dashboards up-to-date.
Setup requirements are minimal: Just a Coupler.io account (you can try for free for 7 days) and your Amplitude login for auth. It takes about 5 minutes to link up. It handles the automation you need, skipping the scripting headaches of other options.
Situation # 2: “I just need to keep all our Amplitude events for long-term storage.”
For archiving every raw event from Amplitude indefinitely (e.g., for compliance or deep historical analysis) Warehouse or S3 export is your go-to. Amplitude pipes uncompressed JSON event data straight to your cloud spot like Google BigQuery, Snowflake, or Amazon S3 on a best-effort hourly basis, letting you query it with SQL and blend with other sources.
Setup requirements: An Amplitude paid plan (Enterprise or higher for Snowflake; all plans for BigQuery/S3), plus your warehouse credentials and a one-time config in Amplitude’s UI. This wins for storage because it’s scalable for huge volumes without manual pulls, though expect potential bundling of hours during peaks and ongoing costs from your provider for keeping all that data around.
Situation 3: “I only need a quick one-off export.”
When you’re just grabbing a snapshot of charts, events, or user data for a single report or ad-hoc check, stick to manual export right from Amplitude’s dashboard. Head to the charts or tracking plan section, pick your timeframe and format (CSV for spreadsheets or JSON for flexibility), and download instantly.
Setup requirements: It works on any Amplitude plan, including free, and requires zero tech skills. It’s purely hands-on, so it’s not for repeats or updates, but for that rare “just this one” moment, it’s faster than anything else.
Situation 4: “We have an engineer and are building a custom integration based on the API.”
If your team’s got a dev ready to weave Amplitude data into a bespoke pipeline, export API gives you the programmatic power. Use simple HTTP GET calls with your API key/secret for auth to fetch raw JSON events over any timeframe up to a year, handling zipped files in your script for full control.
Setup requirements: An Amplitude account with API access, basic coding know-how (like Python for parsing), and dealing with limits like 4GB per request or 2-hour data delays. This is spot-on for custom builds, but skip it if you don’t want to code, retries for timeouts or big loads.
Best practices for Amplitude data export with Coupler.io and why they work
To streamline and enhance your scheduled Amplitude data export to its fullest, consider the following tips:
1. Select only the data you actually need (specific metrics, event time, etc.) to keep your reports and other related docs clean. In the Data sets tab, hide extra columns, apply filters, narrow down date ranges, and more.

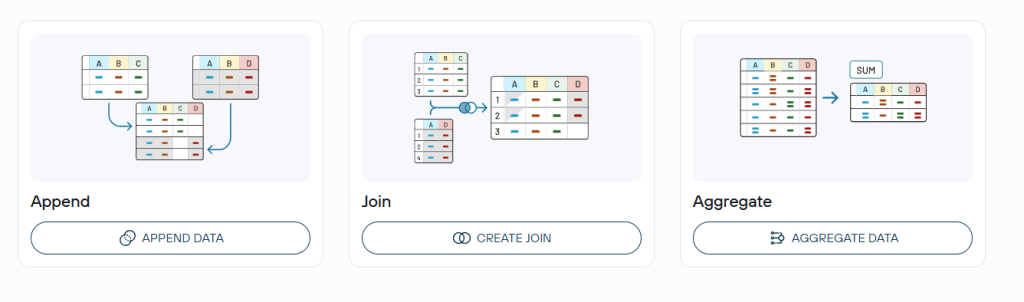
2. Combine Amplitude data with other sources (such as CRM, finance, or advertising platforms) into a single destination for comprehensive, unified reporting. Coupler.io’s data blending capabilities allow you to easily integrate Amplitude data with information from tools like HubSpot, Salesforce, QuickBooks, Google Ads, or Facebook Ads. You can:
- Append similar datasets (stack them vertically)
For example, append ad performance metrics from Google Ads and Facebook Ads to create a unified view of cross-channel campaign data in one table. It’s perfect for stacking similar structures like daily spends or clicks.
- Join them based on common fields (such as dates or campaign IDs)
For example, join Amplitude user behavior events with HubSpot or Salesforce CRM records on shared keys (like user IDs or dates) to track how in-app actions tie into leads and conversions.
- Aggregate the data by grouping on a dimension to get a holistic view and avoid deduplication.
For example, group events by date (daily, weekly, or monthly) and apply sums for total active users or event counts, averages for session duration, or counts for unique users. It allows you to create a lightweight table ideal for trend tracking in dashboards.

After that, you can send the combined data to Google Sheets for quick overviews and simple dashboards, or to BigQuery for more advanced, in-depth analysis.
3. Choose the right frequency for refresh based on your data volume and use-case to avoid overloading or slow performance:
- For high-frequency use cases (e.g., monitoring live ad campaigns in Google Ads blended with Amplitude events), set to every 15-30 minutes for near-real-time insights into spend and conversions. This works well with moderate data volumes, but could slow down or hit API limits if it presupposes pulling millions of rows frequently.
- For large-volume use cases (e.g., monthly financial reporting blending Stripe transactions, QuickBooks invoices, and CRM data), set to daily or weekly refreshes. This avoids performance issues, reduces processing time (especially with incremental updates fetching only new data), and prevents overloading your destination like Google Sheets or BigQuery.
4. Store data in the proper destination depending on the use case:
- For straightforward dashboards, quick sharing, or basic reporting, choose spreadsheets like Google Sheets or Microsoft Excel. They offer easy accessibility and familiar tools for visualization without advanced setup.
- For complex analytics with large datasets, historical trends, etc., choose data warehouses such as BigQuery or PostgreSQL to enable scalable, long-term storage and powerful SQL-based exploration.