Everyone knows that Jira is great at tracking your work, giving you an overview of the things happening in your project, and a place to collect all your tickets and team notes. But sometimes there might be a need to take data out of Jira and do some further analysis with it. For example, you may need it:
- To create custom reports and dashboards that are more detailed than what is available in the platform itself.
- To share data with someone who doesn’t have access to the platform such as stakeholders, clients, etc.
- To audit and see what’s going on with your projects and issues.
- To migrate your data from one Jira instance to another.
There are many ways to export data from Jira, some of which are as simple as a few clicks. However, sometimes the simplest methods are not as easy as they look. In this article, we will walk through the different methods to export Jira data with various options.
Why export data from Jira?
There are many reasons to export data from Jira. Here are some of the most common ones:
- Backup – If you’re running a business, you need to have a backup plan in place for all your data. One way to do this is by exporting data from Jira. This gives you access to all the information about your issues and progresses around them – even if something were to happen with your Jira account, you’d still be able to access all the information you need.
- Reporting and analysis – When exporting your Jira data, you can use it for reporting purposes such as creating reports for further analysis of the progress of projects and issues. This makes it easy for you to report on project status, analyze trends in your project’s progress over time, or even use the data for other purposes like building custom dashboards or automating tasks.
- Migration to another platform – If you’re thinking about migrating from Jira to another platform, you can export Jira data and import it into a different, more suitable tool. Jira allows exporting your data efficiently by creating an Excel spreadsheet or CSV file containing all of the information necessary for importing into another project management tool.
- Share information – If you’re like most teams, you’ve got a lot of data in your Jira projects. And in today’s competitive business environment, you need to share that data with your customers, partners, and other stakeholders—export data to share information and collaborate with your team members.
Which Jira data can be exported?
It’s important to know which Jira data can be exported so that you don’t miss out on any information that might be vital for your project. Jira allows you to export all of the following data:
- Users: Users are the people who use Jira to manage their work. You can export a list of all users in your account or a list of specific users (like the ones you’ve assigned to certain projects).
- Groups: Groups are used to organize users into teams to share common permissions and access rights. You can export a list of all groups in your account, or you can export a list of specific groups (like those that have been assigned to certain projects).
- Issues: You can export a list of issues from your Jira instance by searching for them by name or status, or by choosing specific projects or fields to search by. This can be used for archiving purposes or for reporting purposes. Jira can export issue data stored in one of two ways: CSV or XML file format. The issue data includes basic information such as a list of issues and their status (e.g., open). It also includes additional details such as who created an issue and when it was created, who last edited an issue’s text and when it was last edited, as well as how many comments there are on a particular issue, etc.
How you can export Jira data
When you want to export data from Jira, there are two main methods. You can either use the built-in export options or Coupler.io to perform an automated Jira export to Excel or another destination. There are pros and cons to each method though.
The built-in export options to export Jira data are a good starting point, but they can take up a great deal of time. With a built-in export, you can choose which fields are exported and whether they should be grouped by issue type or other values. This allows you to specify exactly what data needs to be exported, but it also means that the process is manual, which is time-consuming for large volumes of data, and requires regular maintenance as new fields are added, or old ones are removed.
If you’re looking for an automated process that’s easy to set up, it’s best to look into Coupler.io. It allows more flexibility in how data is exported and gives users more control over how often it’s updated. If you need to perform more complicated exports on a regular basis, it’s probably not worth it to rely on the built-in features of Jira. This is especially true if you’re working with large amounts of data or custom fields that aren’t supported by the built-in system. When you automate data export, all information stays up-to-date without requiring any additional work from users.
How to automate Jira data export?
Automating the process of exporting data can save you human effort and time. Coupler.io is a reporting automation platform that lets you schedule data exports from Jira and handle advanced data management cases such as visualization, custom reporting, and analytics, creating automated dataflows, etc.
Coupler.io can automate Jira data exports and makes it easy for you to pull your data out of Jira into Excel, Google Sheets, BigQuery, or Looker Studio. It eliminates the need to do any manual work yourself—it’s all done automatically!
- Go to Coupler.io and sign up to create your account. You can start for free and then choose a subscription plan that meets your requirements. Or you can simply select the desired destination and click Proceed in the form below.
Coupler.io allows you to connect Jira to Looker Studio for data visualization. But you can start with exporting data from Jira to Google Sheets like we did for this example.
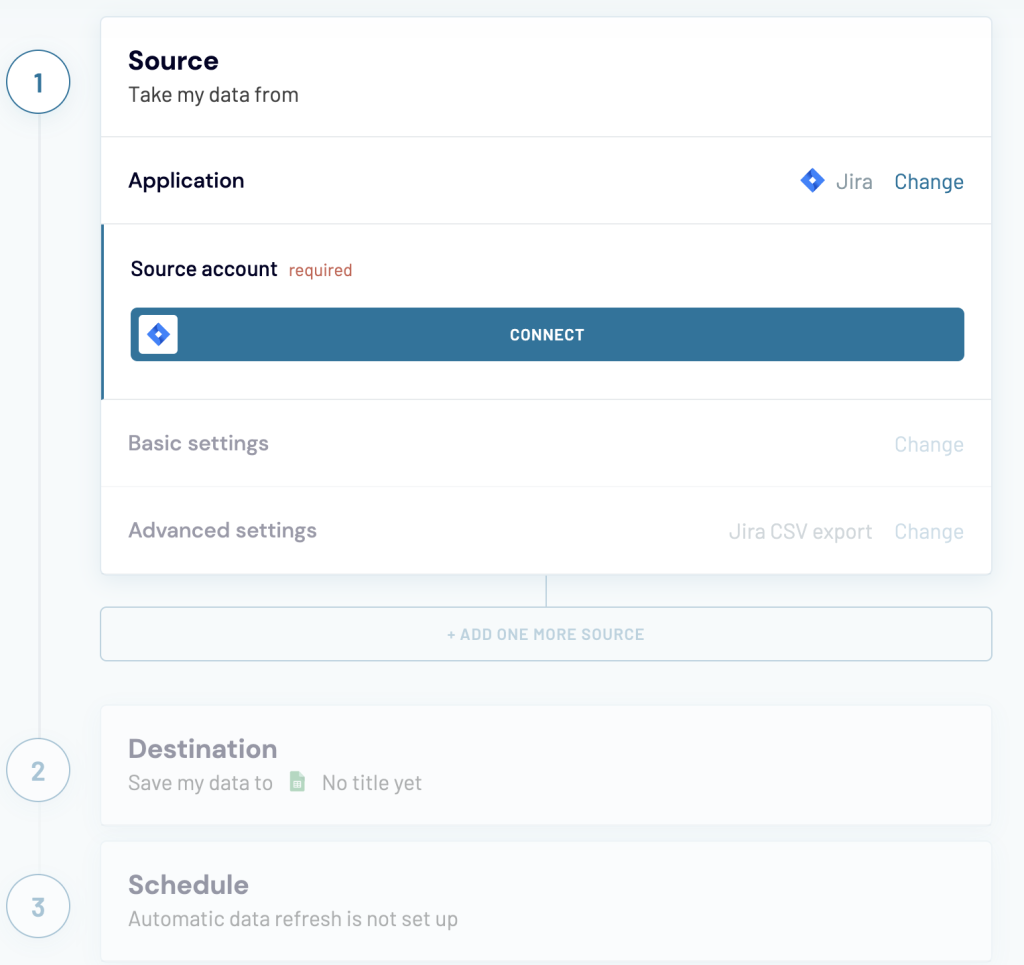
- Now, if you’re doing this for the first time, you’ll have to connect your Jira account by clicking on Connect.
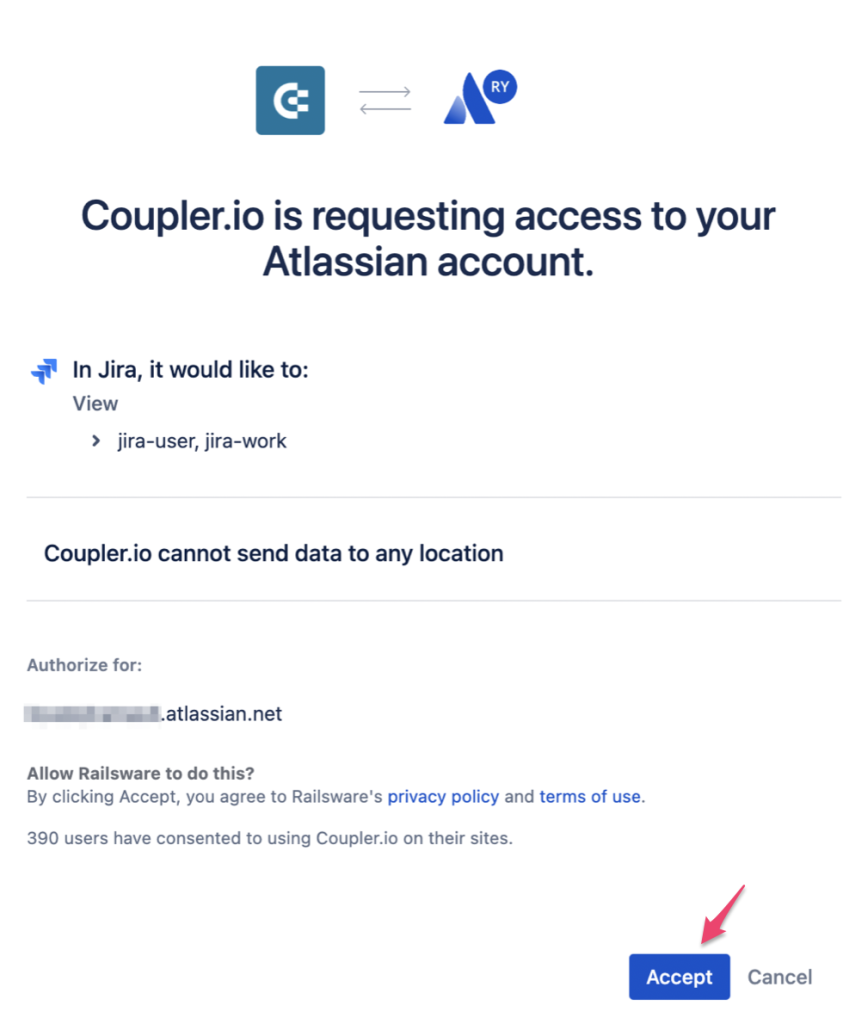
- Another page will open where you need to grant access to Coupler.io to access your Jira account by clicking on Accept.
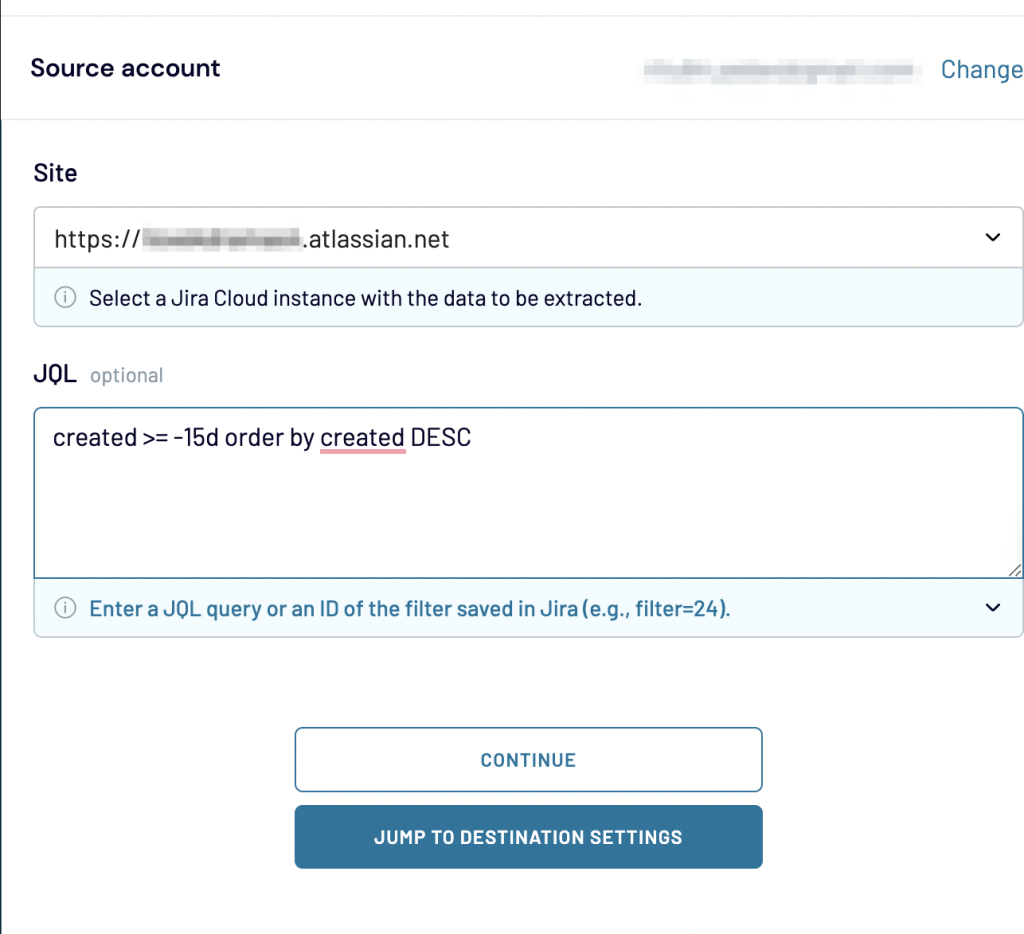
- Once the account is connected, select a Site, a Jira Cloud instance, from which you want the data to be extracted. Optionally, you can enter a JQL query of the filter you wish to export. For this example, we are filtering issues created in the last 15 days using this JQL Query
created >= -15d order by created DESC
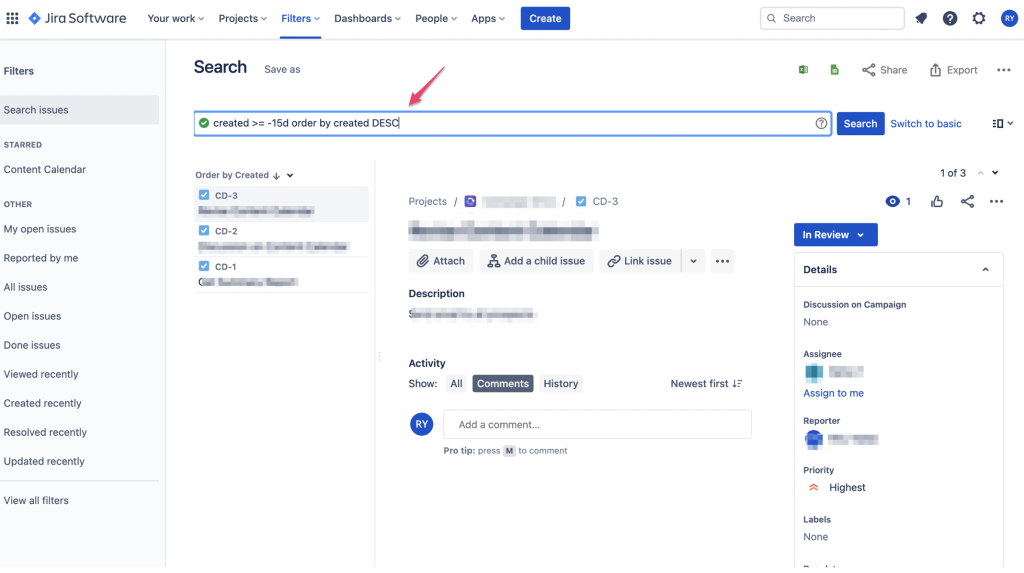
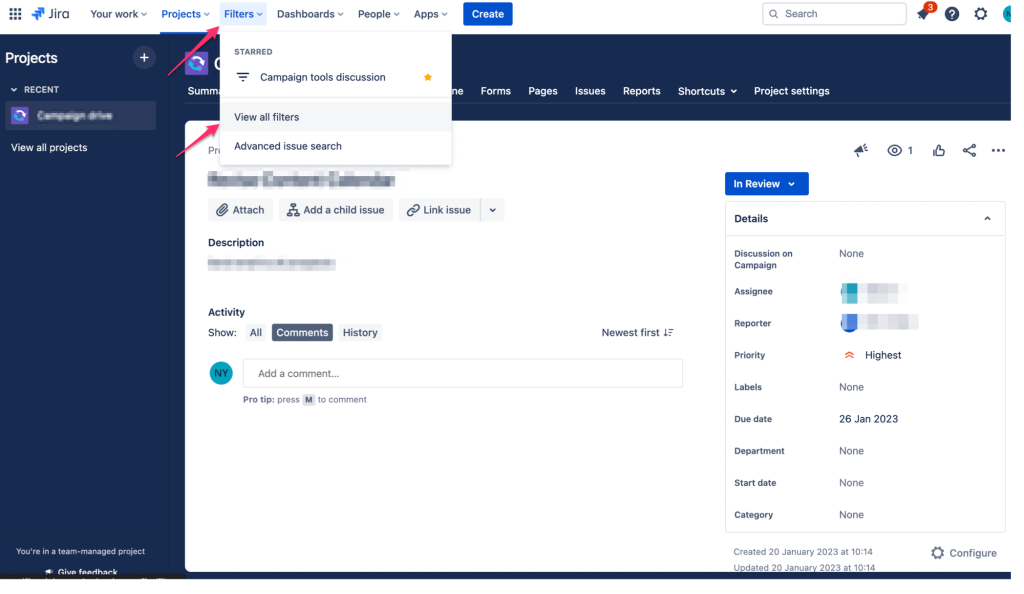
Note: You can fin the JQL Query for the filtered issues if you go to Issues > View all Filters > Create filter > Switch to JQL Query.
- Next, we set up the Destination, which is where your data will be saved after you’ve exported it from Jira. If we were to export from Jira to Excel or Jira to BigQuery, then we would select the respective destination option.
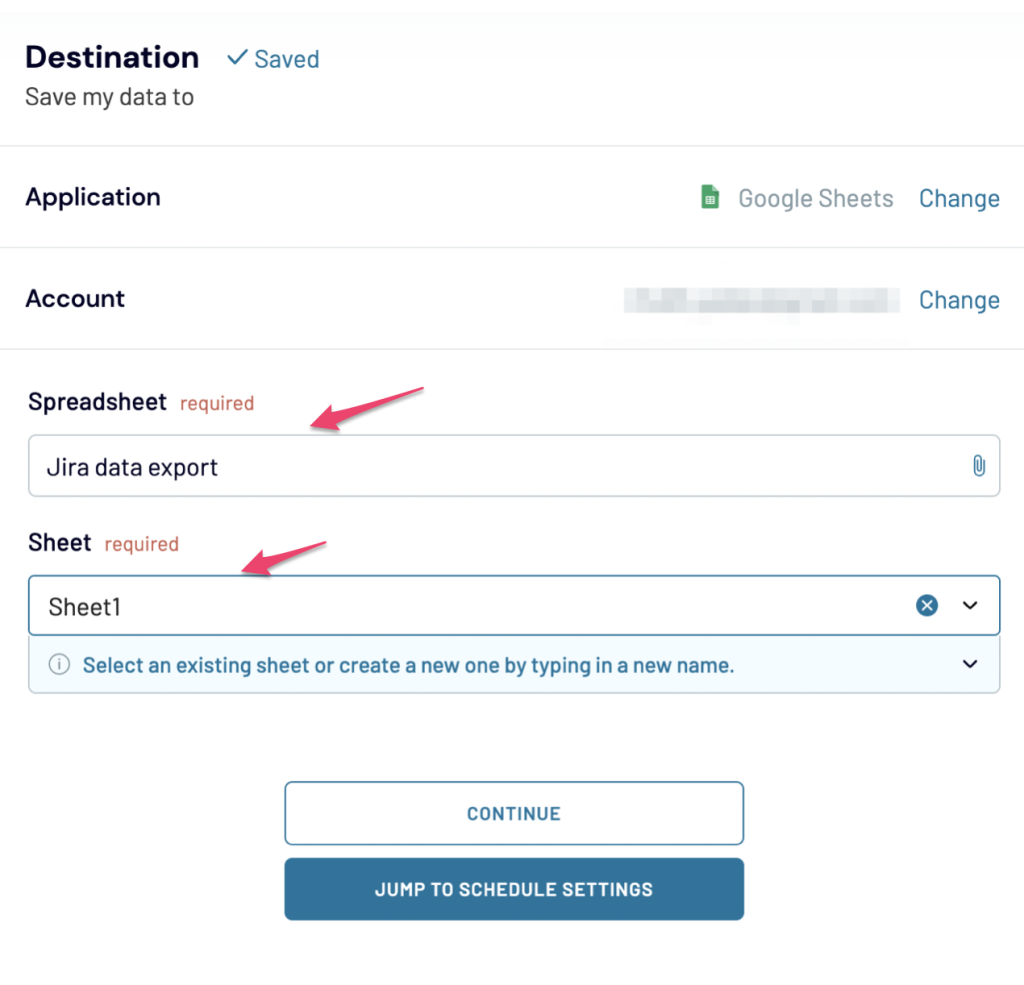
- Now, connect your Google account. And the next step is to select an existing Google spreadsheet where the data will be saved. Then you can either select a sheet or create a new one by typing a new name to store the data. Once done, click on Continue.
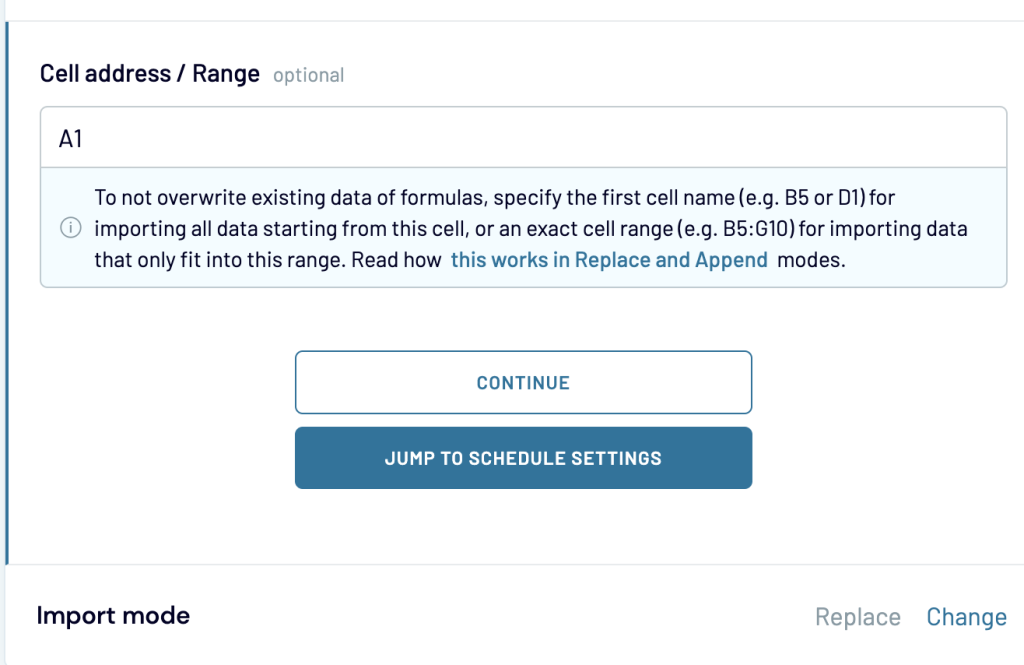
- Optionally, you can specify the Cell address/Range and Import mode choices (if you have any).
- Finally, you have to toggle the Automatic Data Refresh button to automate this export. Select the Interval, Days of Week, Time preferences, and Scheduled Time Zones. Once this is done, your data export will run automatically at a scheduled time.

- After clicking on Save and Run, the data will be available in the selected Google Sheet.

Steps on how to export Jira data manually
Jira has a few different formats for exporting data, and the way you want to go depends on what you’re trying to do with the data. Here, we’ll talk about two of the most common formats: Jira export to CSV and Jira export to PDF.
Example of a Jira export to CSV
Jira allows you to export users, groups of users, and issues from your project to a CSV file.
The export of users and groups is only available for Jira admin users. However, the export of issues can be done by both admins and other users.
Export users from Jira
Jira users is what makes up a team. Each user can have a unique username, email address, and user ID. Here are the steps on how to export a list of all the users:
- When you log in to Jira Software, click on the grid menu on the top left-hand side.
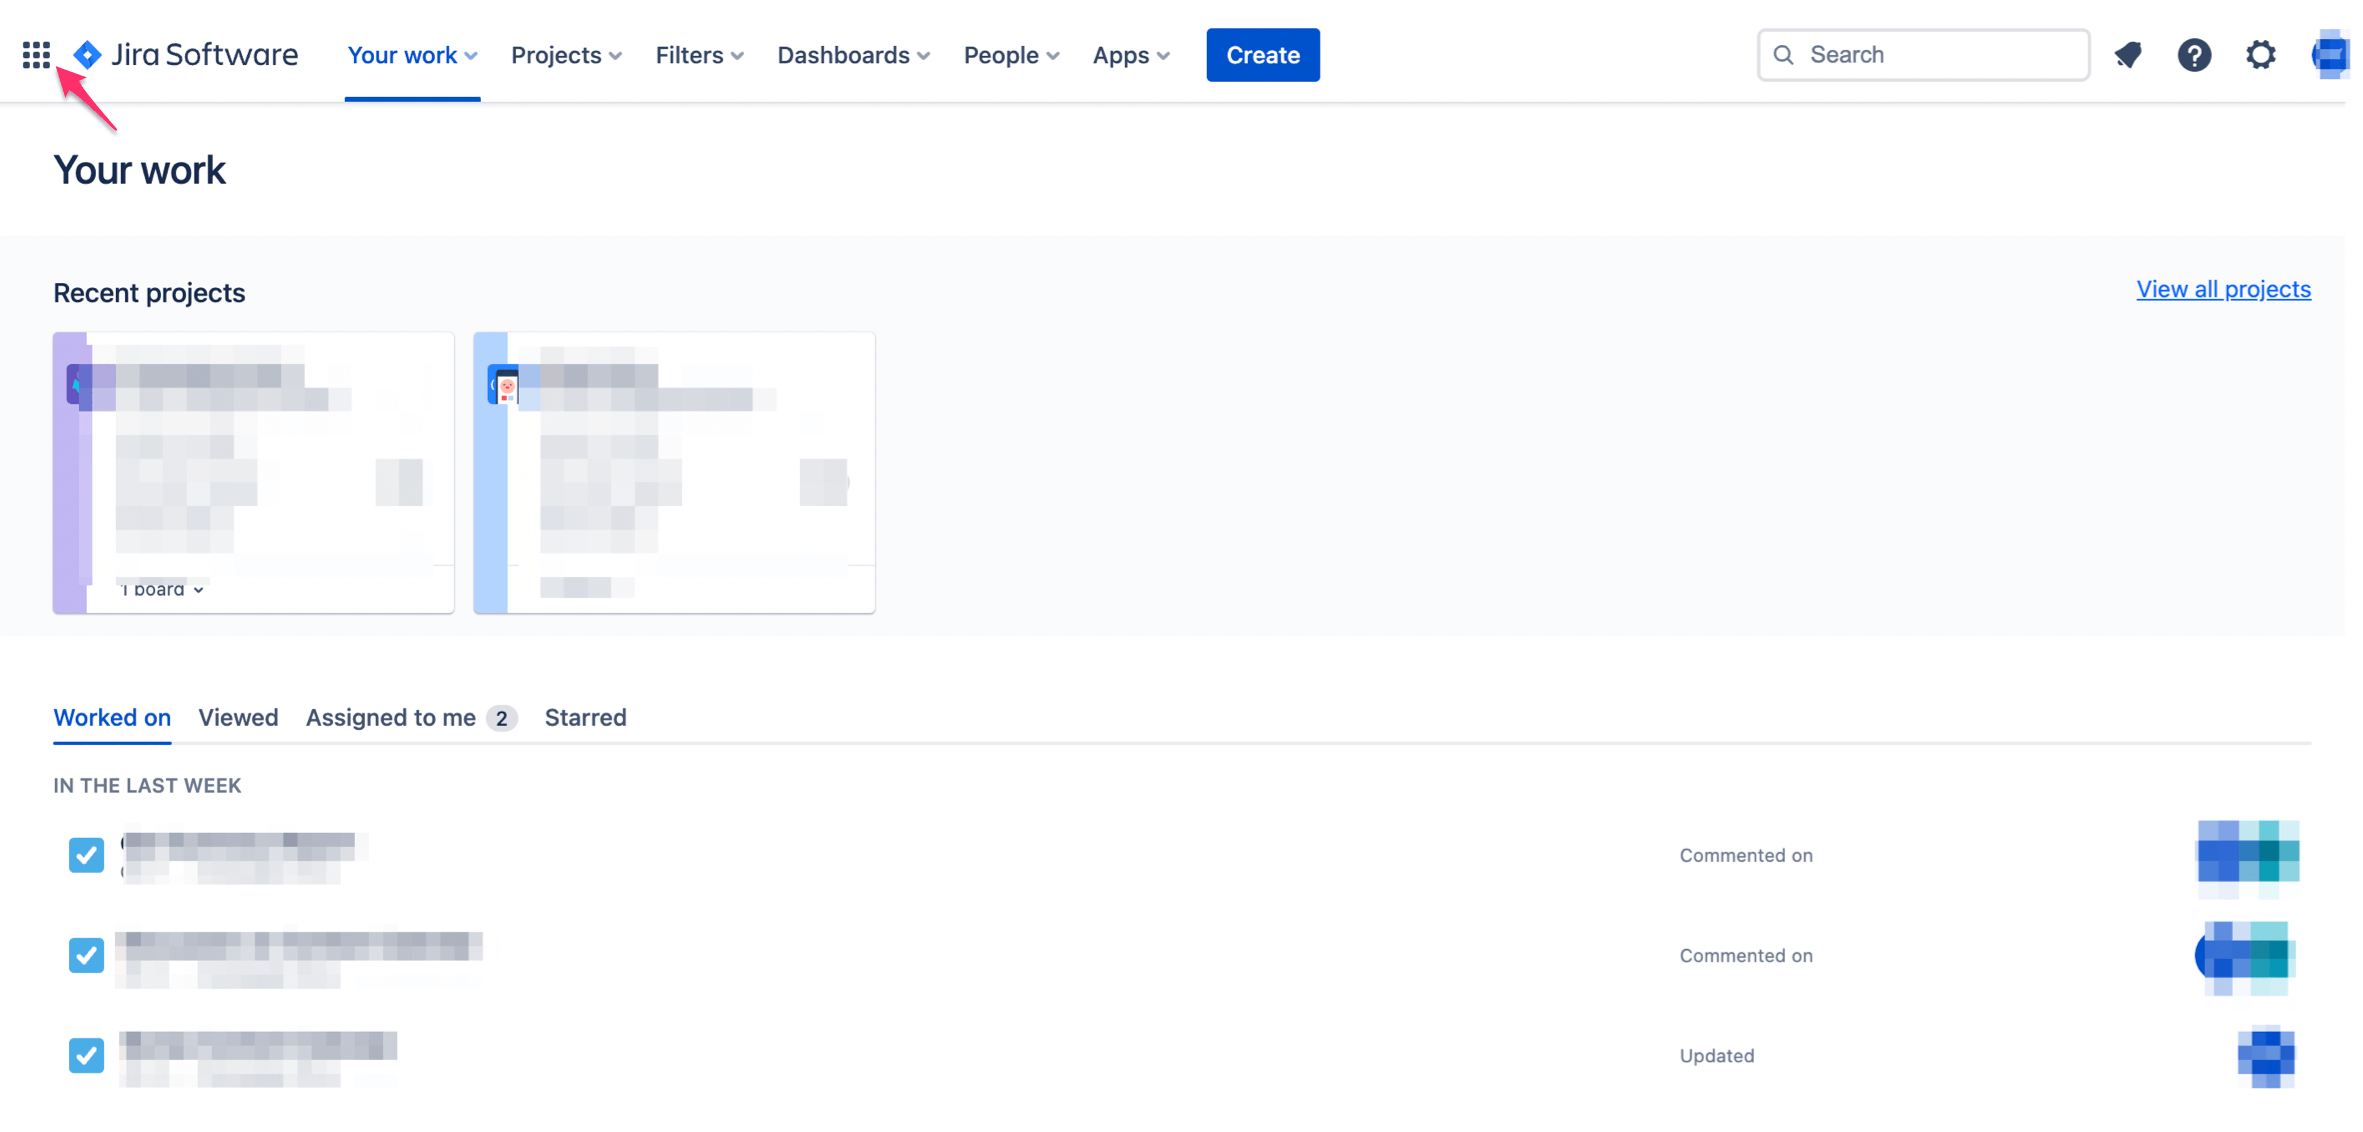
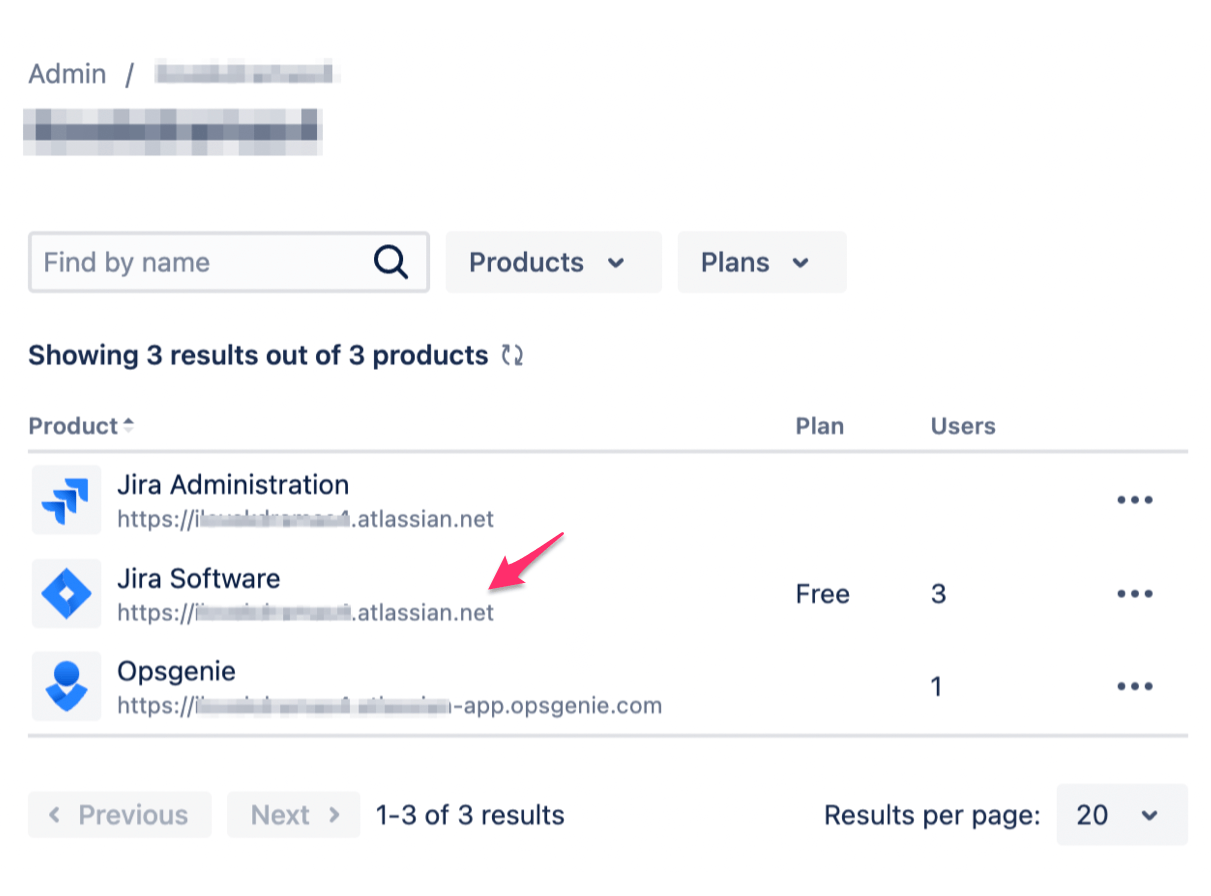
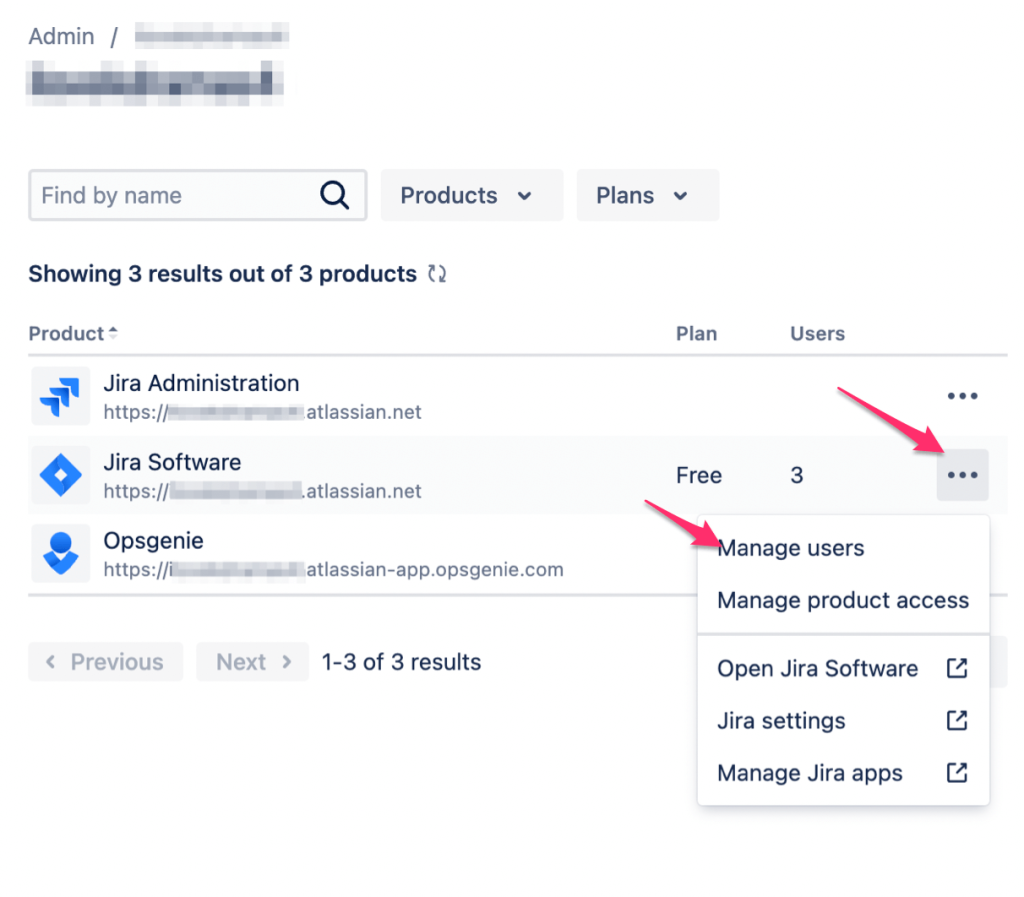
- You will see your products listed on the next page, all you have to do is select the project from which you wish to export the list of users. Here, we are going with Jira Software.
- Click on the three dots and select Manage users.
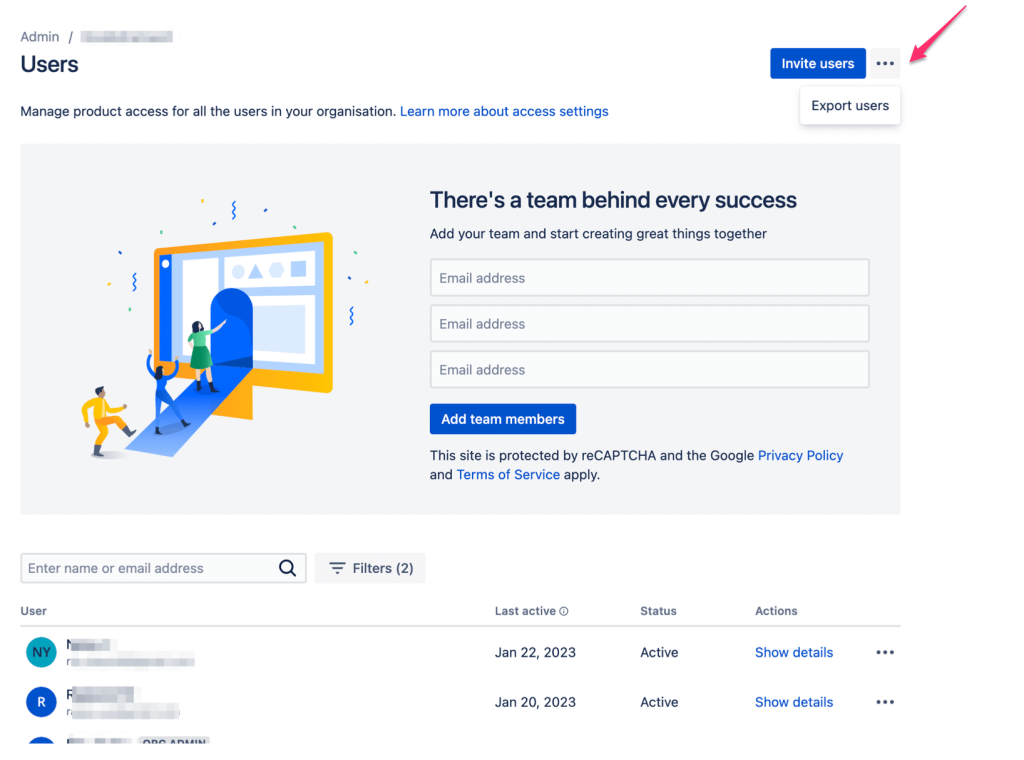
- You will see the list of users on the next page. Now, to export this list all you have to do is click on the three dots on the top right-hand side and select Export users.
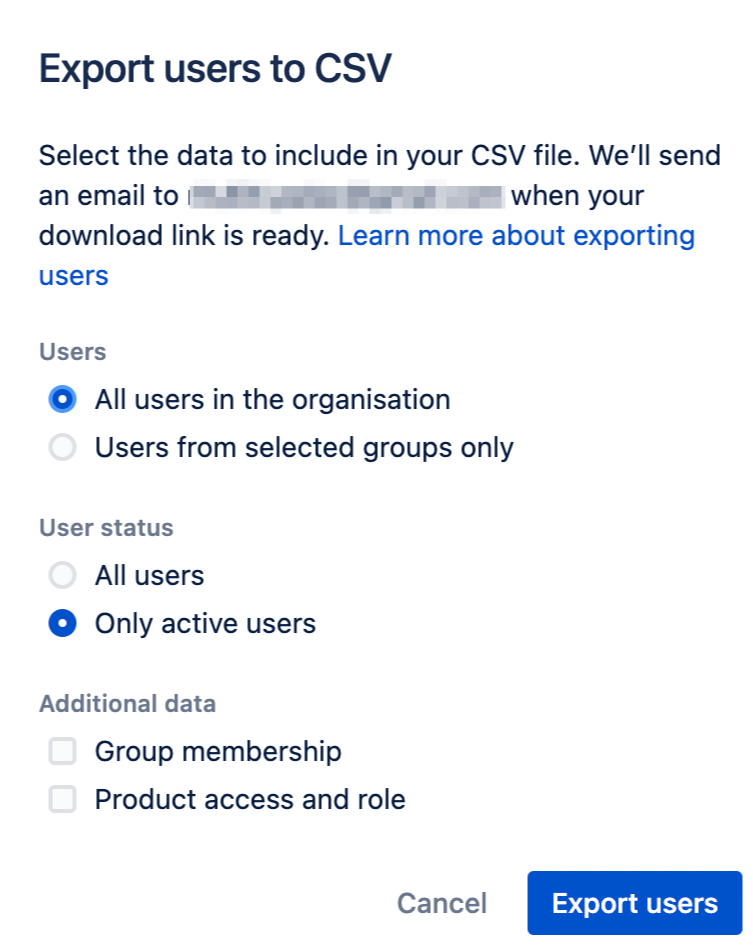
- Next, a pop-up will appear, asking to make any (if required) changes to the list.
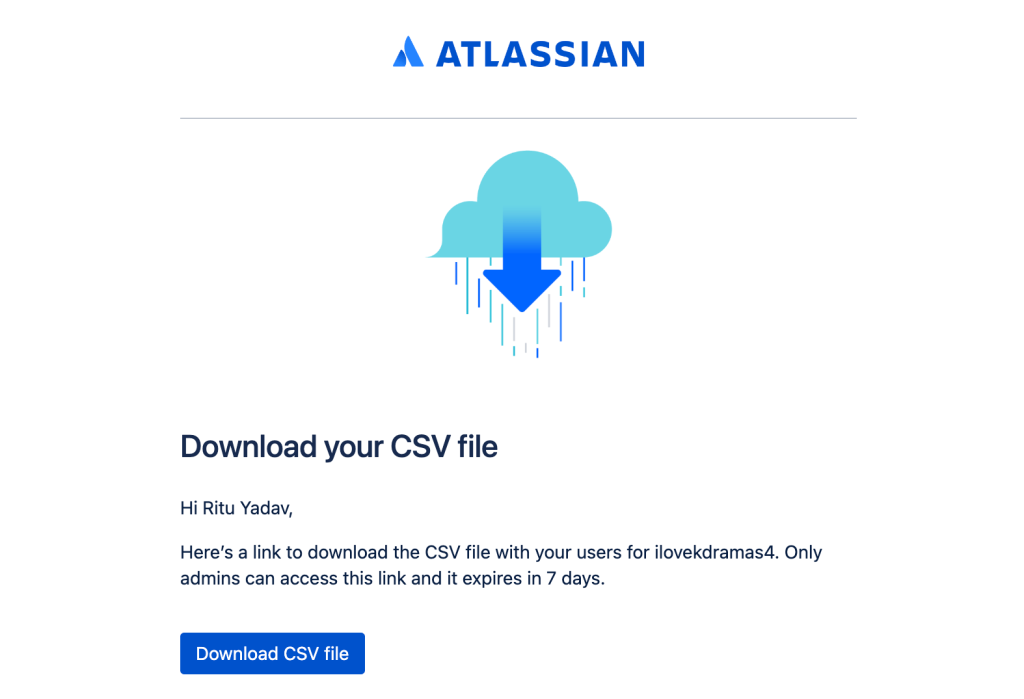
- Click on Download CSV file to access it. The CSV file includes information about each user such as their roles, status, user id, etc. This is how the file looks:

Export groups of users from Jira
There may be times when you only need a list of users from a certain group. To export such a list, follow these steps:
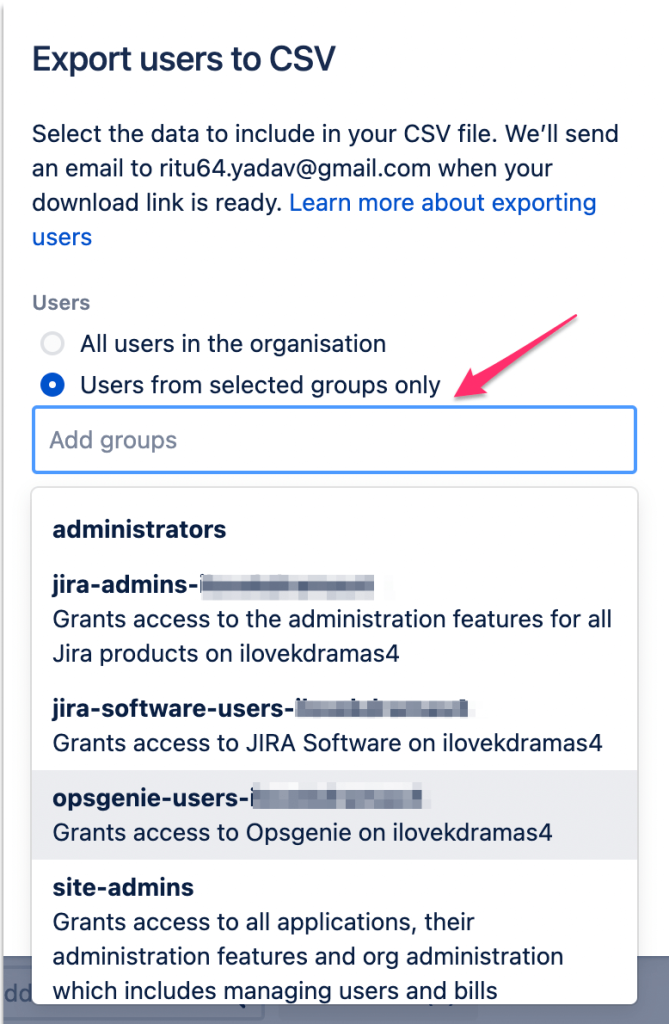
- As mentioned in the Users section above, follow all those steps until you reach the Export users pop-up. Here, select Users from selected groups only and then select the group from which you wish to export the list.
- Once you’ve selected the group, click on Export users. Just like how we exported users, the list will be sent to your email.
- When you’re done making these changes, click on Export users. The list will be sent to your registered email.
Export issues from Jira
We have a detailed guide on exporting Jira issues and in this section, we’ll introduce a brief example.
Exporting issues with all fields is pretty easy. If you’re an admin user, all you have to do is follow these steps:
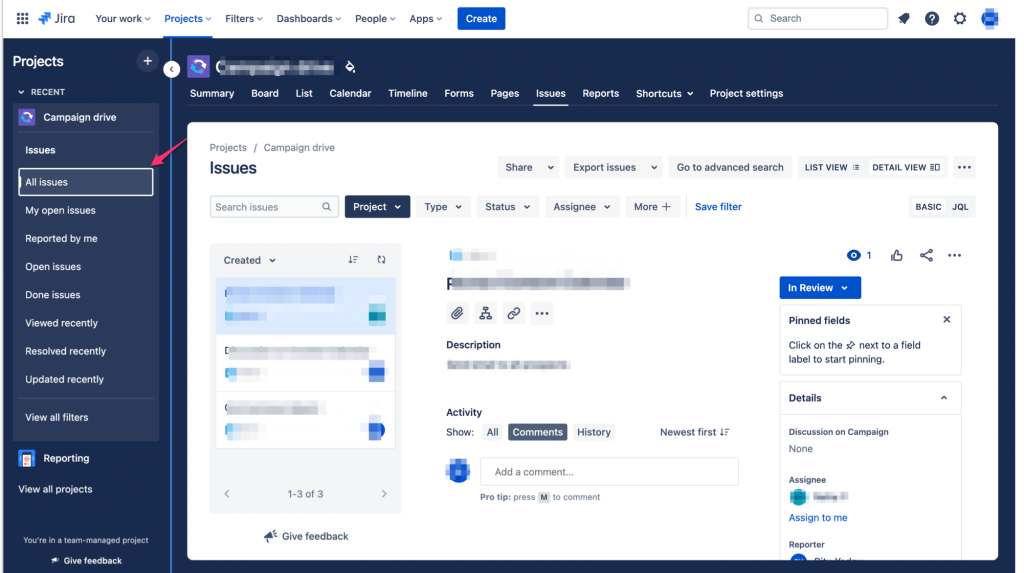
- Go to a project from which you want to export issues and click on Issues from the menu at the top.
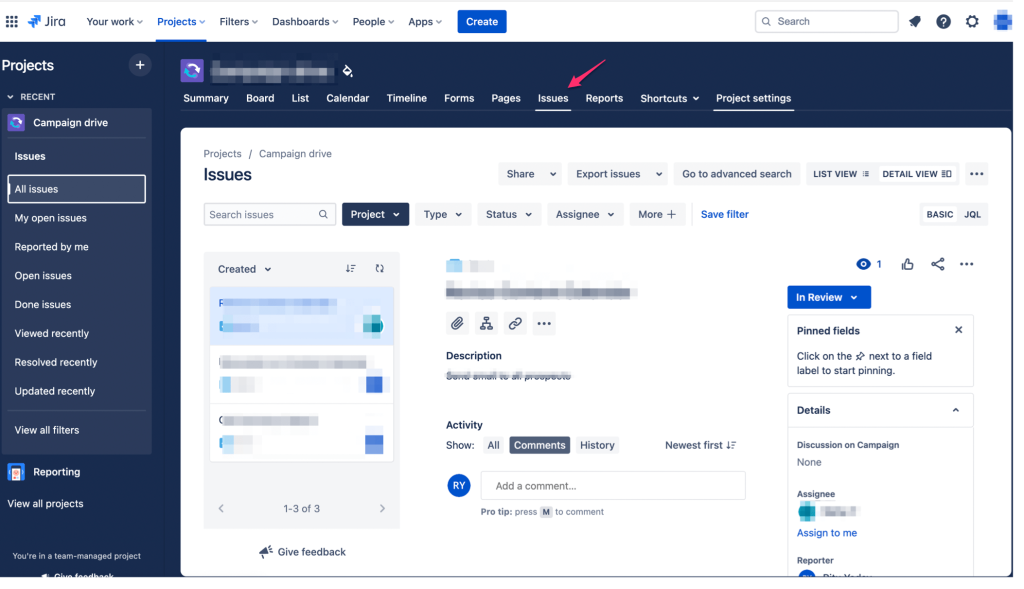
- In the screenshot below, you will see the project has 3 issues. From the right side, you can select the type of issues such as All issues, My open issues, Done issues, etc. In our case, we’ve selected All issues. Now, we want to export these issues.
- Click on Export issues from the top menu and then select Export Excel CSV (all fields).
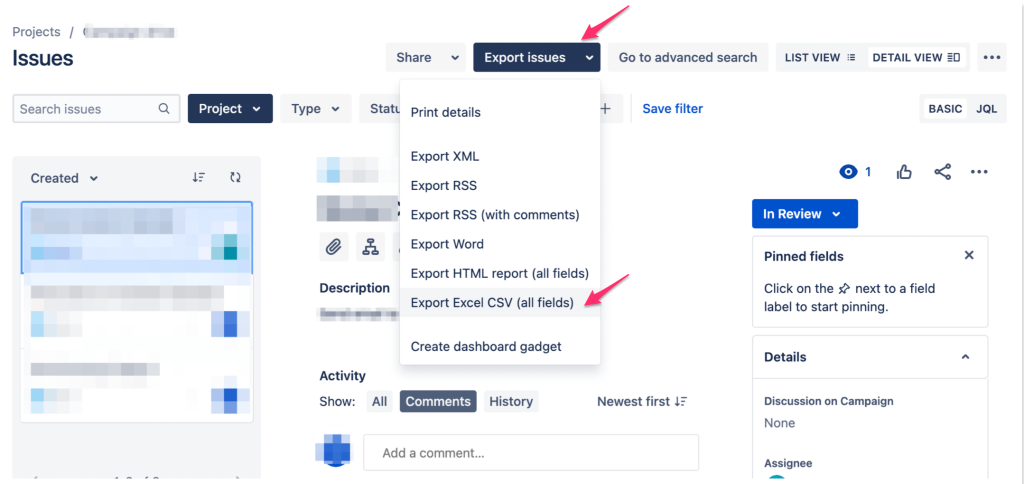
- The list will begin to download and it will include all the custom fields such as comments.

For other users, the steps to export issues are slightly different. Here they are:
- Go to Filters from the top menu and then click on View all filters.
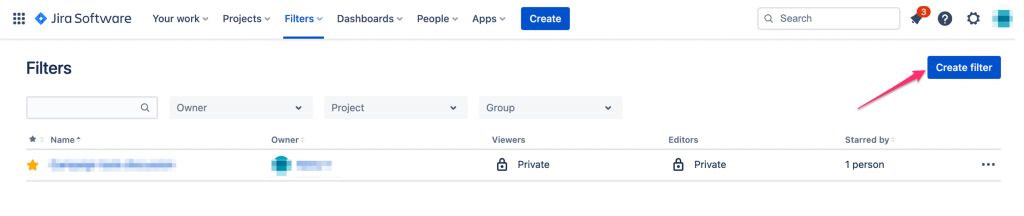
- Click on the Create Filter button.
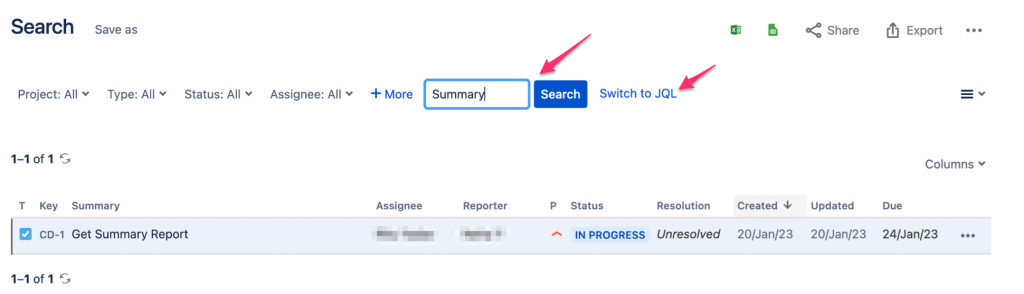
- You can enter keywords (our keyword here is Summary) in the search bar or click Switch to JQL and enter a JQL query here to search for the issues.
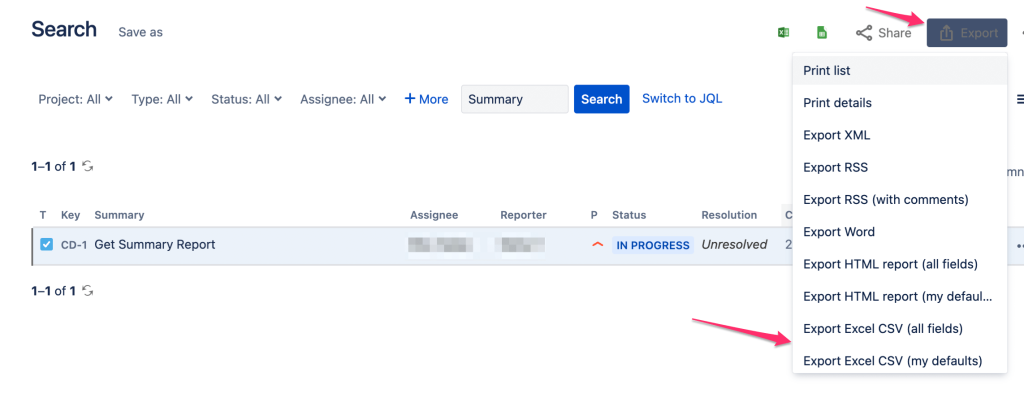
- When you have your issues listed, click on Export and then Export Excel CSV (all fields) or Export Excel CSV (my defaults).
- The CSV file will be downloaded to your computer.
Example of a Jira export to PDF
Although there’s no native method to export data from Jira to PDF, there is a workaround. Follow these steps to do this:
- Again, go to Filters from the top menu and click on View all filters.
- Then, click on Create Filter.
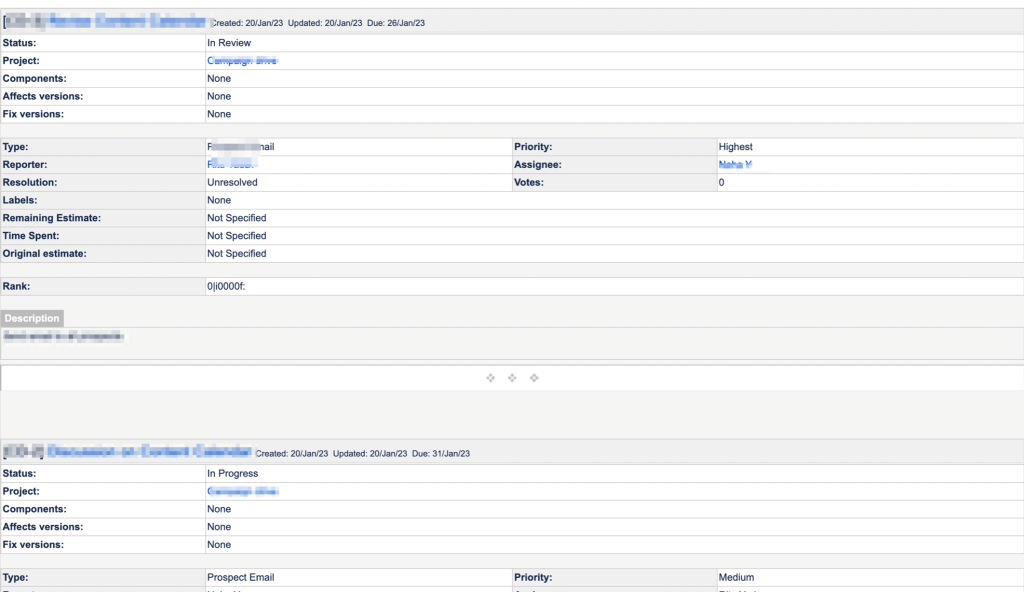
- Enter a keyword in the search bar or Switch to JQL and enter a JQL Query to bring up the issues. Once, they’re up, click on Export and then Print details.

- All the issues with details will be listed on the next page.
- Now, if you’re using a windows system, CTRL+P and select Destination as Save as PDF. If you’re using a Mac Command+P to print, select Destination as Save as PDF. Finally, click on the Save button.
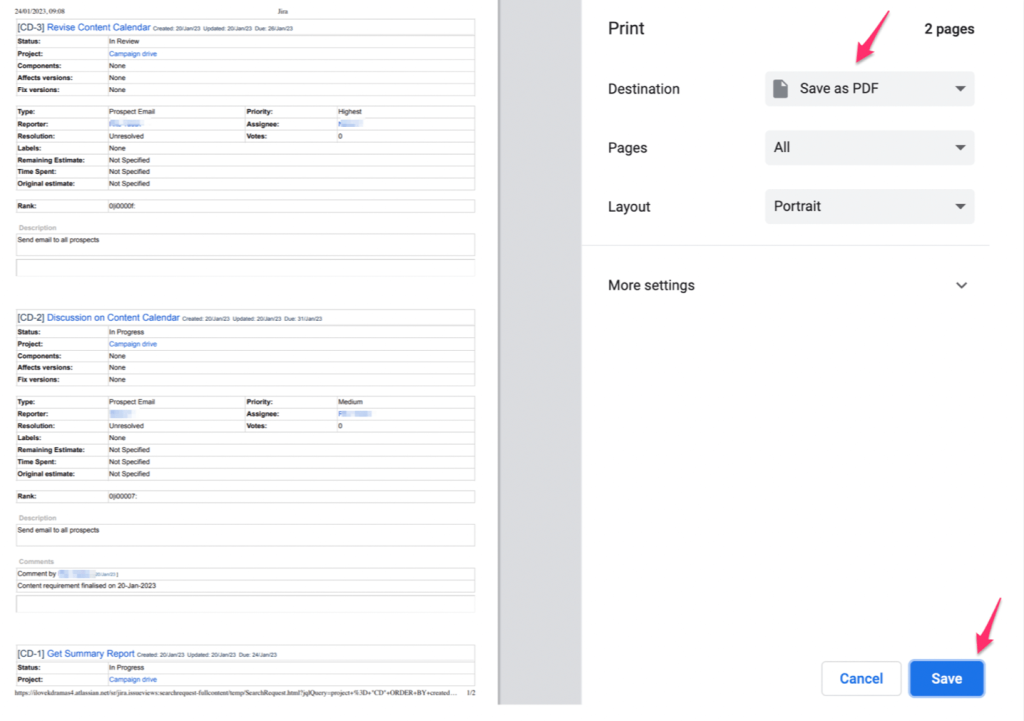
Voila! There you go, your Jira issues are listed in a PDF with all the details.
What is the Jira export limit?
The Jira issue export limit is 1,000 search results, which means you can only export up to 1,000 issues at a time. This limitation, however, is not applicable if you export data from Jira using Coupler.io. All you have to do is enter a JQL Query when you’re setting up your importer in Coupler.io. We’ve provided a detailed explanation here – Jira – Excel more than 1,000 issues.
Jira export: make your life easier
Exporting Jira issues is an excellent way to present your issues to colleagues and clients. You can export the data in various formats, and adjust the columns accordingly depending on what categories you want to show from Jira.
When you export data from Jira online, you make your life easier! If you’re looking to move to another platform, build custom reporting dashboards or just have a backup, Jira export will allow you to take all of your existing data with you. It’s easy, quick, and hassle-free—allowing you to spend less time worrying about data migration, and more time doing the real work!


