When running a Shopify online store, your primary task is turning visitors into paying customers. This is only possible if you ensure a well-optimized sales funnel. For this purpose, you must delve into Shopify data and take action based on informed conclusions. So, let’s discover how to analyze and improve your Shopify sales funnel further in the article.
What is a Shopify sales funnel?
A sales funnel on Shopify represents the way potential customers go through to purchase. It visualizes how you begin your sales with a huge target audience and end with considerably fewer buyers. As an illustration, the average conversion rate for an e-commerce website is around 2.5% to 3%.
At a high level, a sales funnel comprises three distinct parts:
- Top of the funnel: Your target audience isn’t looking to buy from you right now. This step corresponds to the first stage within the AIDA (attention, interest, desire, action) model. Here, intended customers become aware of your brand, product, or service through social media, paid ads, email campaigns, etc.
- Middle of the funnel: After catching the audience’s attention, you get them to visit your website or other resources. That’s how you move your leads toward the interest stage of the customer journey. Next, they evaluate your products or services and competitors’ offerings, switching to the desired stage.
- Bottom of the funnel: Once your leads have done some research, they are ready to buy from you with the right push. The only thing you must do at this step is convince them actually to make a purchase. It’s the action stage, where you acquire new paying customers for your business.
To secure commercial success, you must ensure the sales funnel satisfies your leads’ demands at each stage. But how do you build it to analyze and optimize further? We will answer this and more in the following section.
How do you create a sales funnel on Shopify?
You create a sales funnel on Shopify by connecting your online store to Google Analytics 4 (GA4). This tool informs you how the target audience interacts with your website. It can monitor various actions on diverse platforms and devices, including clicks, scrolls, purchases, etc. Moreover, GA4 helps you understand customer behavior and provides tailored reports on marketing performance.
Step 1: Create a Google Analytics account
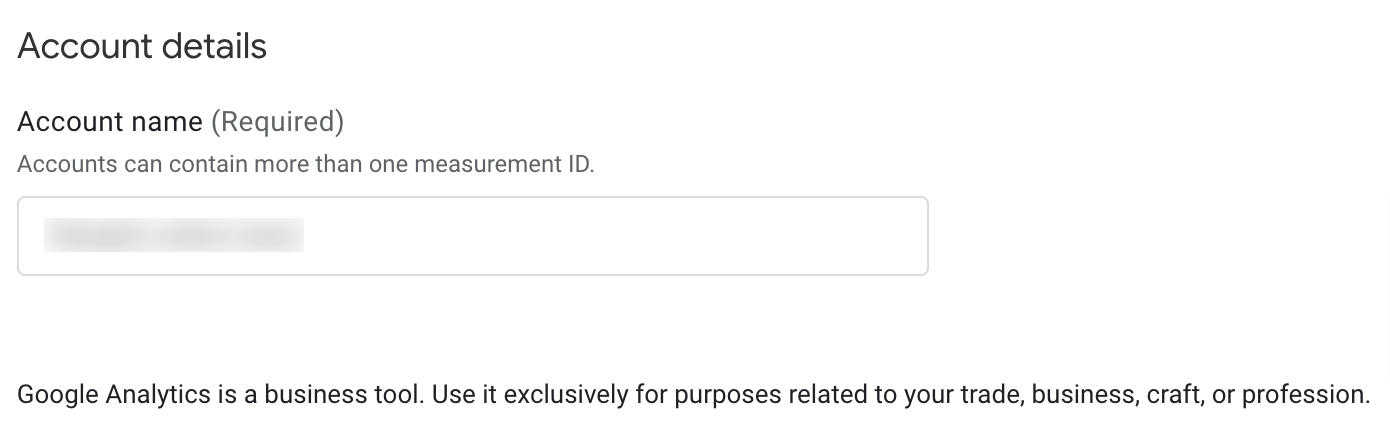
First, check whether you have a Google account to access GA. If you don’t, create one. Once you’ve completed it, proceed to create a Google Analytics account by following this link. Click Sign in to Analytics and then Start measuring. On a new page, provide the Account name.
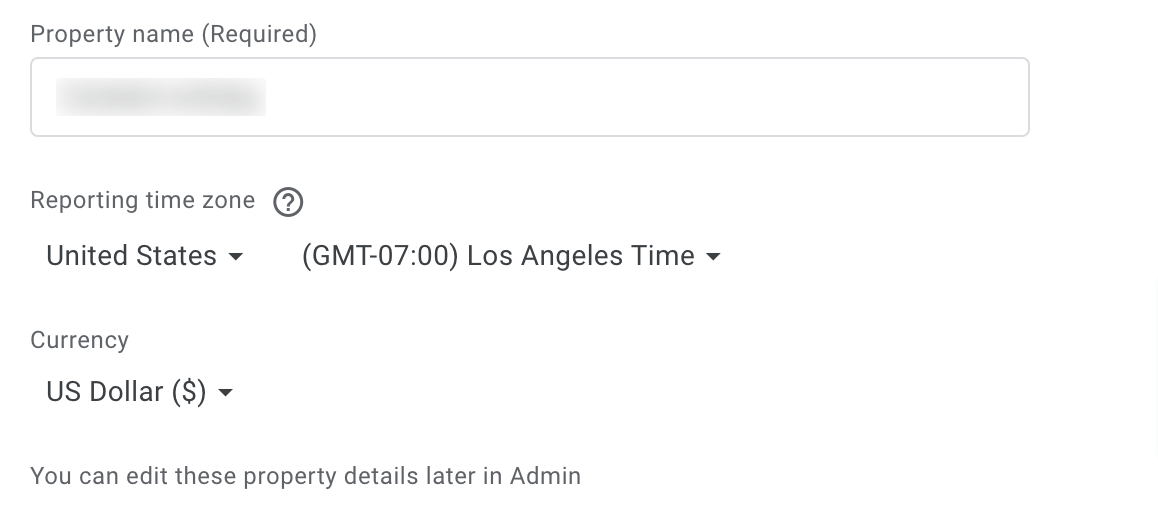
Click Next to type in the Property name, Reporting time zone, and Currency.
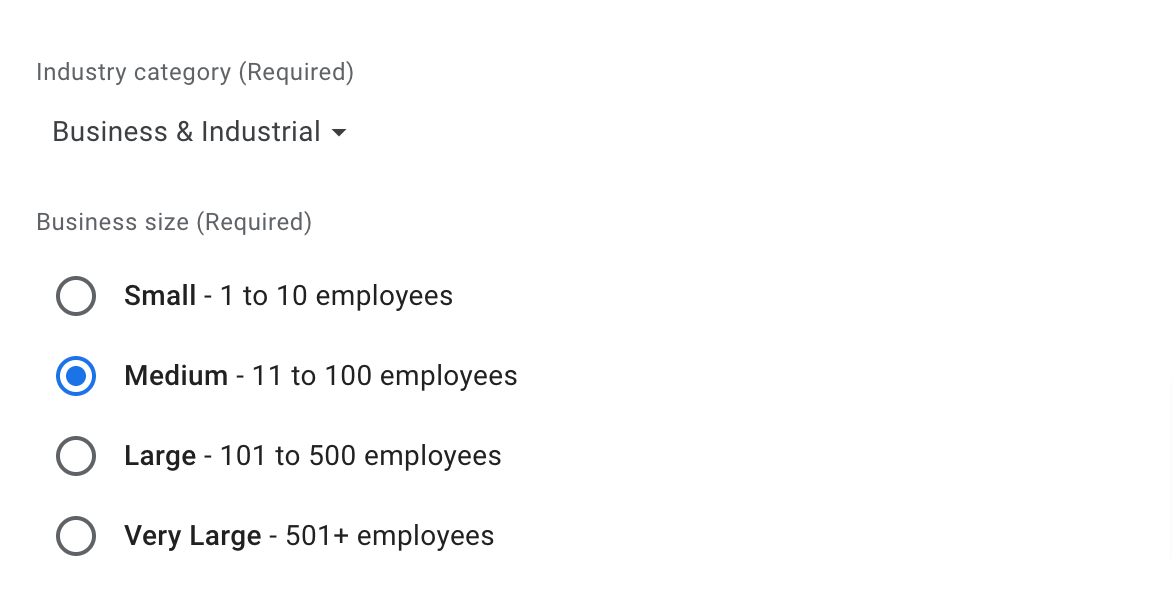
Again, click Next. Select the Industry category from the dropdown list and pick the Business size.
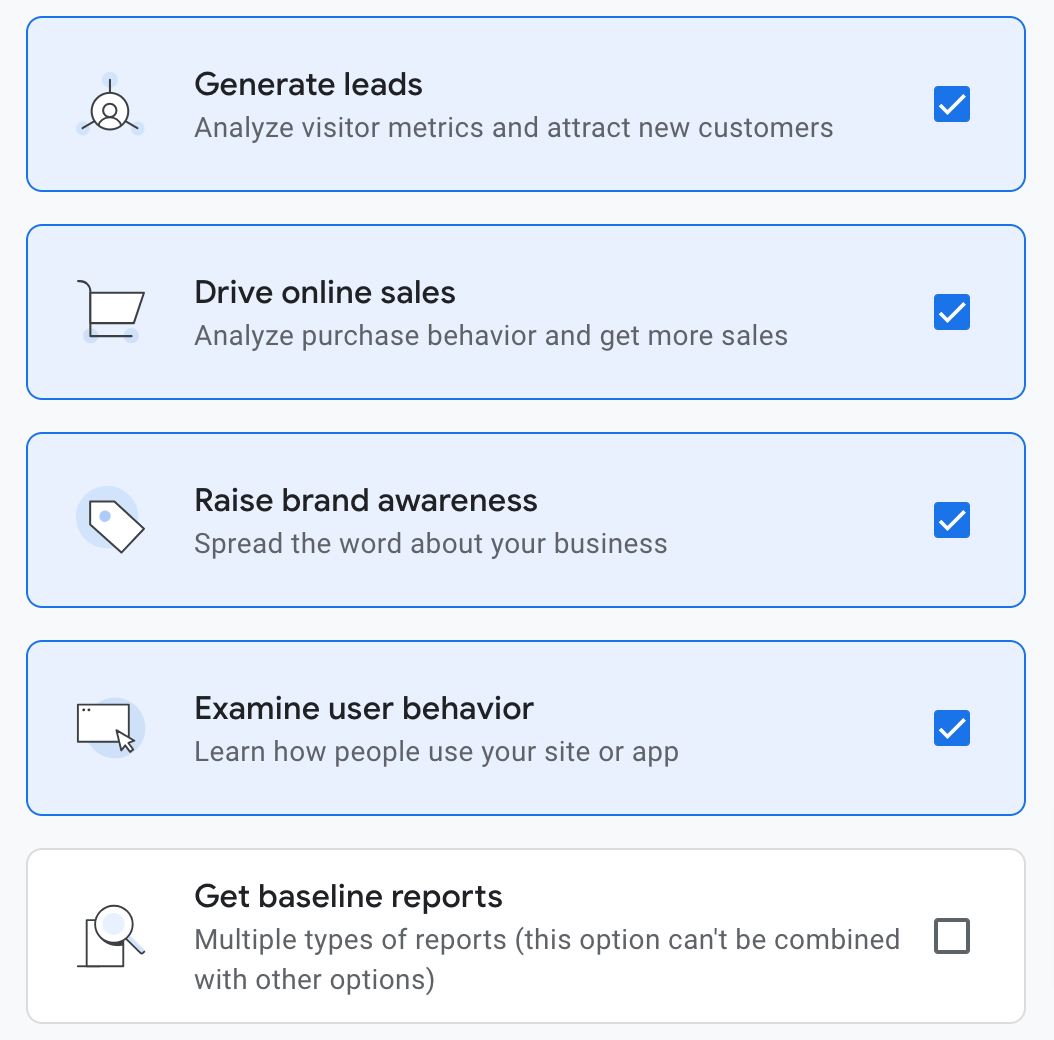
Press Next once more to choose your business objectives. You can put a tick against 1 to 4 options.
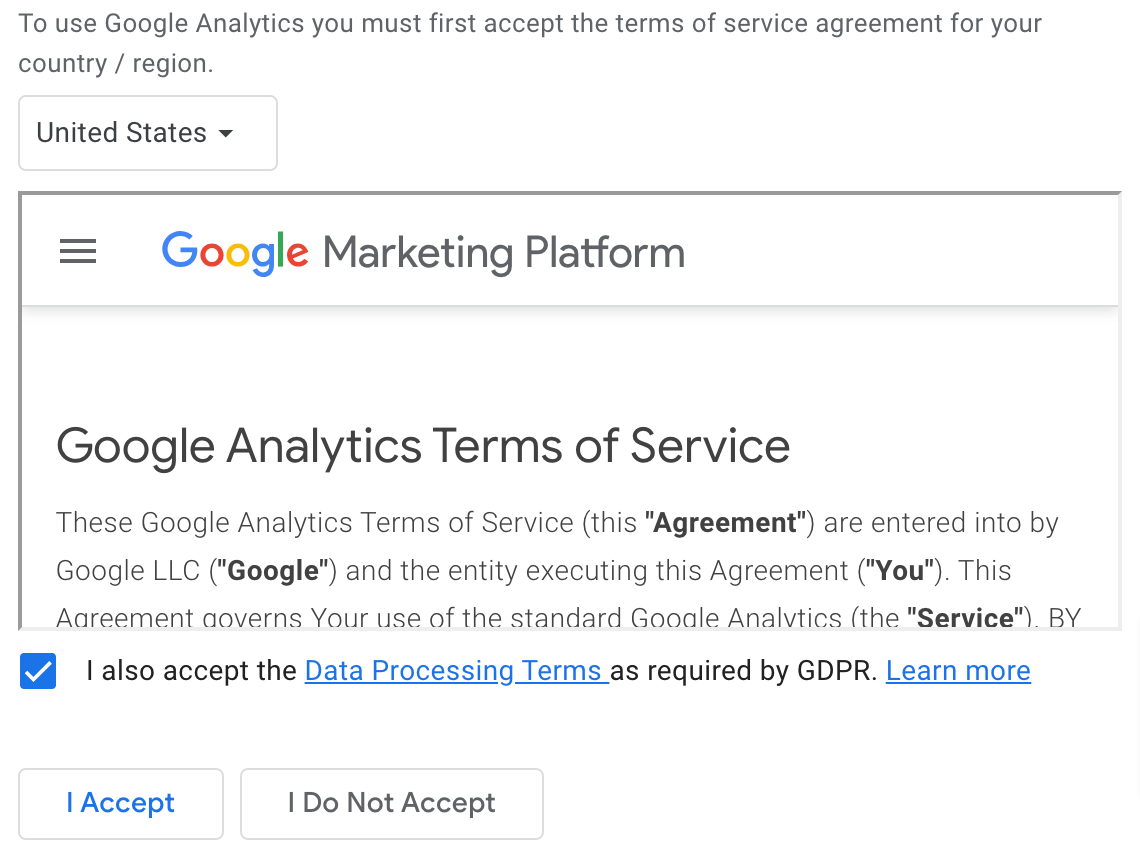
Click Create. In a new window, accept the Data Processing Terms by putting a tick and clicking I accept.
Congrats! You’ve created your Google Analytics account to go for the next step.
Step 2: Move a Google Analytics property
This time, you must select the data stream type. We’ve preselected Web for you. Then, provide the Website URL and Stream name.
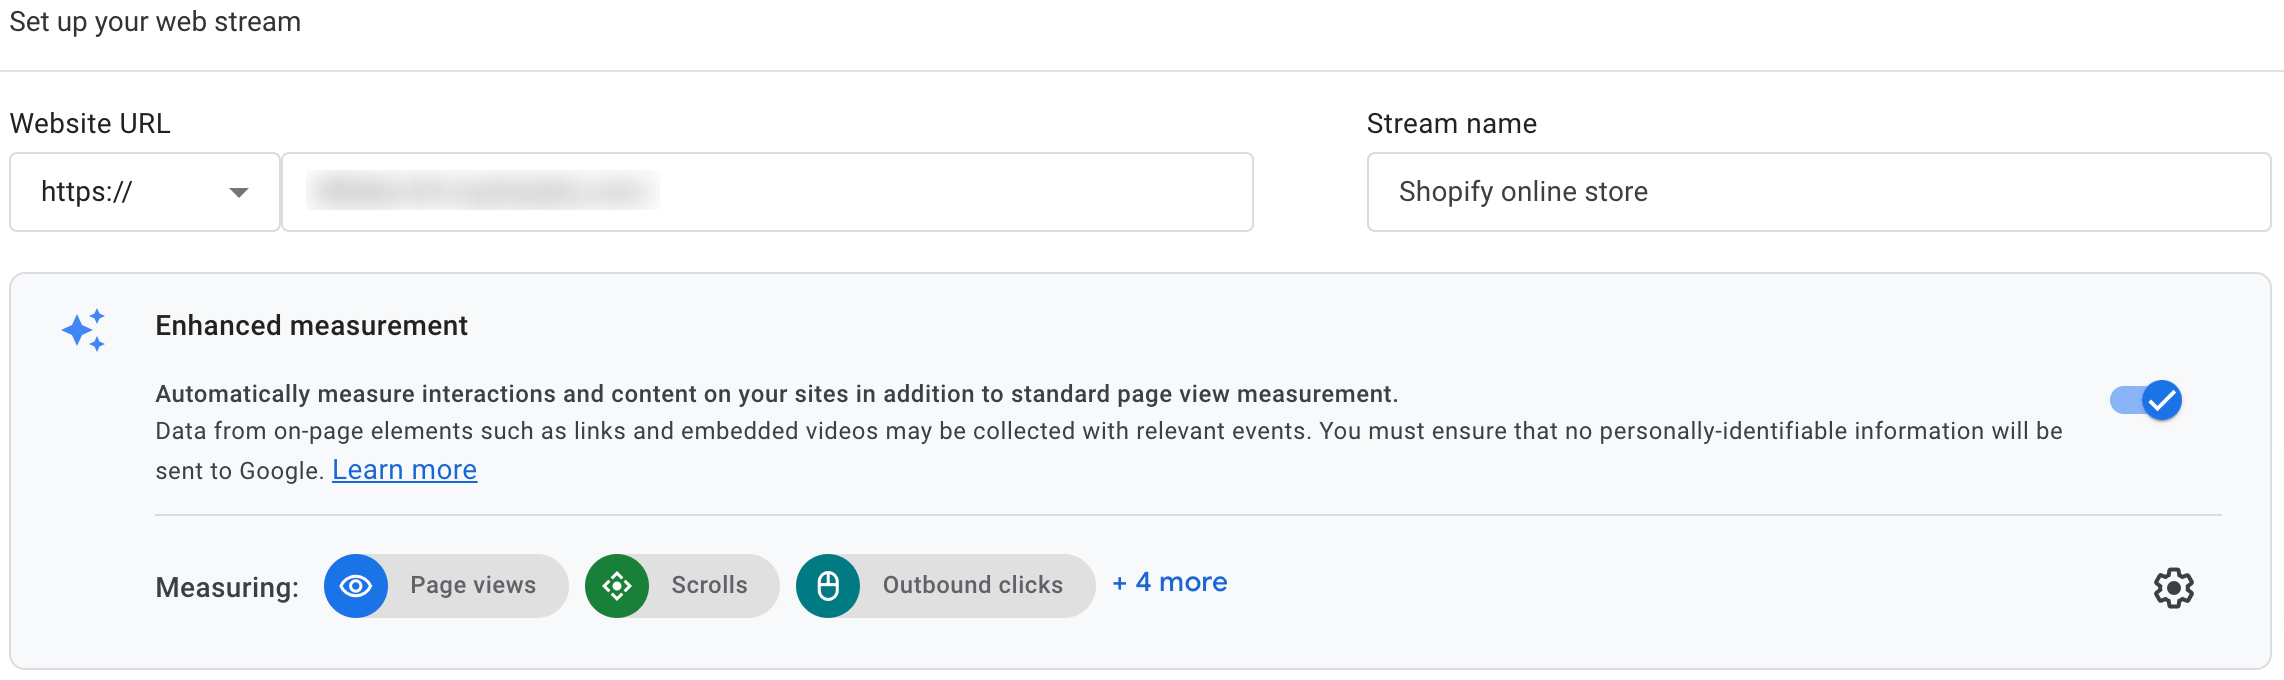
Finally, click Create stream.
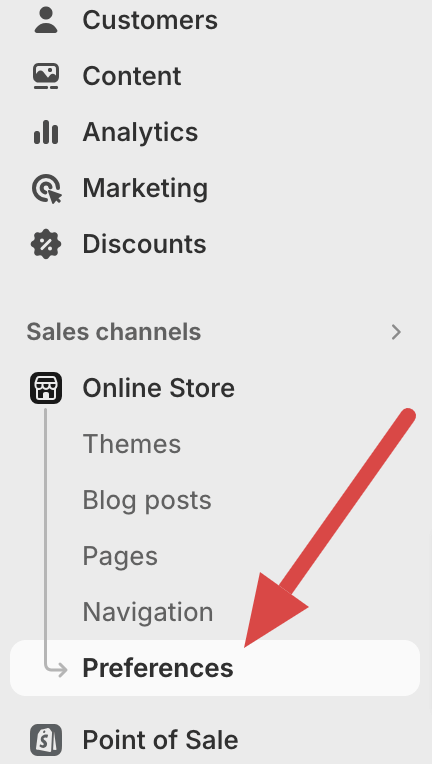
Step 3: Add the Google tag to Shopify
Go to your Shopify admin, select Online store from the Sales channels list on the left, and click Preferences.
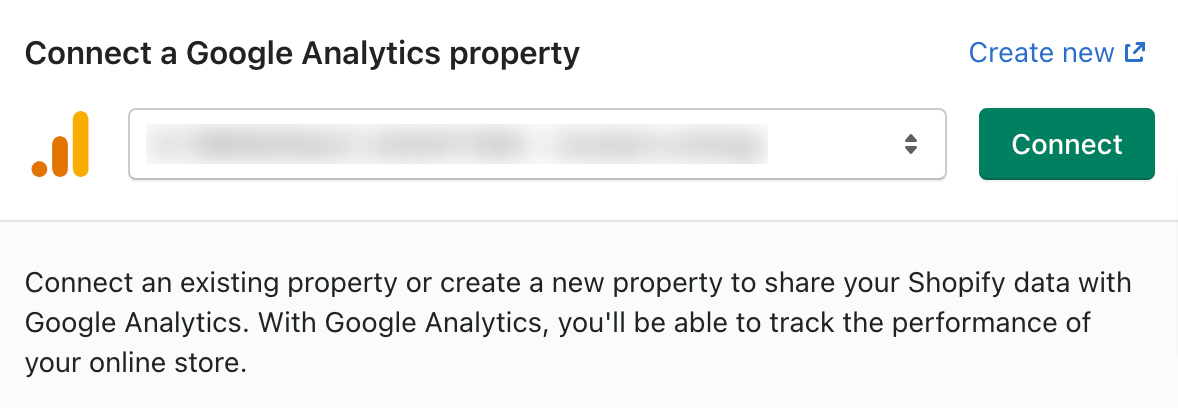
In the Google Analytics section, click Set up Google. On the next page, press Install. Then, click Connect and finish linking your GA account in a new window. Navigate to Connect a Google Analytics property and press Connect.
GA can only track all e-commerce events when you remove password protection from your online store. You can do this from the Shopify admin. Again, select Online store from the Sales channels list on the left and click Preferences.
Scroll down to the Password protection section and untick Restrict access to visitors with the password. Lastly, click Save.
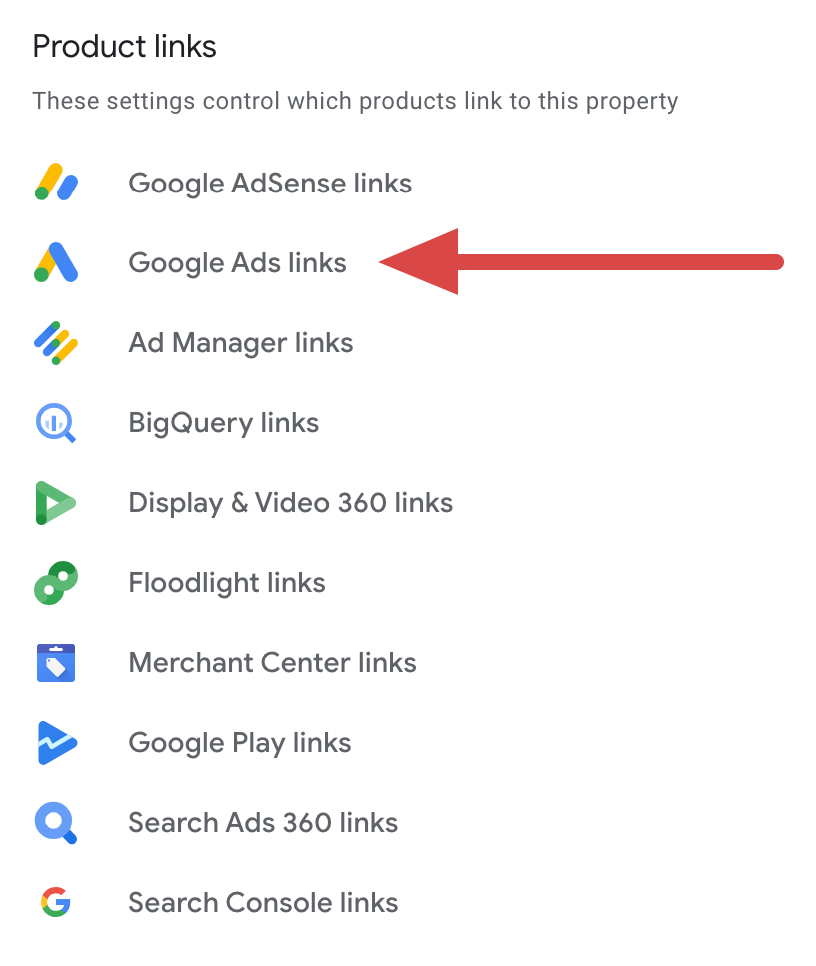
Step 4: Link your GA account to the Google Ads account
Connecting your Google Ads account makes sense if you’re running paid search advertising. To do this, return to your Google Analytics account. Then, move the pointer to the left sidebar menu and click Admin in the bottom left corner. Scroll down to the Product links column and select Google Ads links.
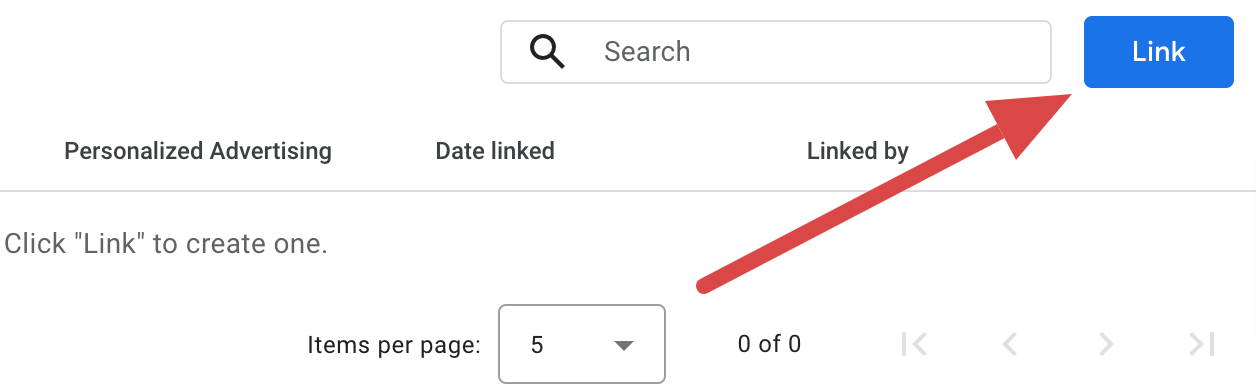
Now, click Link.
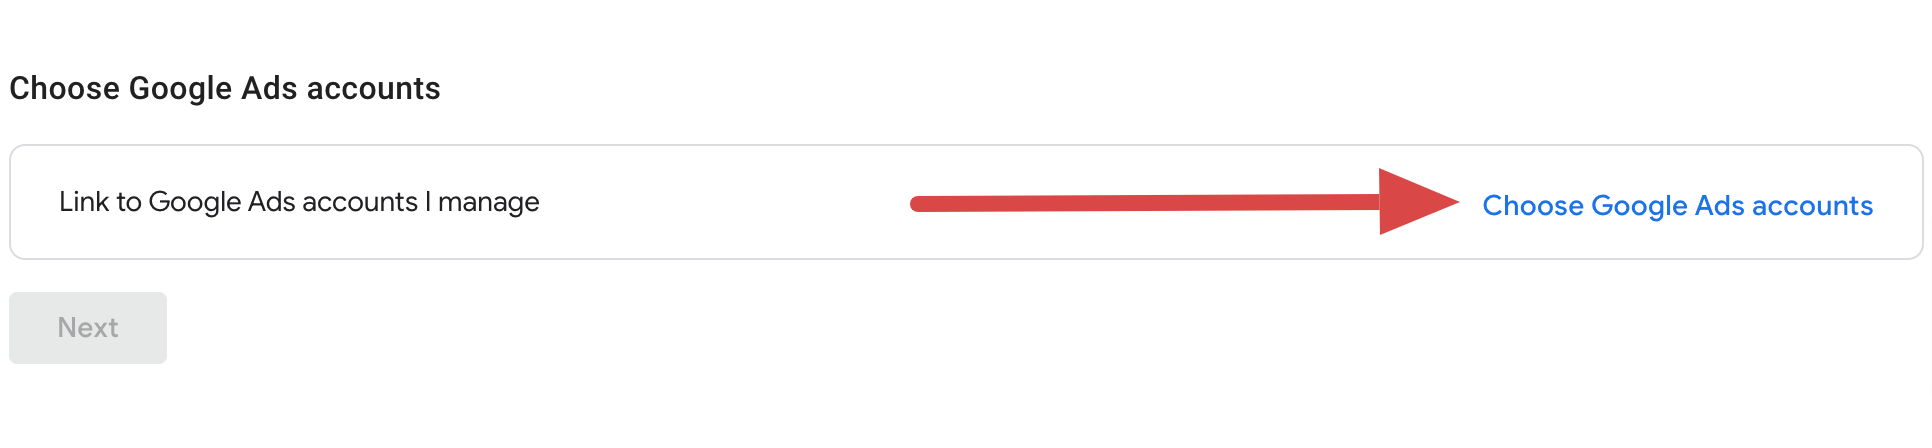
Press Choose Google Ads accounts.
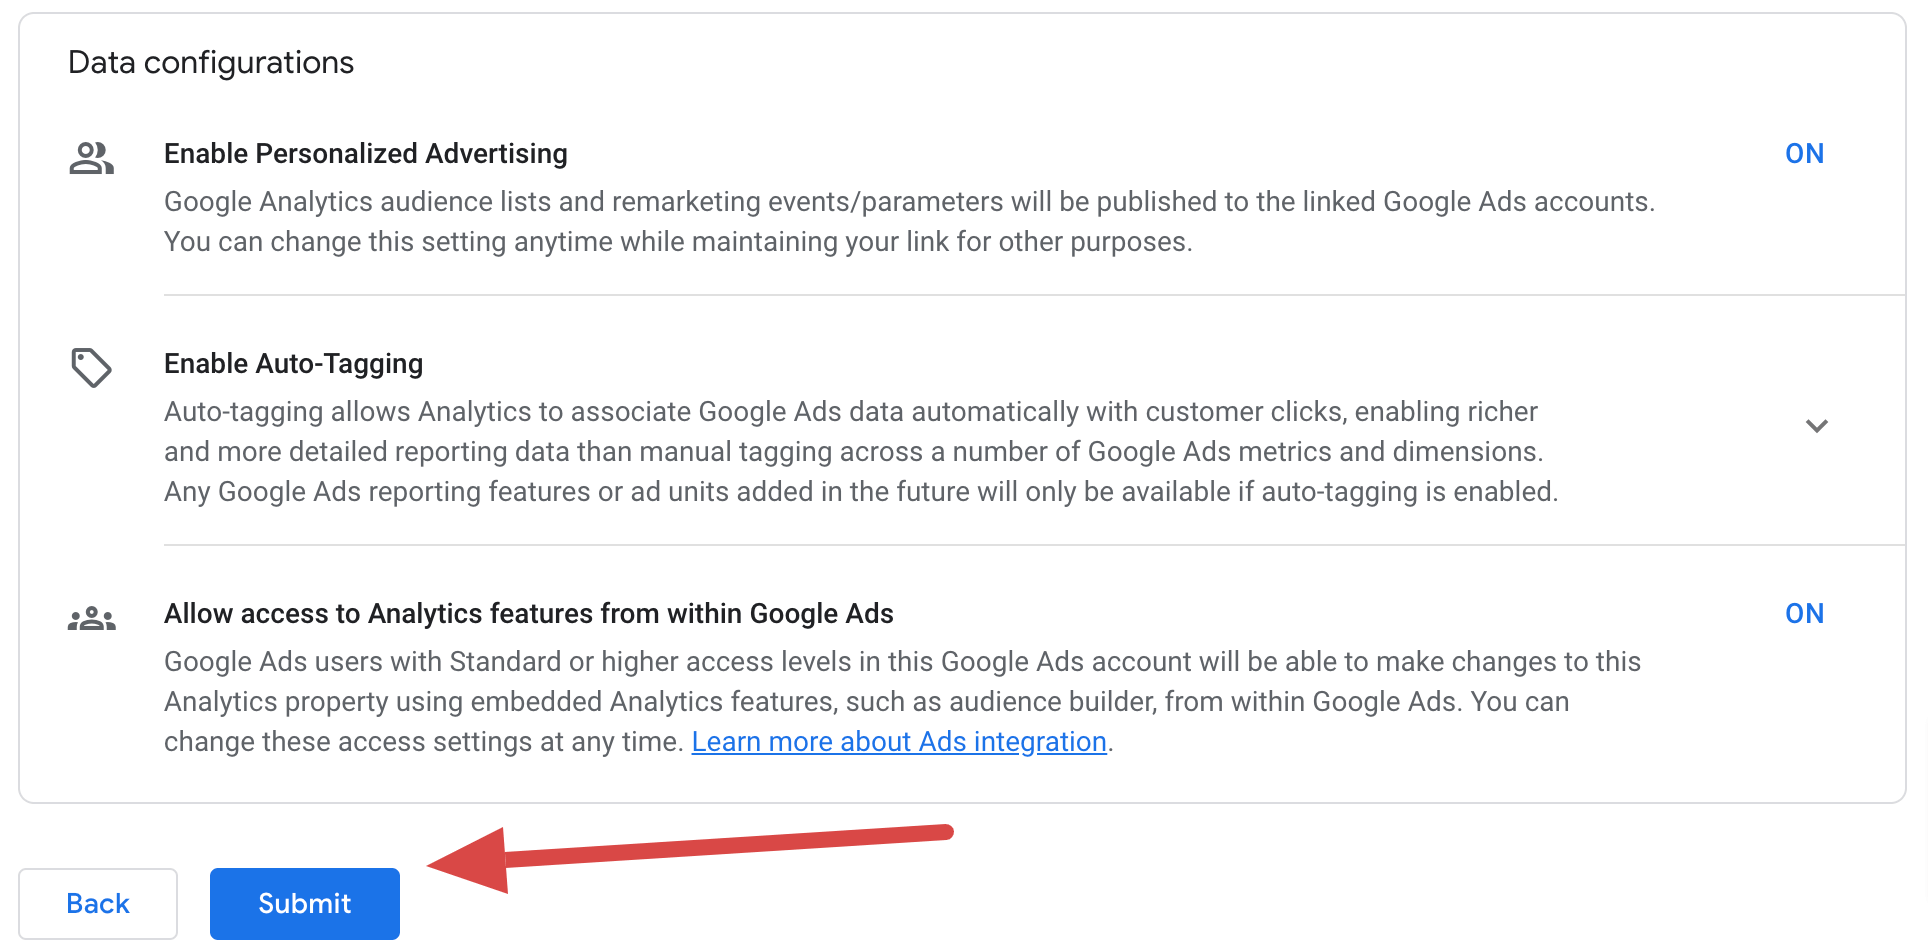
Put a tick against your account/accounts, click Confirm, and press Next. Select Next once again and click Submit.
Step 5: Connect GA to Looker Studio
To prepare for sales funnel analysis, you must visualize your Google Analytics data. It’s achievable with the help of various data viz tools. For example, Looker Studio enables you to build dashboards to see the big picture of your marketing efforts at each customer journey stage.
You can connect GA with Looker Studio in the following way:
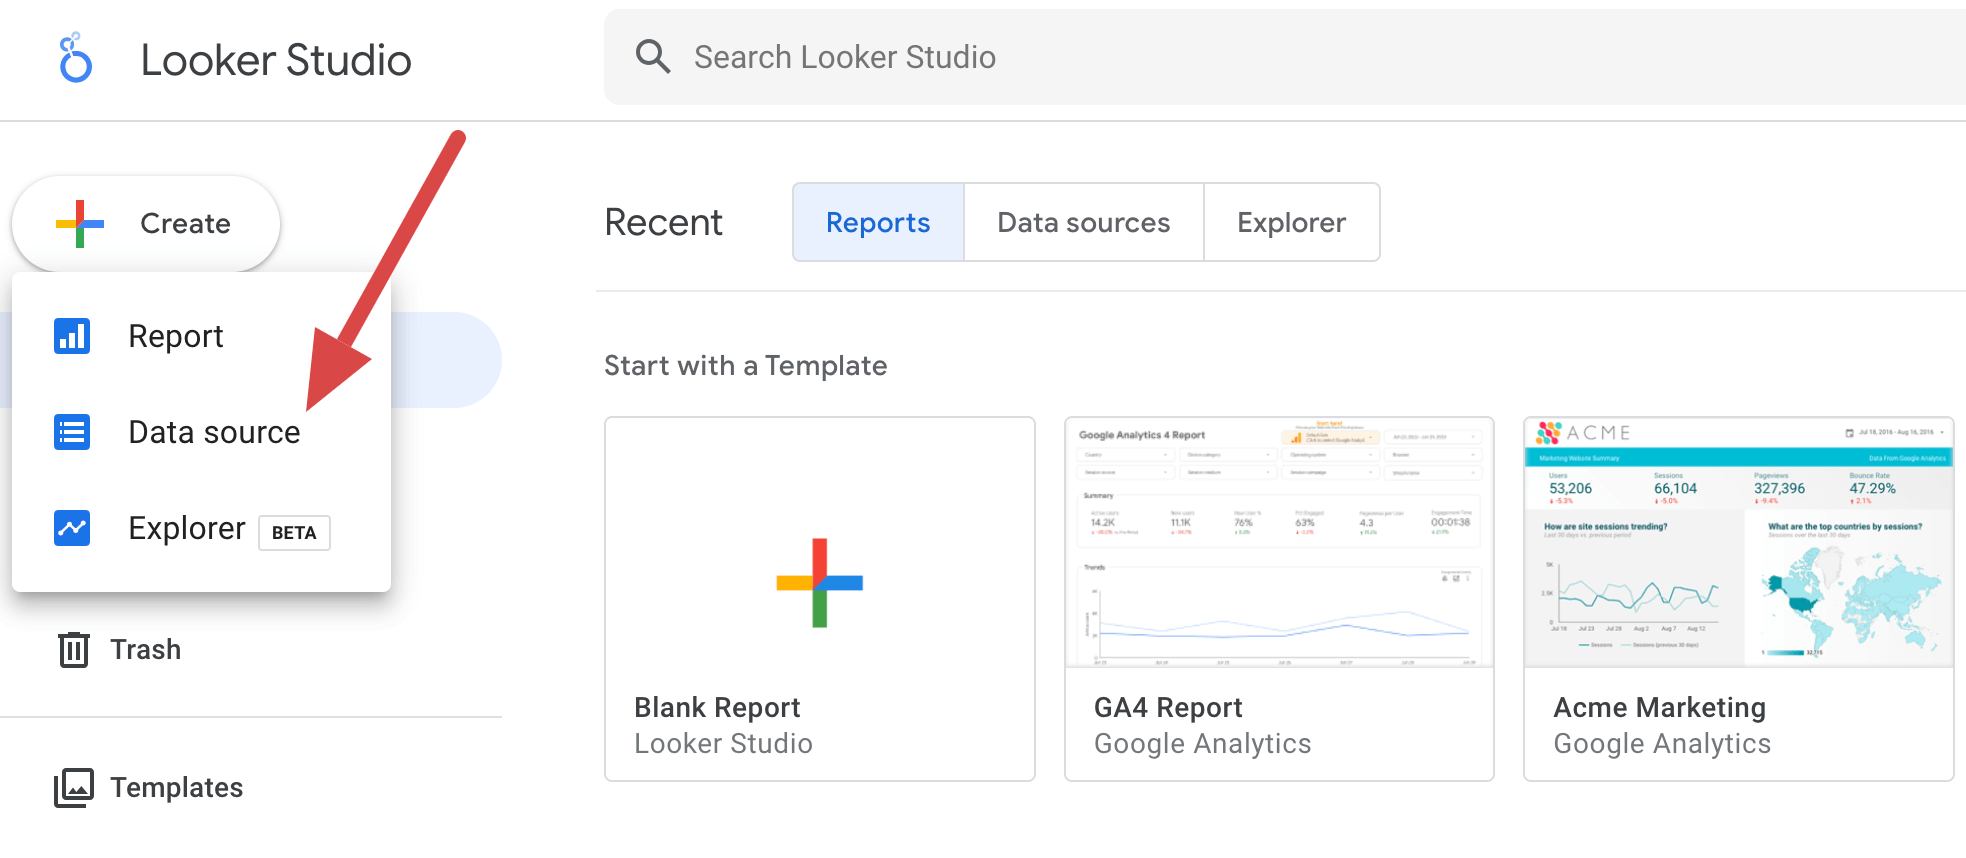
- Sign in to your Looker Studio account with Google account credentials. In the top-left corner of the home page, click Create and select the Data source from the list.
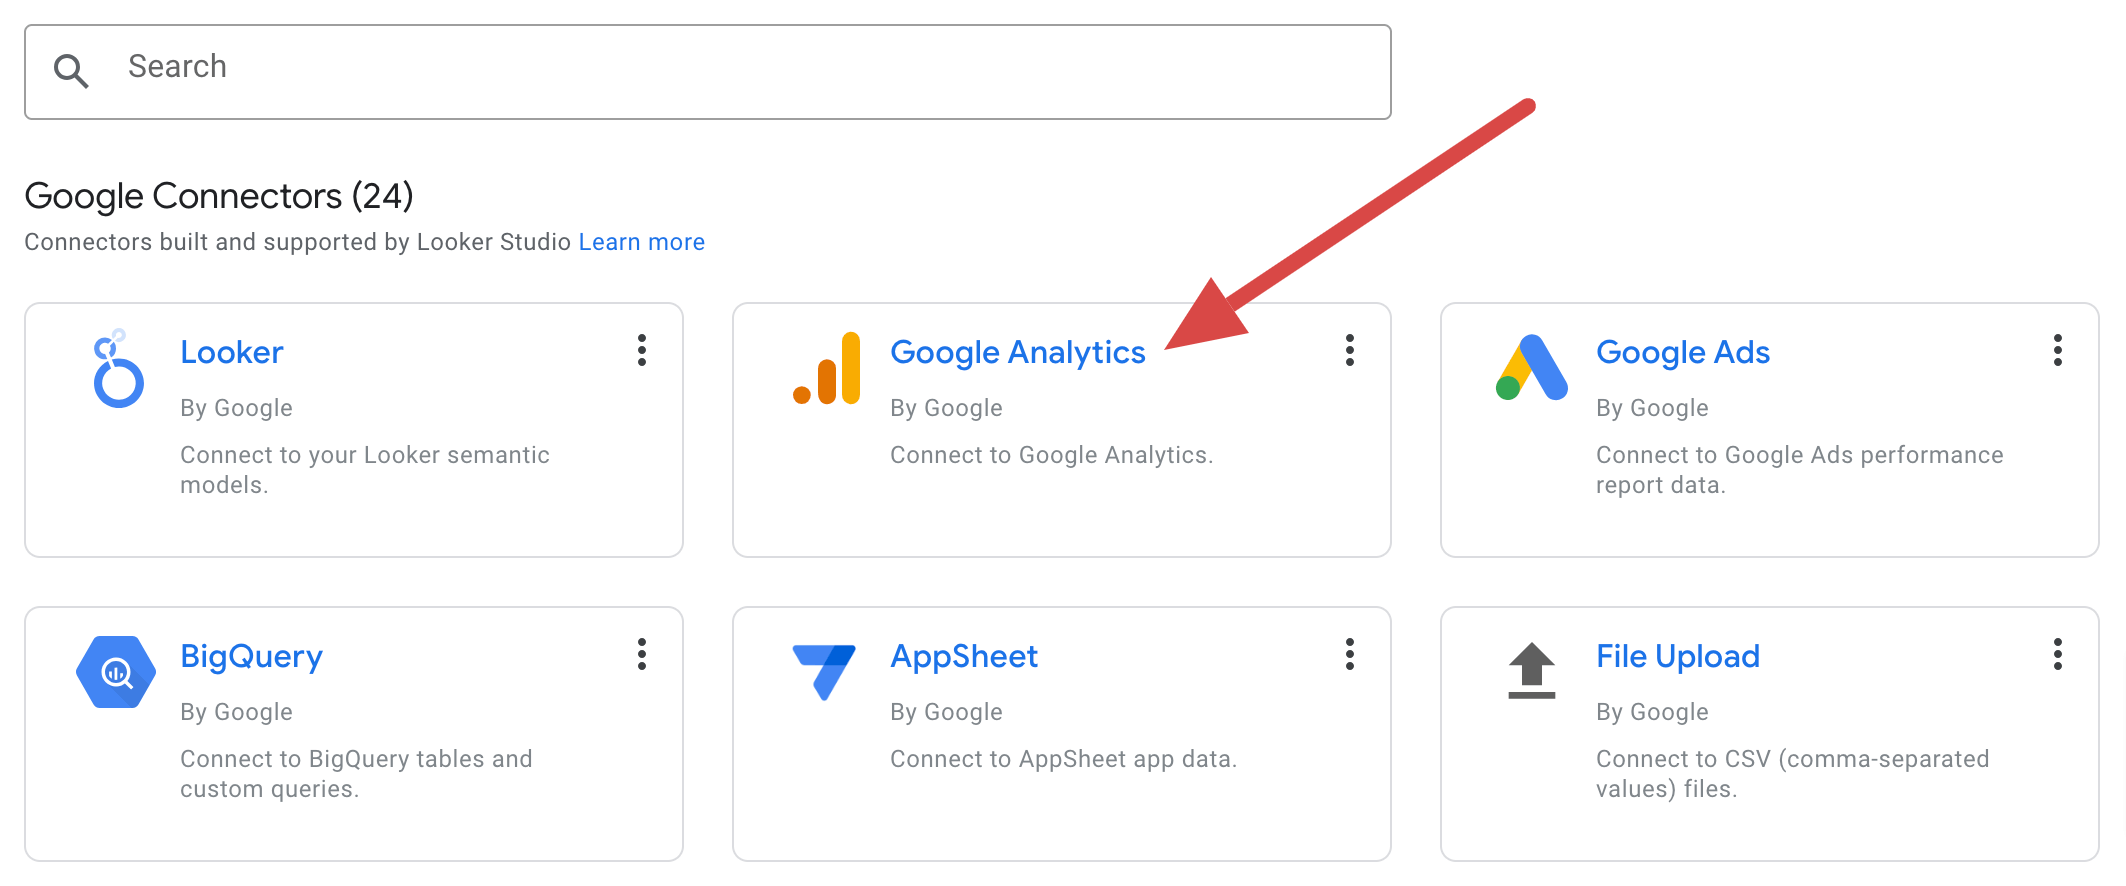
- Choose Google Analytics from the list of Looker Studio connectors.
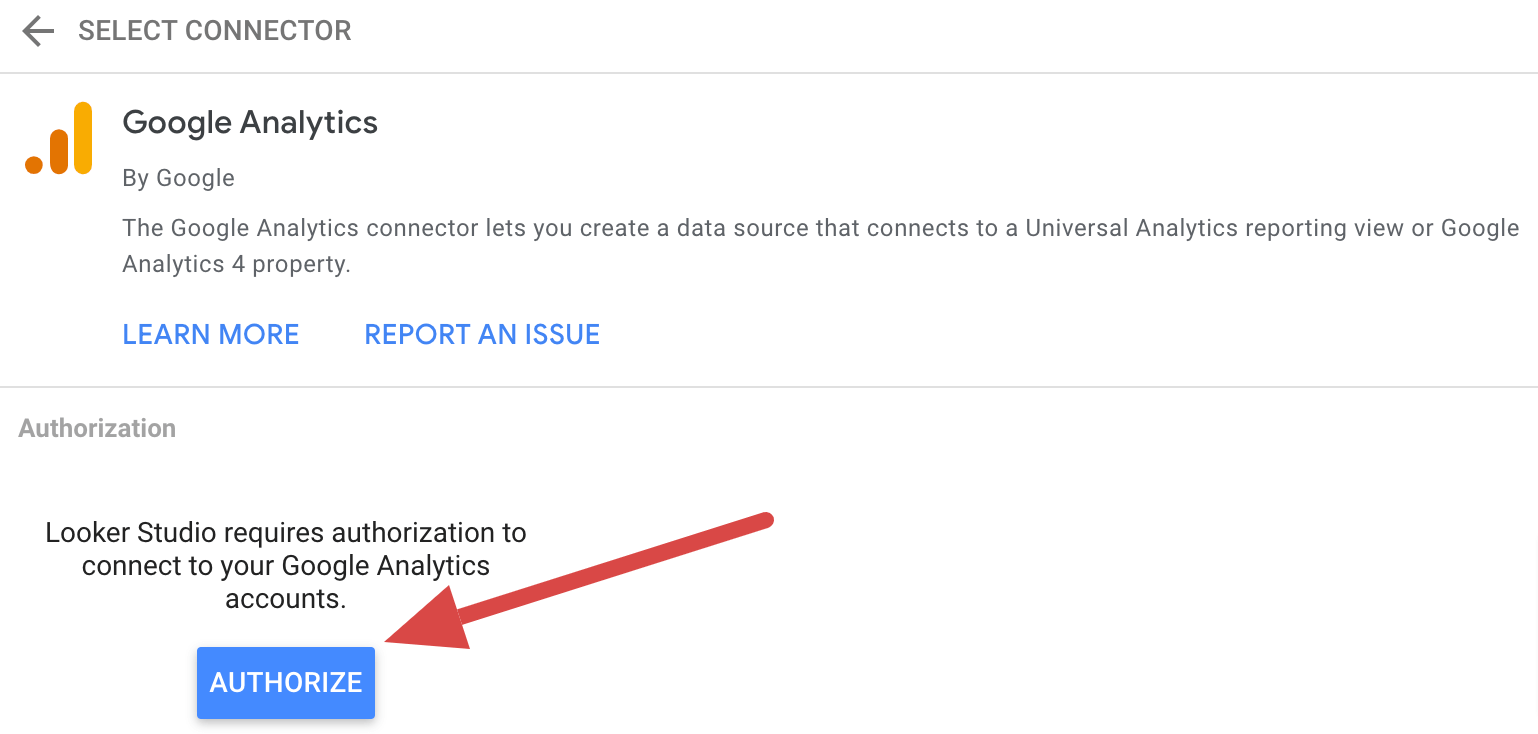
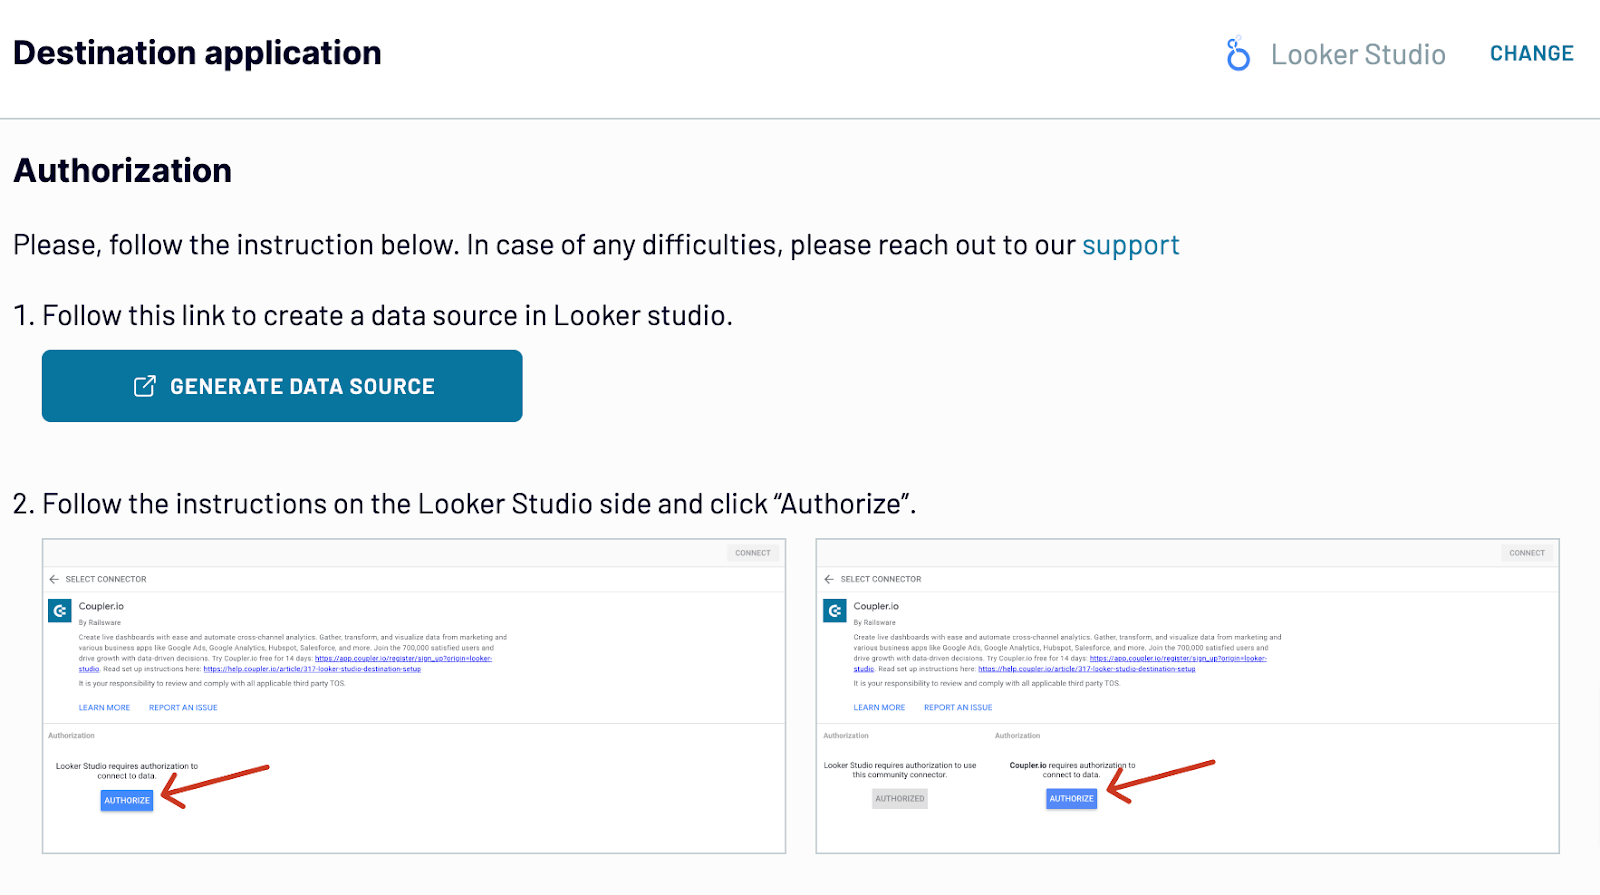
- After that, click Authorize to access Google Analytics data from Looker Studio.
- In a new window, opt for your Google account. Then, choose the Account and Property in the automatically created table. Next, click Connect.
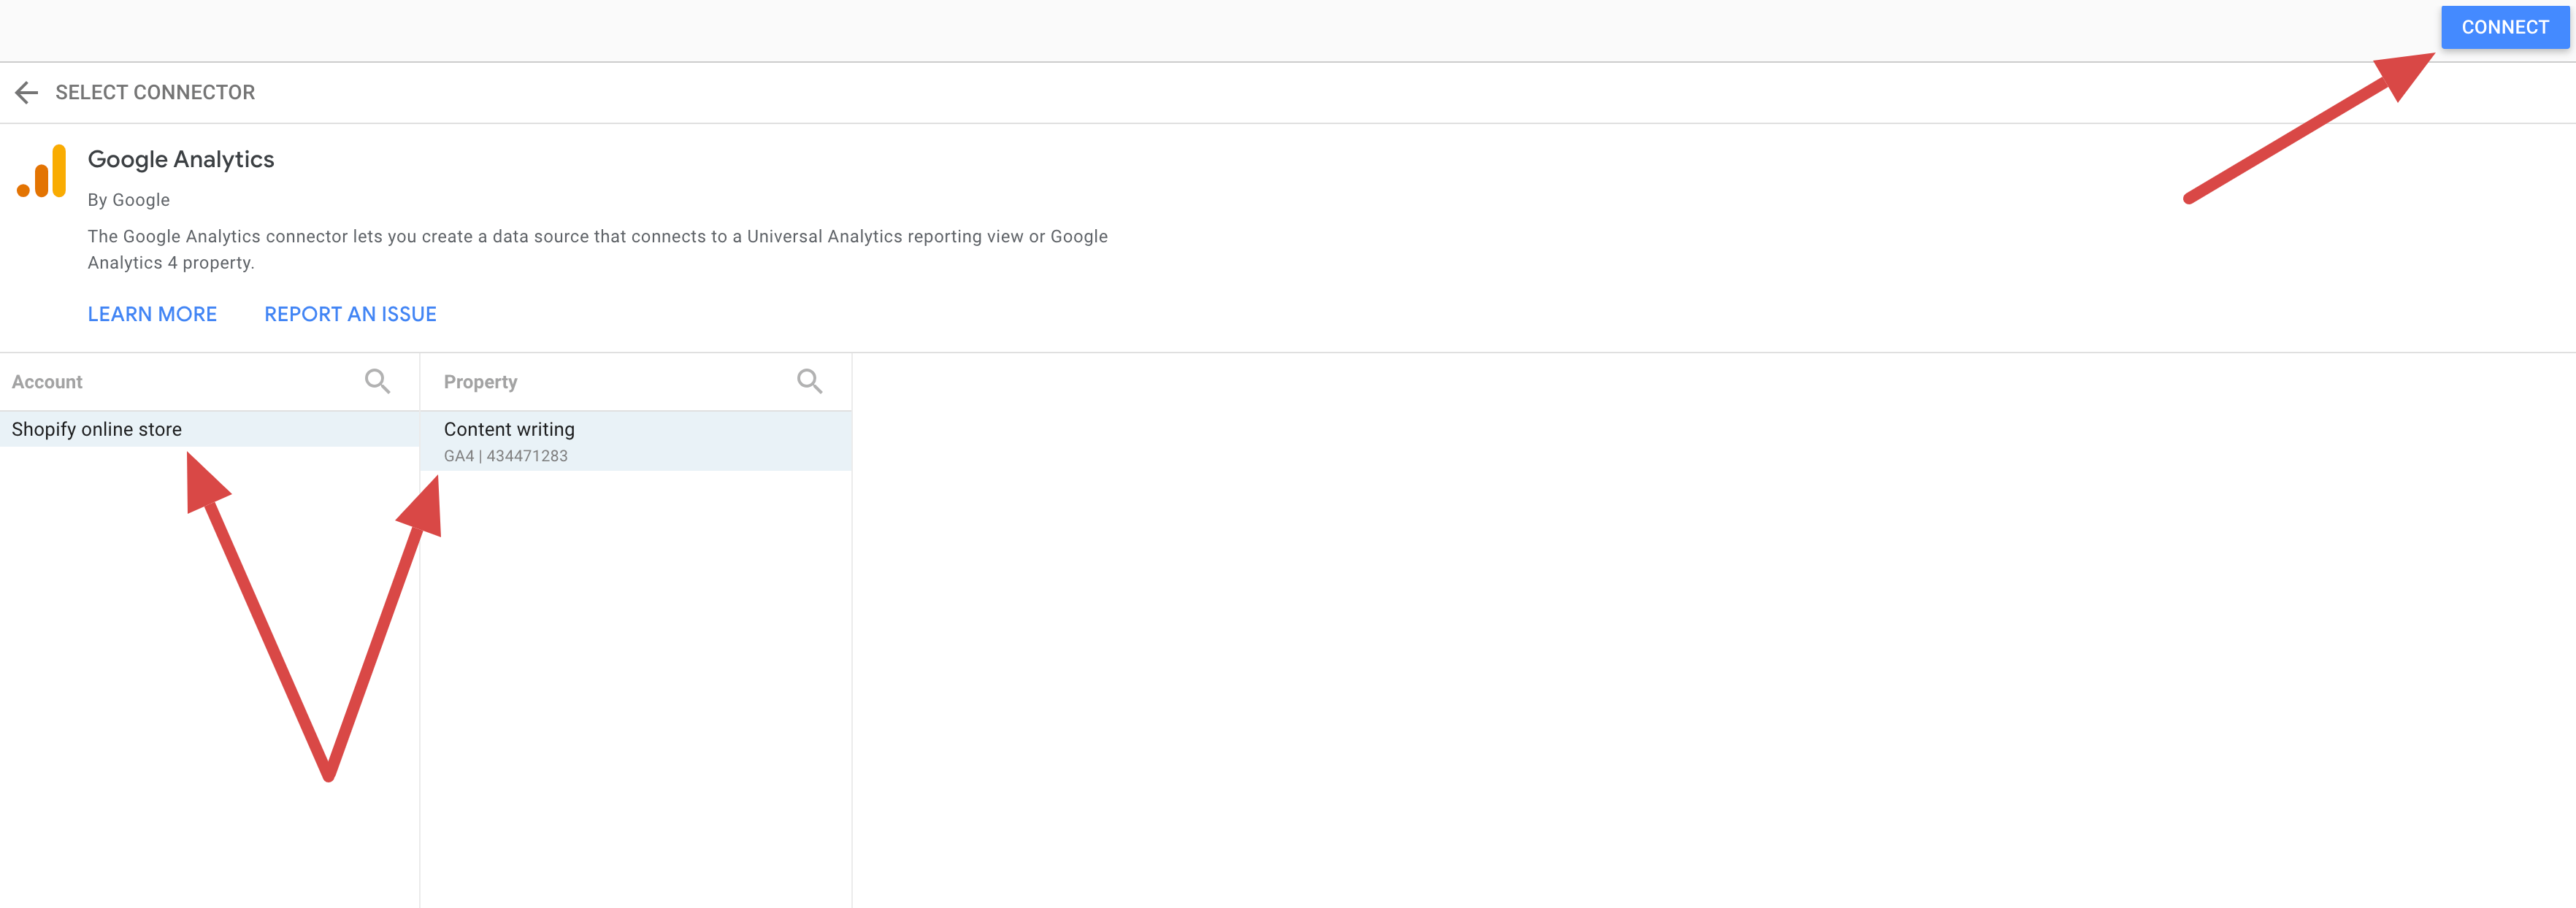
Connection completed! Now, let’s move to the last step of creating your Shopify sales funnel – data visualization.
How to visualize a Shopify sales funnel with a free dashboard template
While connecting GA to Looker Studio has been quick, building a dashboard isn’t. Luckily, there’s a way to automate this process. Here is a Shopify sales dashboard template in Looker Studio to visualize your sales funnel. You can perform analysis based on the aggregated numbers or break down the report by:
- campaign
- channel
- channel group
- country
- item
- device
- period
The setup itself is pretty straightforward and takes just a few minutes:
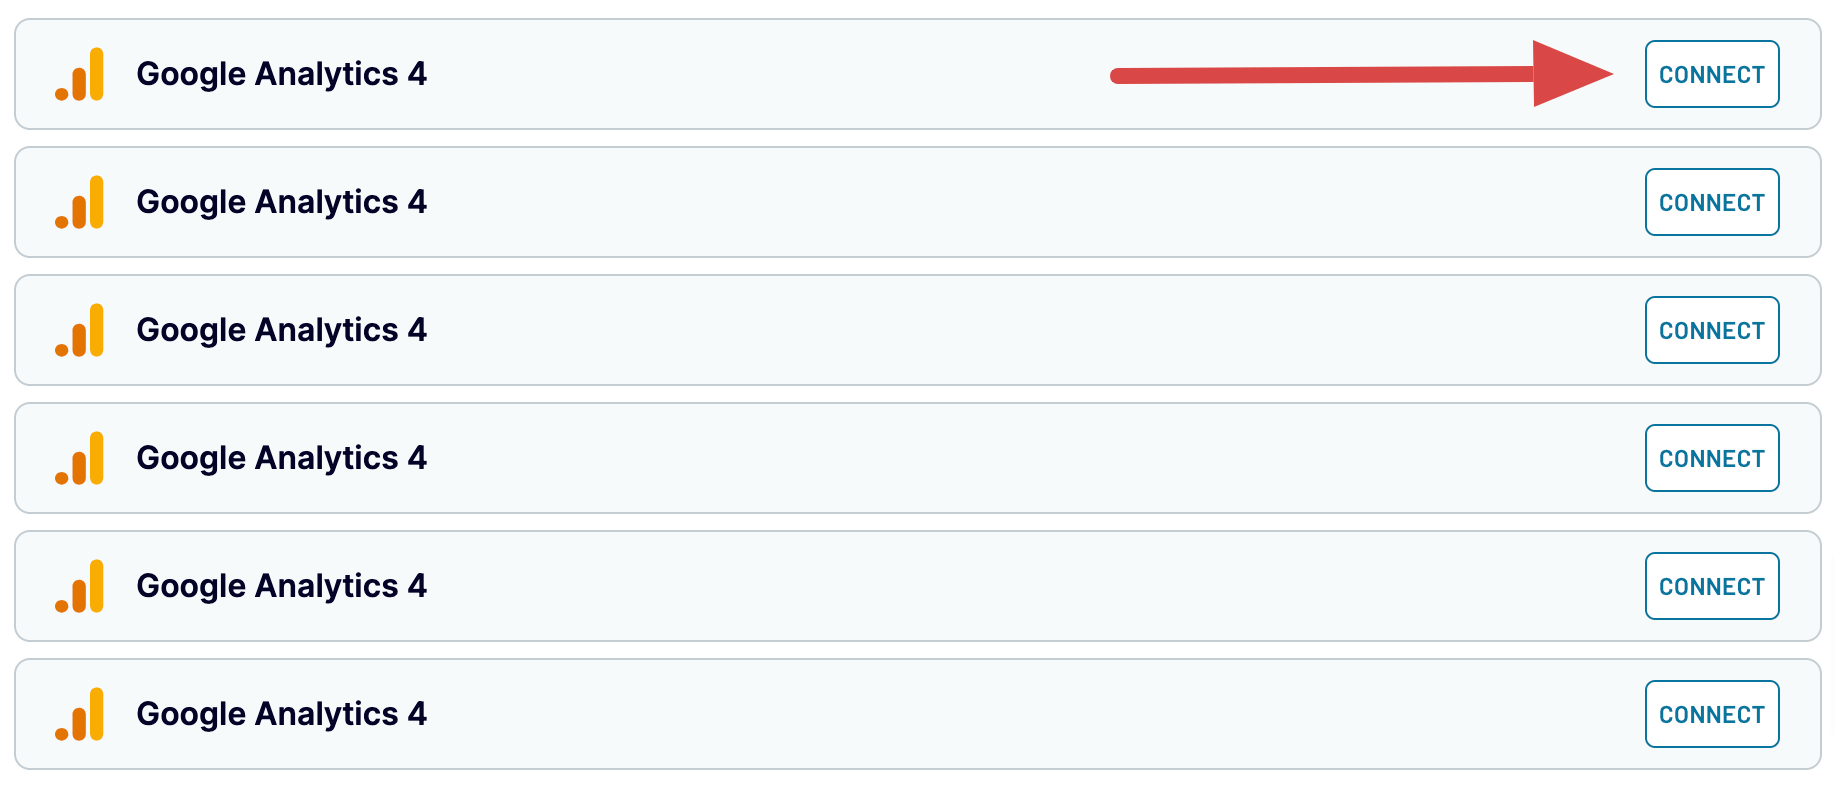
- Follow this link to sign up to Coupler.io for free to start configuring the dashboard and creating an automated data integration.
- Click Connect next to any of the Google Analytics sources in the list to link them all at once.
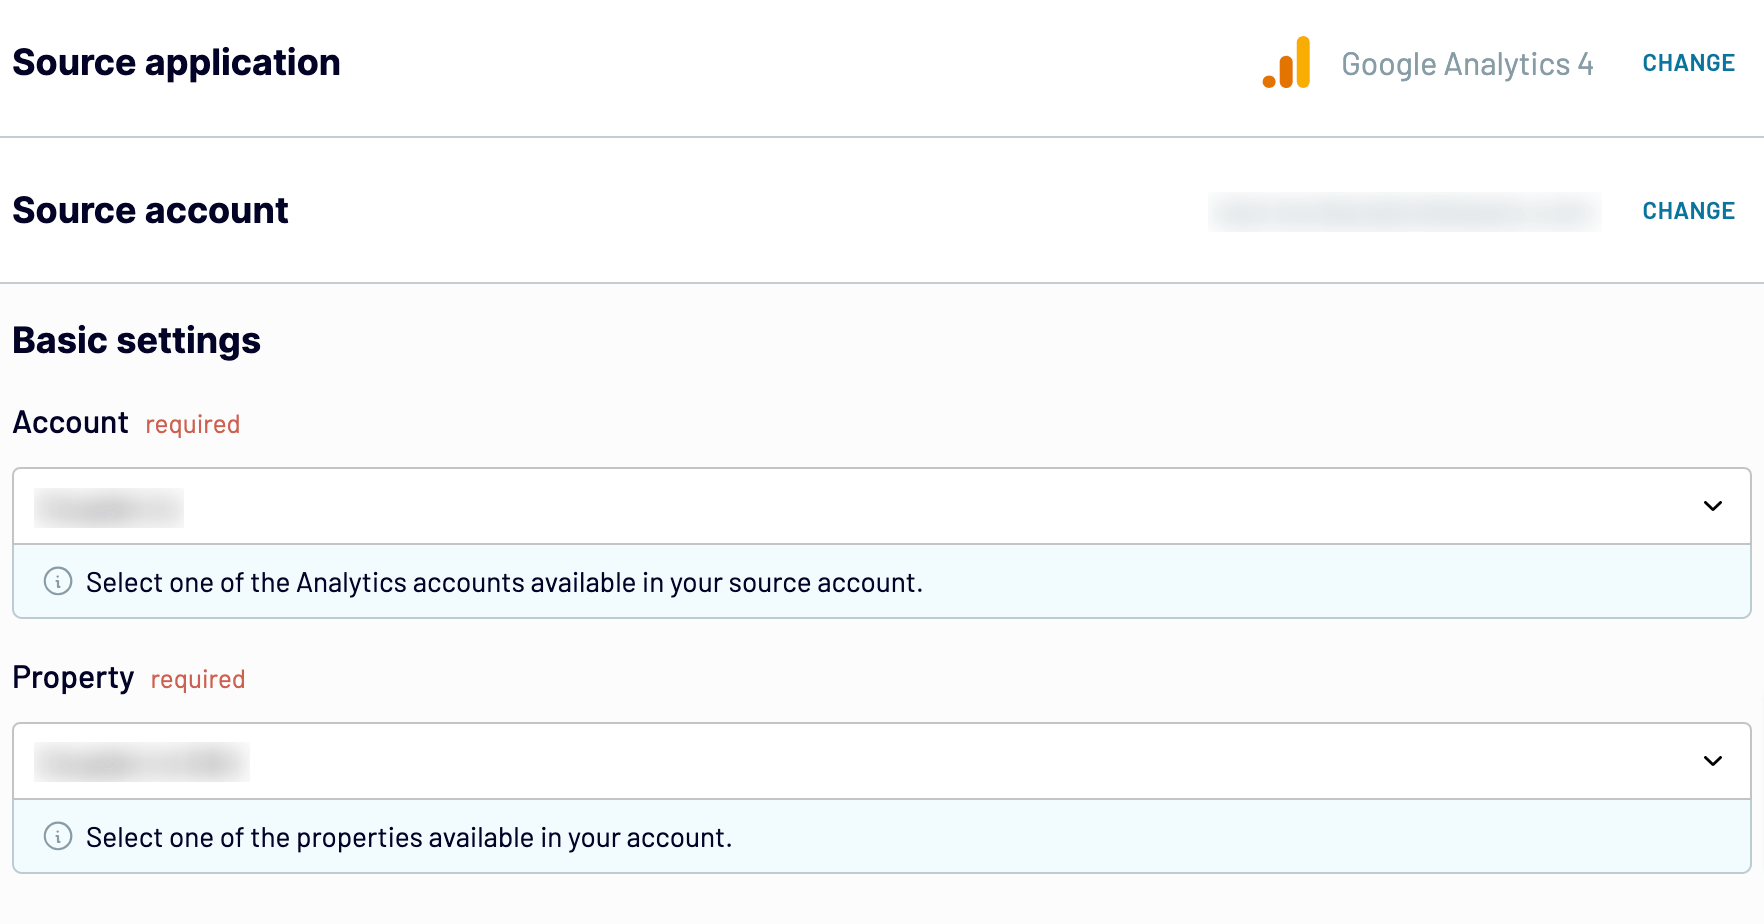
- Authorize your Google Analytics account and click Continue. Next, choose the Account and Property.
- Press Finish and proceed. Then, click Proceed.
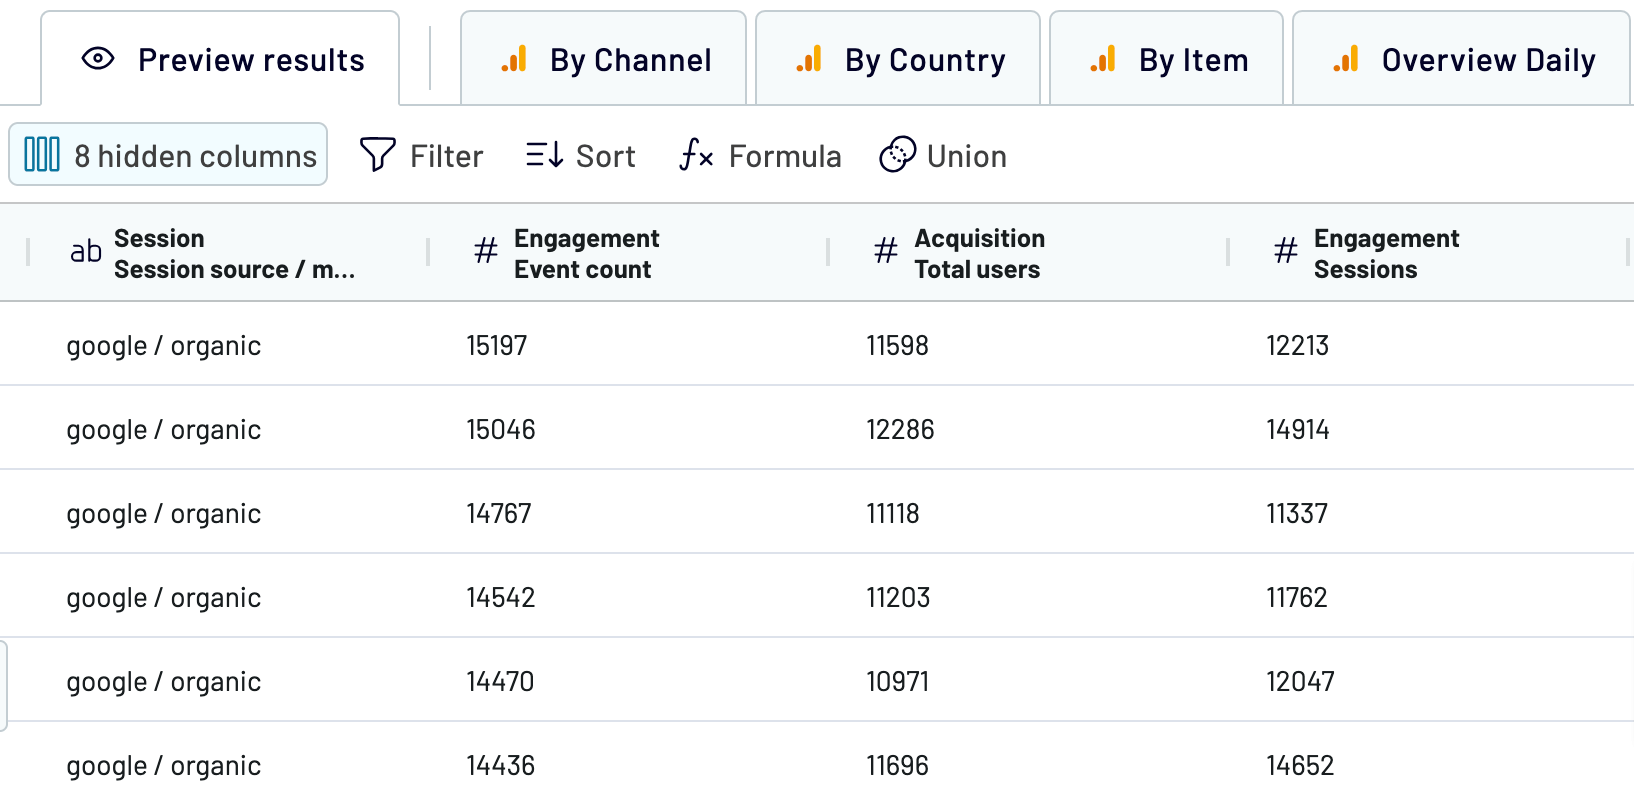
- Now, you can preview data to include in the report. No actions are needed here.
- Click Proceed. Next, follow in-app instructions to authorize the connector and create a data source in Looker Studio.
- The final click should be on the Create report button.

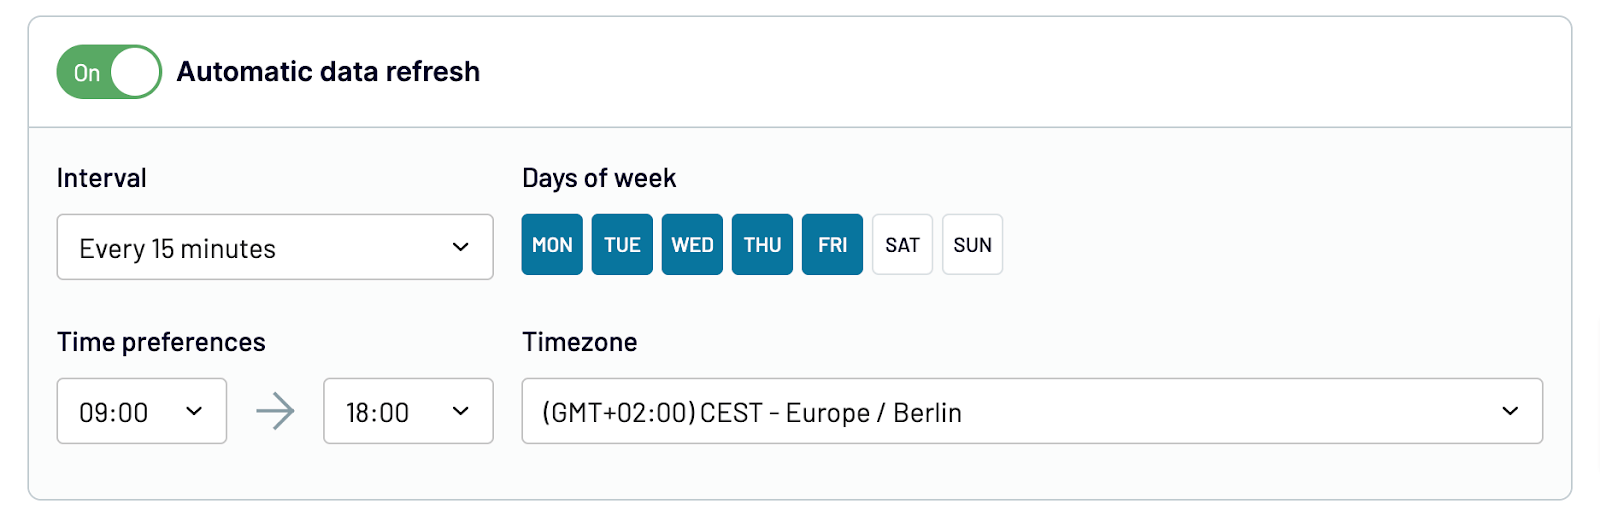
- You’ll be redirected to the report with your data. By default, the dashboard is updated automatically every day. For a more frequent data refresh, return to Coupler.io and change the schedule according to your preferences.
Visualize the Shopify sales funnel with Coupler.io
Get started for freeHow to analyze your Shopify sales funnel
As you’ve already visualized the Shopify sales funnel, it’s time to remember why you’ve created it – data analytics. You need it to know where to optimize the customer journey. For instance, visualized data helps you identify where potential buyers drop off. This way, you can find some areas to enhance. There are multiple ways to analyze your sales funnel, for example, by focusing on a campaign/channel, performing a geographic sales breakdown, or making it item-based. Let’s look at each of these methods.
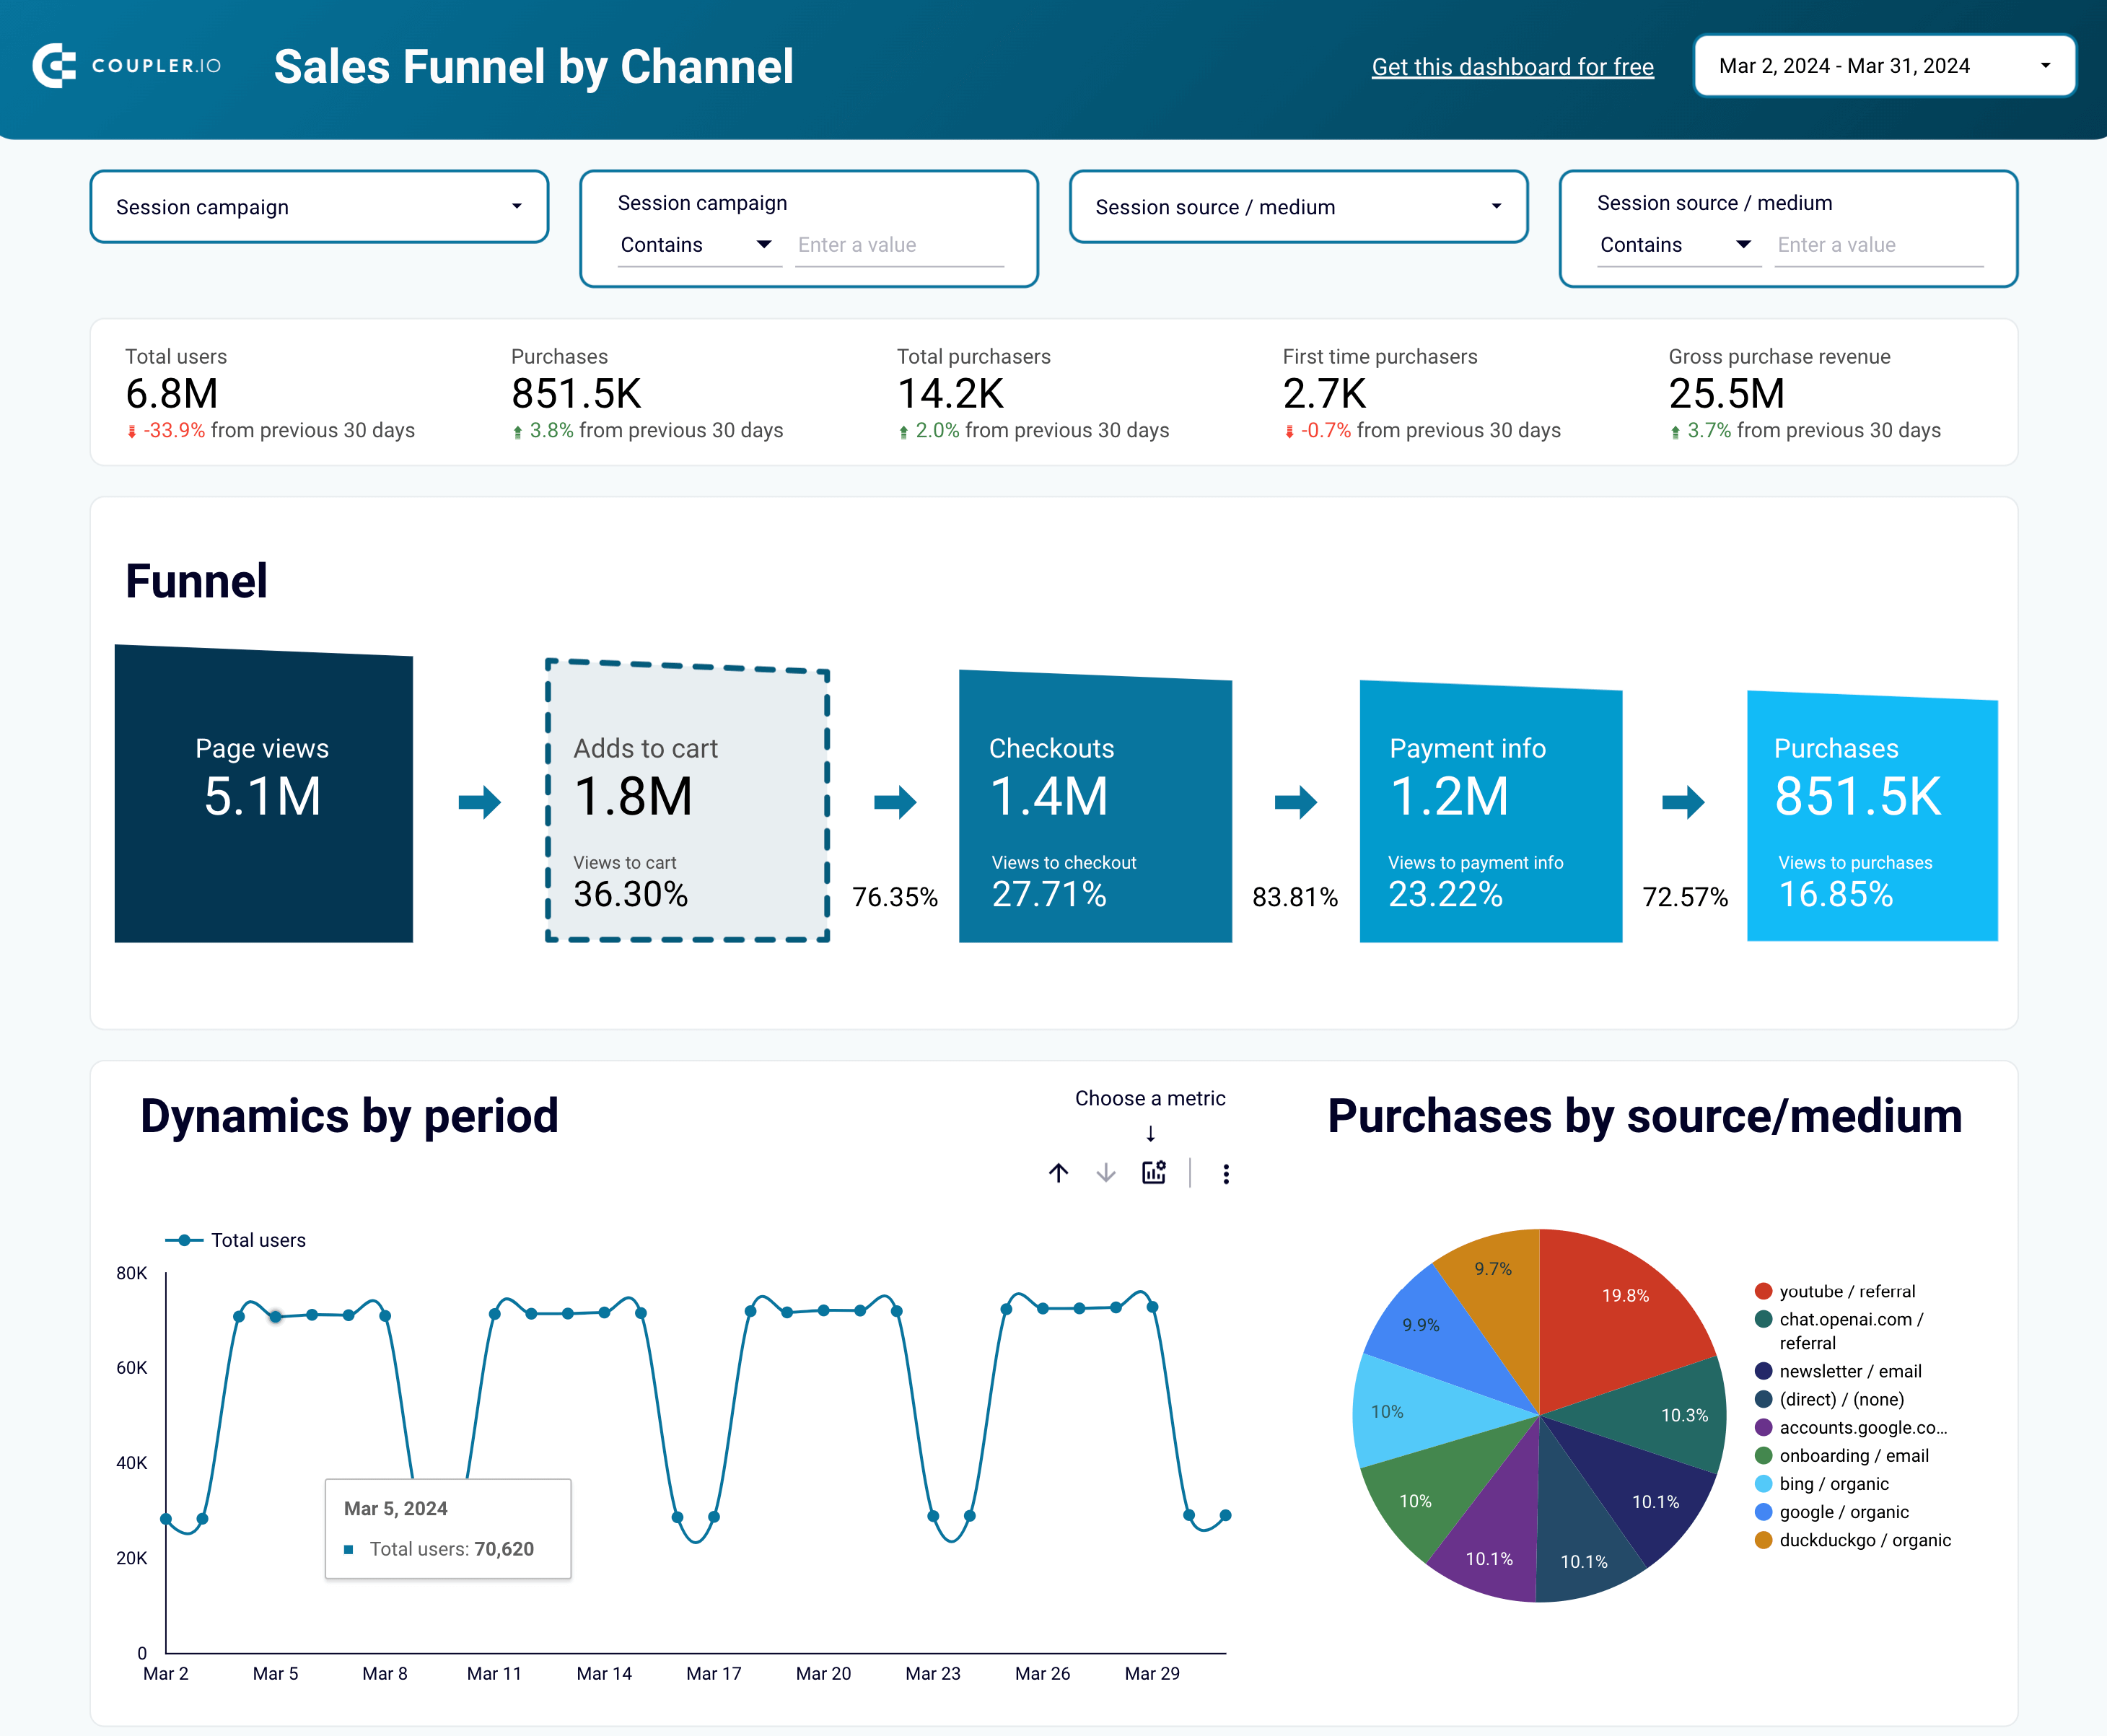
Analyze your sales funnel by campaign/channel
This method allows you to separately measure the success of direct, organic, email, or referral types of traffic. You can concentrate on specific campaigns or channels by applying filters and values.
Key metrics to track include Total users, Purchases, Total purchasers, First-time purchasers, and Gross purchase revenue. These figures help you evaluate both the breadth and depth of customer engagement and conversion.
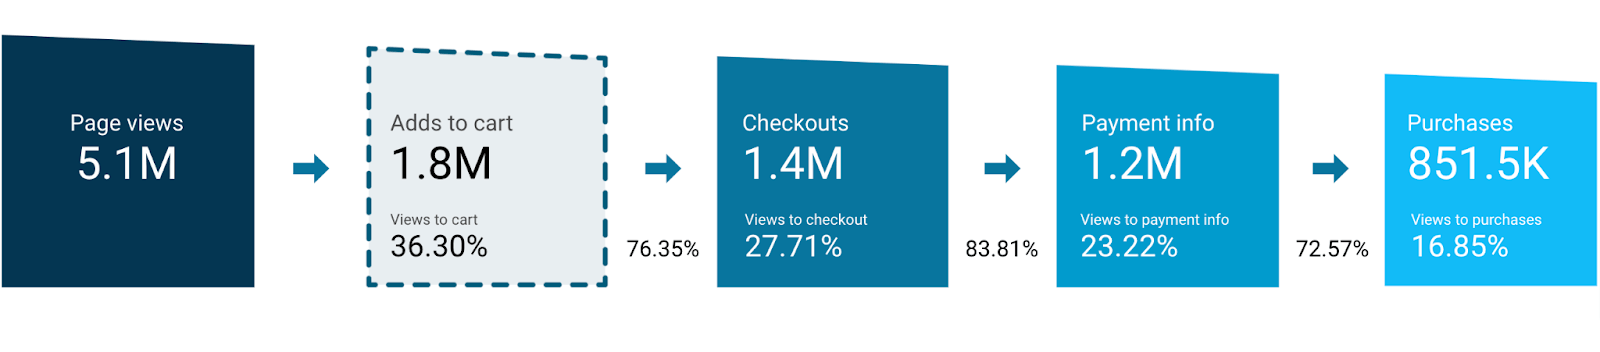
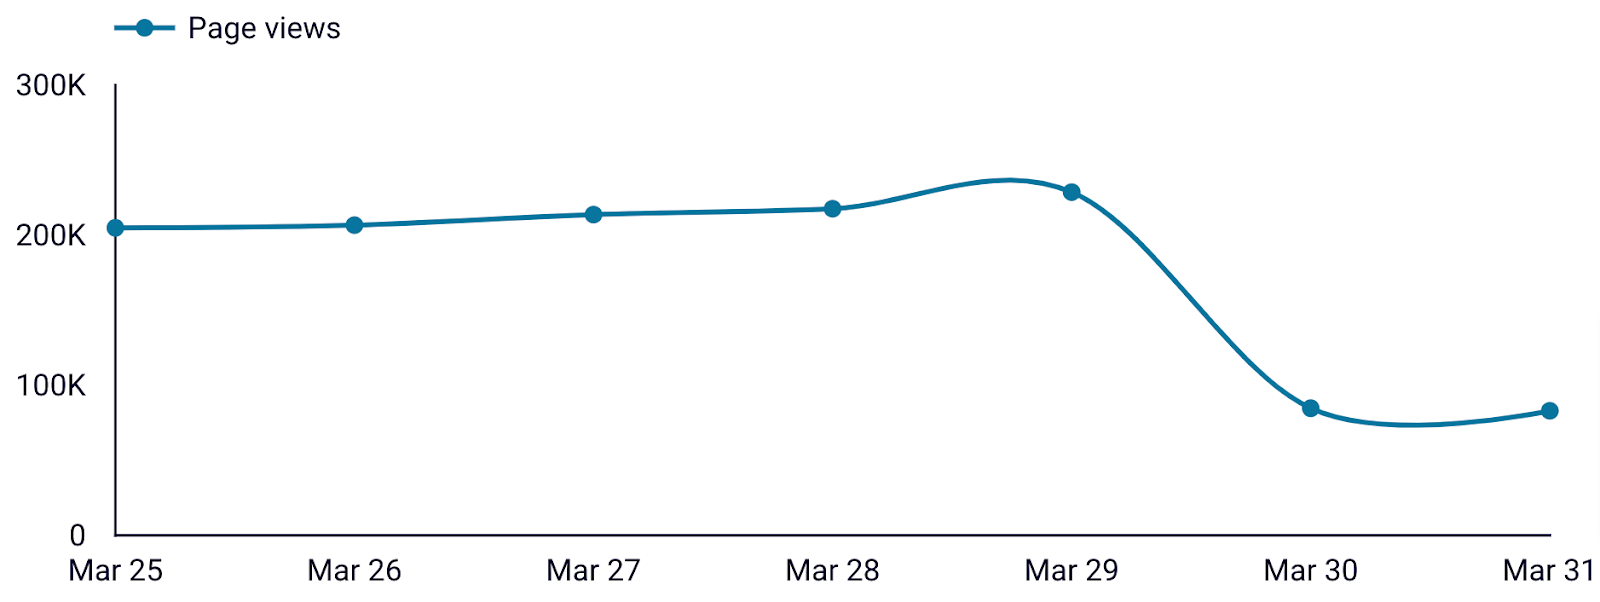
To dig deeper into your sales funnel, examine step-by-step metrics like Page views, Views to cart, Views to checkout, Views to payment info, and Views to purchases. This sequential analysis reveals the progression of customer interactions. It also highlights potential bottlenecks or drop-off points.
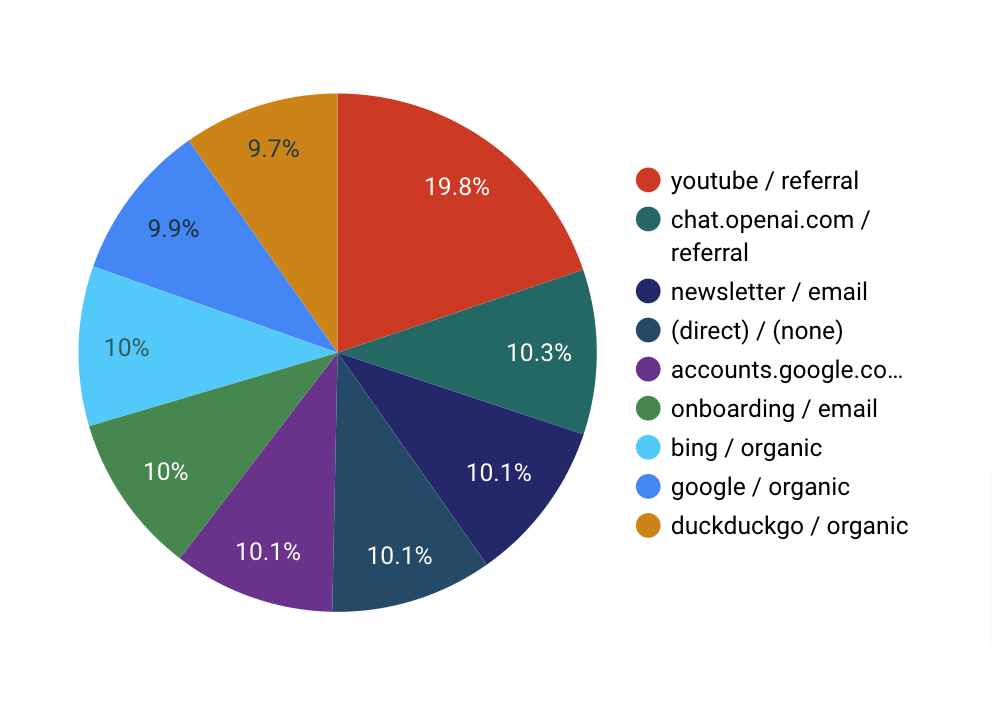
Moreover, your dashboard illustrates dynamics over different periods by particular metrics. It enables you to discover trends and patterns in customer behavior. Additionally, you can analyze purchases by source medium.
That’s how you determine which marketing channels are most effective in driving conversions.
Perform a geographic sales breakdown
Country-based analysis offers another valuable perspective on your sales funnel. You can do this by filtering results on the mentioned metrics according to specific locations. This way, you learn about regional variations in your sales outcomes.
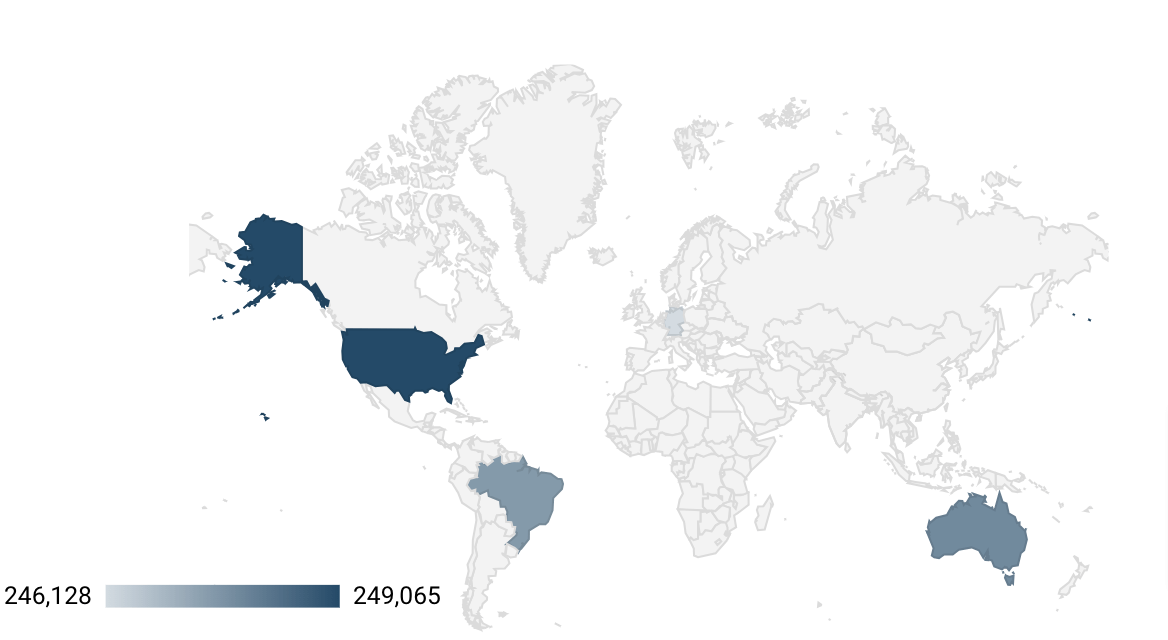
For example, a geographic sales breakdown lets you know where your marketing activities are effective or not. On top of that, you can analyze dynamics over time to see how your performance evolves across different countries.
It helps you stay responsive to shifting market trends and customer preferences on a global scale. As a case in point, you can adjust your marketing strategies to better target particular regions.
Conduct an item-based sales funnel analysis
If you wish to understand the performance of individual products, then analyze the sales funnel by item. Now, metrics that reflect the sequence of the customer journey will include Items viewed, Item views to cart, Item views to checkout, Item views to purchases, and Gross item revenue.
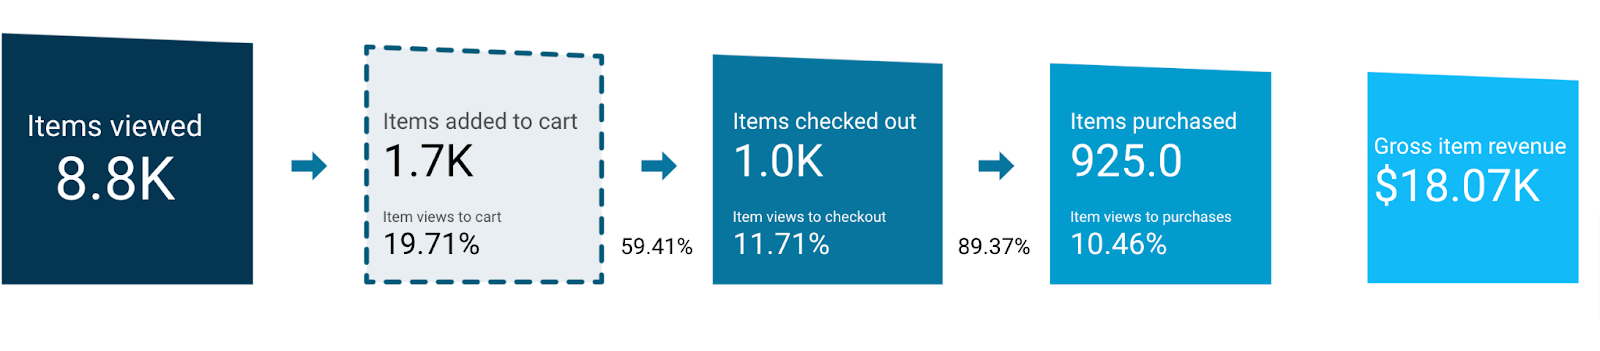
This analysis explains how well your items capture customer interest and translate it into sales. By tracking the above metrics for separate items, you can identify top-performing products and those requiring some action.

To deepen your analytics, examine item-specific results across different periods. Knowing temporal fluctuations, you can make more informed product-level optimizations to elevate revenue.
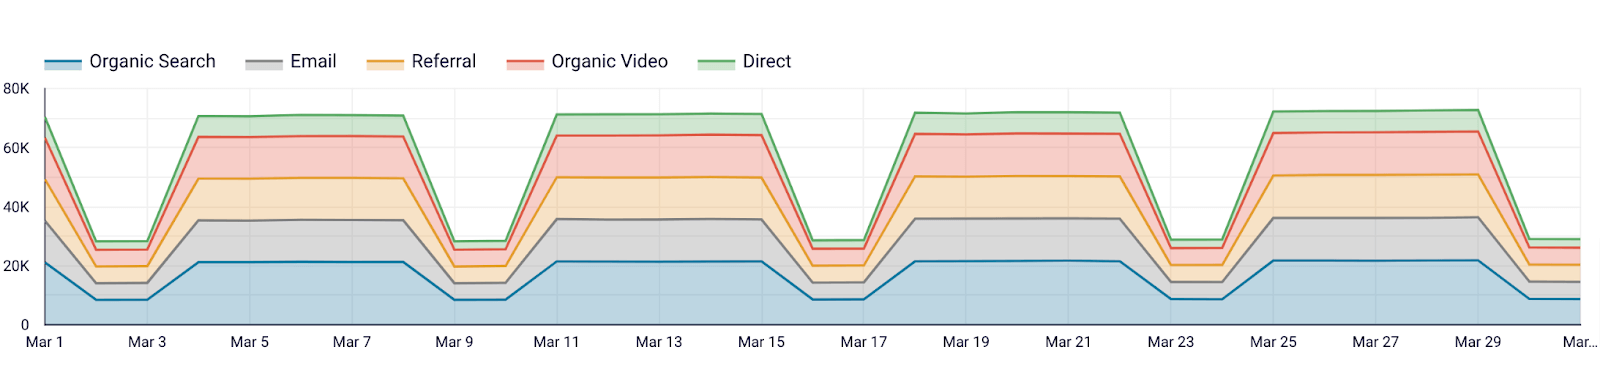
Overview your traffic
One way to analyze your traffic is filtering by Session default channel groups like Organic search, Email, Organic video, Referral, and Direct. That’s how you can quickly assess the effectiveness of your acquisition channels.
Additionally, segment your traffic performance by Device categories, such as Mobile, Desktop, and Tablet. It lets you check whether your website provides a seamless user experience across different devices.
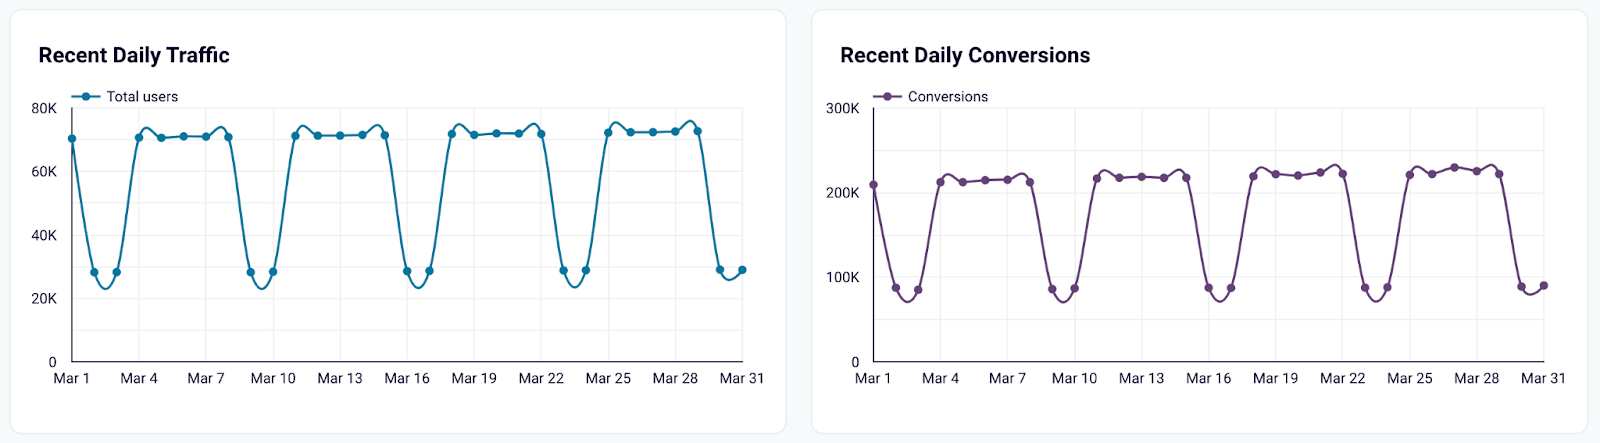
Metrics tracked within a traffic overview include Total users, New users, Sessions, and Conversions. They update you on the overall health of your traffic and its ability to yield conversions and engagement.

By exploring Recent daily traffic and Recent daily conversions, you can react to day-to-day changes in customer behavior.
For more detailed analysis, evaluate the everyday contribution of each channel to your traffic based on Recent daily traffic by channels.
To view your traffic from a broader standpoint, look at Weekly traffic for last 6 months or Monthly traffic for last 12 months.
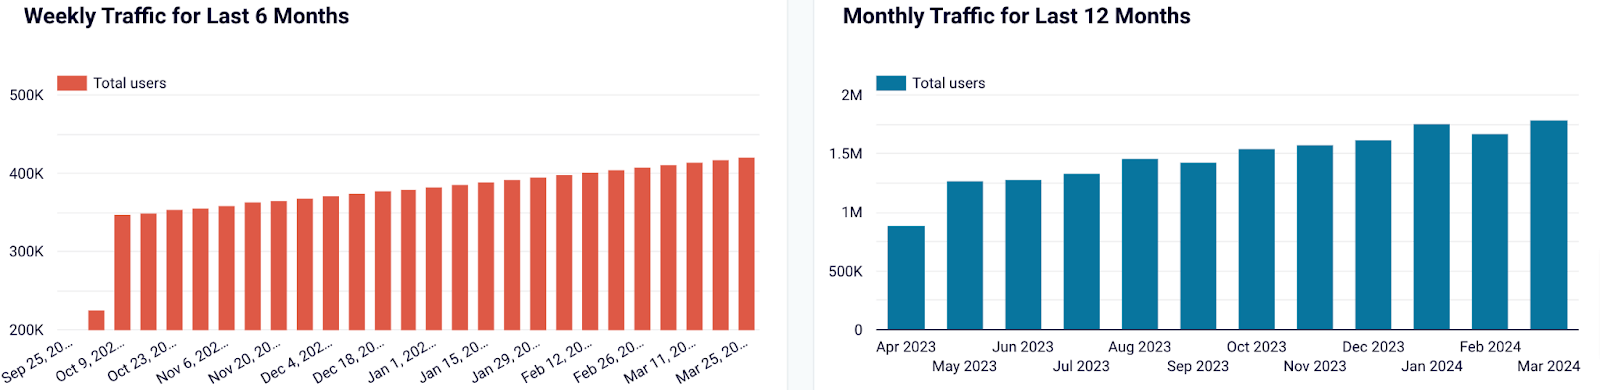
This breakdown will show you long-term seasonal variations in your traffic. As a result, you’ll be able to make data-driven strategic decisions regarding traffic generation.
Prioritize your performance improvement
Now that you know how to analyze a sales funnel, it’s possible to discover many opportunities for improvement. The only question to answer is what to put first and what to treat secondary. One of the solutions is to follow a simplified version of the PIE framework (we’ll decode this abbreviation for you later on).
To begin with, rate your ideas out of five based on your subjective evaluation of their potential impact. It means how much you anticipate the adjustments will elevate your metrics. Next, assess the ideas for ease. That’s about how simple they would be to realize. After that, calculate the priority using the formula Priority = Impact + Ease.
Once you’ve worked this out, prioritize the adjustments with the highest overall score. Imagine you’re hesitating between featuring customer reviews on landing pages and launching paid search ads for remarketing:
- Customer reviews: 4/5 impact, 5/5 ease, total score of 4 + 5 = 9
- Paid search ads: 5/5 impact, 3/5 ease, total score of 5 + 3 = 8
So, you will start optimizing your sales funnel with customer reviews. Next, try out this enhancement. For example, you can do this through A/B testing: post different testimonials on multiple landing pages. Then, compare the results for each of the versions.
Note that A/B testing is particularly well-suited for tracking your metrics over time. By doing so, you ensure this or that idea fulfilled your expectations.
While it’s good to understand how to prioritize your optimizations, you should also learn which ones are worth making. Let’s discuss this next.
How can you optimize Shopify sales funnel?
We suggest you begin by overviewing workable optimizations for each customer journey stage.
Awareness stage
First, your task is to grab the attention of your target audience. To succeed at this, you can’t do without high-quality visuals and compelling content.
Nor is this achievable without a unique value proposition – you must communicate your product’s or service’s advantages straightforwardly. As an option, offer free materials to potential buyers to familiarize them with your brand.
Interest stage
Double-check whether your product pages present features and benefits clearly and briefly. It’s also time to implement customer reviews to appear trustworthy in the eyes of your audience. Entice your leads into buying from you by providing opportunities to economize, such as discounted prices.
Decision stage
Here, the checkout process comes into play. You can launch retargeting ads, emails, or text messages to return your leads to their carts and make them complete the purchase.
Action stage
Express gratitude to your buyers through a thank-you page with a personalized message. You can also run loyalty programs for customers to go back and purchase more. Encourage them to give feedback on your product or services and tag you on social media. It will enhance brand visibility and build your reputation.
Still, you’re not limited to step-by-step optimizations. There might also be some gaps you can bridge:
- Supply missing info: Make it quick for potential customers to learn anything about your services or products. This information must be comprehensive and readily accessible. Every detail counts, whether shipping time, discount policy, or payment options.
- Help prospective buyers find what they need: It’s particularly relevant if your online store has extensive catalogs or many similar items. If so, ensure your website features easy-to-use search and filtering functionality. Don’t let your leads waste time browsing through the pages.
- Solve technical issues: Visitors may leave your website because of minutes waiting for the page to show up on their screen. For instance, this might be large files that prevent it from loading. Fix this issue to increase your page speed, reduce bounce rate, and refine the user experience.
With this in mind, let’s switch to overviewing tools you can use to take the customer journey to the next level.
Top tools to optimize your Shopify sales funnel
Some of the applications to enhance your sales funnel include:
1. Retention.com
It’s an identity resolution software designed to recover lost shoppers. That makes it possible to capture store visitors, even those not logged in to Shopify or across different devices. So, you can re-engage lapsed audiences with abandonment flows via email or SMS to grow your revenue.
2. Honeycomb Upsell & Cross Sell
This app helps you boost your Shopify store’s average order value. For example, use it to feature high-converting cross-sell offers on your product, cart, and thank-you pages or automate upsells. With Honeycomb’s AI-powered recommendation engine, you can be confident that the best offers match the right products.
3. Coupler.io
Coupler.io is a professional solution for advanced marketing analytics. It automates the import of Shopify data from Google Analytics to Looker Studio. Moreover, it visualizes your sales funnel by loading data directly into the dashboard template. Consequently, you skip manual data visualization and proceed to analysis immediately. This approach saves you much time and prevents human errors.
4. Upsell Wizard
Upsell Wizard can assist you with in-cart upselling, checkout upsells, and post-purchase offers. Thanks to this tool, you secure strategic upsell funnels by implementing discounted upsells and “buy X, get Y” deals. Additionally, Upsell Wizard’s AI automates product suggestions and upsell opportunities.
5. UFE Cross Sell & Upsell Funnel
You can try the UFE Cross Sell & Upsell Bundle app to get recommendations for discounted upsells, upsell bundles, quantity discounts, and tiered pricing. For instance, this allows you to adopt one-click upsell checkout promotions in popup, in-page, and floating styles. One more thing you can do with this tool is add aftersale and post-purchase upsells on any page.
6. ReConvert Post Purchase Upsell
ReConvert is beneficial in creating one-click upsells, post-purchase upsells, and discounted upsells for your checkout and thank-you pages. As an illustration, you can improve your one-page checkout upsell and thank-you page by collecting birthdays, tracking orders, offering bundle style cross-sell, etc. Furthermore, build and manage your checkout upsell strategy with a drag-and-drop editor.
7. Zipify Pages
If you need a landing page builder, consider Zipify Pages. This application offers a drag-and-drop functionality, pre-designed templates, mobile responsiveness, conversion elements, and A/B testing. It smoothly integrates with Shopify to easily publish and manage your landing pages. Additionally, it provides analytics aimed at optimizing landing page performance.
So, you’ve explored all the critical aspects of sales funnel optimization. To sum up, let’s now restate the reason for analyzing the customer journey for your Shopify online store.
Why it’s crucial to analyze your Shopify sales funnel
Analyzing a Shopify sales funnel lets you know what changes to implement for your online store. That’s how you understand your decisions originate from objective data, not guesswork or intuition. It helps you arrange efficient workflows, allocate resources wisely, and identify viable opportunities to increase your sales.
Before you can optimize sales funnel improvements like this, how do you optimize analytics? Our answer would be to try Coupler.io. It enables you to create simple analysis-ready reports in a dashboard format automatically.
Collect your Shopify data from Google Analytics and import it to Looker Studio in minutes. Furthermore, ensure your report is self-updating by scheduling data refreshes at preferred intervals. Try Coupler.io for free and put it to the test yourself!
Visualize the Shopify sales funnel with Coupler.io
Get started for free


