The two primary ways to export a chart of accounts in QuickBooks are manual (native) and automated export. Which one is the best for you depends on your current goals. The first one is a great option if you only need to export your QuickBooks data from time to time. If that is not the case and you need to export it regularly (for example, for backup purposes or continuous monitoring), it’s better to opt for automation. Let’s take a look at both methods.
How to export a chart of accounts in QuickBooks Online manually
Brief summary:
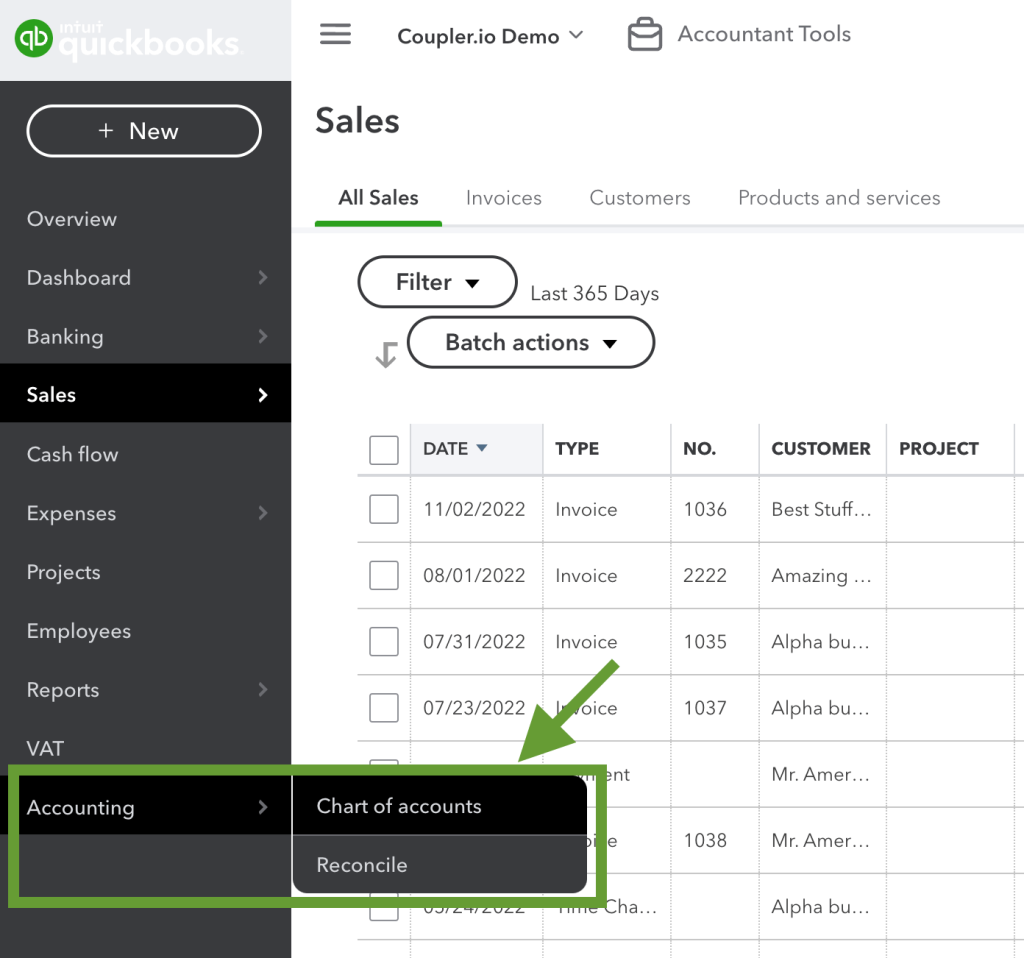
- Select Accounting -> Chart of Accounts
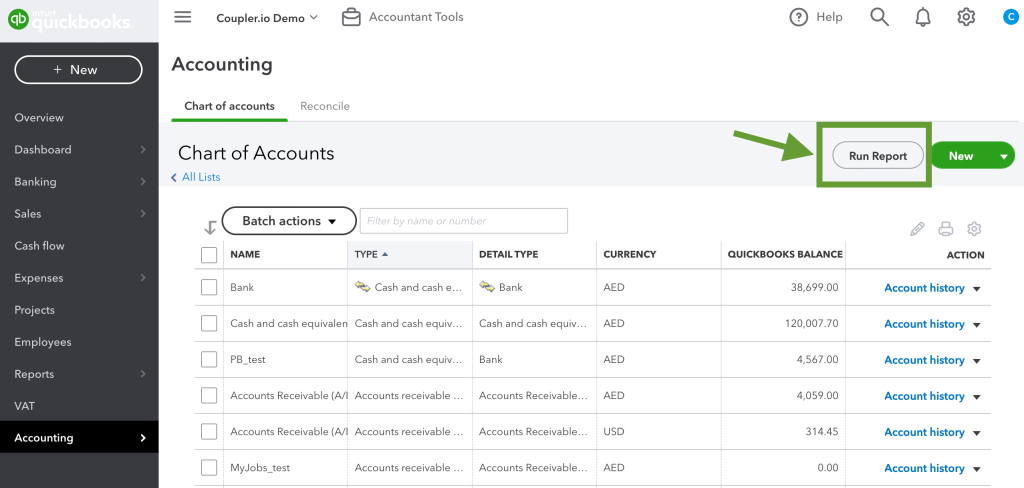
- Press the Run Report button
- Click the Export icon in the top right corner
- Select Export to Excel or Export to PDF
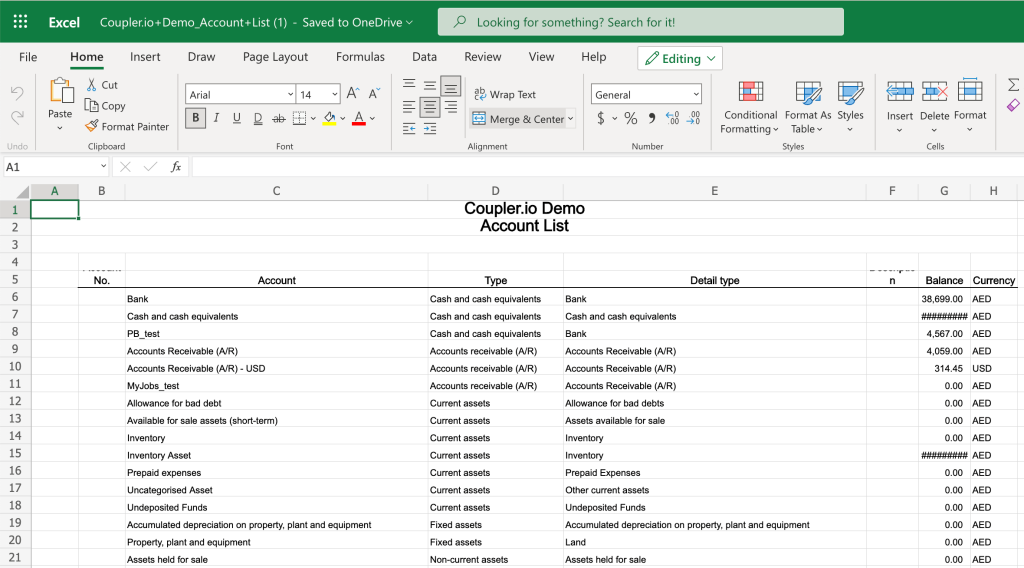
- The exported file will download on your computer
Now, let’s see how this works in more detail, with screenshots and examples.
- Log in to your QuickBooks account
- In the main menu on the left, select Accounting -> Chart of Accounts
- In the upper right corner, press the Run Report button.
- Then, press the Export icon and select how you want to export your chart of accounts – as a PDF of XLSX file. If you select the latter option, the file with the extracted data will be downloaded automatically.
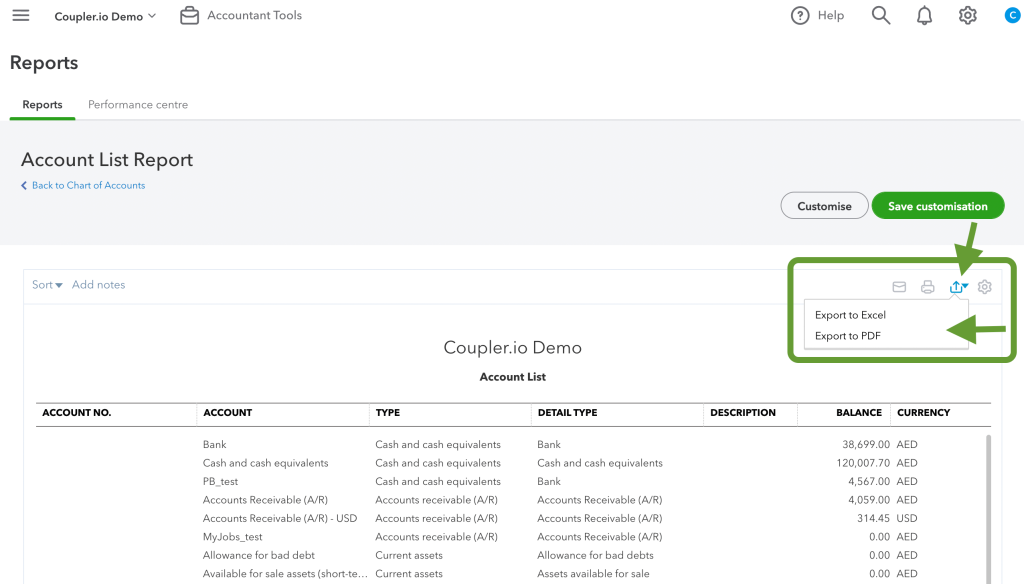
- If you opt for the PDF format, you will see a preview where you can adjust the orientation and other settings. You can also email your chart of accounts data from here.

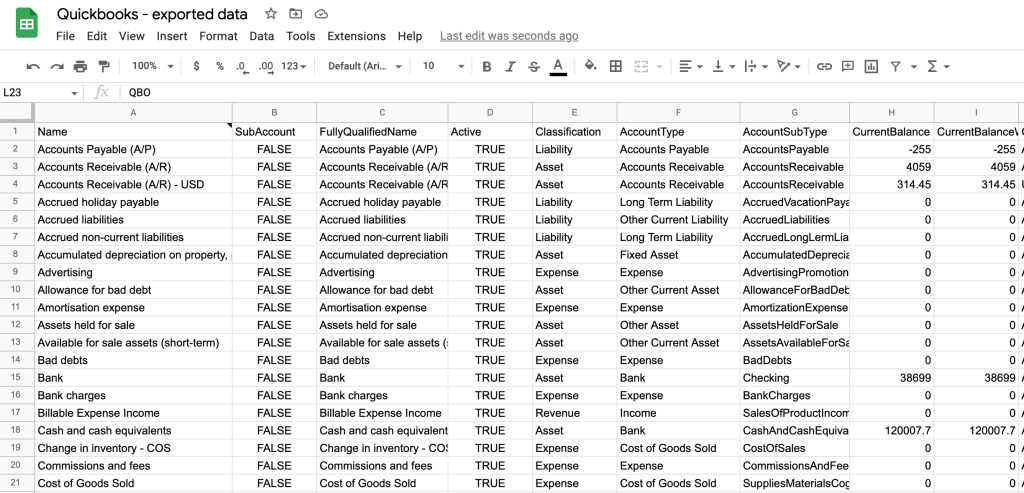
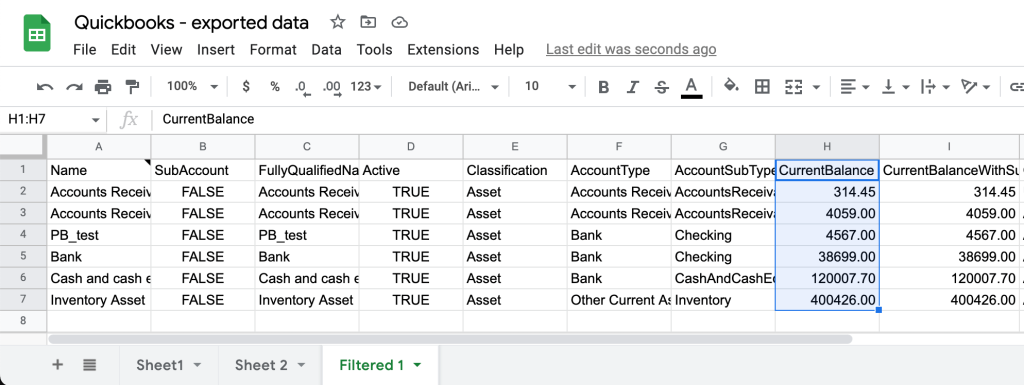
- Here’s how the exported data looks in Excel:
As you can see, with this native functionality, you can easily export a chart of accounts in QuickBooks. However, if you need to do this often, we recommend that you consider the automated method as well. It’s easy to use, and it doesn’t require any technical background.
How to export a chart of accounts in QuickBooks Online automatically
As there’s no native functionality for this, you’ll need to use a third-party solution. We’ll show you how to export a chart of accounts in QuickBooks using Coupler.io. This is a reporting automation solution to automatically transfer your QuickBooks data to Excel, Google Sheets, BigQuery, and other apps. In addition, it will keep the exported information up to date, refreshing it on a schedule without any involvement from your side.
1. Collect your Quickbooks data
- To start exporting your QuickBooks data, select the destination app from the widget below and click Proceed.
- After creating a Coupler.io account for free, follow the onscreen instructions to connect your QuickBooks account.
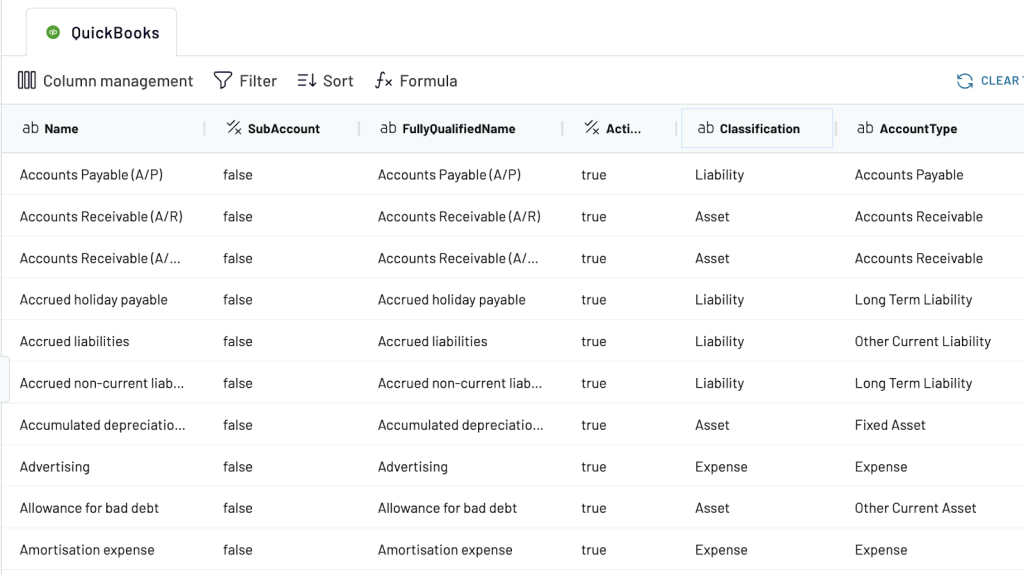
- In the next step, select the data entity to export. Using Coupler.io, you can extract about 30 different data types from QuickBooks. In this example, we need to export a chart of accounts, so we’ll select Account.

2. Transform and organize data
In the next step, you can edit the dataset, if needed – as a result, you can send to the destination app data that is analysis-ready. In particular, you can:
- Hide, rename, or rearrange columns
- Split or merge columns
- Use formulas to perform calculations in a new column
- Sort and filter data
- Merge or join data from different accounts or apps
Once your data is ready, proceed further and follow the wizard’s instructions to connect your data destination.
3. Schedule updates
- Last but not least – let’s set up a schedule for the updates. Toggle on the Automatic data refresh feature. Then, specify your preferences. You can select the update interval, ranging from every month to every 15 minutes. You can also select the days of the week and the times when you want to have your data refreshed.
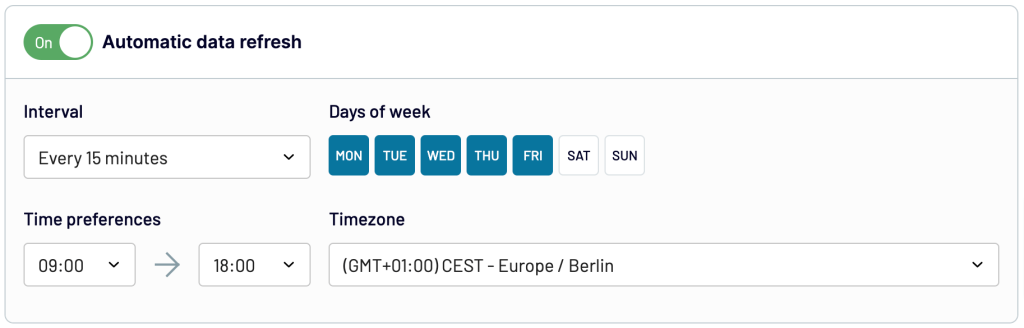
For instance, you can schedule updates every 15 minutes 24/7 – in this case, you will always have the latest QuickBooks data in the selected file or database. Or, as another example, you can opt for refreshing your data every Thursday at 10:00 because this is when you prepare a weekly report for stakeholders. The tool is rather flexible and allows you to tailor the schedule for your needs and processes.
- Once the schedule is ready, press Run importer. Here’s what the exported data looks like in Google Sheets
Now you know how to export a chart of accounts in QuickBooks Online automatically. You can use the imported data to build custom dashboards, perform advanced calculations, analyze your data in-depth, and more. If you want to connect QuickBooks to BigQuery or automate QuickBooks export to Excel, you can follow the same steps we’ve described above.
How to export filtered data from a chart of accounts in QuickBooks
Coupler.io allows you to sort and filter your QuickBooks data before exporting. For example, you can filter data from the chart of accounts by ID, Name, Description, AccountType, CurrentBalance, and other parameters. We already explained how to create an importer using Coupler.io. Now let’s see how to use filters.
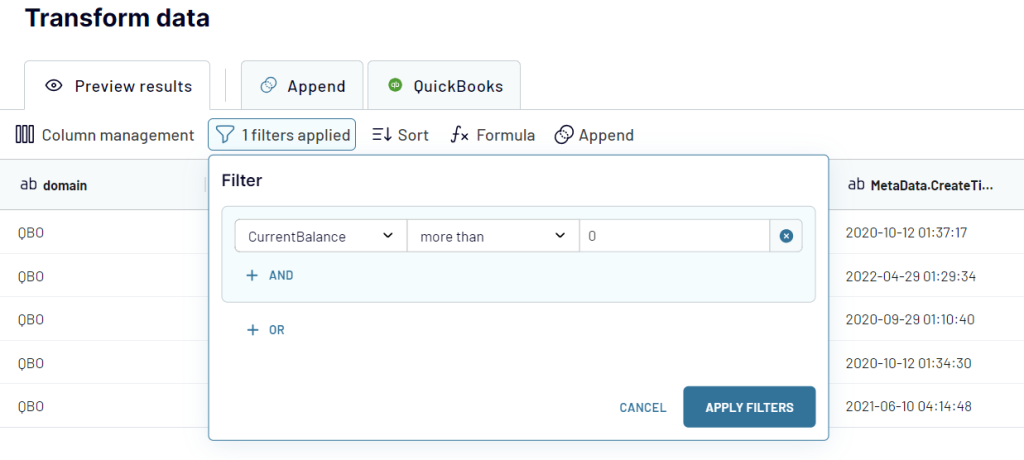
At the transformation step, click Filter. Suppose we only want to export accounts with a balance greater than zero. Then choose the CurrentBalance column, specify the condition more than, and enter 0 as the value.
There is also an alternative way to filter QuickBooks data in Coupler.io using the where parameter during the QuickBooks connector setup.
For more details, please head to our Help Center article How to use the Where parameter in QuickBooks importer.
In addition to filtering, we can order the data we want to export. In our example, we want to see accounts in ascending order, from the smallest CurrentBalance to the largest one. In this case, click Sort, select CurrentBalance and the order: 1=>9.
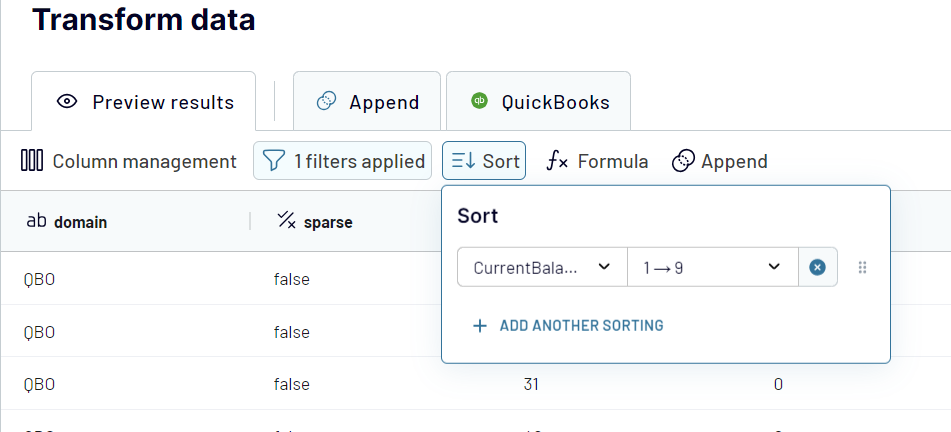
Once everything is ready, run the importer. Now, we have exported only those accounts that have a positive balance, and the entries are displayed in ascending order, depending on the funds available on each account.
In this example, we’ve transferred specific data from a chart of accounts to Google Sheets. The flow for exporting filtered and sorted data to Excel or BigQuery is exactly the same, so now you know how to do this too!
Which method to use to export a chart of accounts in QuickBooks?
Each of the methods we’ve explored in this article can serve the purpose. So, which one you choose will ultimately depend on your goals. The advantage of the manual method is that it’s native, so you can export a chart of accounts in QuickBooks directly from your account. It’s a good fit if you don’t need to do this often.
Automation, on the other hand, is a powerful solution for professionals who need to manage data systematically. With such a data integration tool as Coupler.io, your exported QuickBooks data will be refreshed on a schedule without any manual effort. You might need to spend several minutes to set up the importer, but you will only need to do this once. Exporting data automatically will help to eliminate repetitive tasks, save time, and significantly increase efficiency. We hope this article was useful to you!

Automate QuickBooks data export with Coupler.io
Get started for free