The ability to export contacts from Salesforce is among the most common requests our users share with us. No surprise here – it’s far easier to keep track of your contacts from the comfort of a spreadsheet. Many Salesforce users also choose to pull data from the platform and then import it into other tools they use for email outreach, reporting, and so on.
As is often the case, there’s more than one way of exporting contacts from Salesforce. We’ll explain the native methods built into the platform as well as an external option that helps automate the process.
How to export contacts from Salesforce – available approaches
The manual method for fetching data from Salesforce is pretty straightforward. You jump into one of the existing reports, (optionally) filter for the required data, and export the information in a chosen format. Alternatively, you compose a custom report and follow the same procedure.
Contacts aren’t available with a standard report, so you’ll need to follow the latter method and create a custom report. You’ll then be able to export them as an Excel or a .csv file. You can also schedule for Contacts data to be exported weekly or monthly, depending on the Salesforce plan you’re on.
Fetching contacts manually has one big disadvantage – it requires a certain amount of work every time you want to get fresh data. It can be automated to some extent with the scheduled exports, but weekly or monthly exports may not be sufficient for some of you.
The alternative approach involves the automation of data export from Salesforce. You can use Coupler.io for this. It’s a reporting automation platform to turn raw data into meaningful reports. With Coupler.io, you can set up automated importers that will be pulling contacts from Salesforce at the frequency that works best for you. Many other data entities are also available for export from Salesforce.
The available destinations for your data include spreadsheet apps (Excel, Google Sheets), BI tools (Looker Studio, Power BI, Tableau), data warehouses (BigQuery, PostgreSQL), and more. We’ll discuss the setup in the next section.
How to export bulk contacts from Salesforce using Coupler.io
You can automate exporting contacts from Salesforce in three simple steps.
Step 1. Extract your data
Select the desired destination in the form below and click Proceed. You’ll be offered to create a Coupler.io account for free.
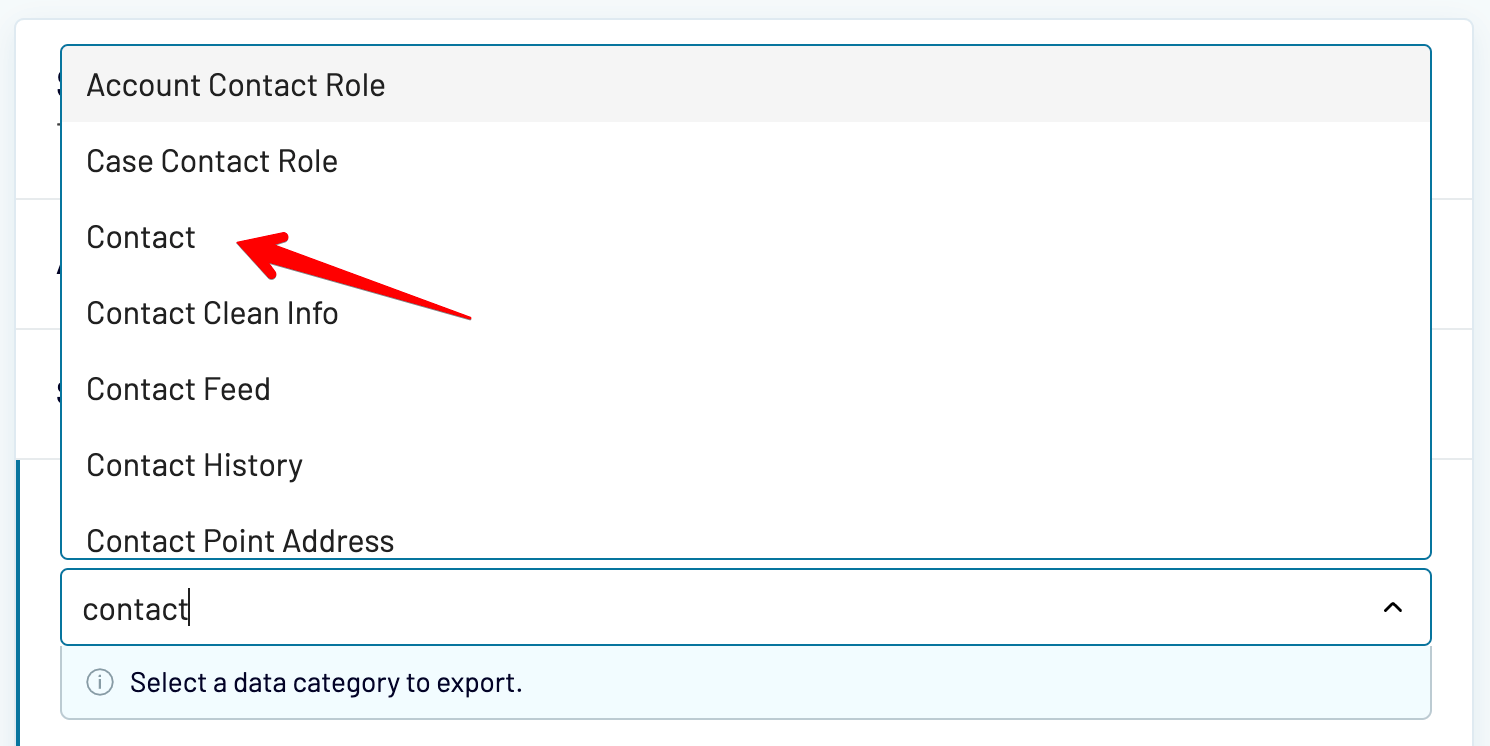
Then, follow the instructions to Connect your Salesforce account and choose what data entity to export. There are various data types that are related to Contacts and can be extracted with the help of Coupler.io. We will choose Contact.
You can pull all the available contacts or you can customize the import using optional settings. For example, you could fetch contacts modified after a certain date or those based in a specific country. We’ll show you an example later.
Step 2. Preview and edit Salesforce contacts
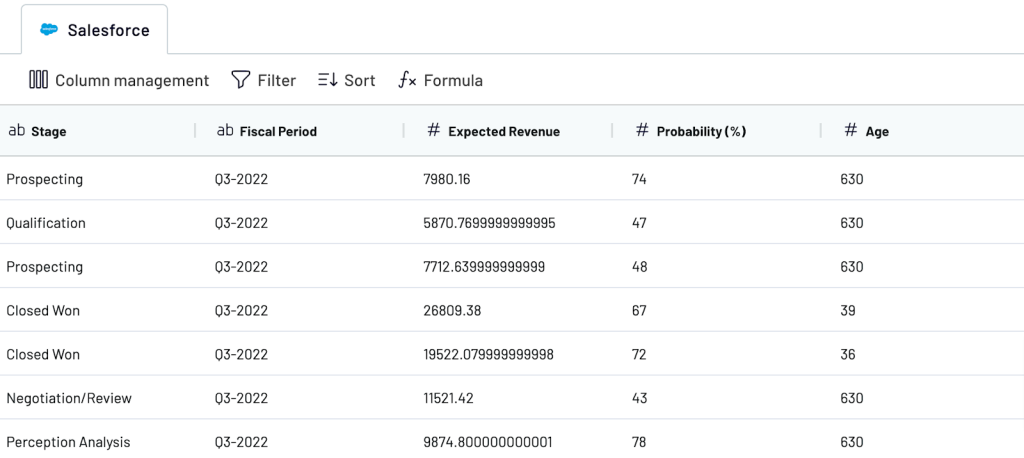
In the next step, you can review and transform the dataset you are about to export. It’s very convenient that data transfer doesn’t happen somewhere “under the hood” – instead, you can actually see your data.
You can rearrange and rename columns, hide the columns you don’t need, add new ones, and so so on. Coupler.io also lets you sort and filter data, use formulas and perform calculations, and even combine data from several accounts or from different apps into one data set.
If you don’t need to make any edits, you can just preview your data to see if everything is okay. Once this is done, follow the instructions to connect your destination account.
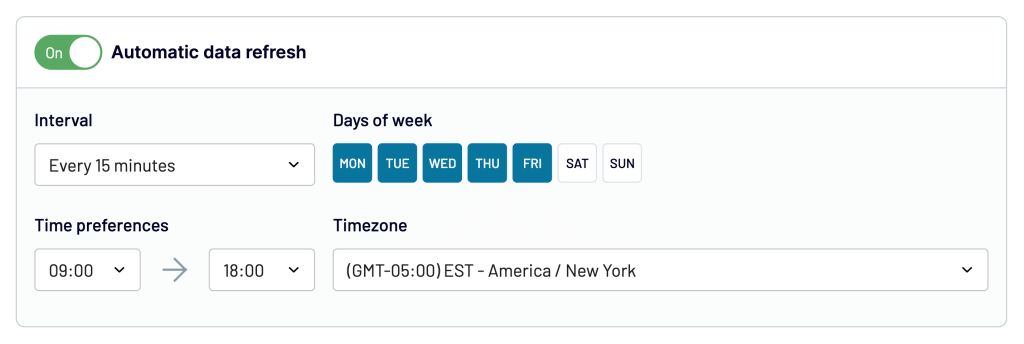
Step 3. Schedule updates and manage your data
Enable Automatic data refresh and decide when the data should be refreshed. You can choose to, for example, refresh it hourly on weekdays or pull a fresh report every morning at 7 am. It’s up to you.
Coupler.io will keep updating your Salesforce Contacts in the destination app automatically. In our example, we will get a self-updating spreadsheet.
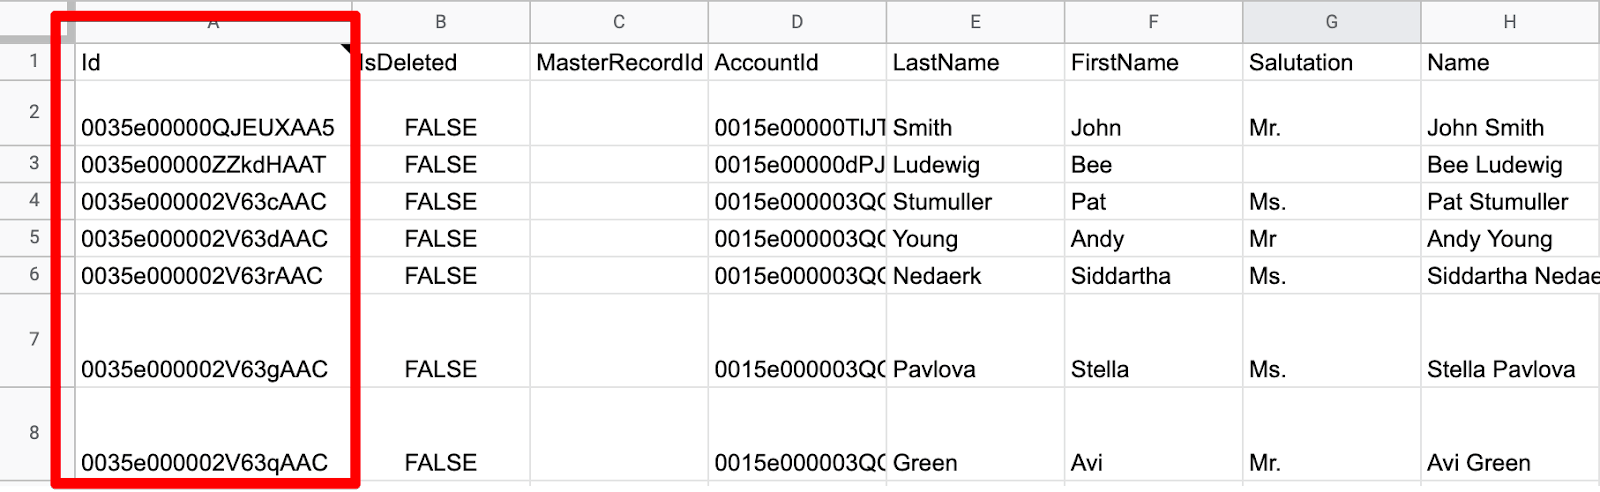
Then, save and run the importer. Once your data is transferred, you can view results. Here’s a sample export of contacts from our Salesforce account:
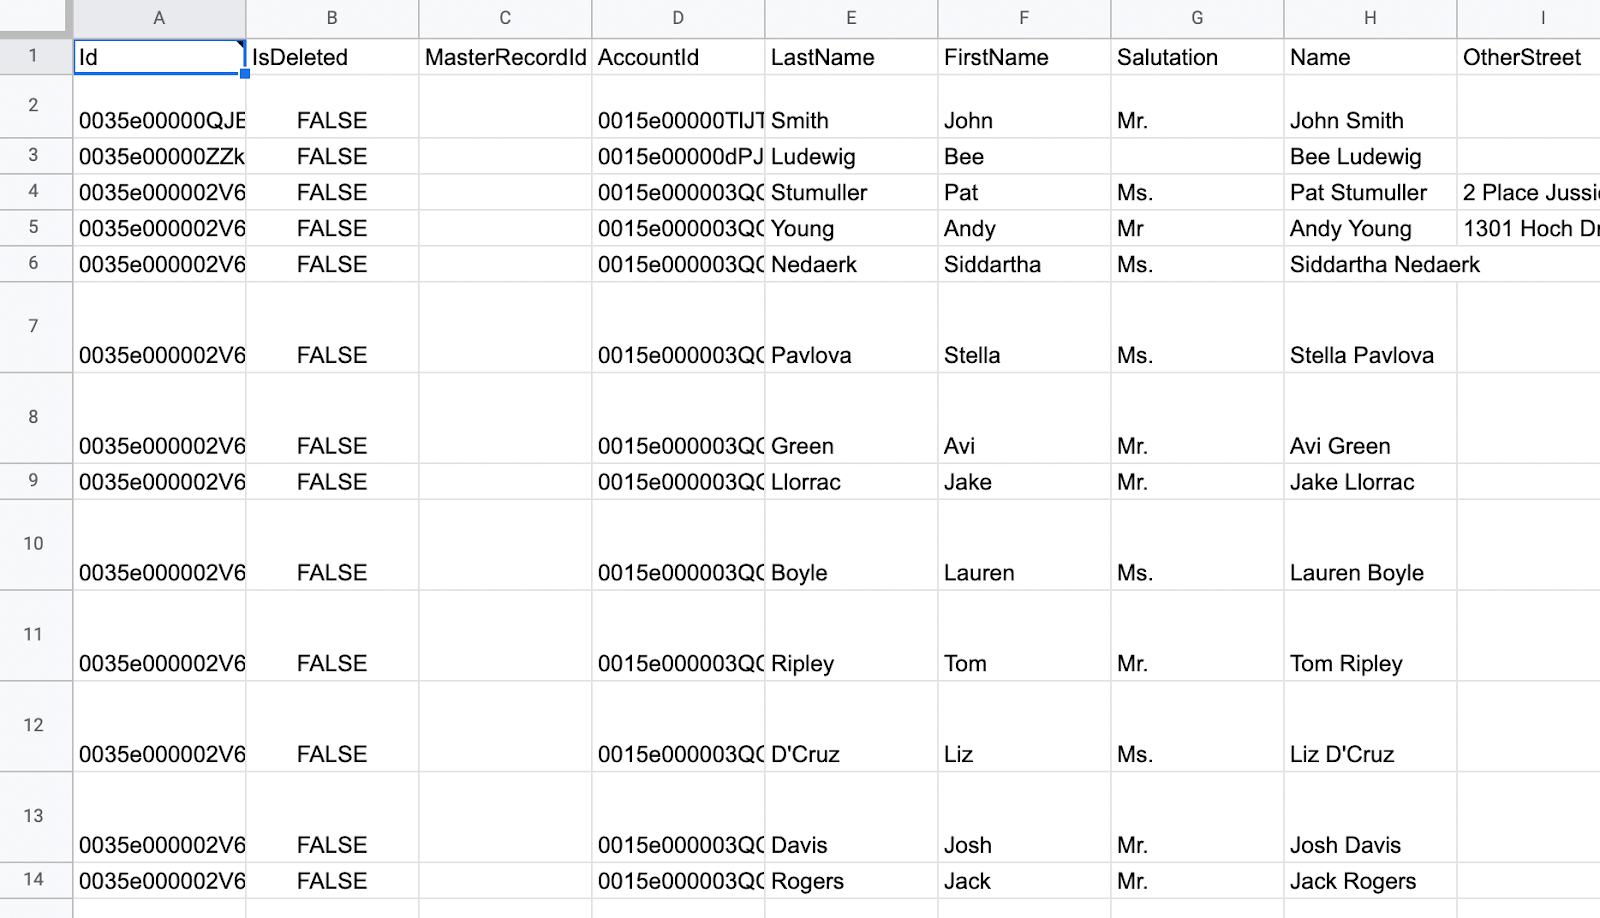
That’s it! Now you can have all your contacts in a spreadsheet that is always up to date.
How to export ids from a list of contacts in Salesforce
Whenever you export contacts with Coupler.io, IDs come in the package. It’s the first column of each import.
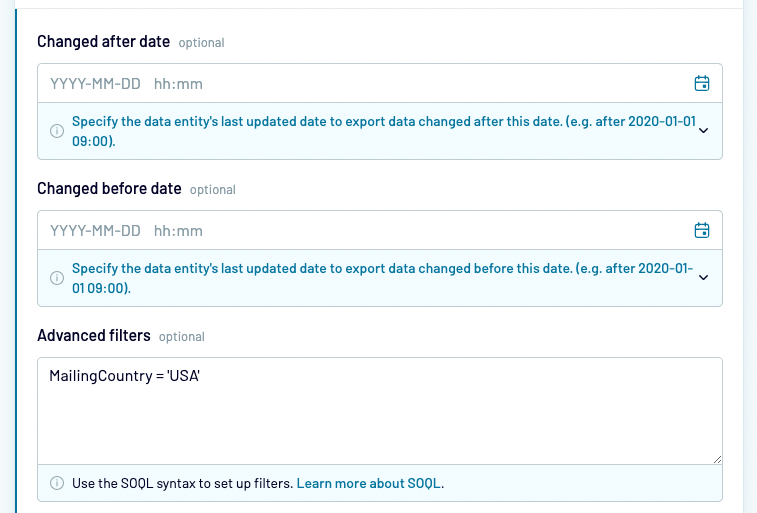
If you’d like to fetch IDs only of the specific contacts, you can add the filtering criteria to the Advanced Filters field in Coupler.io. For example, to get IDs of contacts with “USA” in the MailingCountry field, you would use the following:
MailingCountry = 'USA'
See our Salesforce integration documentation for more examples.
How to export contacts from a campaign in Salesforce
Contacts added to your campaigns are available in a separate data entity. When configuring an importer, choose Campaign Member as a data entity.
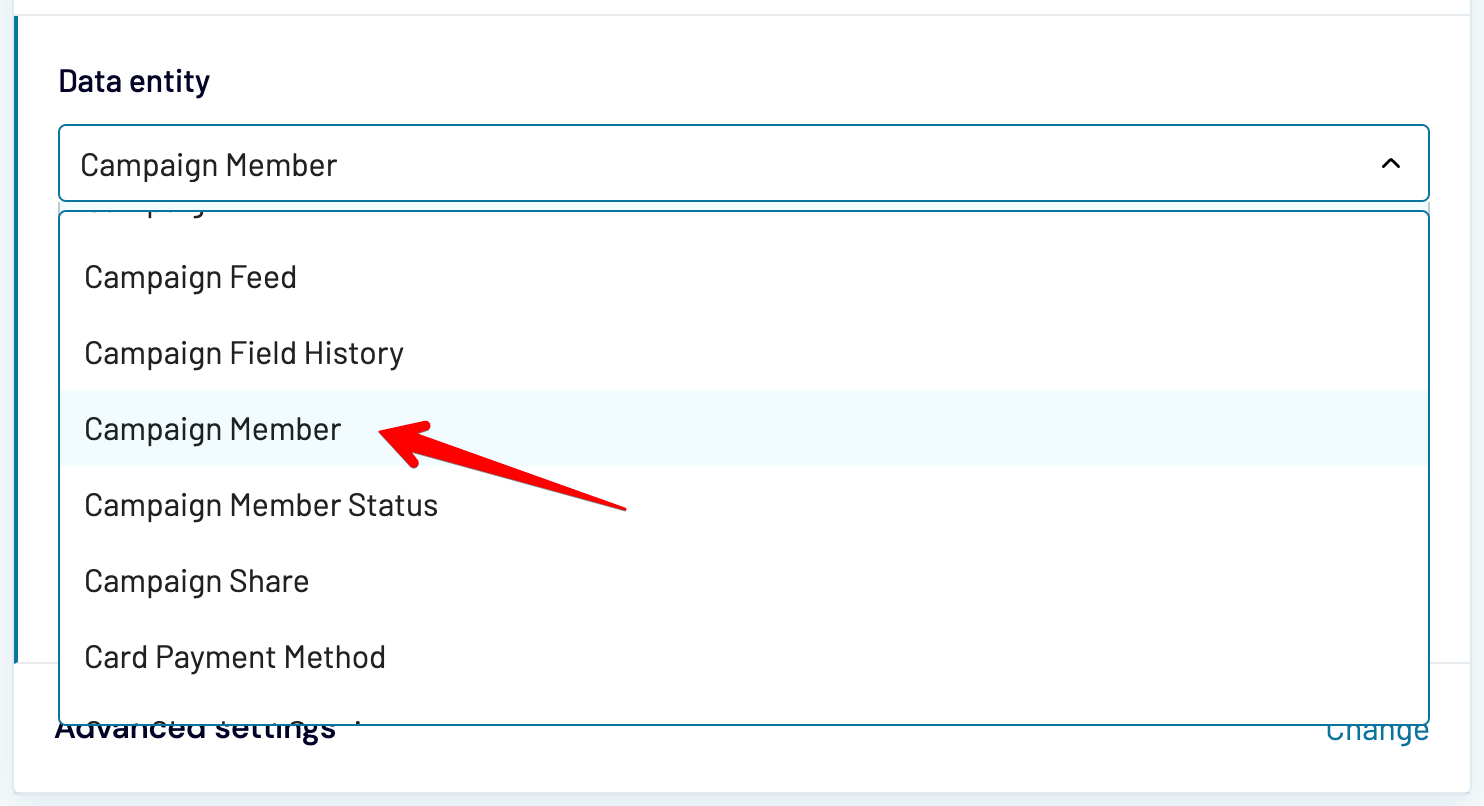
This will fetch all contacts added to any campaign on your Salesforce account. This won’t do the job most of the time as you’ll want to export contacts from only one specific campaign, or perhaps just from a few.
Each Campaign Member export features a CampaignId field. You’ll want to use Advanced filters in Coupler.io once again to filter only for the contacts belonging to a specific campaign.
For example, one of our campaigns has an ID “7015e000000qFveAAE” so we’ll use the following filter:
CampaignId = '7015e000000qFveAAE'
If we wanted to fetch campaign members from several campaigns, we simply need to separate them with the OR operator. For example:
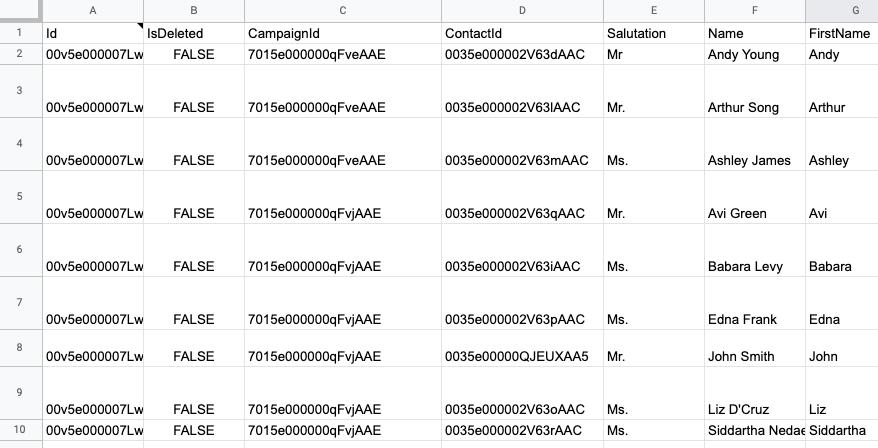
CampaignId = '7015e000000qFveAAE' OR CampaignId = '7015e000000qFvjAAE'
Here’s an example import:
If you’re not sure what’s the CampaignId of a particular campaign, you can always run one more import. The entity name is Campaign and it features IDs, campaign names, and a lot of other handy details.

How to export all contacts for a company from Salesforce?
You can also fetch contacts associated only with one company (account). To do that, you’ll also use the Contact entity that we described in the earlier chapter.
Once the import has finished, you’ll see the AccountId associated with each contact.
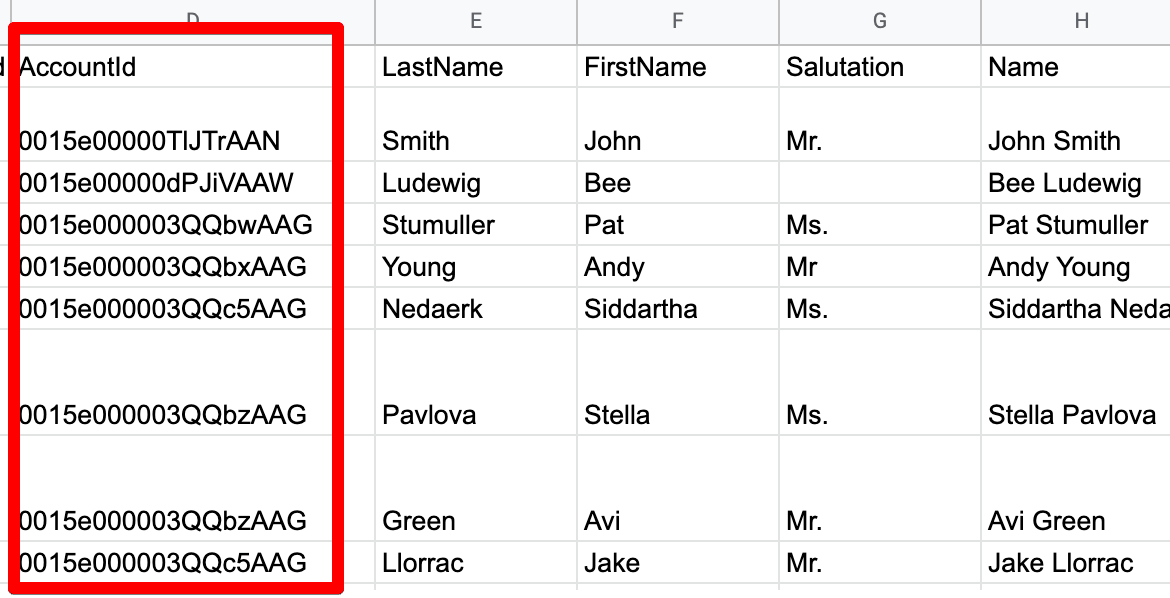
Following the earlier example, you can use the Advanced filters to export only the contacts matching the desired AccountId. For example:
AccountId = '0015e00000TlJTrAAN'
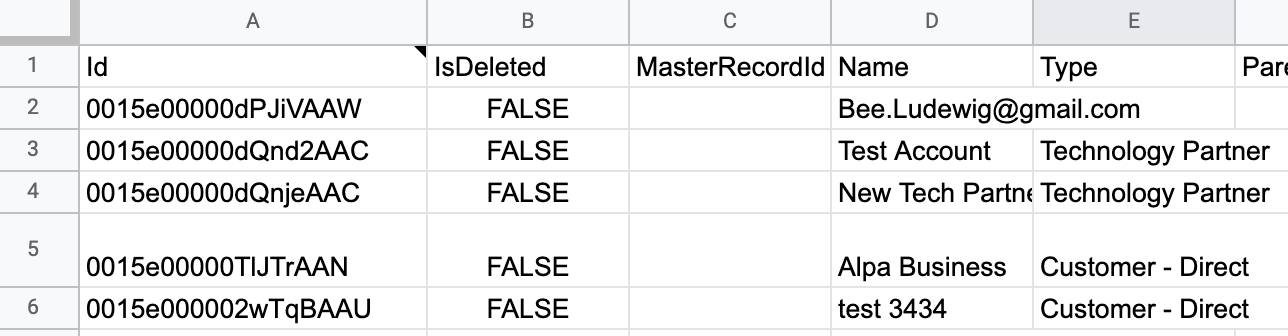
If you’re unsure what a particular AccountId represents, you can always run one more import of Account entity. There, you’ll find the desired Ids with the account names.
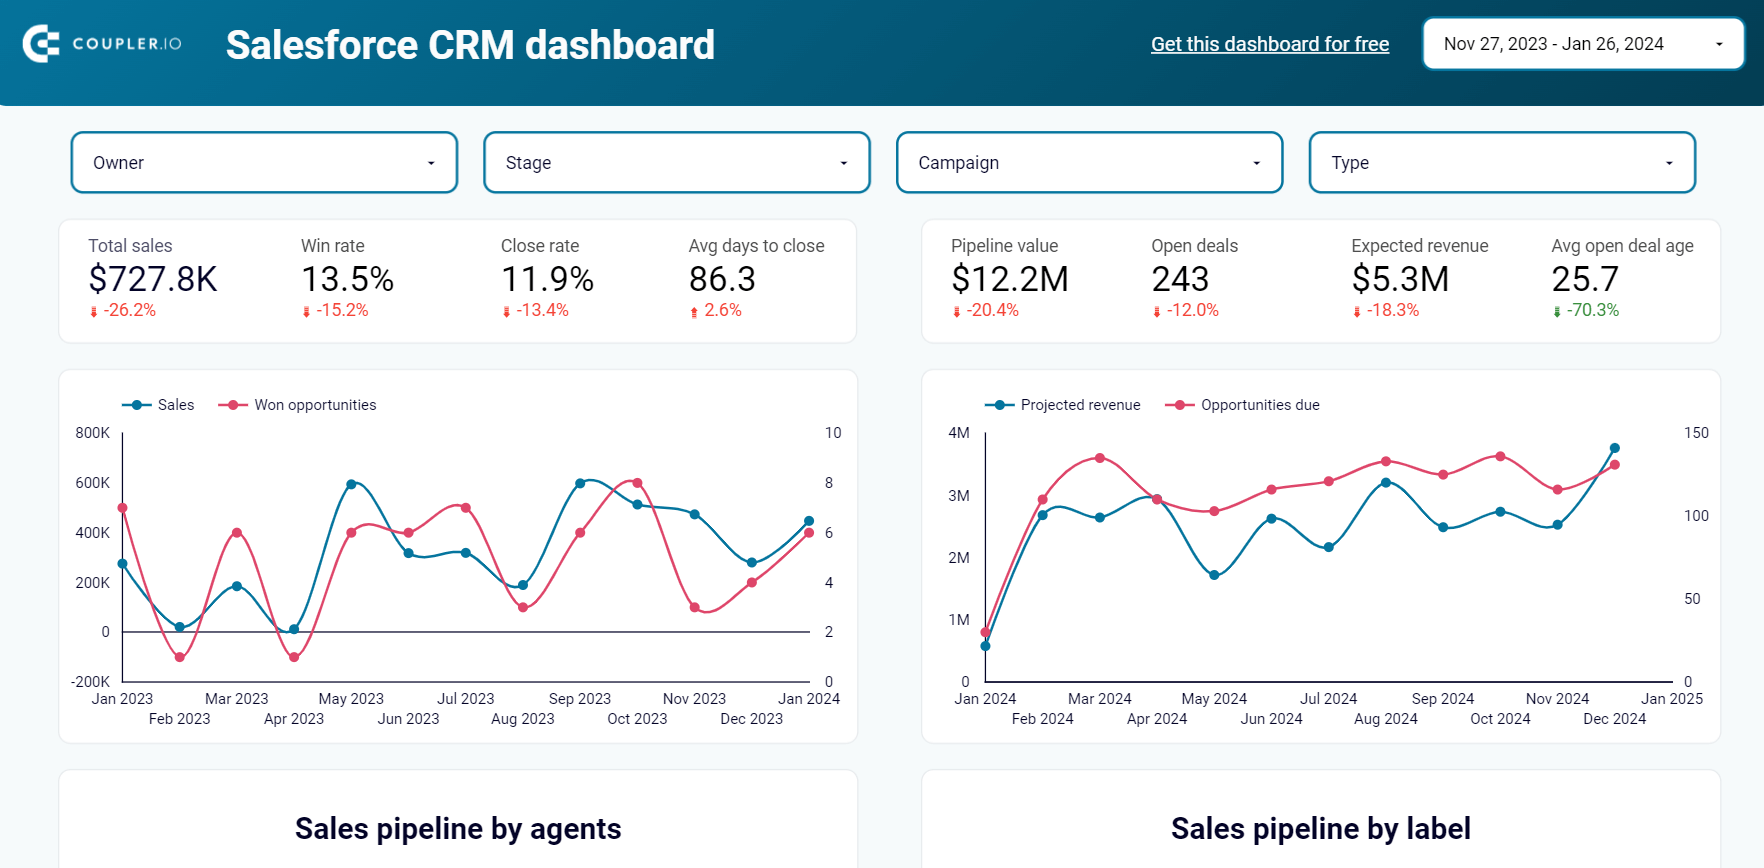
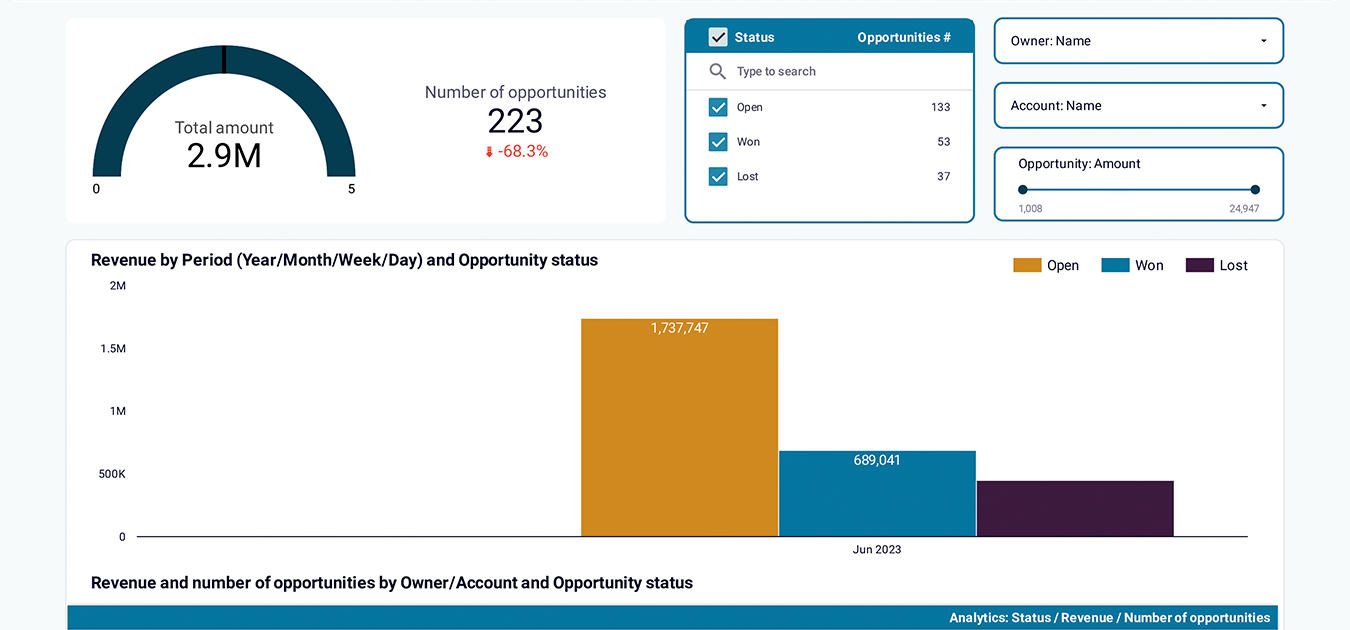
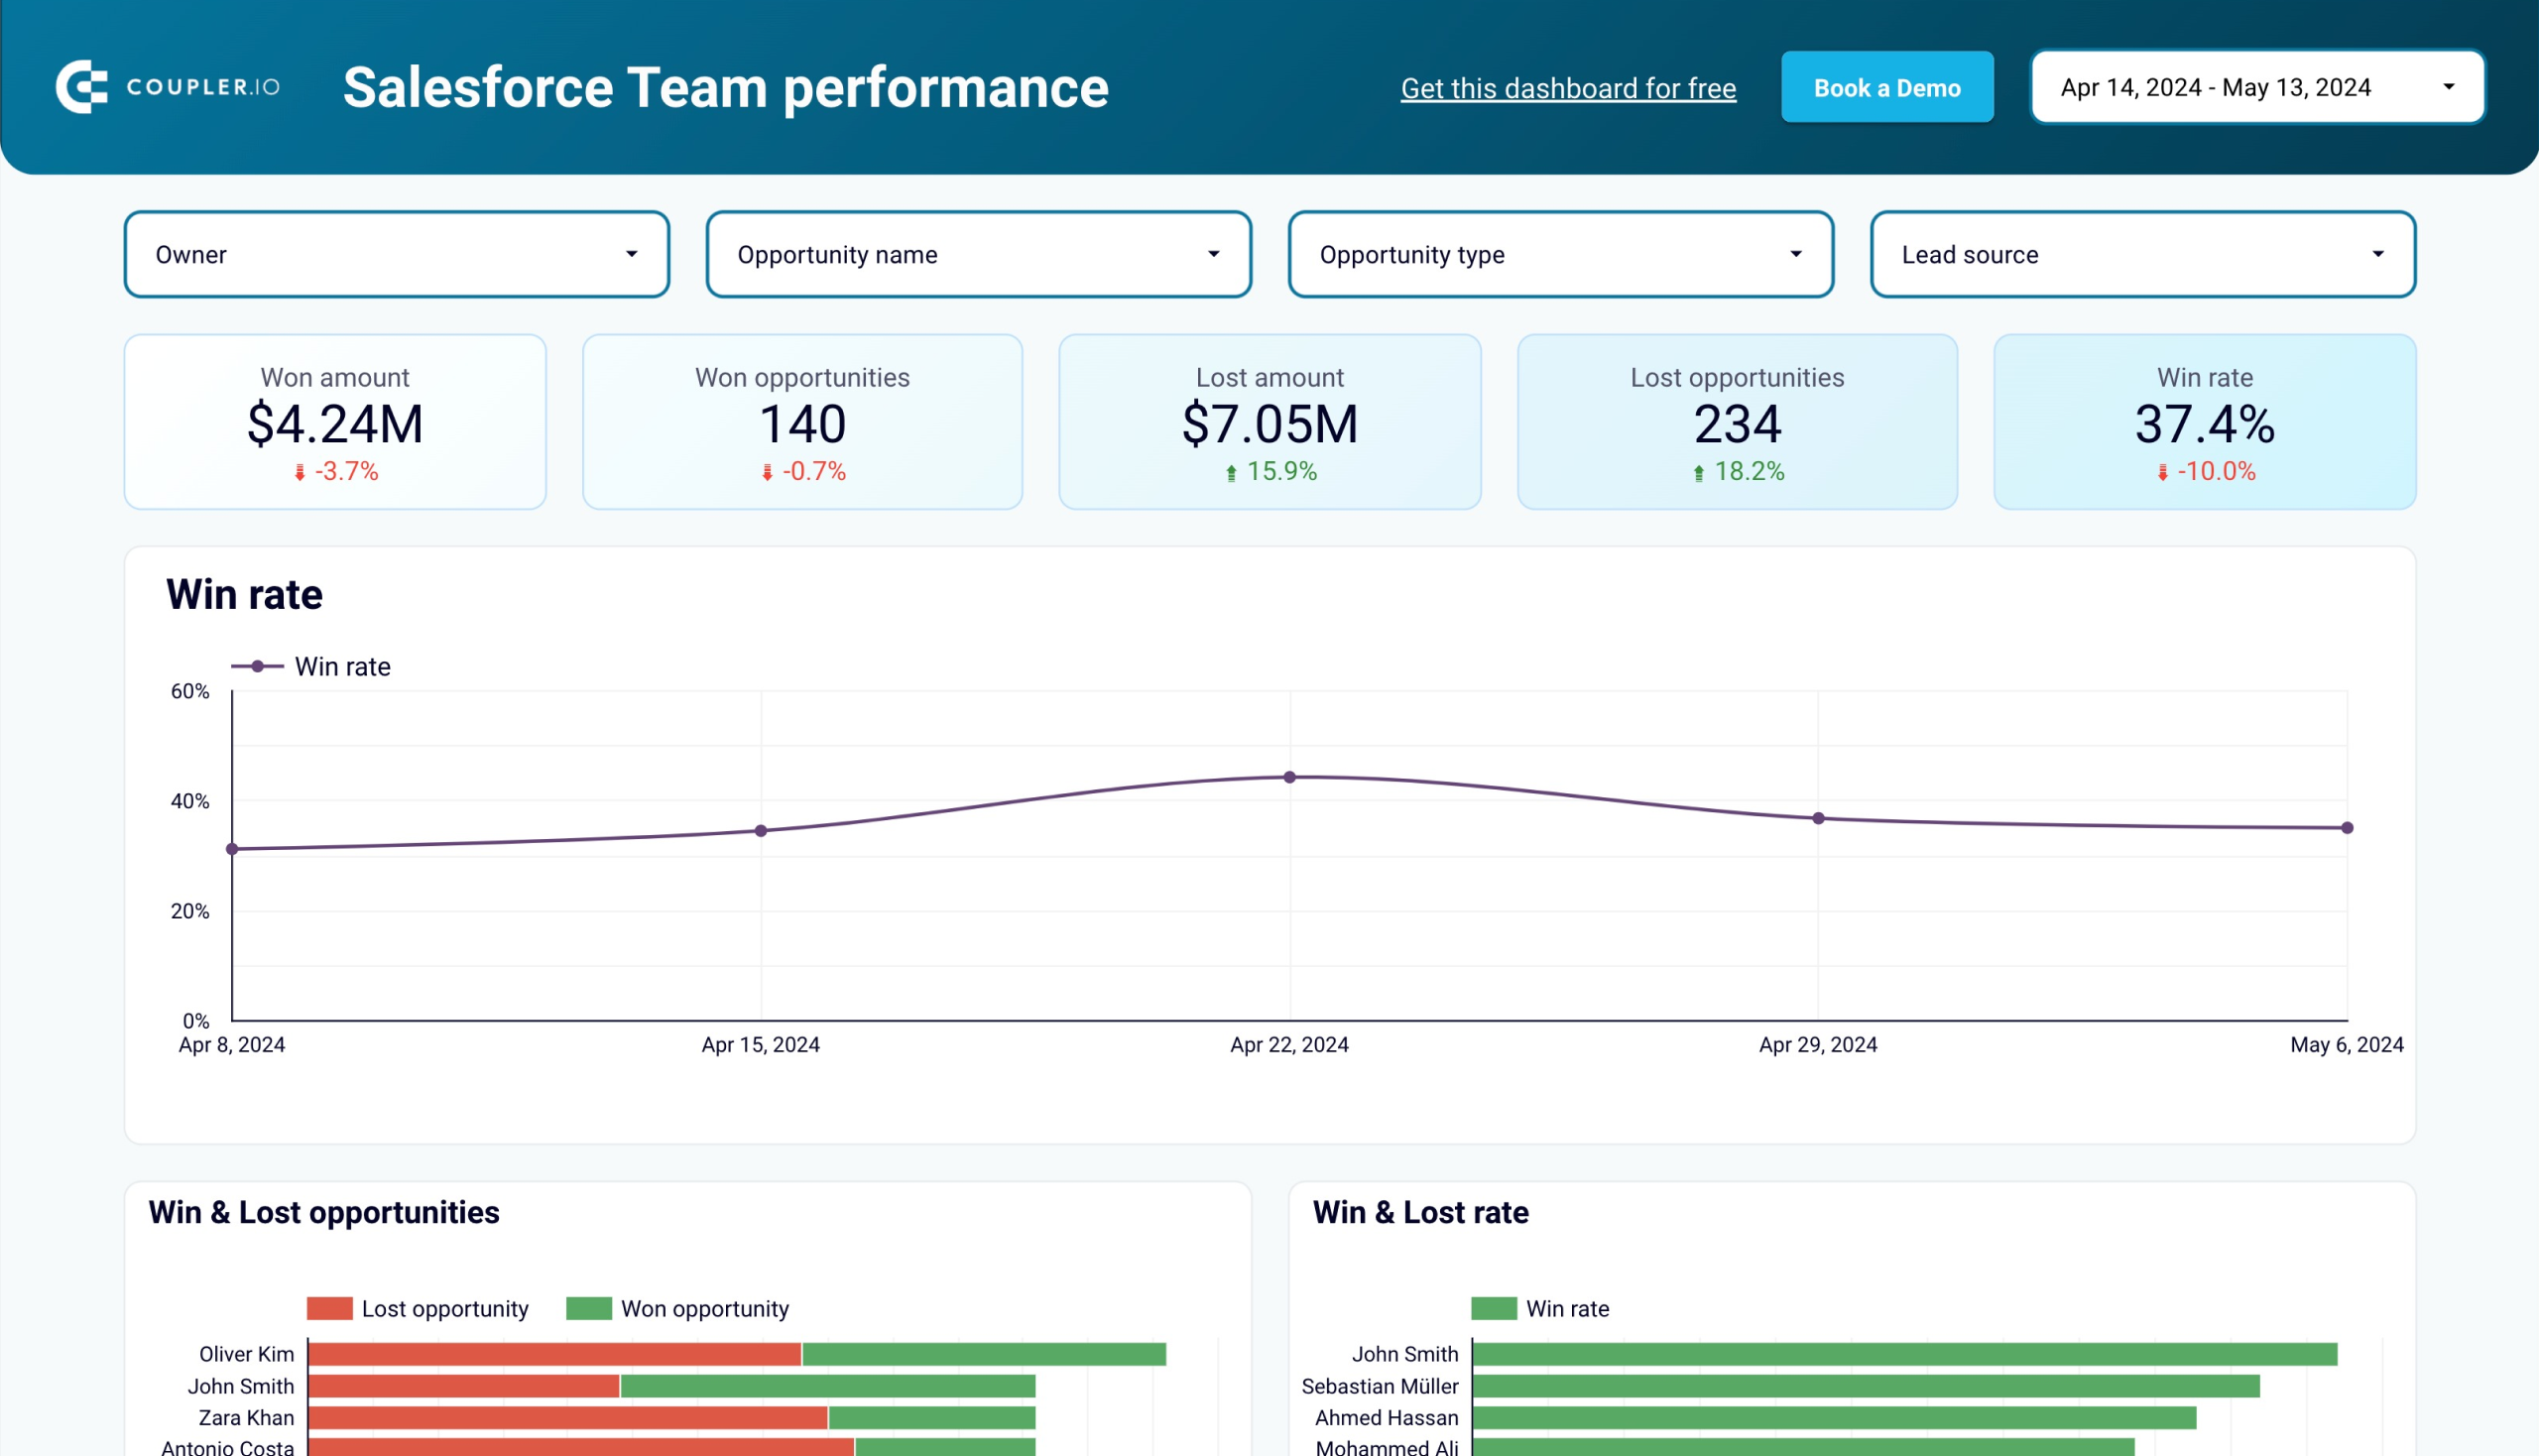
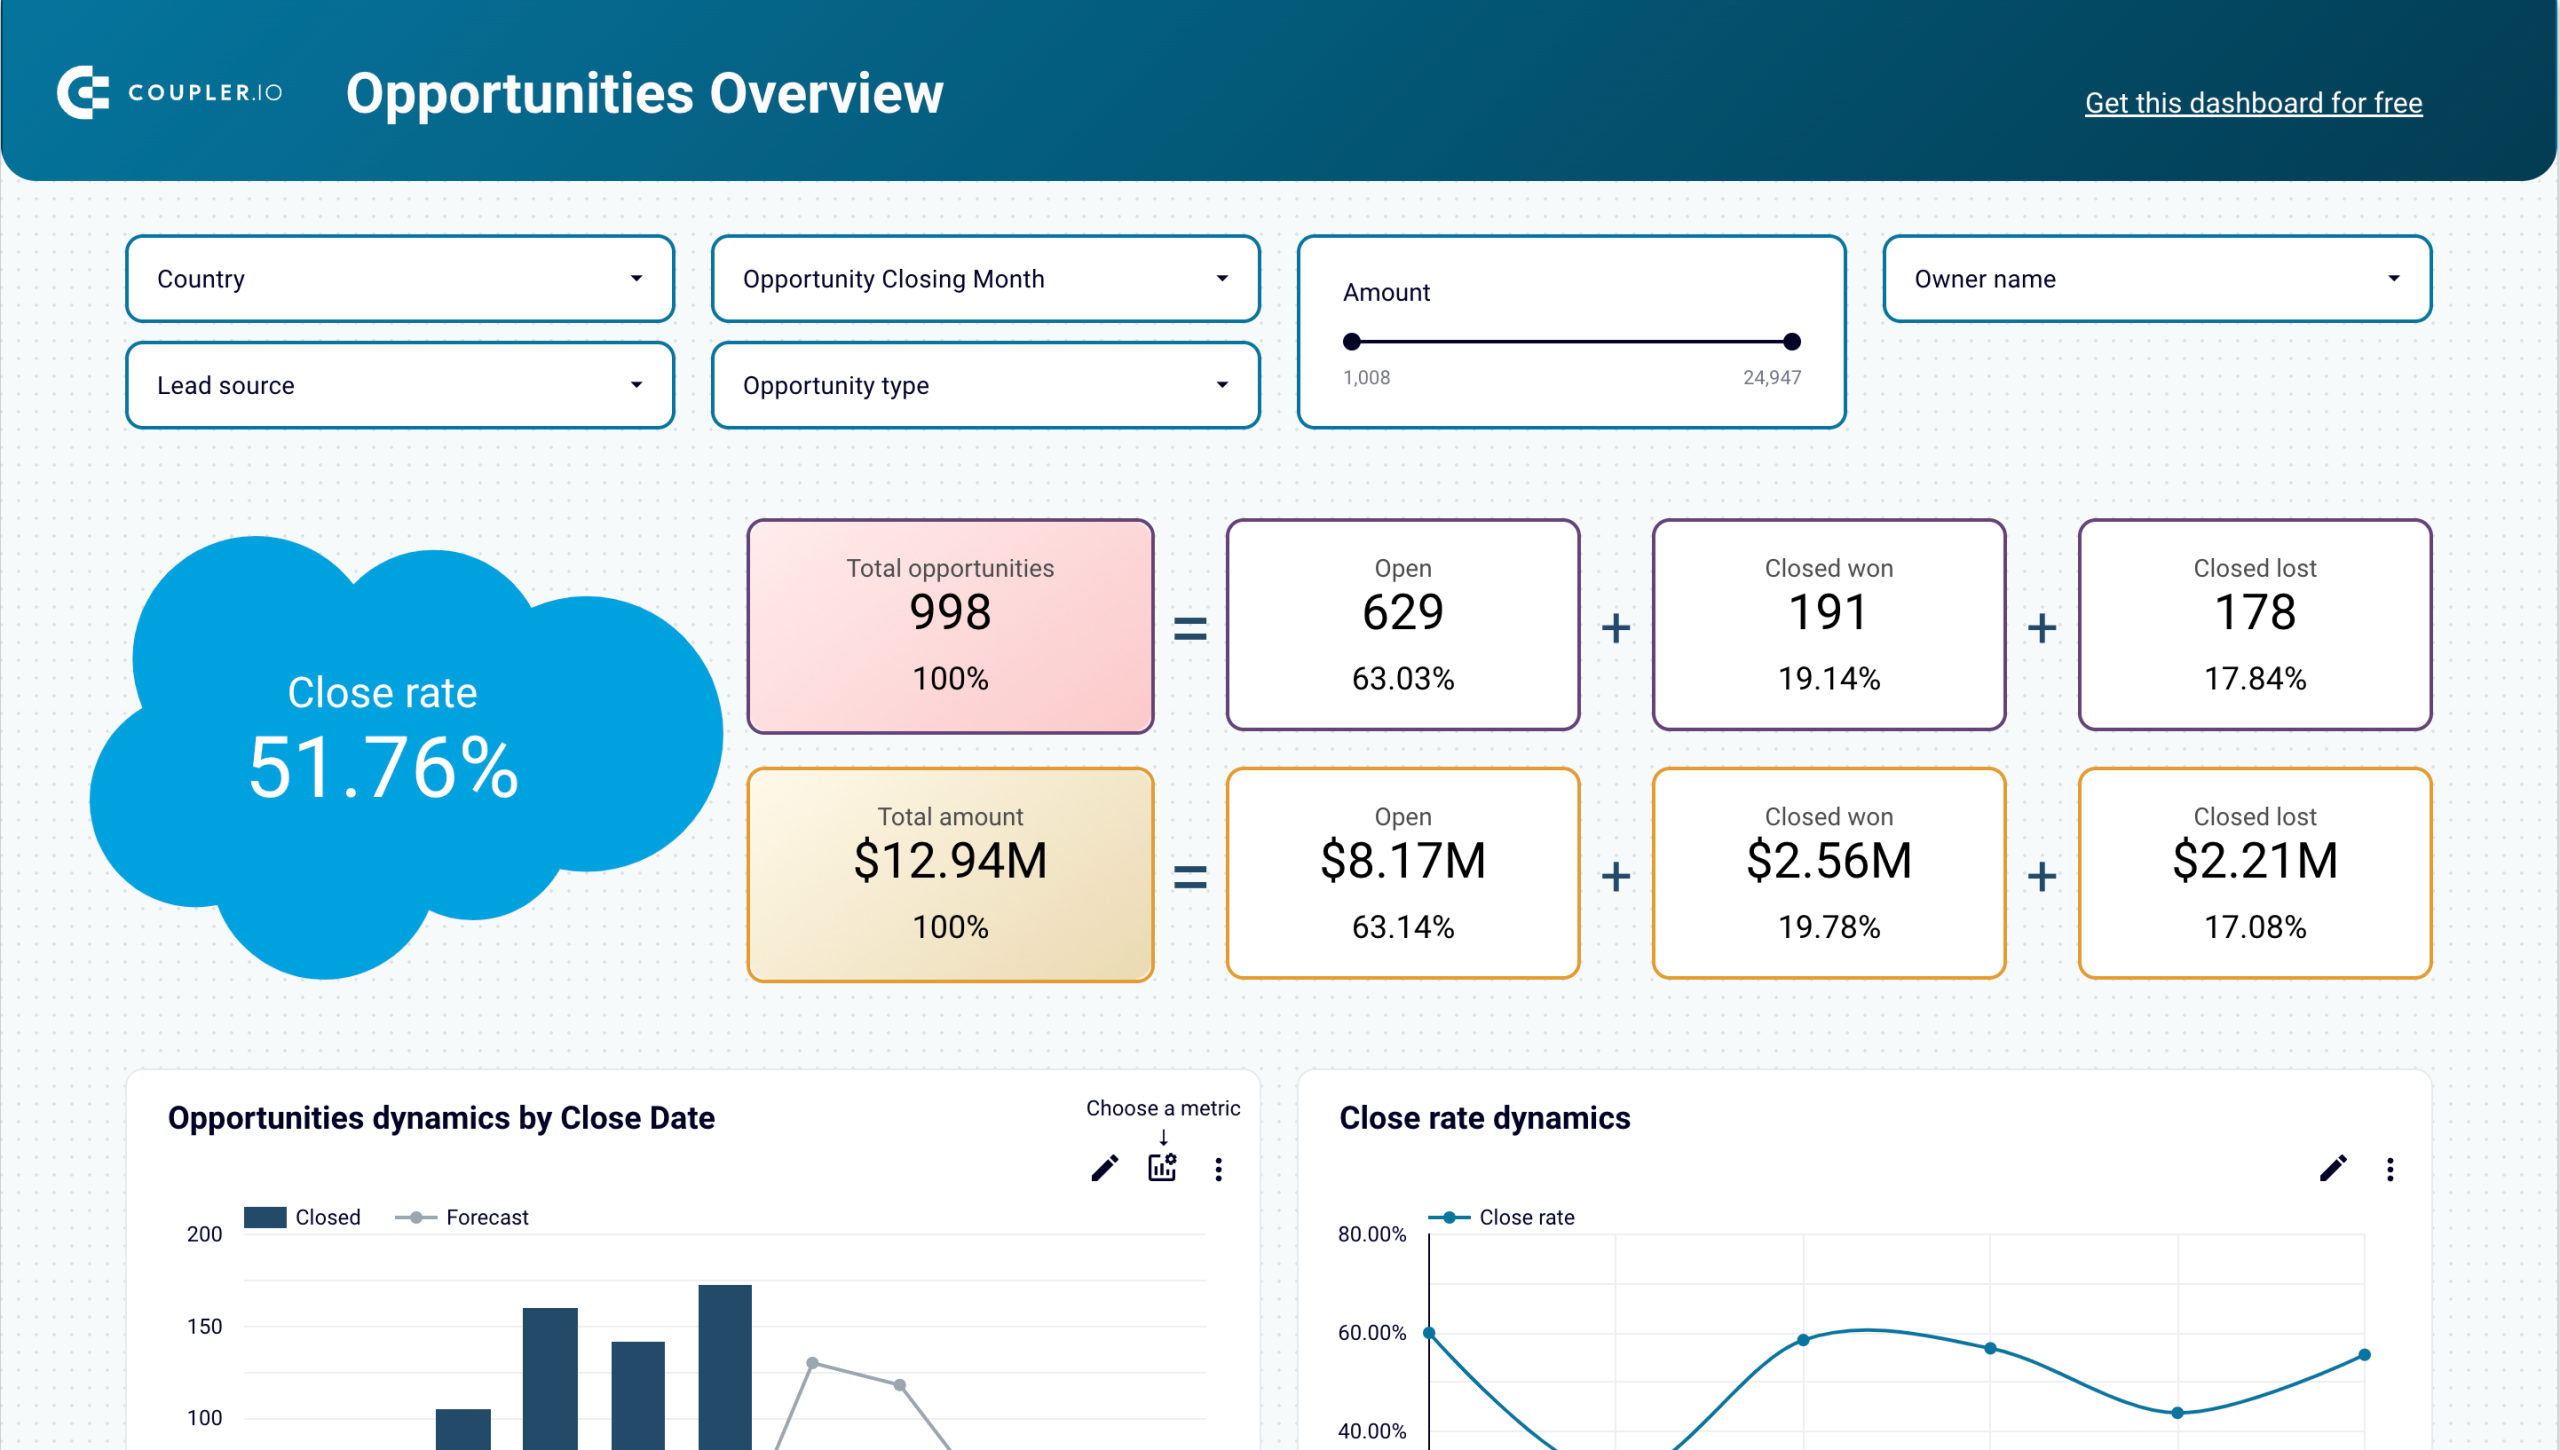
Bonus tip: how to export your Salesforce data to Looker Studio and instantly visualize it with a template
Apart from exporting your Salesforce data to a spreadsheet app, you can also transfer it to a BI tool and visualize it. This might not make much sense for the contact list alone, but it’s a useful option if you want to monitor other Salesforce data as well.
Coupler.io offers a number of ready-to-use Salesforce dashboard templates. They are white-label reporting solutions that do not require any manipulations from your side. To start using them, open the template and go to the Readme tab in the menu on the left. Then, follow the instructions to connect your Salesforce account. All the settings are already pre-configured, so your dashboard will be ready in minutes.


How to export a list of contacts from Salesforce – native method
As we mentioned earlier, the first step is to create a custom report that will feature our contacts.
If you don’t have one yet, jump to the Reports tab in the menu. Then, choose either New Report or New Report (Salesforce Classic). The former will create a report in Salesforce’s Lightning Experience that we use in this tutorial.
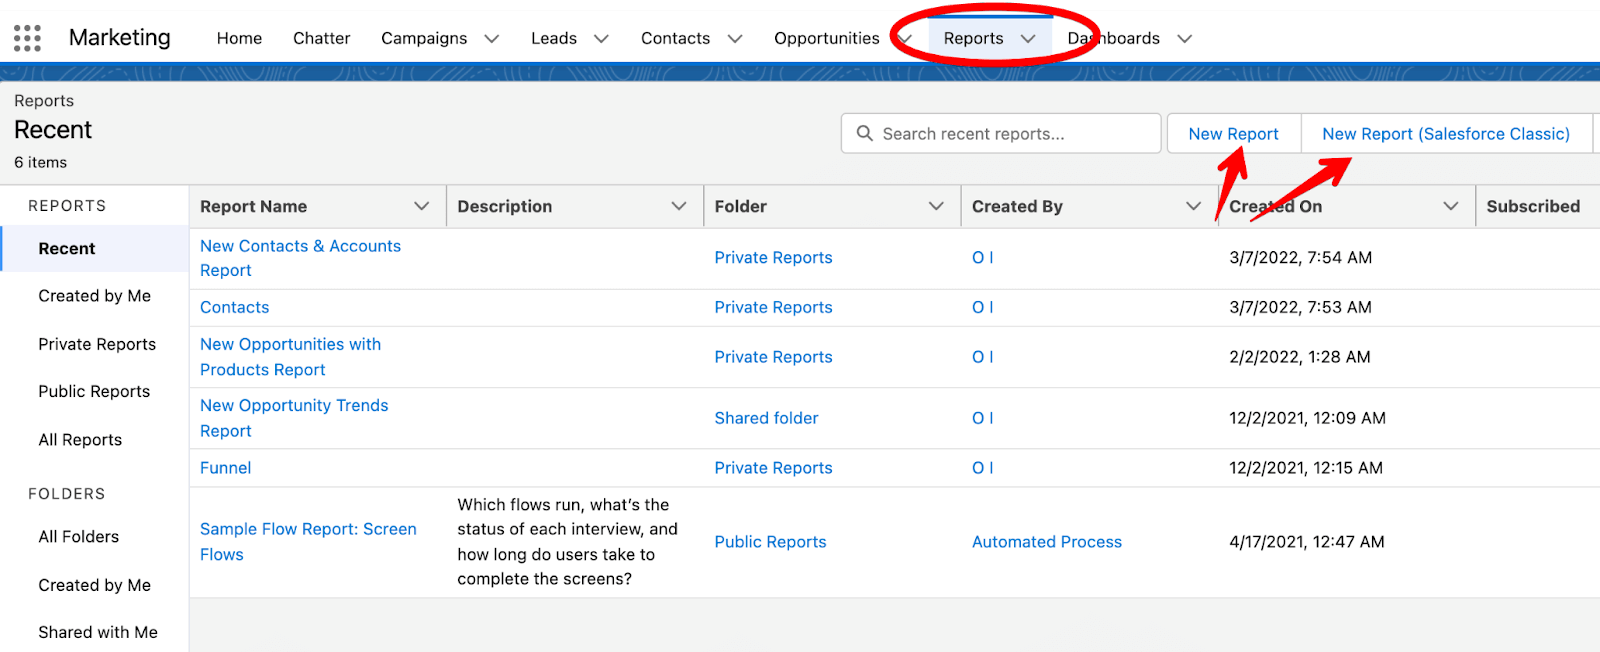
There are several Contact-related reports. The first on the list – Contacts & Accounts – is the most generic one and will do the job for many. We’ll pick it and click Continue.
On the next screen, you’ll see your Contacts & Accounts export. Here, you can:
- Filter the data
- Adjust the reporting period
- Choose to show only your contacts or accounts, or perhaps display all available accounts
- And more
Adjust the settings and click to Run the importer. If you plan to export this report again in the future, you may want to choose to Save & Run instead.
Once the report has been processed, click the triangle icon in the top-right corner and then choose Export.
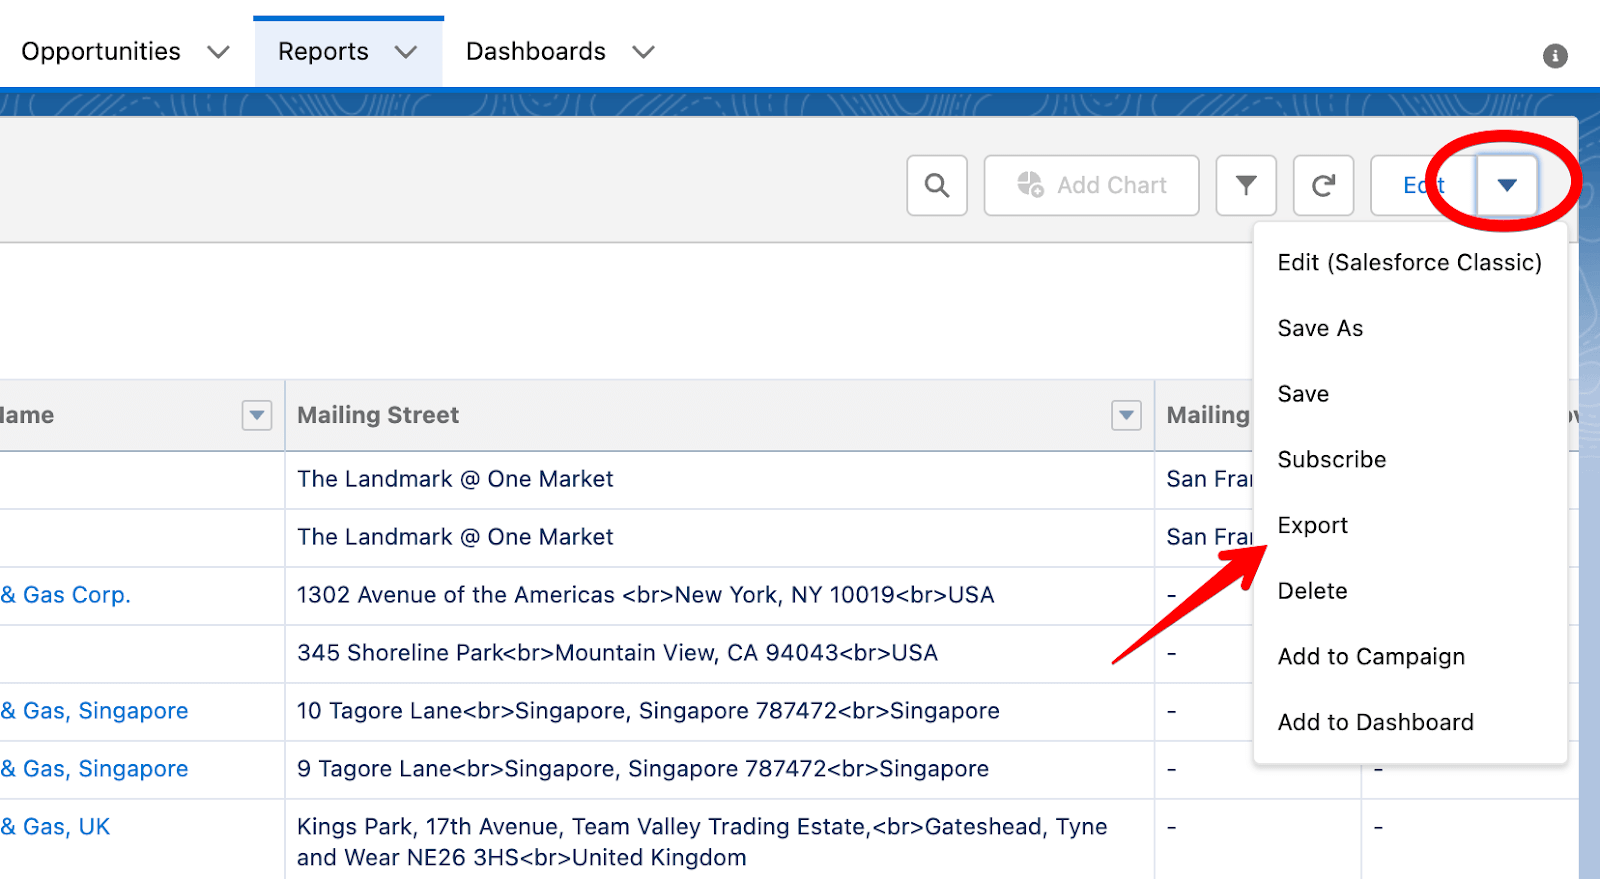
You can choose one of the two available export views. One is a Formatted Report which will feature your data with headers, groupings, and filter settings you’ve chosen. If you don’t plan to process the data further, it’s probably the most suitable option.
If, however, you plan to transform the data or import it into another tool, it’s best to choose the Details Only option.
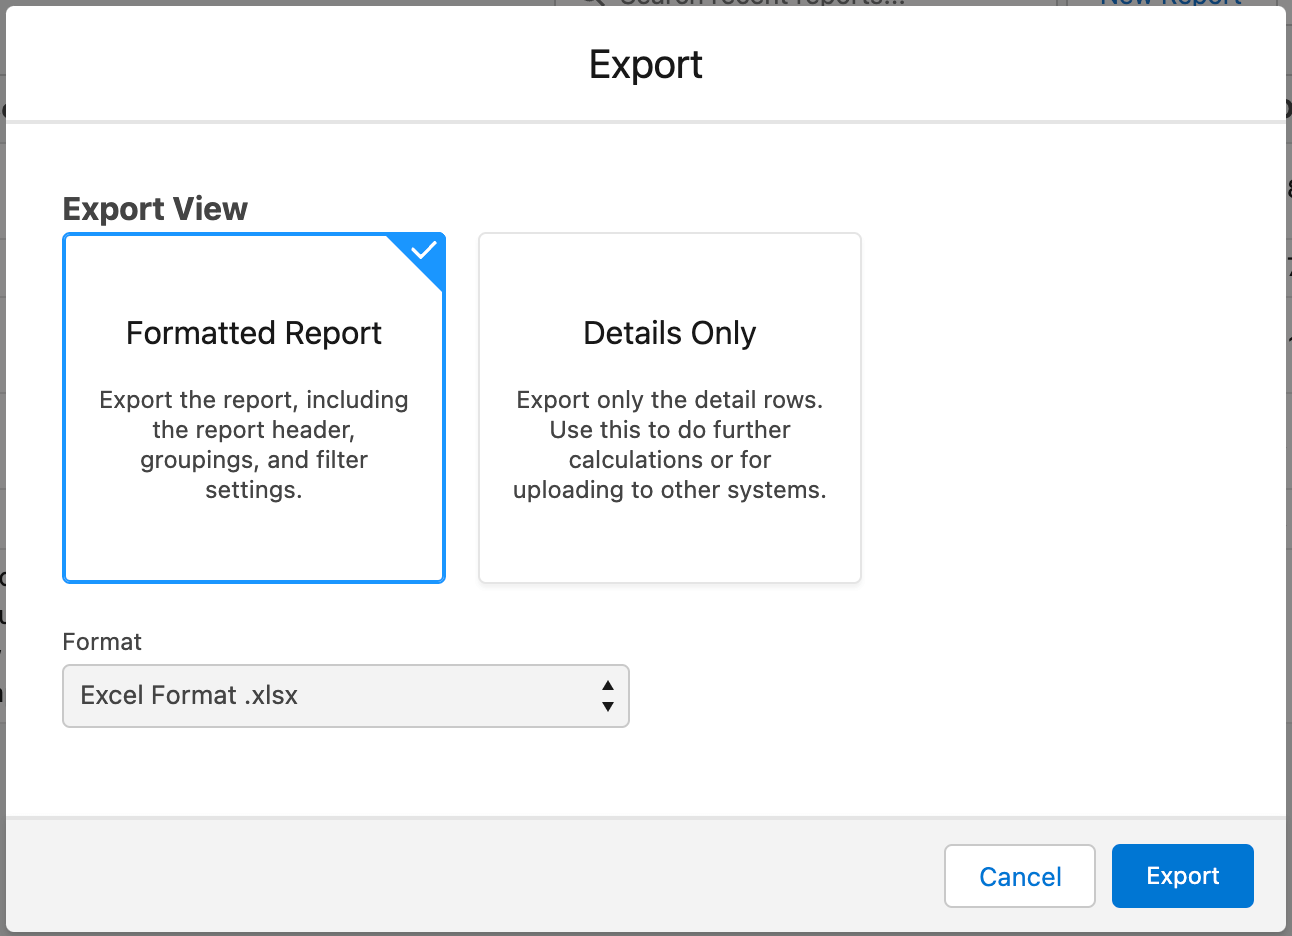
If you choose a Formatted Report, you’ll only be able to export the data as a .xlsx (Excel) file. If you opt for Details Only, you’ll have a chance to export in either .xlsx or .csv format.
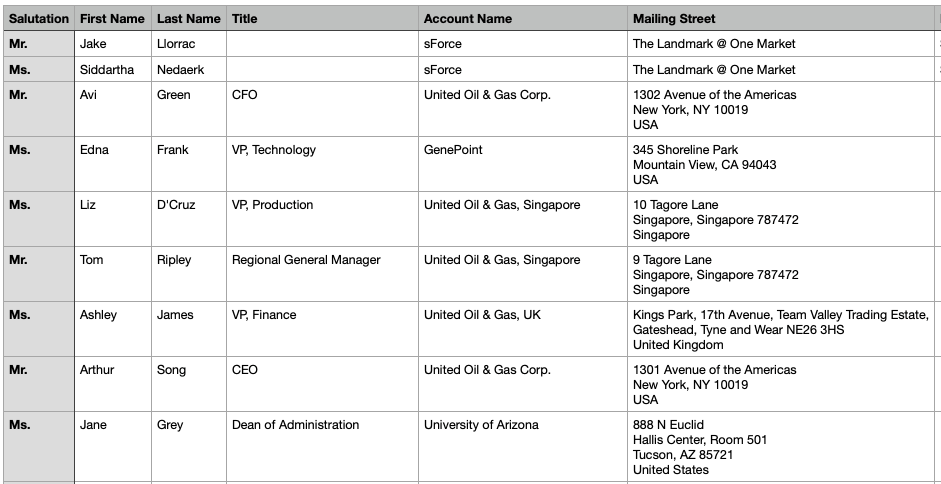
As the last step, click Export. The file will be saved to your device. Here’s a sample .csv export of our contacts and accounts.
Scheduling a contacts export in Salesforce
An alternative approach to exporting contacts is with the default data export functionality. With it, you can export contacts from Salesforce as a one-off activity or choose to schedule an export on a monthly or weekly (users on the Enterprise, Performance, or Unlimited plan) basis.
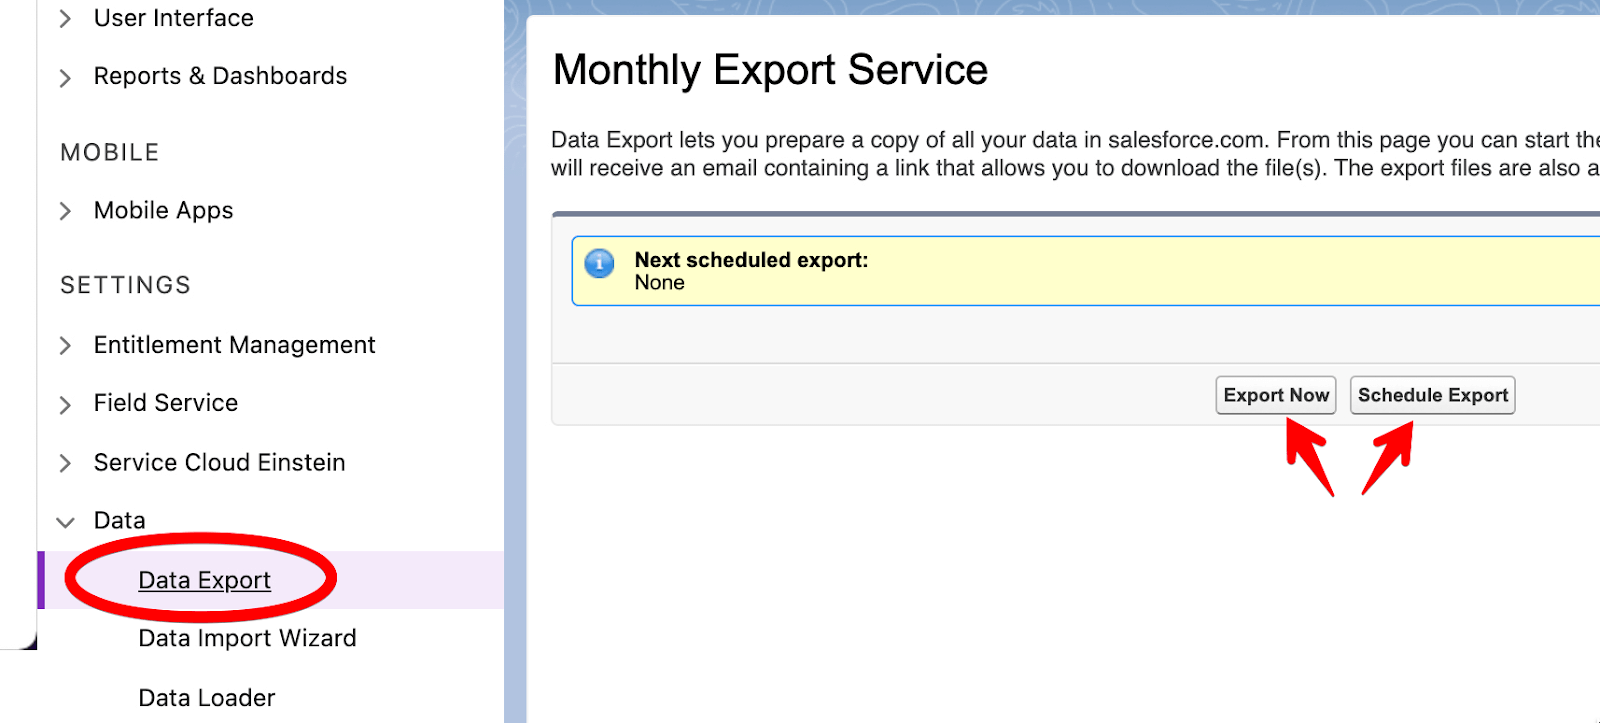
To find this option, click the gear icon in the top-right corner of the screen and jump to Service Setup Home. There, find Data Export in the Data menu and choose to either Export Now or Schedule Export. We’ll go with a scheduled export of contacts.
Next, you can choose the frequency of exports as well as precisely when they should happen. From the list of data entities below, choose Contact. Then, click the Save button.
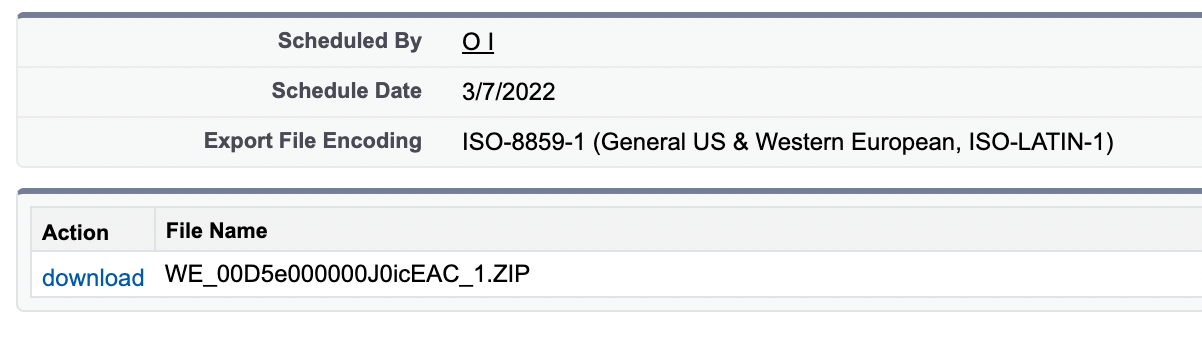
From now on, you’ll get an email notification once a new report has been generated. It will be available for download on the Data Export pages within Salesforce.
Export contacts from Salesforce – summary
Salesforce provides an easy way to export contacts and any other data from the platform. Once you’ve put together a relevant report, you can customize it to your liking and only export the contacts you need.
You can pull the very same data with Coupler.io, but perhaps in a more convenient way. Whichever destination app you choose, it’s easy to put together a dashboard and see it auto-update as the fresh data is imported in the background.

Automate Salesforce data export with Coupler.io
Get started for free