While ClickUp is a great tool for organizing collaboration, you might need to extract data from this app for enhanced analysis, reporting purposes, or to blend it with information from other apps, such as Asana. Transferring your ClickUp data to a spreadsheet can be a convenient way to do all this.
So, you can export ClickUp to Excel to get a clear overview of the project’s progress, calculate custom metrics, build dashboards directly in the spreadsheet, and more. In addition, collecting all your project data in Excel allows you to create better reports and do performance checks. This way, you can easily measure the productivity of your team, identify blockers, and share your reports with colleagues.
How to export ClickUp to Excel in different ways
ClickUp is one of the most popular tools used for project management and planning. It comes with various features, views, and an easy-to-use interface. You can also check ClickUp pricing and learn more of its features.
Depending on your need, there are various data types that you can export, including lists, tasks, checklists, team members, goals, customer fields, forms, and reports.
In general, you have three options for transferring your data from ClickUp to Excel:
- Manually with the XLSX or CSV files: With this method, you can export data in just a few clicks, but you will need to repeat this process every time you want to update the information in your spreadsheet. So, if you need to do this on a schedule, you will have to keep track of the planned updates yourself. Also, it’s important to know that you can only export List view and Table view from ClickUp with this method. For free and unlimited users, you only have 5 exports per member per month. However, for the other 3 paid plans – Business, Business Plus, and Enterprise, you have unlimited custom exports.
- Coupler.io: This data integration platform allows you to automate exports of data from Clickup to spreadsheets, BI tools, data warehouses, and AI tools. So, you can connect ClickUp to Excel and automate data refresh at a desired schedule. Moreover, the tool enables you to combine the ClickUp data with information from over 400 business apps and sources for advanced reporting.
- Automatically via API: This method is a good option for those needing more flexibility, but it requires strong coding skills.
Connecting ClickUp to Excel via API requires solid technical expertise, dealing with complex settings, and a lot of coding, so it’s not feasible for business users. At the same time, Coupler.io and the manual export allow you to transfer data between the two apps quickly and easily without any tech knowledge.
Connect ClickUp to Excel with Coupler.io
It only takes a few minutes and several clicks to automate the data flow from ClickUp to Excel. You can get started right away using this interactive form, where we’ve preselected ClickUp as a source app and Microsoft Excel as a destination app.
The form is preset for the export to Excel Online – an Excel file stored in your OneDrive or OneDrive for Business account.
At the same time, Coupler.io enables you to export data to an Excel file (CSV), which automatically downloads to your device. For this, change the destination to Excel Desktop using the drop-down list.
You’ll be offered to create a Coupler.io account for free with no credit card required. After that, complete three simple steps.
Step 1. Collect data from ClickUp
Connect your ClickUp account. For this, you’ll need to generate an API token. Check out what it looks like using this interactive form:
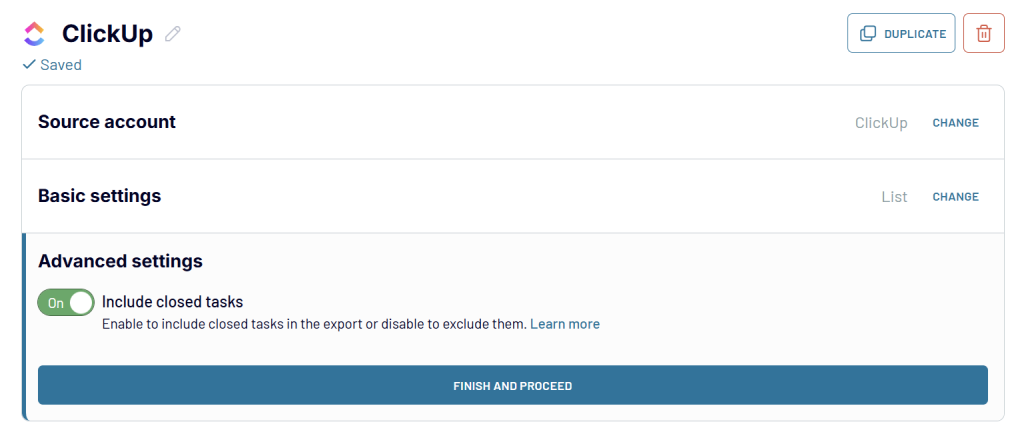
Once connected, select the data entity you want to export, such as User, Team, List, etc.
In the Advanced settings, you can also include closed tasks in the export.
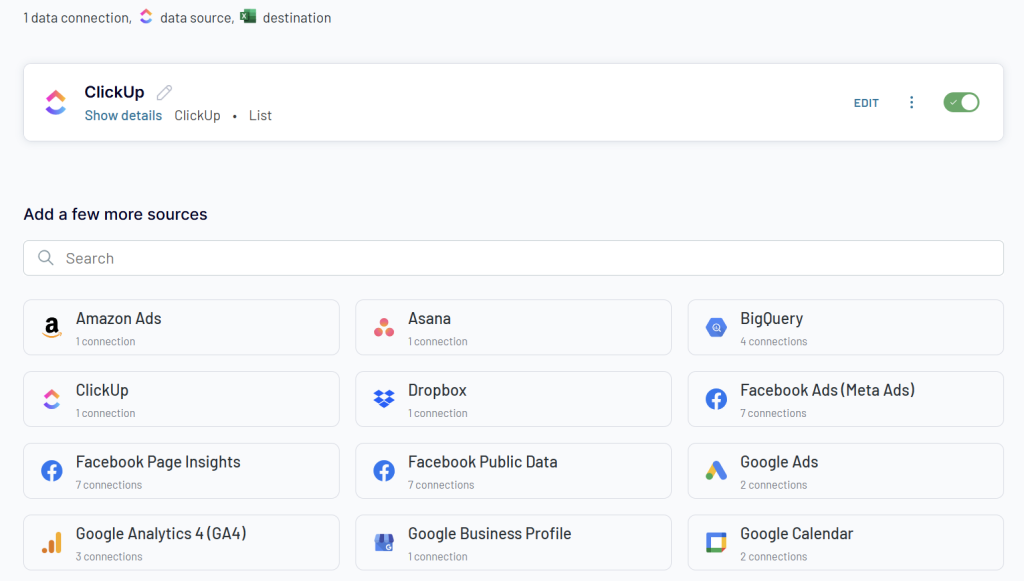
We’ve mentioned that Coupler.io enables you to combine ClickUp data with other apps and sources. You can add multiple accounts, blend different data entities, or consolidate information with other apps. Just add the needed sources and configure their connection.
Step 2. Organize your data
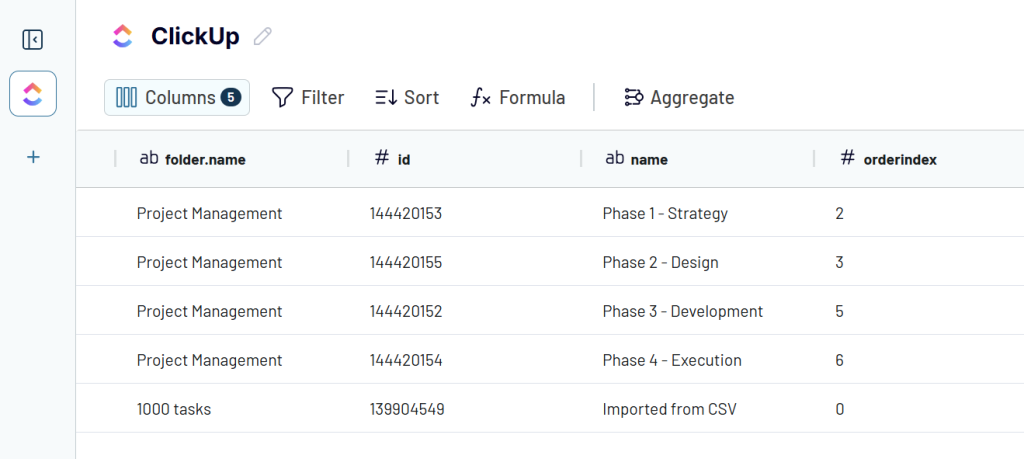
The Transformations step is optional; however, it allows you to make your raw data from ClickUp analysis ready. You can:
- Filter and sort data
- Edit, hide, rename, and reorder columns
- Create new columns using formulas
- Aggregate data by performing operations like sum, average, count, min, or max on specific columns
- Join or append data if you’ve connected multiple data sources.
Step 3. Load data to Excel and schedule data refresh
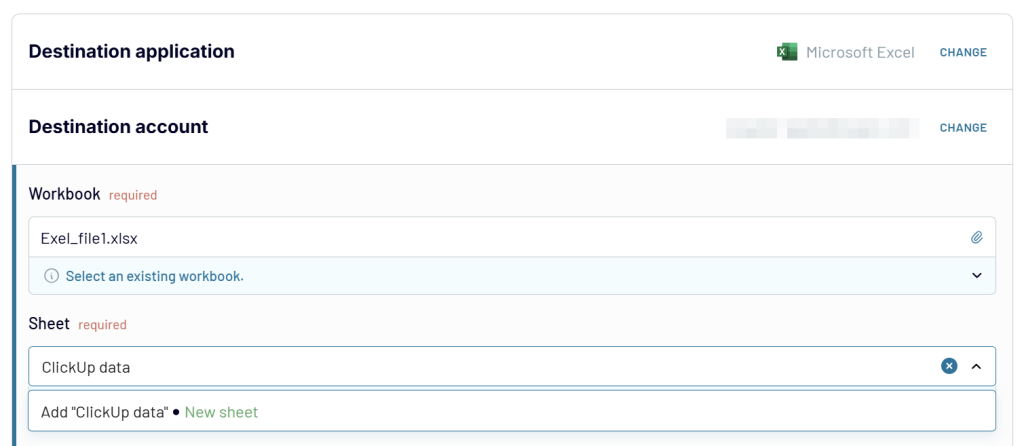
The last step is dedicated to configuring your Excel workbook for the ClickUp data. Connect your Microsoft account, then select a workbook and a worksheet. The latter can be created anew if you enter a name for your new worksheet.
If you want to download ClickUp data in an Excel file, then use the Excel Desktop as a destination. It will let you generate a CSV file, which you can download to your device and open in the Excel desktop app.
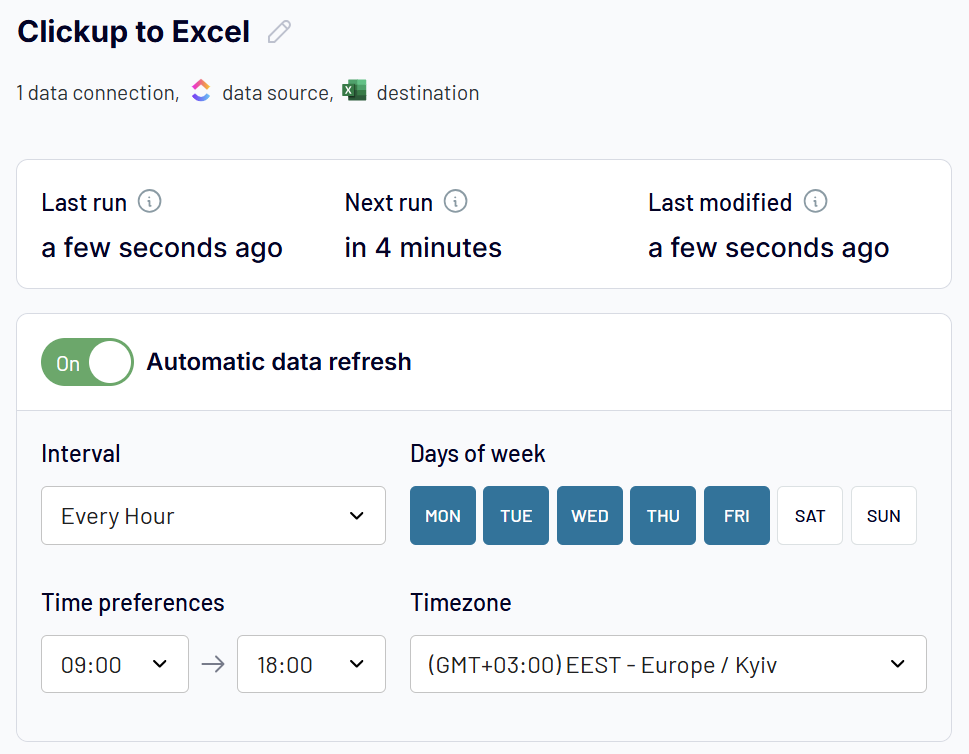
Click Save and Run to export data from ClickUp to Excel. In addition, enable the Automatic data refresh and set up a schedule for recurring data exports.
Ready to automate ClickUp data export
 Try Coupler.io for free
Ready to automate ClickUp data export
Try Coupler.io for freeHere are a few advantages of exporting ClickUp data to Excel automatically with Coupler.io.
- Easy Setup: You can easily connect ClickUp to Excel with the JSON integration, and you don’t need to possess any coding skills. The integration can be configured in just a few clicks.
- Flexible Export Options: You can choose which data to export from ClickUp and how to format it. For instance, you can export data on tasks, projects, time entries, and more. You can also choose which fields to include in the export and how to format the data.
- Real-time Data Sync: Coupler.io supports near real-time data sync, meaning that any changes you make in ClickUp can be reflected in your Excel file almost in real-time. This can be especially useful if you need to keep your ClickUp information in Excel always fresh.
- Flexible schedule: It’s easy to set up a schedule for the updates, and Coupler.io will automatically export data every 15 minutes, every hour, or every month, depending on your selection.
What data you can export from ClickUp to Excel with Coupler.io
Coupler.io provides you access to the following ClickUp data:
| Data Entity | Description | Why Export |
|---|---|---|
| User | Details about workspace members, including name, email, and role. | To audit user activity, manage access, or match users with assigned tasks and time logs. |
| Team | General information about your ClickUp workspace (team name and ID). | To link data across entities or reference team metadata in reports. |
| List | Task lists within folders or spaces, including name, status, and due dates. | To track list progress, measure delivery timelines, or structure reports by list. |
| Space | Top-level containers that organize folders and lists. | To analyze tasks, time logs, or goals by broader teams or departments. |
| Folder | Containers within spaces that group related lists. | To maintain workspace hierarchy or segment data by process stages. |
| Task | Work items with fields like title, status, assignee, and custom fields. | To build dashboards, review workloads, or analyze task performance and blockers. |
| Time tracking | Logged time entries per task, with user, duration, and timestamps. | To analyze time spent by task, project, or user for billing or productivity insights. |
| Time tracking tags | Labels for categorizing time entries (e.g., billable vs non-billable). | To break down logged time by work type, billing category, or project phase. |
| List custom fields | Custom fields configured at the list level. | To review usage, standardize across lists, or document field configurations. |
| Team custom fields | Workspace-level custom fields shared across multiple lists and spaces. | To unify reporting on shared data points like clients, estimates, or priorities. |
| Space tags | Tags created within a space for task organization. | To filter tasks by category, initiative, or theme. |
| Team goals | Objectives and progress metrics set at the team level. | To track OKRs or strategic goals across projects and users. |
| List comments | Comments left on tasks within a list, including author and timestamp. | To audit communication, monitor collaboration, or extract feedback from task discussions. |
If you did not find a data entity you can export from ClickUp with Coupler.io, no worries! You can also contact our customer support and request the required data entity. Our team will consider the possibility of adding it as fast as possible and offer a temporary solution to save your time. For example, with the help of the JSON integration, which allows users to retrieve data from APIs without coding or complex technical setups. In any case, you won’t be left alone with your challenge. Try Coupler.io for free right away and get your ClickUp data in minutes.
How to transfer data from ClickUp to Excel manually using XLSX or CSV files
The manual option for ClickUp export to Excel is pretty basic and requires you to make a few clicks in the ClickUp user interface. For this tutorial, let’s export a ClickUp List view to Excel.
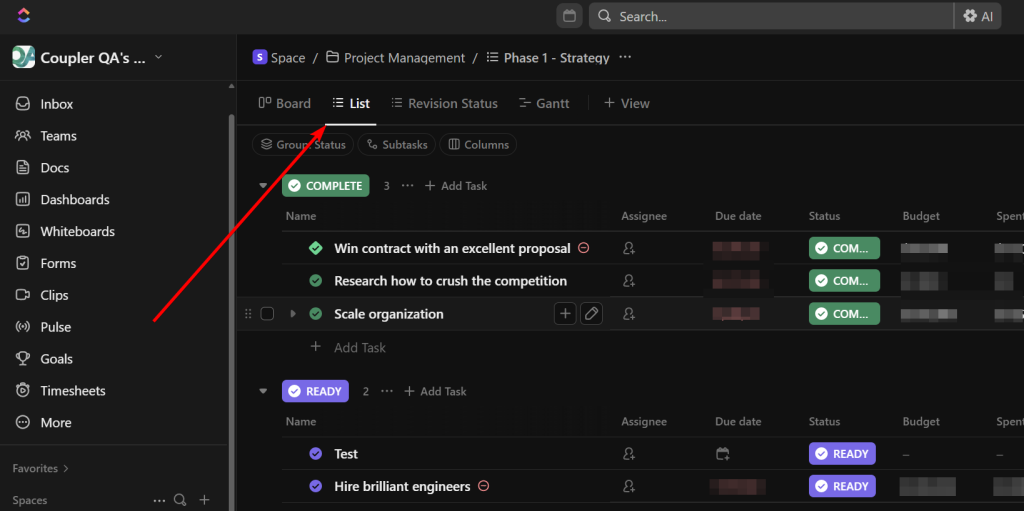
Step 1. Log in to your ClickUp account and select List View from the top of your dashboard.
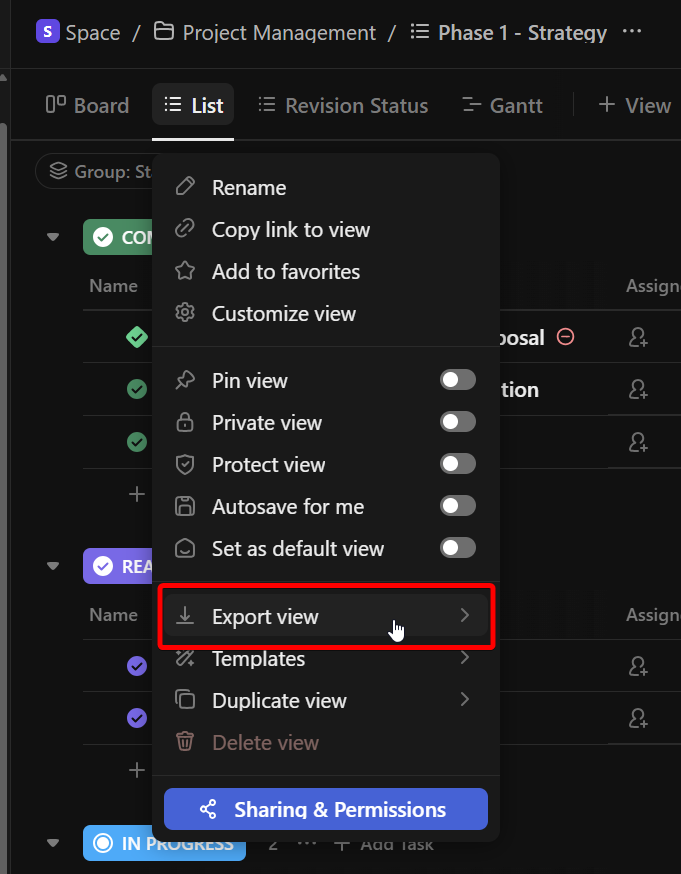
Step 2. Right-click on the List view and select Export view from the menu.
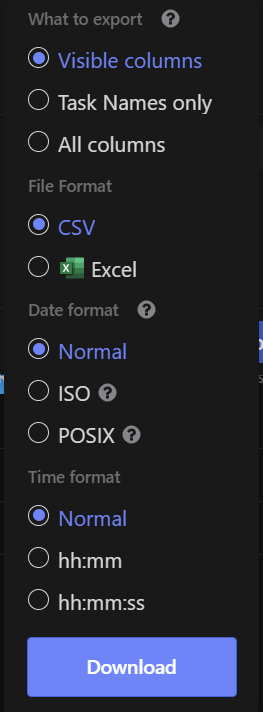
Step 3. From the dropdown menu configure your export and choose what you want to include in the data transferred. You can choose what to export (Visible columns, Task Names only, or All columns), time format, and date format. Also, you can export the data to CSV or Excel. The latter is what you need to export ClickUp to Excel. Click Download.
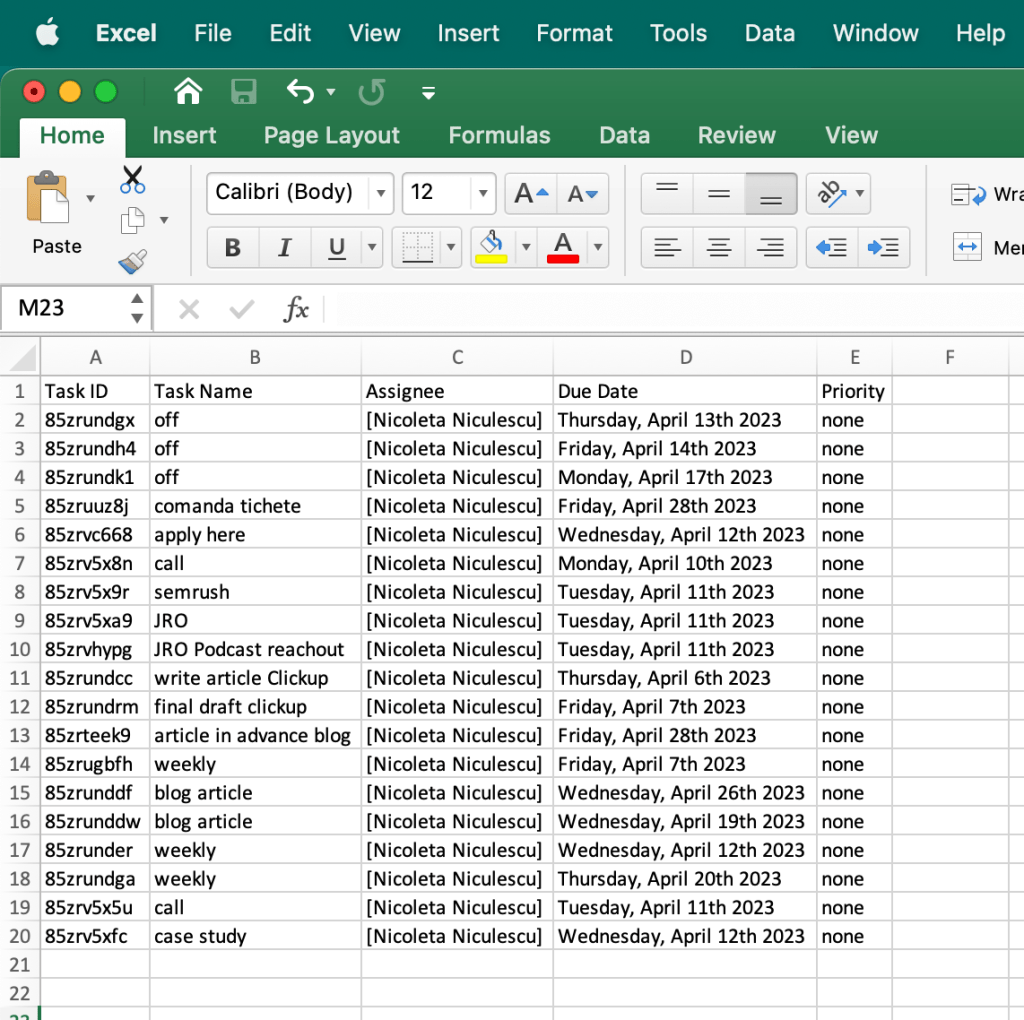
After downloading the Excel file, you can simply open it in Excel. This is what it looks like:
Alternatively, you can also export your data as CSV. You will need to follow all of the steps from above, except the last step. There, instead, click on CSV and then download the file.
To open the CSV file, you will need to import it. To do so, open Excel, go to the File tab, select Import -> CSV file -> Import.

Then, navigate to the location of the CSV file and press Get Data.
In the Text Import Wizard window, select Delimited and choose the delimiter used in the CSV file (e.g., comma, semicolon, tab).
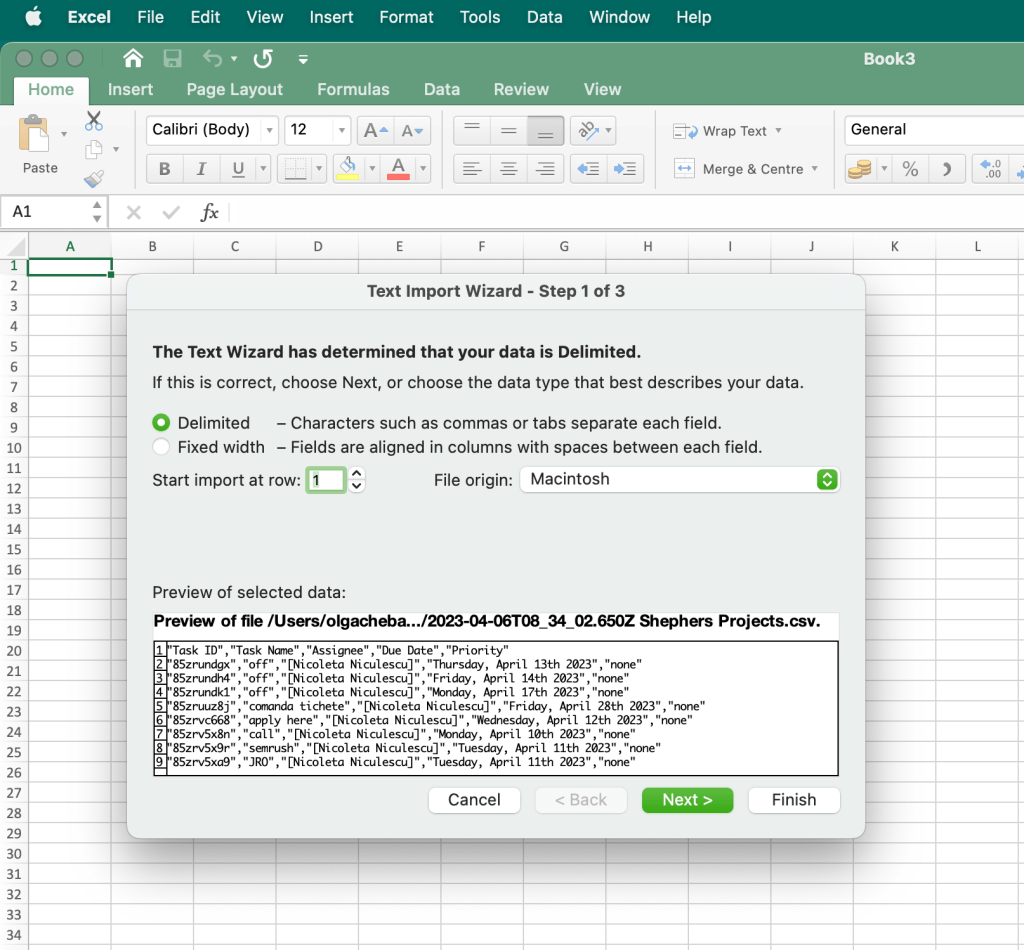
Preview the data to ensure it’s being correctly parsed, and then choose the format for each column (e.g., “General”, “Text”, “Date”).

Finally, choose where to put the imported data in your worksheet and click Import. Here’s what the imported dataset looks like:

Which option is best to export ClickUp data easily
Exporting data from ClickUp doesn’t have to be complicated. The choice between manual export and automated solutions depends on your specific needs, frequency of use, and technical requirements.
When to use manual export (XLSX/CSV)
The manual export method works best for:
- One-time or occasional exports when you need data for a specific analysis or report
- Small teams with simple reporting needs who don’t require frequent data updates
- Budget-conscious users since it’s completely free (though limited to 5 exports per month for free/unlimited users)
- Quick data snapshots when you need current information immediately without setting up automation
However, keep in mind the limitations: you can only export List view and Table view, and you’ll need to manually repeat the process each time you want updated data.
When to choose Coupler.io automation
Coupler.io is the ideal solution when you need:
- Regular, scheduled updates to keep your Excel data current without manual intervention
- Access to comprehensive ClickUp data including users, teams, time tracking, goals, and custom fields beyond just list views
- Data transformation capabilities to filter, sort, aggregate, or combine data before export
- Integration with multiple data sources to create comprehensive reports that blend ClickUp data with information from other business apps
- Scalable reporting for growing teams that need consistent, reliable data flows
The automation approach saves significant time and ensures data accuracy by eliminating manual steps and potential human errors.
When to consider API development
The API route makes sense only if you:
- Have dedicated development resources and coding expertise
- Need highly customized data processing that goes beyond standard export options
- Require real-time data synchronization
- Want to build custom applications or integrations
For most business users, this option involves unnecessary complexity and ongoing maintenance overhead.
Bottom line recommendation
Start with manual export if you’re testing the waters or have infrequent needs. Upgrade to Coupler.io once you find yourself regularly exporting data or when you need more comprehensive reporting capabilities. The time saved through automation quickly justifies the investment, especially for teams that rely on ClickUp data for regular decision-making and performance tracking.
The key is matching your export method to your actual usage patterns and business requirements rather than overcomplicating the process from the start.
Automate ClickUp data export with Coupler.io
Get started for free