Facebook has become more than just connecting with close ones, uploading pictures of homemade dishes, and sharing details from amazing trips. Small and large businesses use Facebook for brand awareness and to promote their products or services. As a result, the platform becomes a trove of information valuable for marketers and analytics professionals. How do you extract this data from Facebook? Let’s find it out.
How to export Facebook data: your options
Whether you are exporting your personal Facebook data or your business data, there are several ways to do it:
Extract data manually from the Facebook platform. You can download personal data from your Facebook account. Meta Business Suite and Ads Manager allow you to pull business data from your account. Manual data export works well if you are not going to repeat this often.
Automate data export using Coupler.io. Data export automation is especially convenient for reporting purposes, analytics or to create a self-updating backup copy of your Facebook data. Coupler.io is a data integration platform with AI analytics capabilities. It lets you extract Facebook Ads data and business page data. You only need to specify all the settings once, and then your data will be exported regularly on a schedule, with no manual effort.
Use Facebook’s API to export data programmatically. It’s a great method that allows for significant customization and gives you a lot of freedom. However, this requires coding skills. We are not covering this method in this tutorial as it’s already described in detail in Facebook API documentation. Strictly speaking, the previous option, Coupler.io, is also based on using API, but in that case, coding is already done by the app’s developers.
How to automate exports of Facebook business data with Coupler.io
You can use Coupler.io to extract Facebook Ads data, as well as Facebook Page Insights and Facebook Public Data. It supports the following destination apps for your data:
- BI tools: Looker Studio, Power BI, Tableau, and Qlik
- Spreadsheet apps: Google Sheets, Microsoft Excel
- Data warehouses: Google BigQuery, Amazon Redshift, PostgreSQL.
- AI tools: Claude, ChatGPT, Perplexity
Additionally, you can export data as an online published JSON file and load information to Monday.com.
If you prefer to work with spreadsheets, see how to import Facebook Ads to Google Sheets or explore other Google Sheets integrations. Coupler.io supports numerous marketing data sources, such as GA4, Google Ads, Mailchimp, Bing Ads, and more.
Let’s explore the setup flow for each Facebook business data type.
Export Facebook Ads data
In the form below, select the desired destination app and click Proceed. You’ll be offered to create a Coupler.io account for free.
Step 1. Collect data
Connect the ad account from where you’d like to load data. Then, select the report type, which is the particular category of data you’ll export. The Reports and insights provide you with information about the performance of your campaigns. It also requires you to specify the start/end date and metrics/dimensions to include in your report.
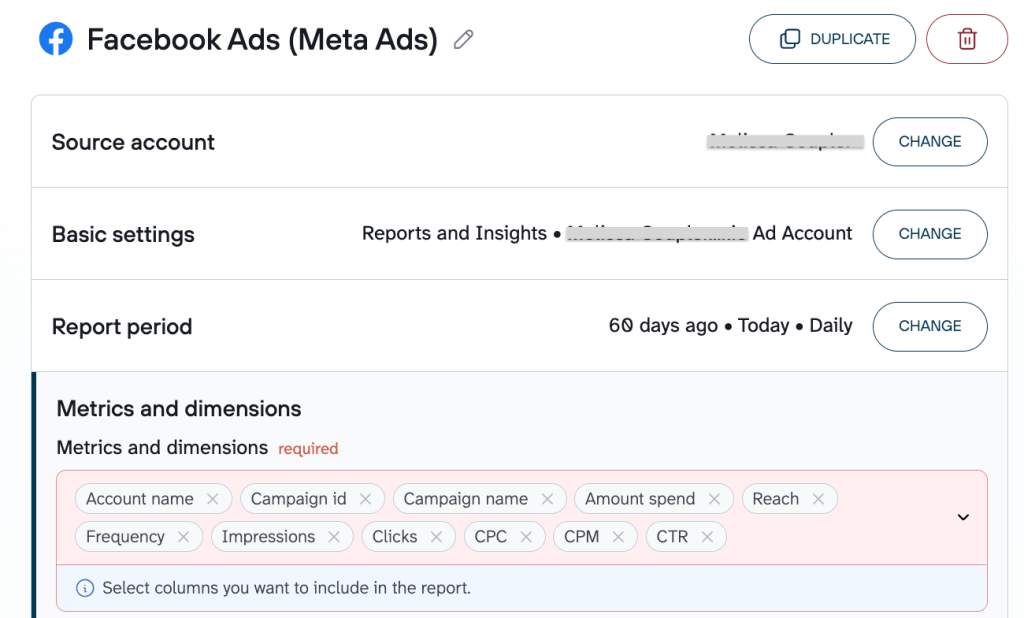
Alternatively, you can export a list of ad sets, campaigns, and ads.
Step 2. Transform data
The next step is to organize your data before exporting to your destination. Coupler.io allows you to:
- Manage columns (rename, rearrange, and hide unnecessary ones).
- Sort and filter data
- Add custom columns
- Blend data if you’ve connected multiple ad accounts or other sources

Alternatively, you can use pre-built data set templates that already include the necessary transformations for a specific use case.
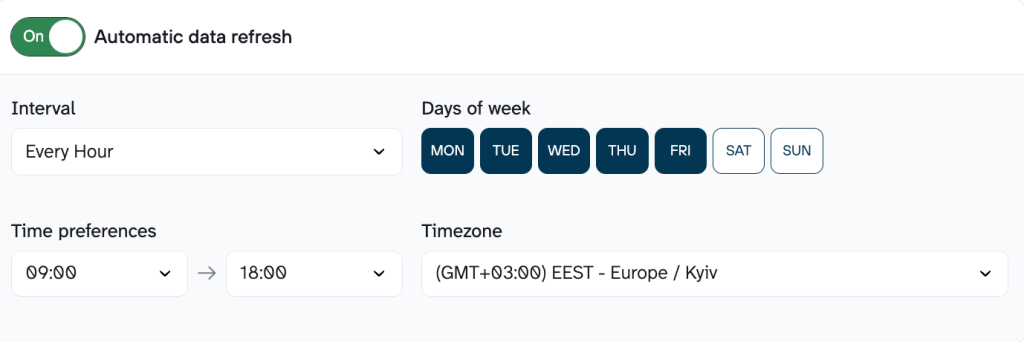
Step 3. Load data and schedule data refresh
Once your data is organized, follow the in-app instructions to load it to your selected destination app. After that, toggle on the Automatic data refresh and configure the desired schedule.
Step 4. Analyze data with AI Agent
Once your Facebook data is flowing into Coupler.io, you can chat with it directly using the built-in AI Agent.
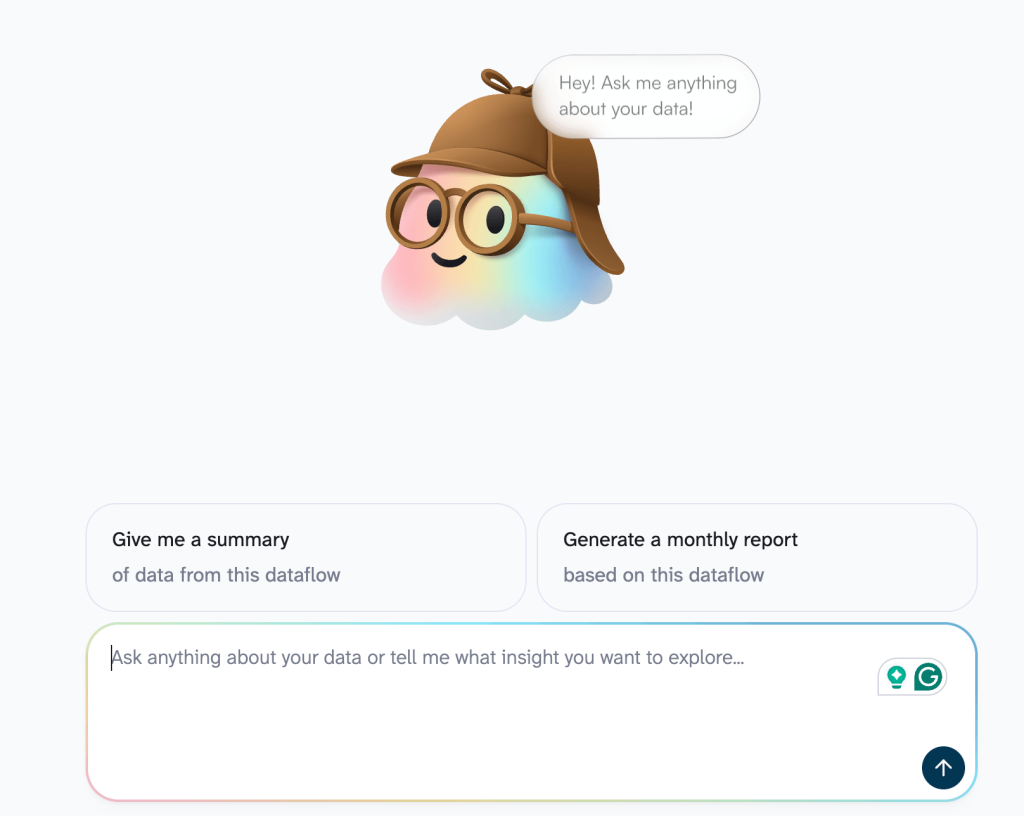
Ask questions in plain language (e.g., “Which campaigns deliver the lowest CPC and highest CTR simultaneously?”) and get instant, verified answers. Coupler.io’s Analytical Engine queries your data, runs the calculations, and returns only confirmed numbers.
Export page insights from Facebook
In the form below, select the desired destination app and click Proceed. You’ll be offered to create a Coupler.io account for free.
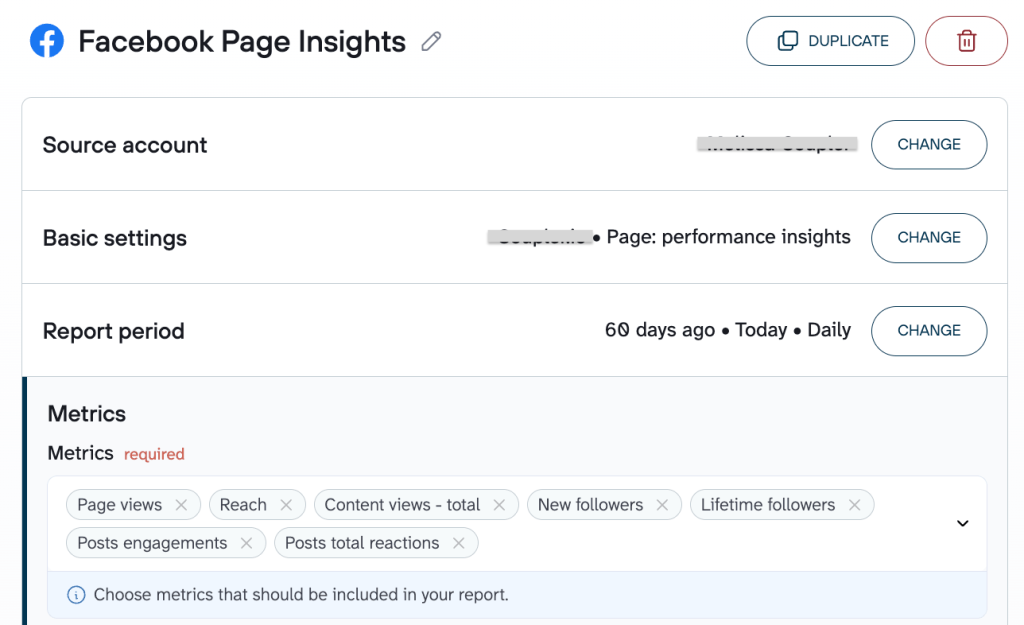
Connect your Facebook account, then select the pages from where you want to export data and the report type. The latter includes a few options for pages and posts, for example, Page: performance insights.
You’ll also need to specify the start/end date, the period to split data, and metrics/dimensions to include in your report.
The next steps are the same as for the Facebook Ads data export. You need to organize your data and load it to the destination app. For example, here is what it looks like to connect Facebook Page Insights to Data Studio.
Export public data from Facebook
In the form below, select the desired destination app and click Proceed. You’ll be offered to create a Coupler.io account for free.
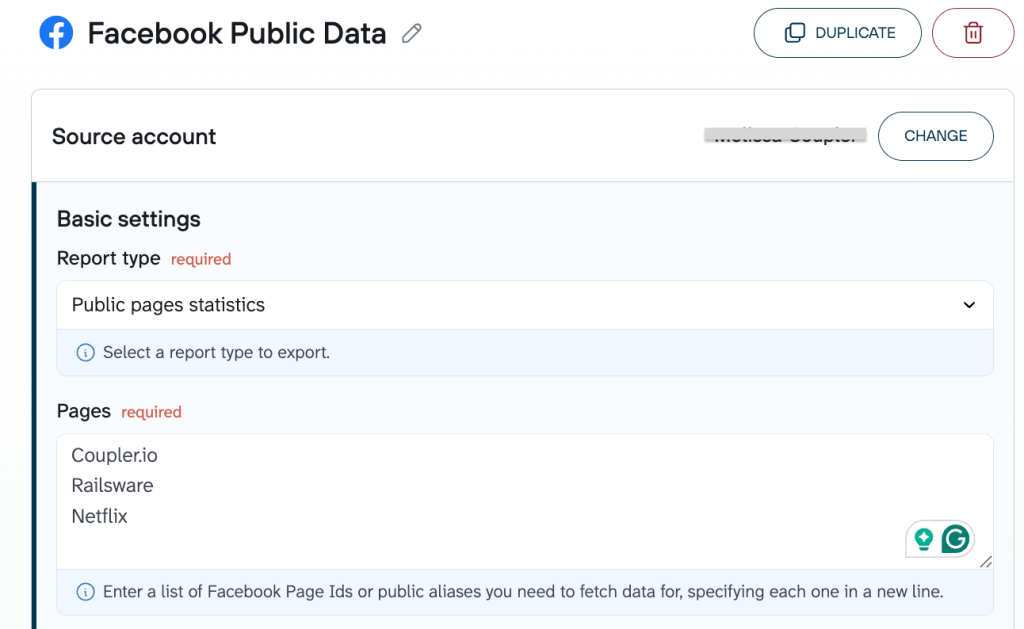
Connect your Facebook account, then select the report type and enter a list of Facebook Page IDs.
The next steps are the same as for the Facebook Ads data export. You need to organize your data and load it to the destination app.
Use AI to analyze your Facebook Ads and Page Insights data
Once your Facebook data flows through Coupler.io, you can connect it to ChatGPT, Claude, Gemini, or any other AI tool via Coupler.io AI Integrations and get answers instantly.
Only share approved business datasets with AI tools. Don’t upload personal Facebook archives or anything with user-level data unless you’ve reviewed what fields are in there, removed what’s unnecessary, and checked how your AI tool handles the data it receives.
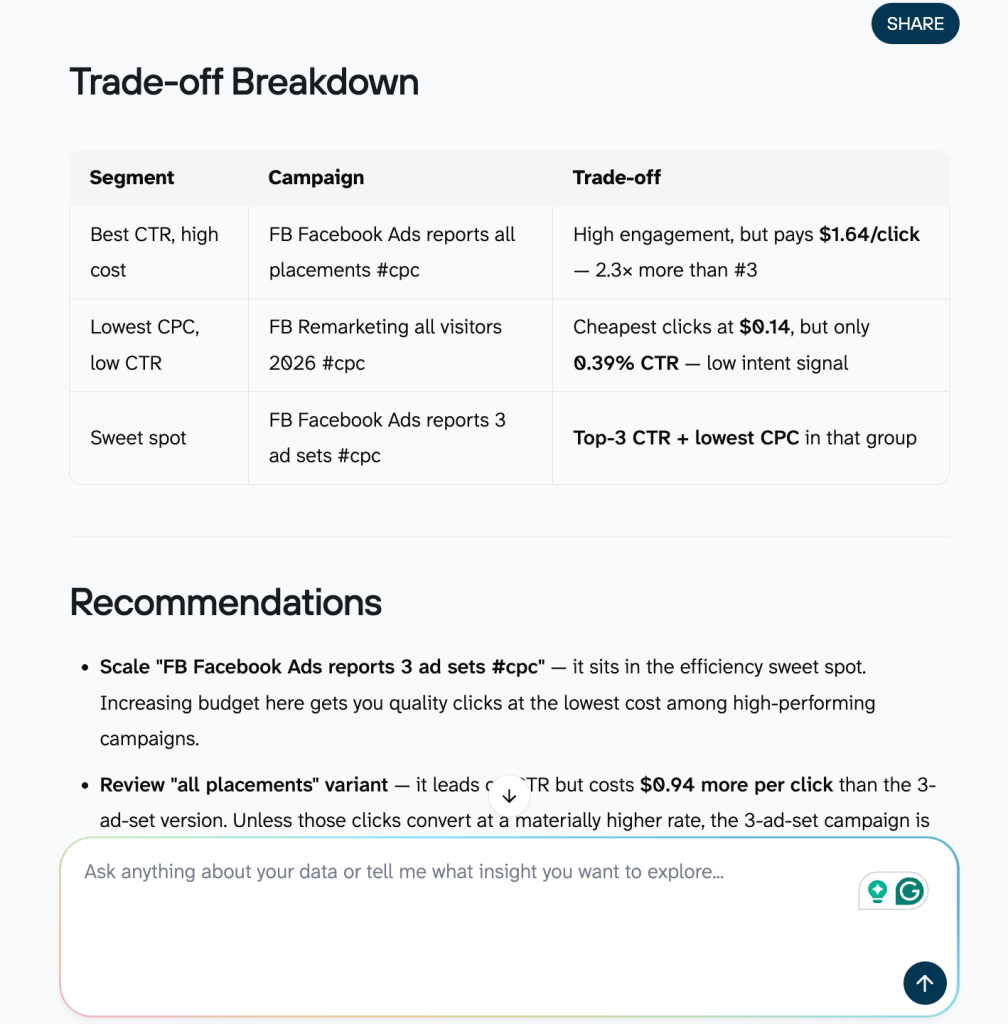
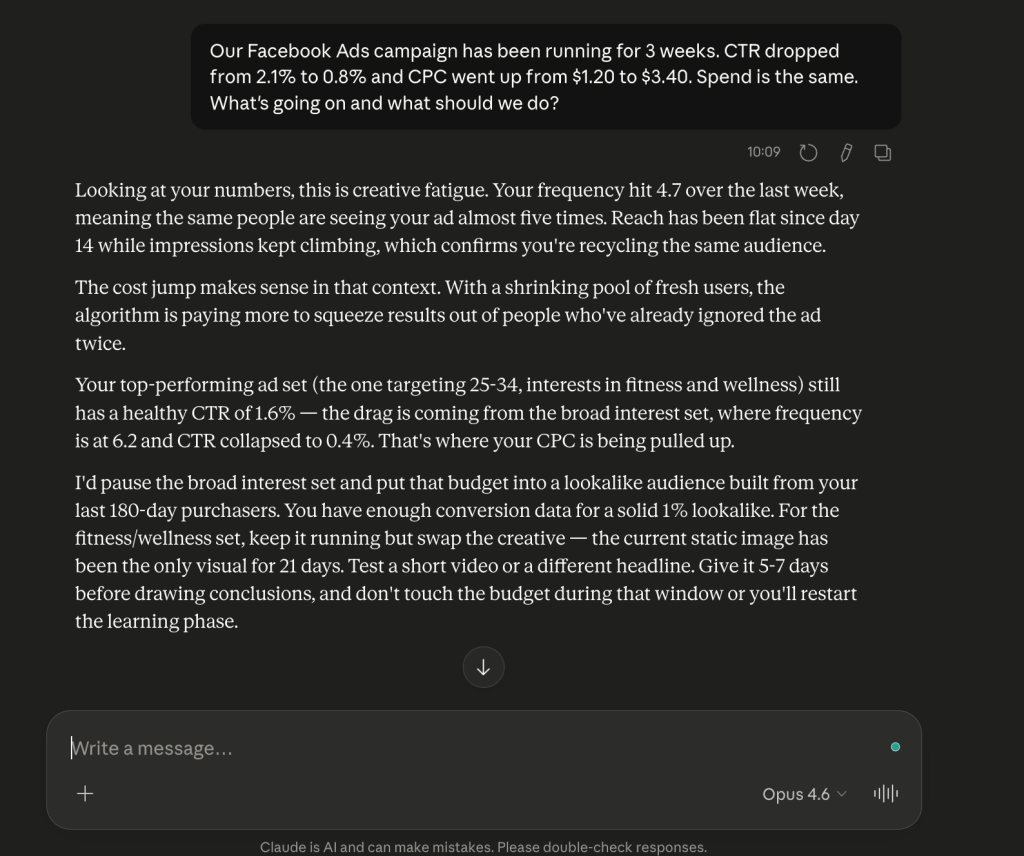
For Facebook Ads, AI can show you where spend is going relative to results, which campaigns are losing steam, and why certain creatives stop working. It also catches things that are easy to miss, like a placement quietly draining budget while a cheaper one gets better results. For example, you can find out:
- which campaigns to cut or pause before they burn more budget
- why CTR dropped or CPC went up
- what to test next when a creative stops converting
- how performance breaks down across placements, audiences, and time periods
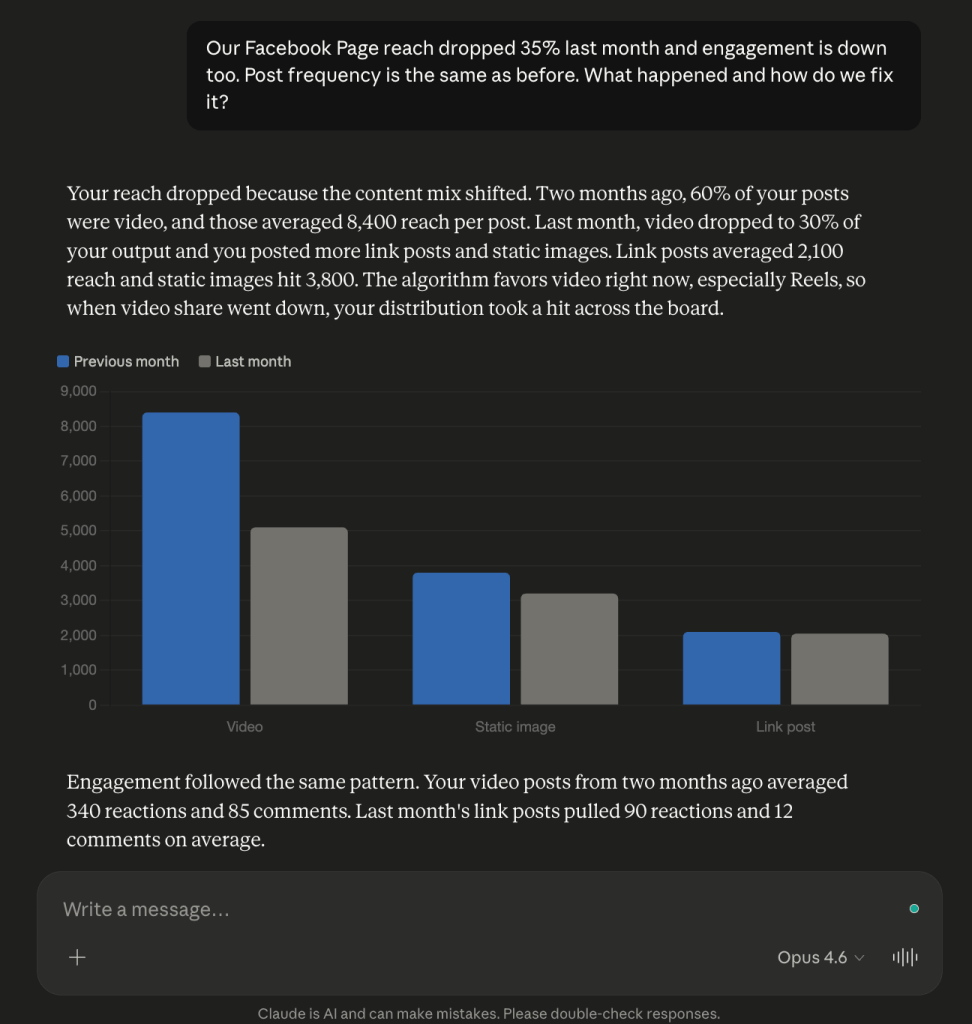
For Facebook Page Insights, AI can tell you which content got traction, how your audience responded over time, and where engagement shifted. You get a clear read on :
- which formats, topics, or posting times drive the most reach
- how follower growth and engagement changed month over month
- what caused a drop in organic reach
All of this works with live Facebook data from your Coupler.io pipelines, so the analysis from the AI tool you select is always based on your latest numbers.

Turn Facebook data into AI-powered analysis
Try AI IntegrationsFree dashboard templates to turn your Facebook data into insights
Coupler.io not only allows you to automate exports of business data from Facebook but also make the most out of your data. It provides a library of report/dashboard templates to boost reporting. They are equipped with a built-in connector to automate data load from Facebook to your dashboard. Take a look at some examples of Facebook dashboard templates below.
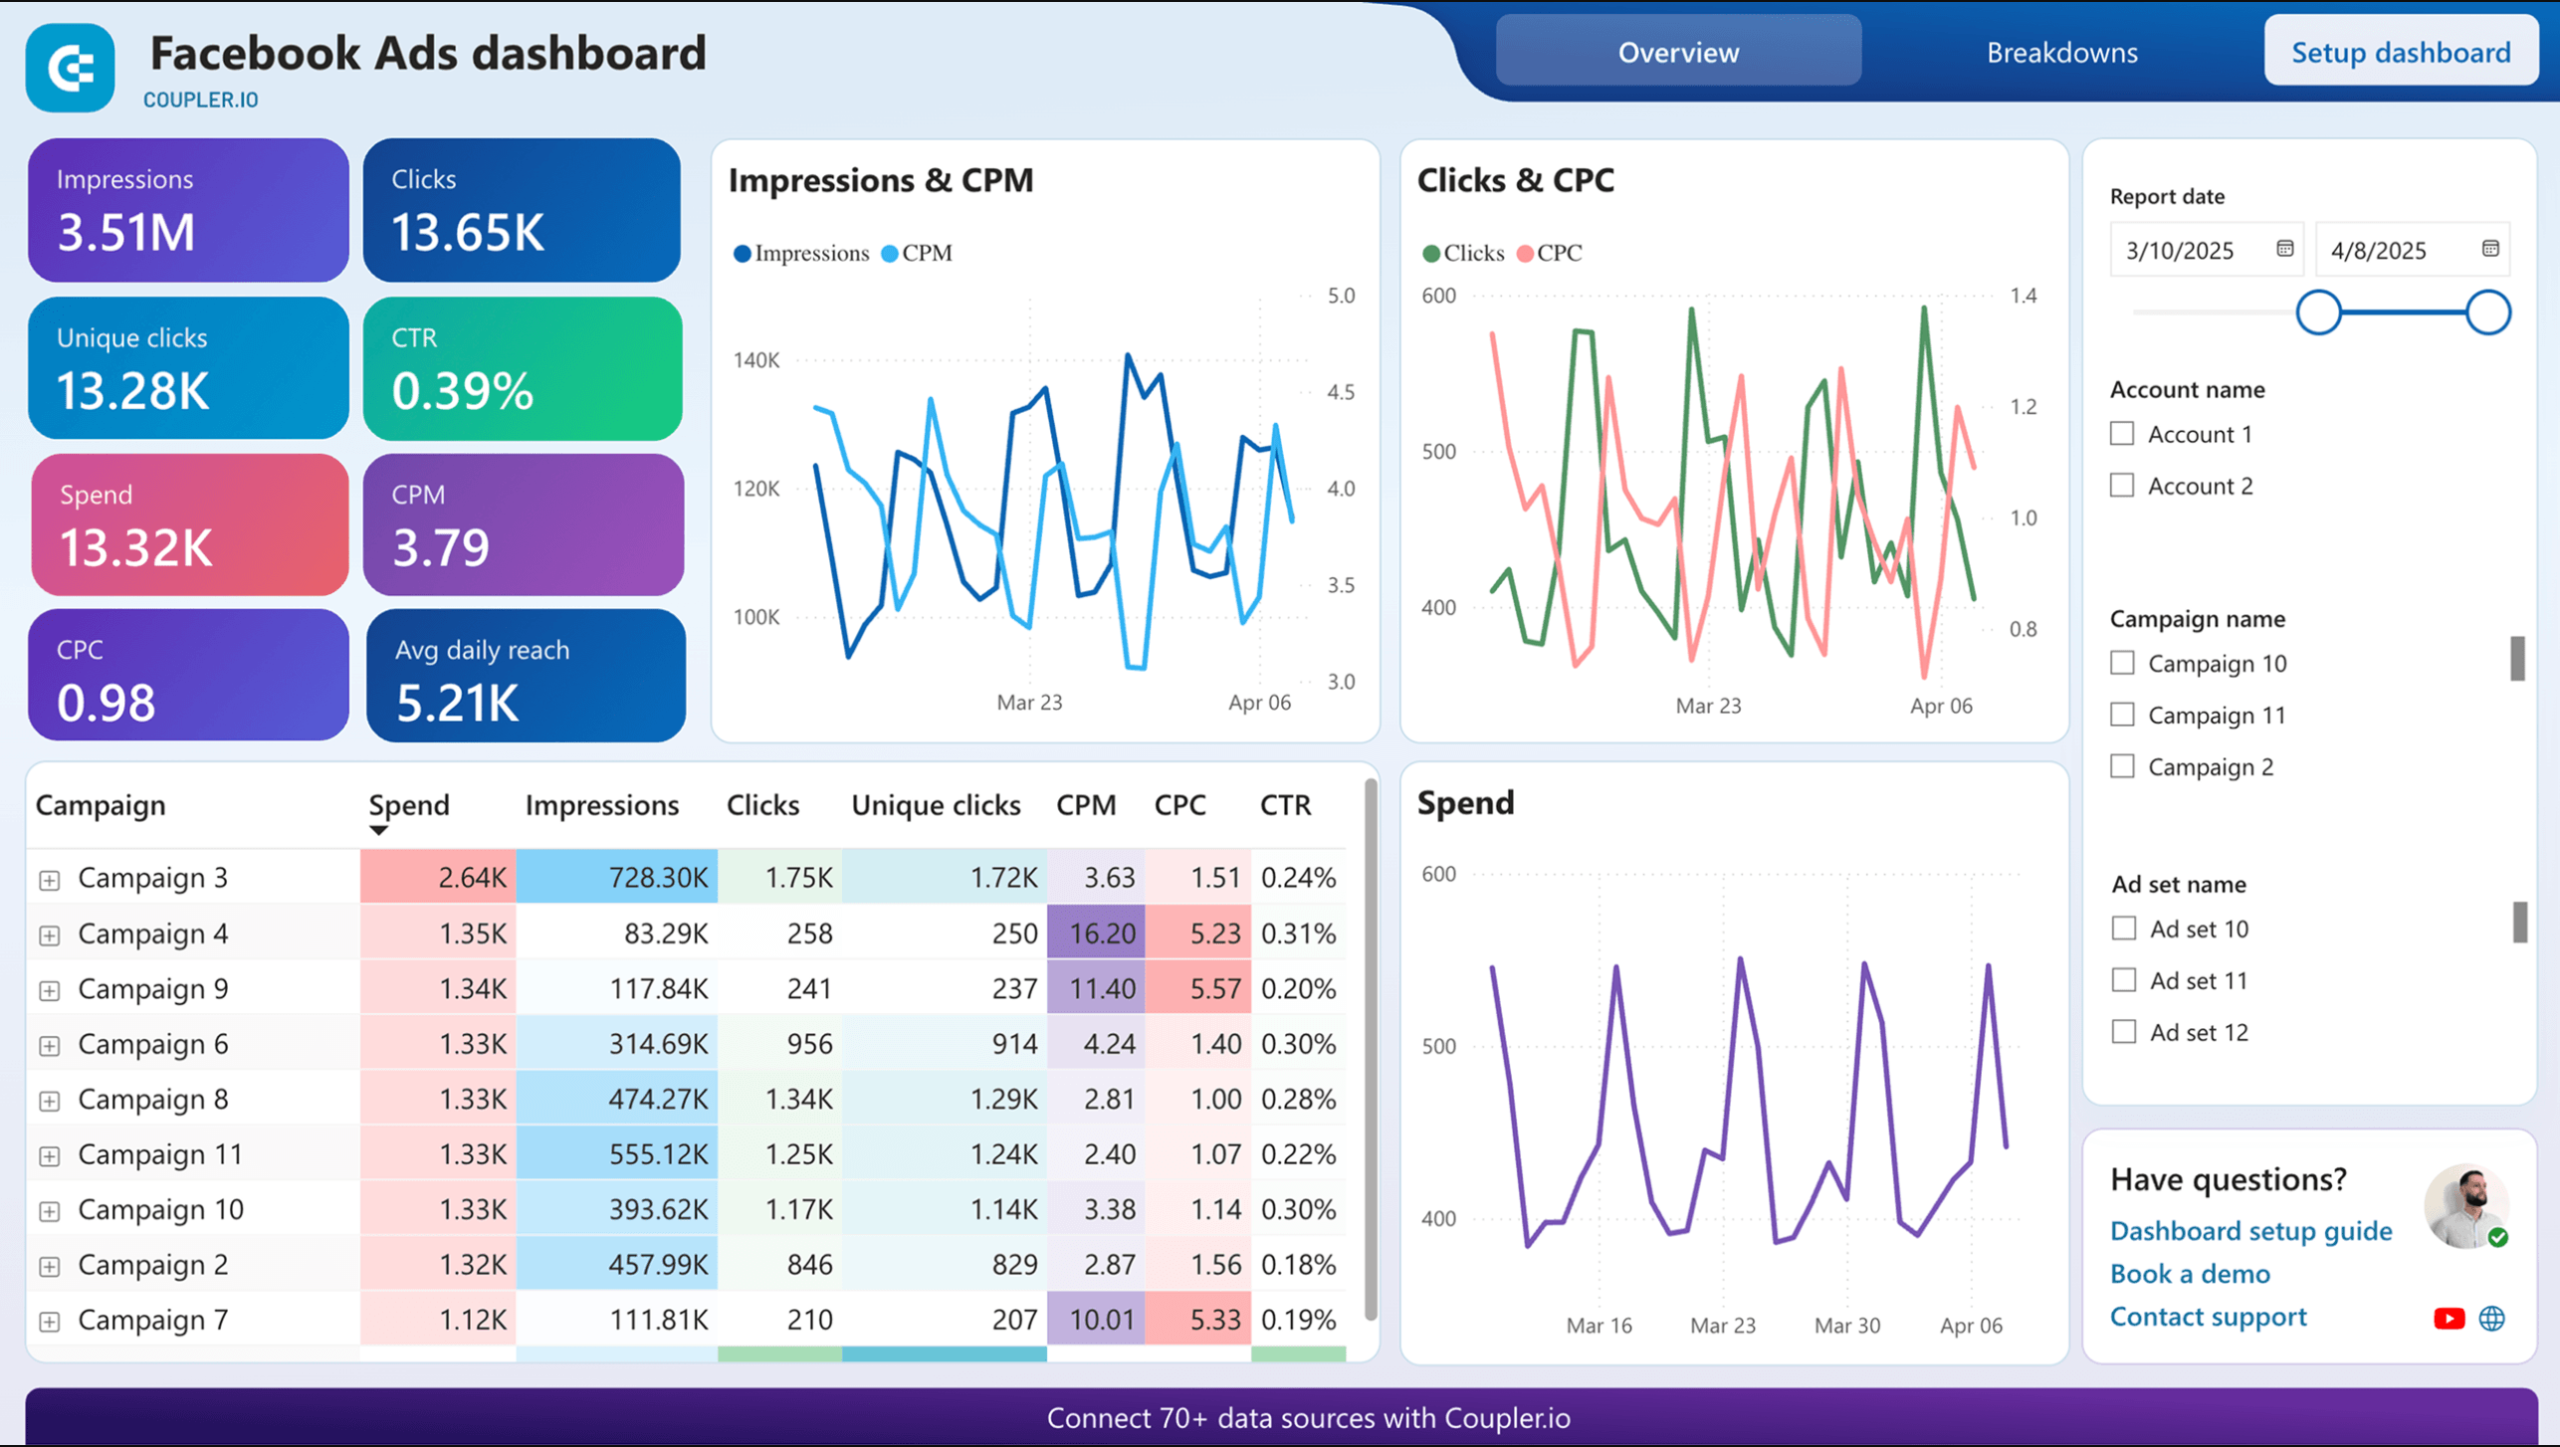
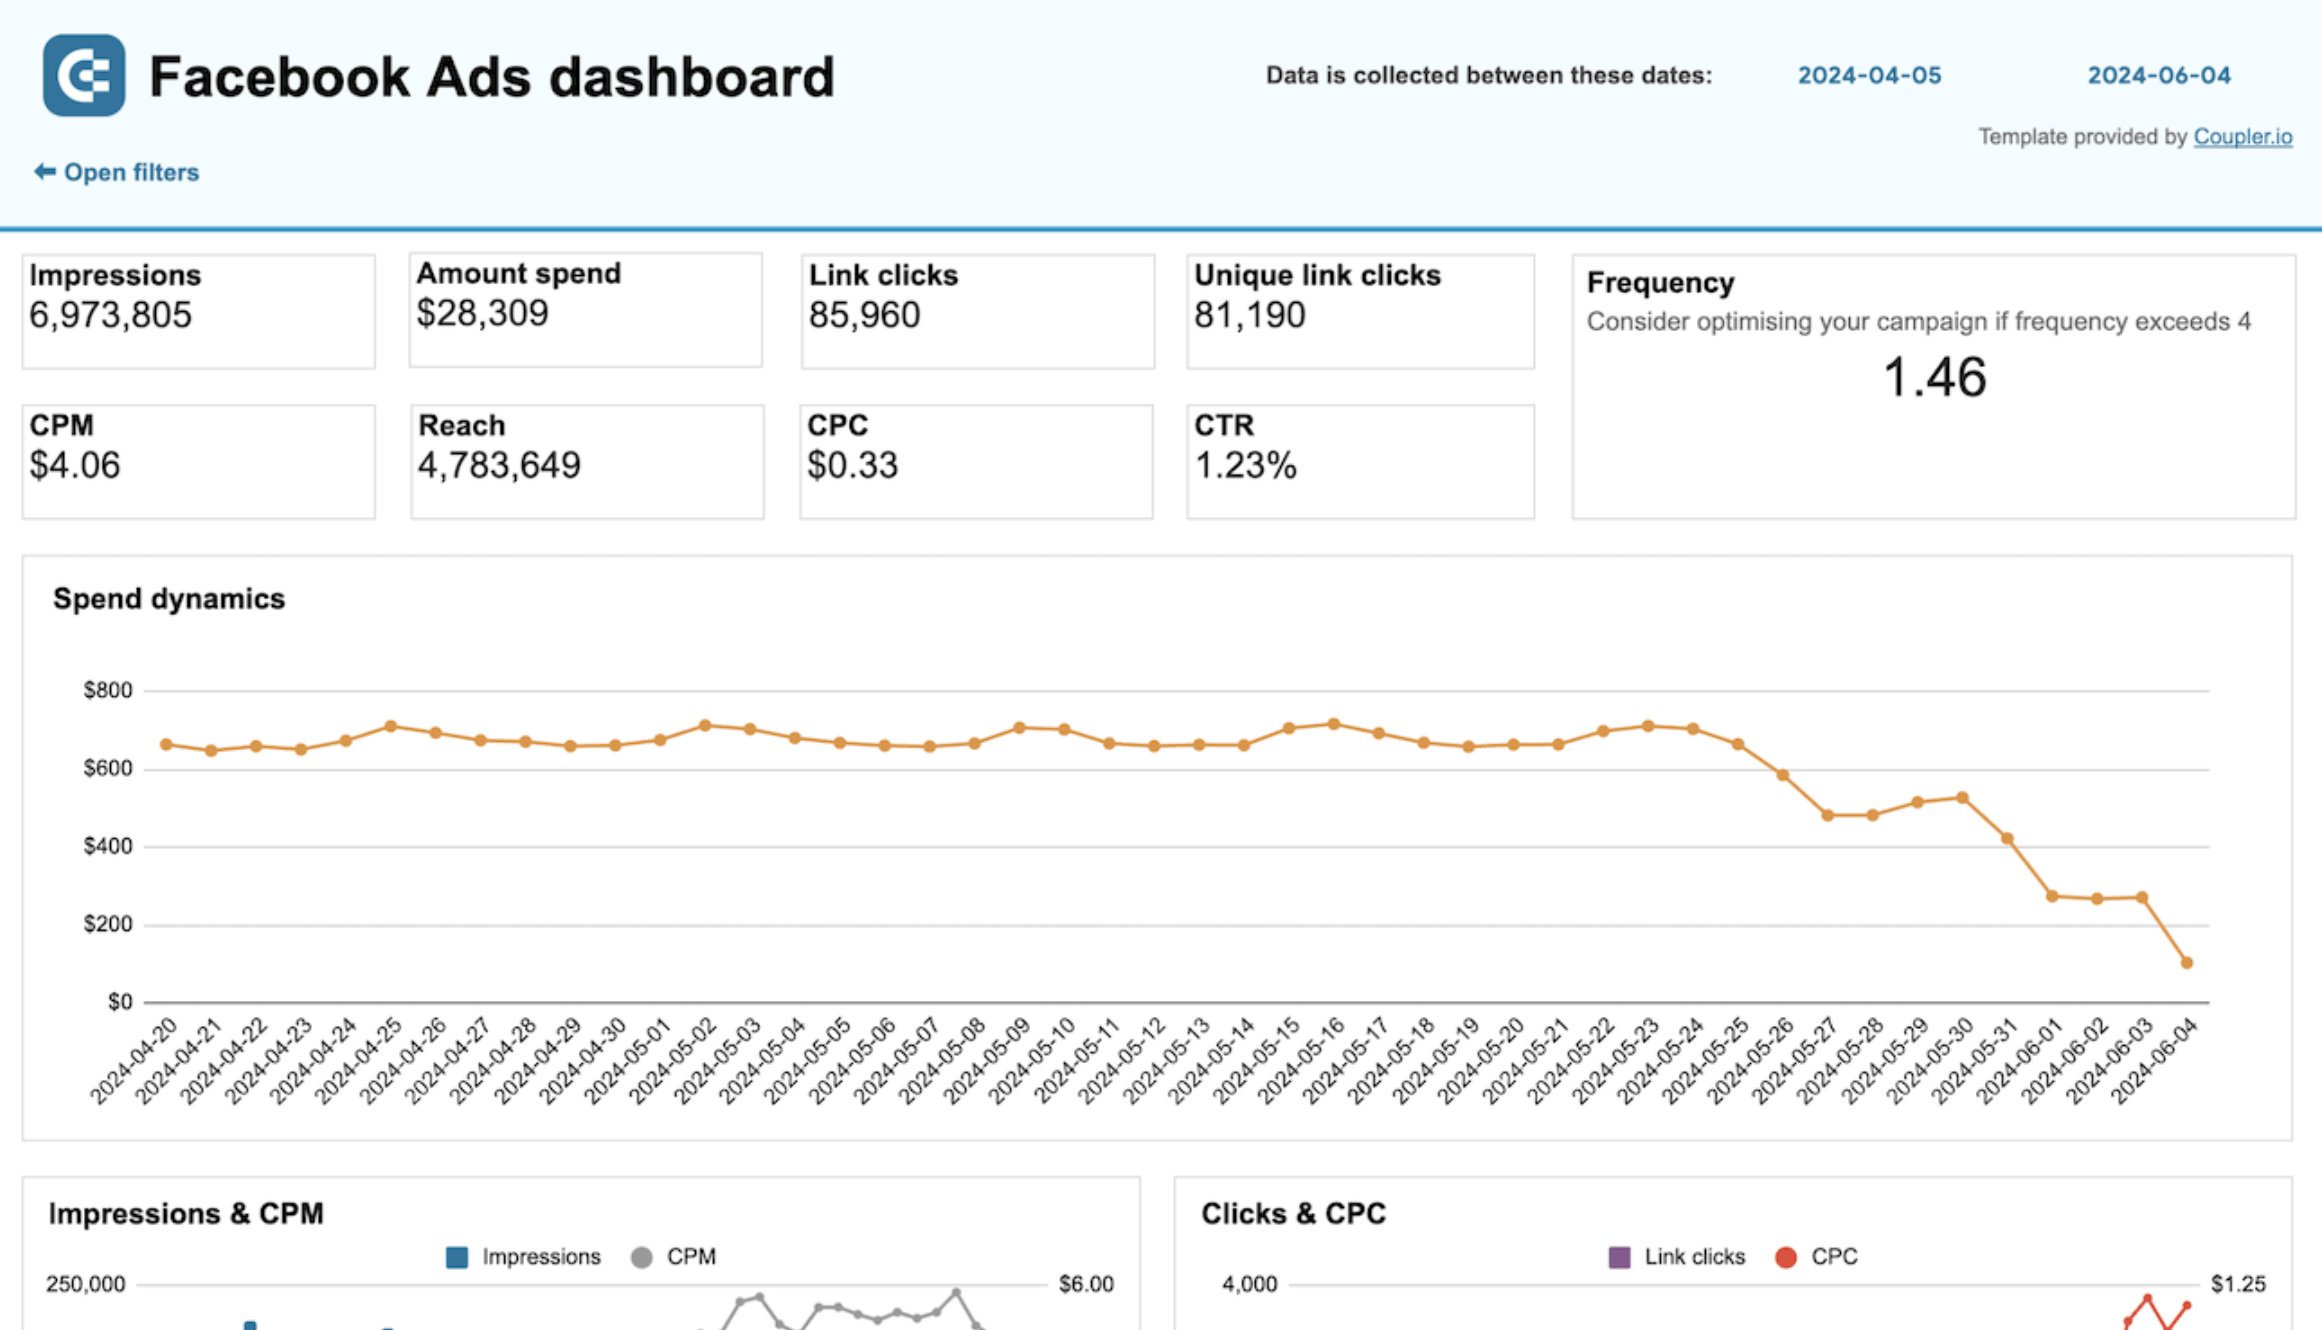
1. Facebook Ads dashboard
The Facebook Ads dashboard template offers an overview of your ad campaigns’ performance to power your decision-making with data.
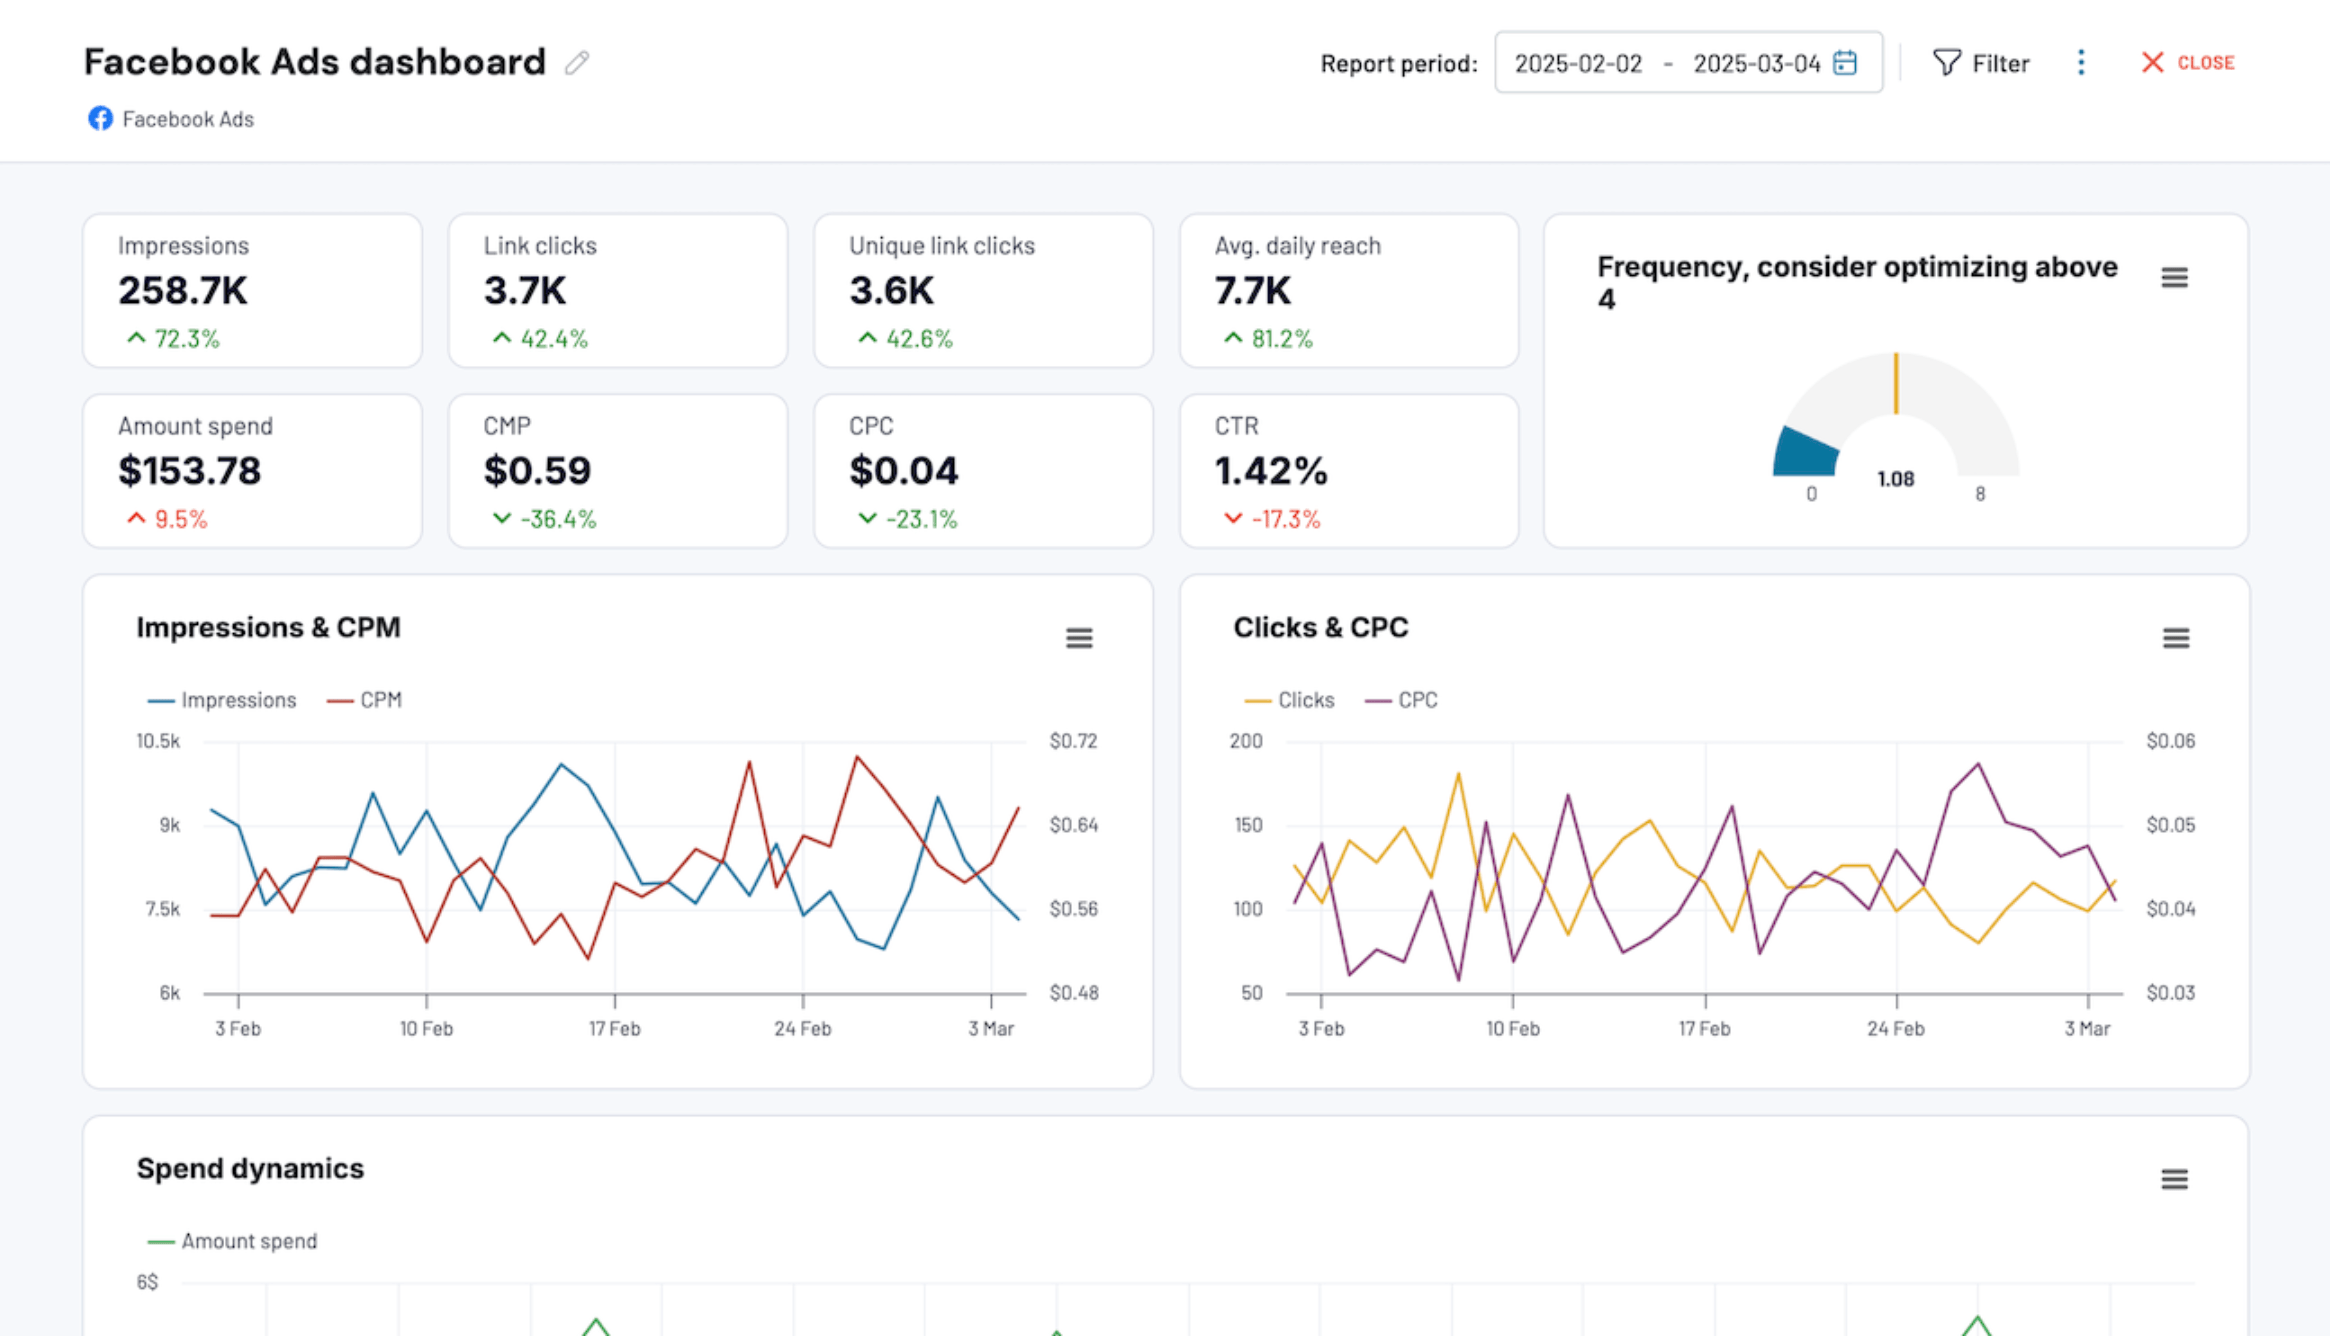
You can monitor and analyze the dynamics of spend, cost per click, and other key performance indicators. The dashboard also automatically tracks the frequency of Facebook ads across your entire account. The frequency meter is valuable when your ads are managed by an agency or freelancer, serving as a reliable quality checker for the overall ad setup. You can also use AI Insights to ask questions about your dashboard and get instant answers. The template is designed in Coupler.io and is available as a template in Looker Studio, Power BI, and Google Sheets.


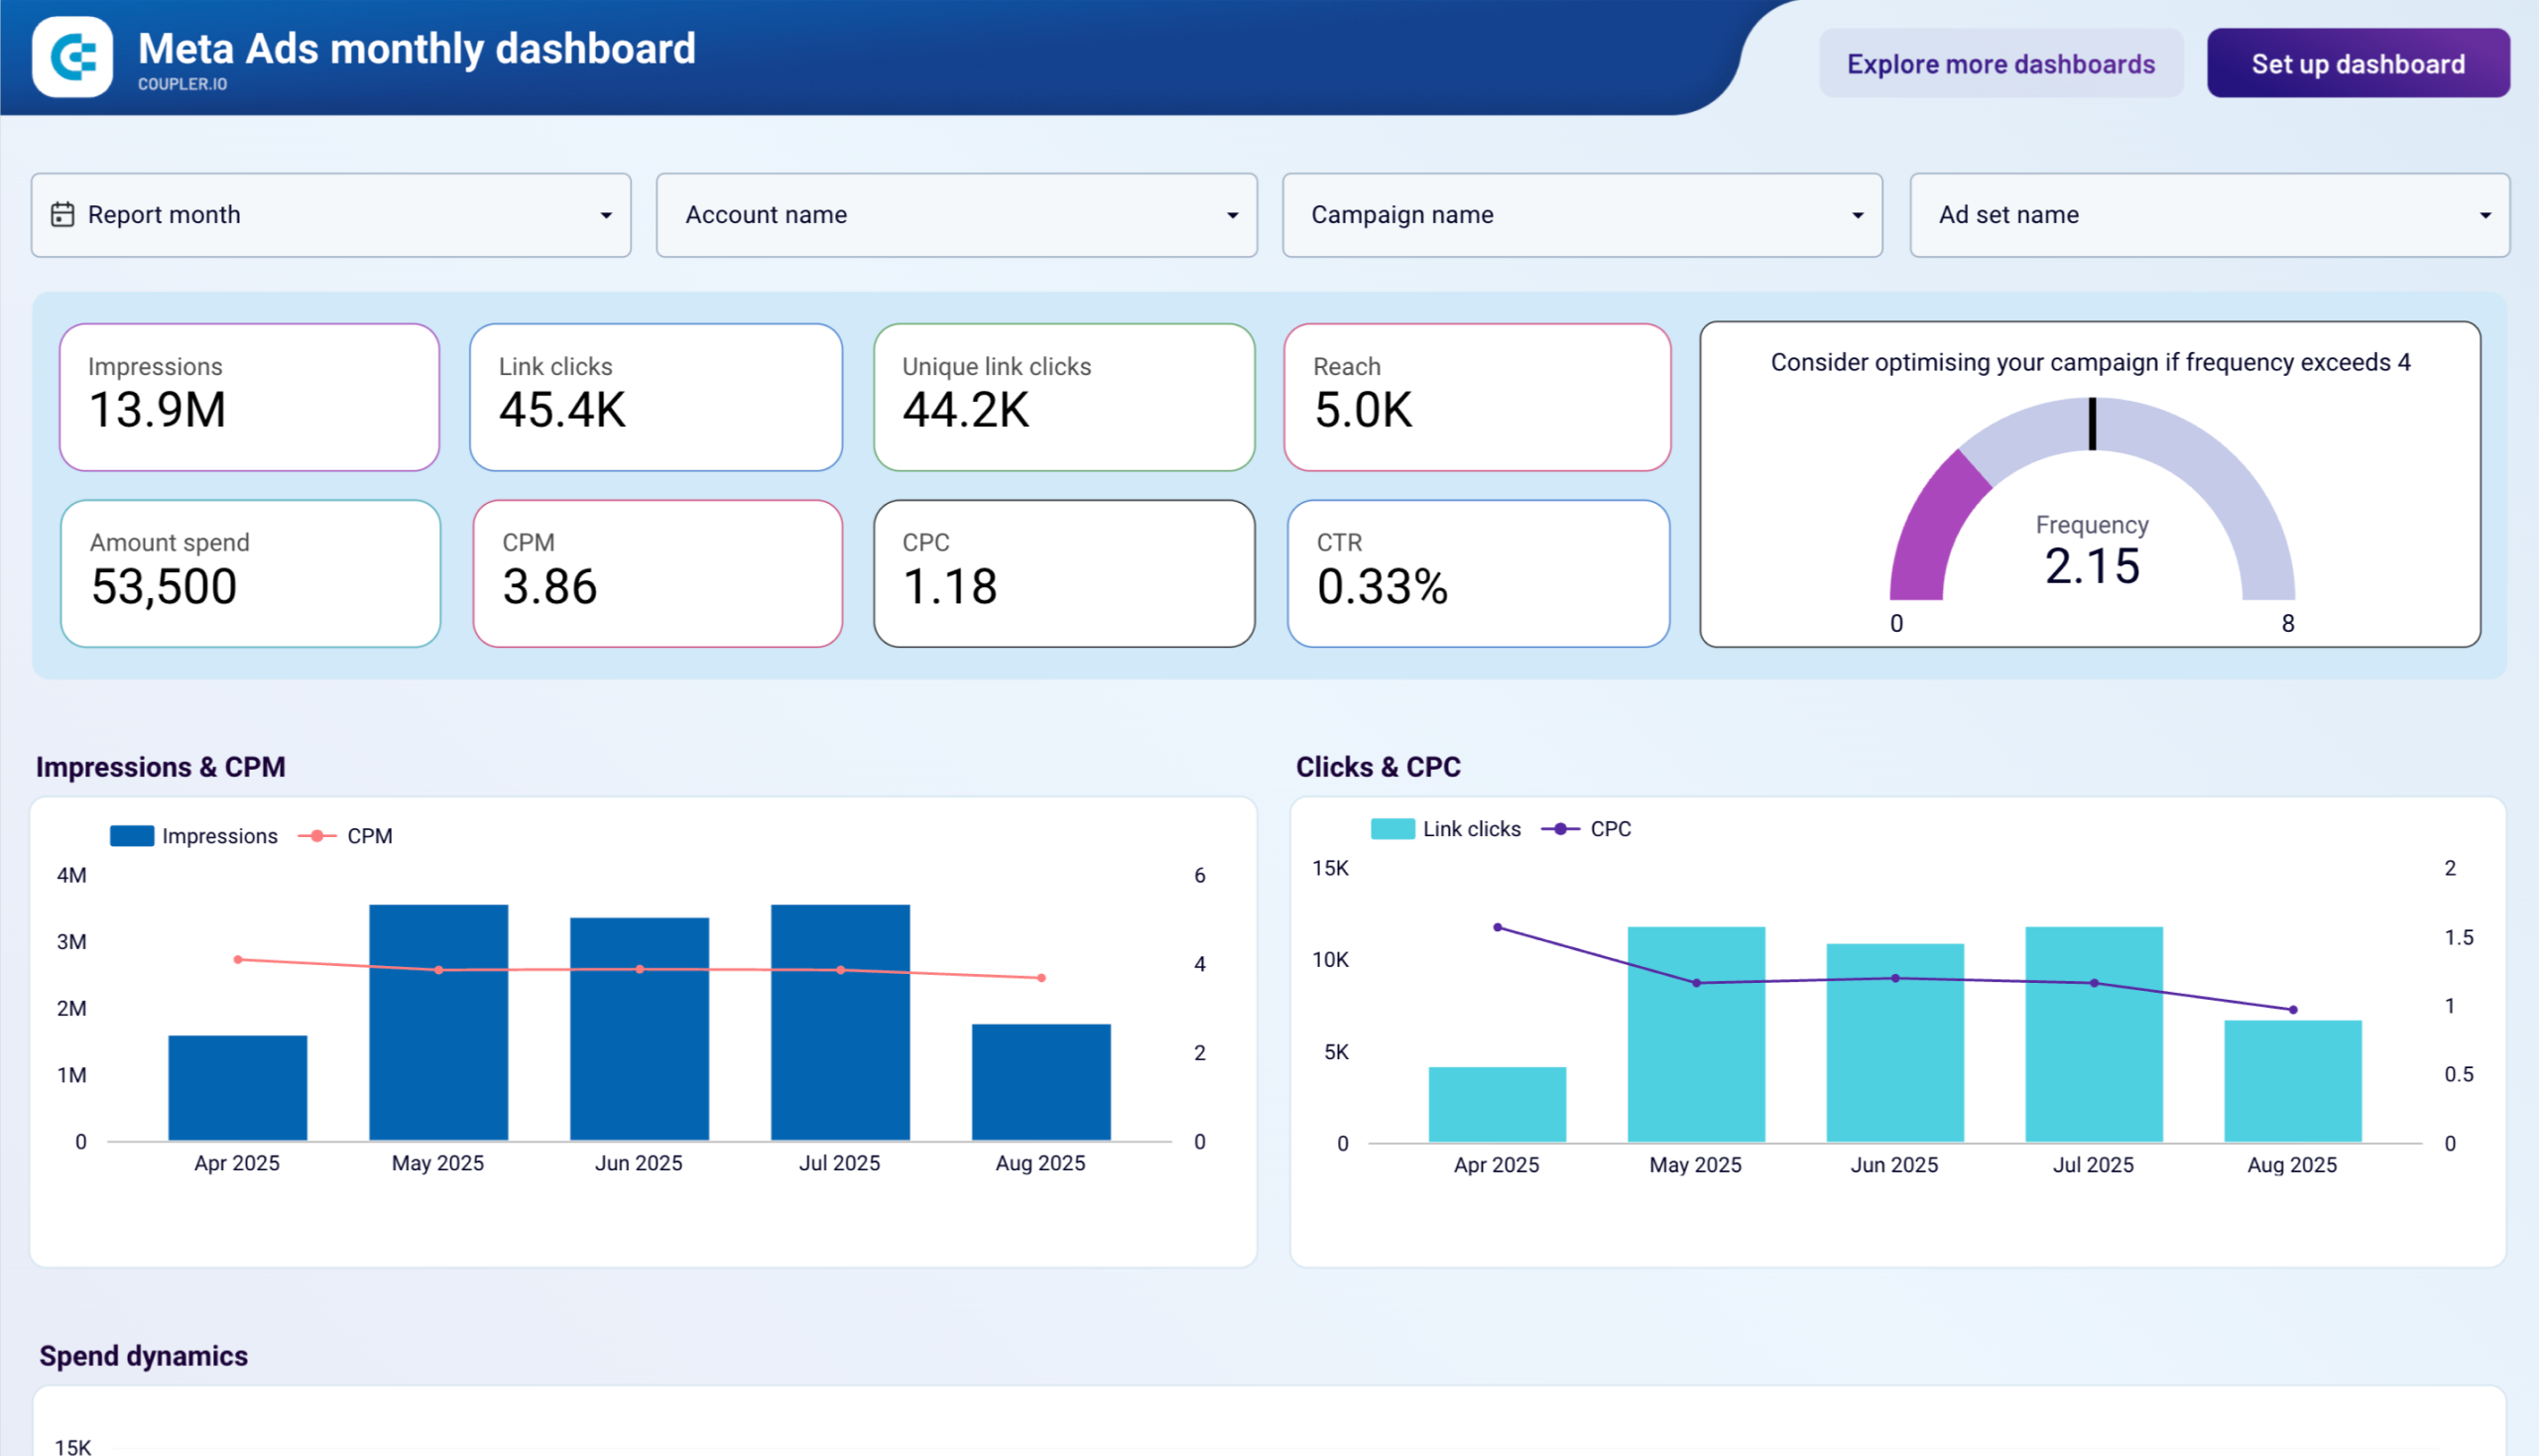
2. Meta Ads monthly performance dashboard
The Meta Ads monthly performance dashboard helps businesses track their Facebook and Instagram advertising performance with a focus on monthly trends and strategic insights. It provides comprehensive demographic analysis, device performance tracking, and geographic market evaluation to optimize your social media advertising strategy.
Meta Ads monthly performance dashboard
 Preview dashboard
Meta Ads monthly performance dashboard
Preview dashboardYou can analyze monthly performance trends across key metrics, monitor demographic engagement patterns by age groups and gender, and track device performance across iPhone, Android, desktop, and tablet users. The dashboard also includes geographic breakdowns to identify expansion opportunities and ad frequency management tools to maintain optimal exposure levels.
This Data Studio template is equipped with a built-in Coupler.io connector to automate data load from Facebook and Instagram advertising accounts. The monthly perspective makes it ideal for executive reporting, strategic planning, and quarterly campaign optimization. You can specify a custom schedule for updates and refresh the dashboard automatically with fresh monthly data.
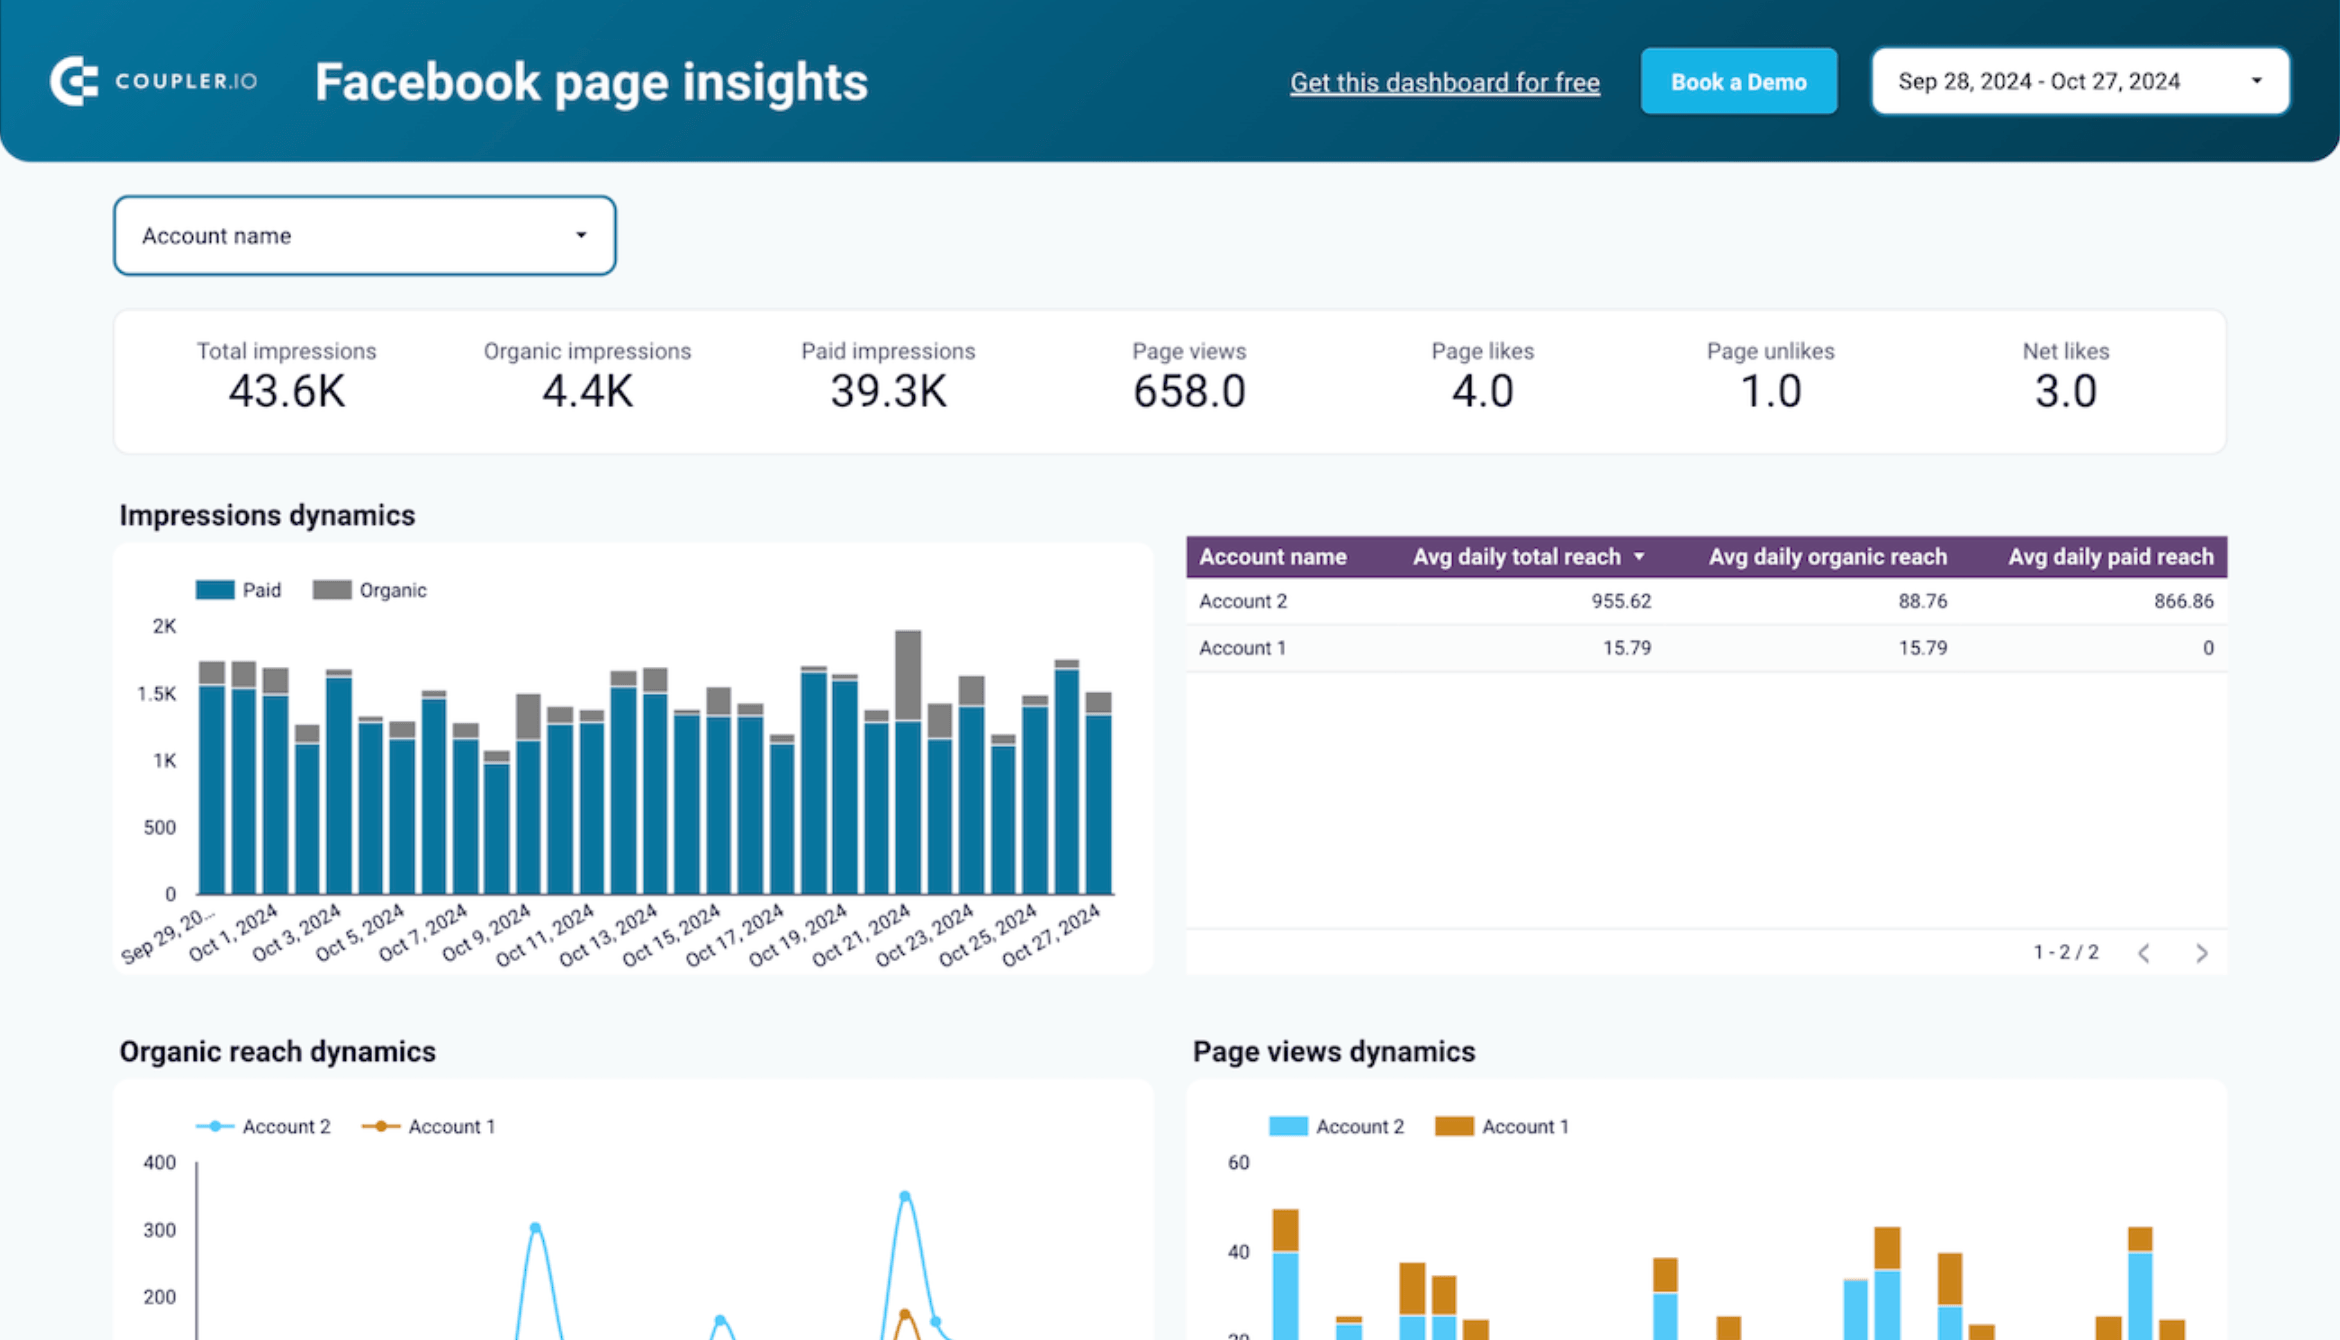
3. Facebook page insights dashboard
The Facebook Page insights dashboard helps businesses track and optimize their Facebook page performance. It provides key metrics like impressions, reach, and page views, offering a clear view of how your content resonates with the audience.
Facebook page insights dashboard
 Preview dashboard
Facebook page insights dashboard
Preview dashboardYou can analyze trends in organic and paid reach, monitor audience engagement, and identify what drives interactions like likes, shares, and comments. With geographic breakdowns and post-performance insights, this Looker Studio dashboard enables you to refine your content strategy and target the right audience effectively.
Other template examples include an All-in-one social media analytics dashboard, a Multi-channel ad creatives performance dashboard, and more.
How to export business data from Facebook manually
Business data includes different types such as page insights, audience information, ad campaign results, etc. Basically, you can get this data using Meta Business Suite and Ads Manager. Let’s explore each option.
How to export Facebook business page insights data
Pages are a critical part of your business or your interests. Through Facebook Pages, you can create a community for your business or interest, and have a place to interact with your audience, promote your work, and/or share new findings.
Facebook Insights contains important information for your Business page. To download this information, you can follow the steps below:
Go to Meta Business Suite and click Insights in the left menu.
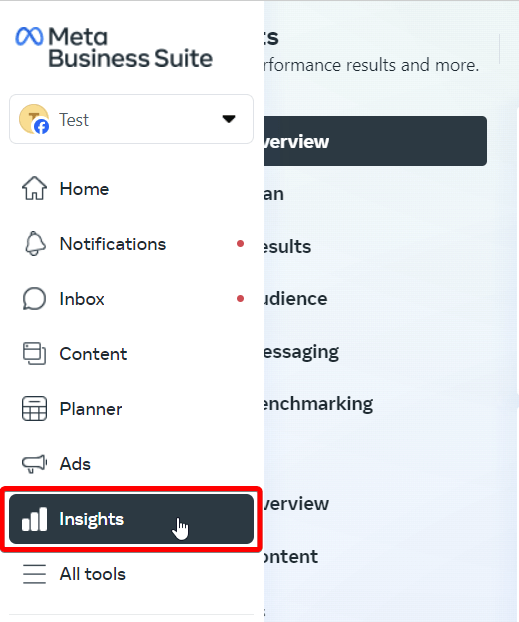
You’ll see different sections such as Overview, Plan, Results, Audience, etc. The overview is not exportable as it was previously. But you can get information about the results of your page in the respective section.
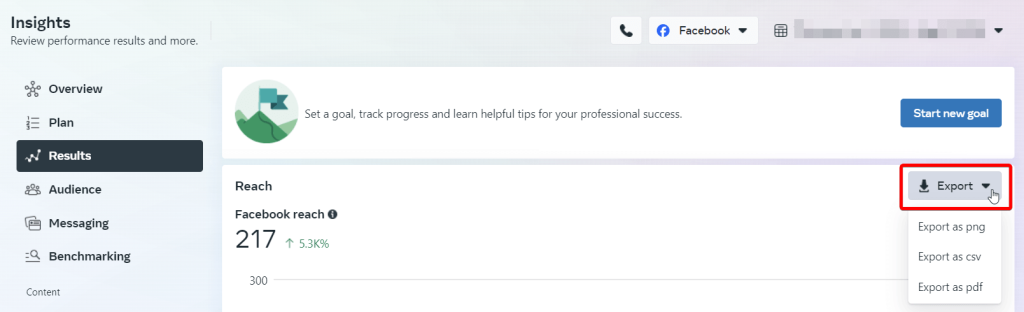
Export business page results
Select Results and then click Export to download information about Facebook reach, visits, follows, and ad trends. For each of these insights, you’ll need to export data separately. The available file formats are PNG, CSV, and PDF.
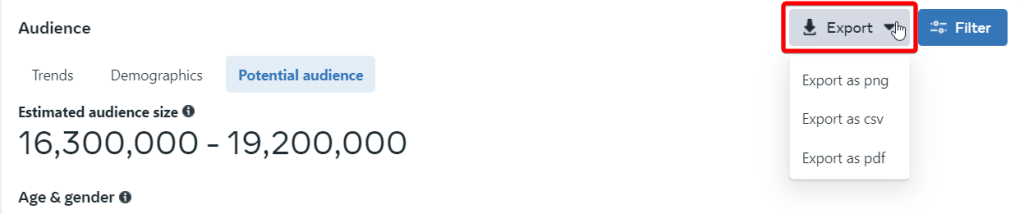
Export business page audience data
If you go to the Audience section of Facebook Insights, you’ll see three tabs: Trends, Demographics, and Potential audience.
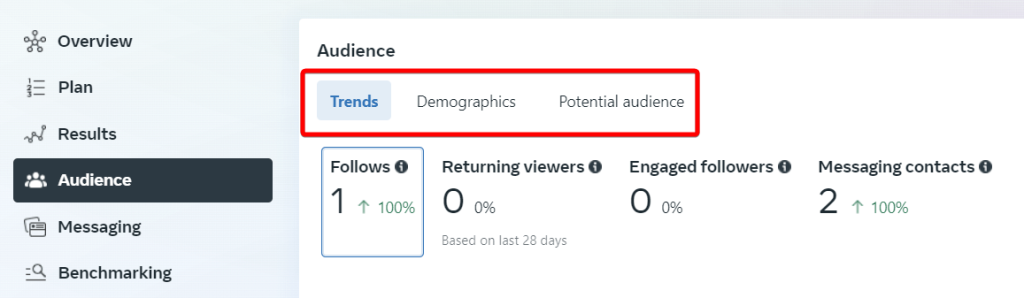
The data from Demographics and Potential audience is exportable. Just click the Export button and select the file format (PNG, CSV, or PDF).
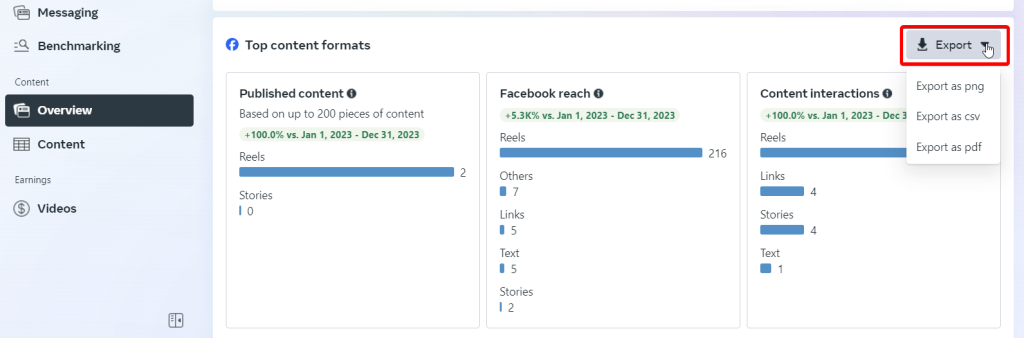
Export business page content data
Scroll down to the Content Overview section where you can export Top content formats.
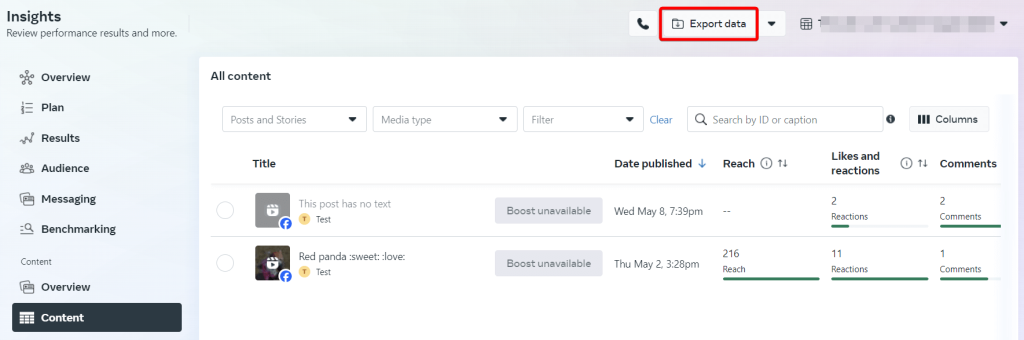
And if you open the Content section, you can export content metrics data. For this, click the Export data button on the top.
Then select the page, date range, metric presets and specify three parameters: Data view, Content level, and Filter.
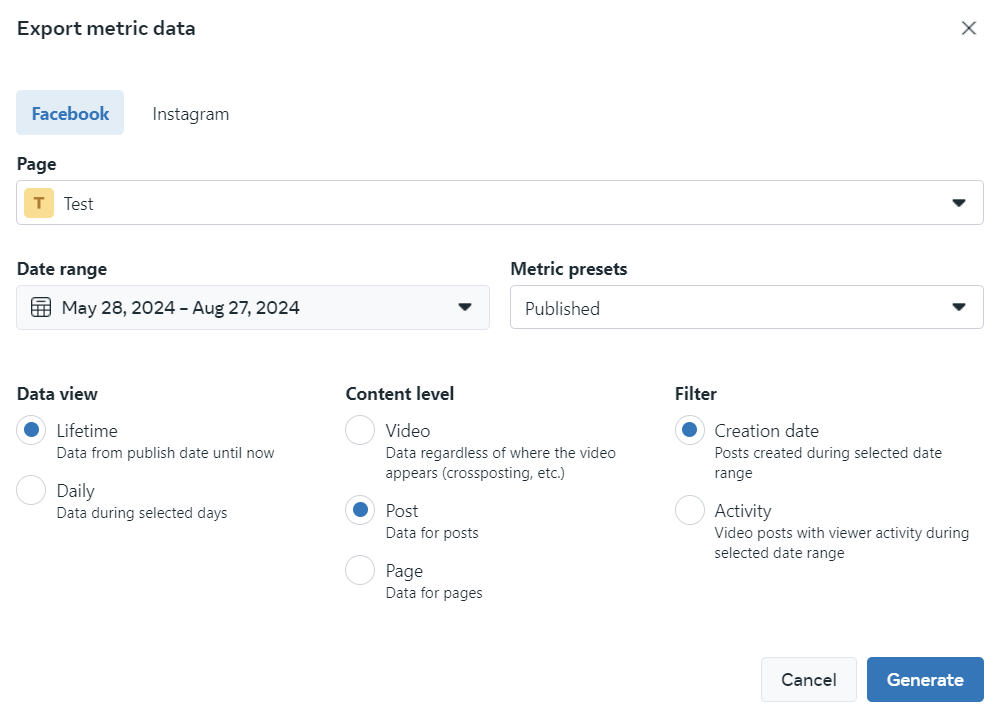
Click Generate and wait for your file to be prepared. After that, you’ll be able to download it.
How to export Facebook Ads data using Ads Manager
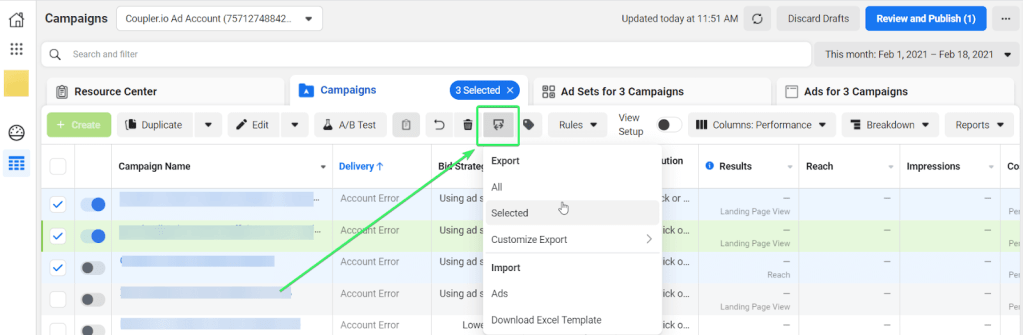
Open the Ads Manager, go to Campaigns, and select the Facebook campaign(s) you want to export. Click the Export & Import button and choose one of the three options:
- All – to export data of all campaigns
- Selected – to export data of the selected campaigns
- Customize Export – to select the columns you want to export
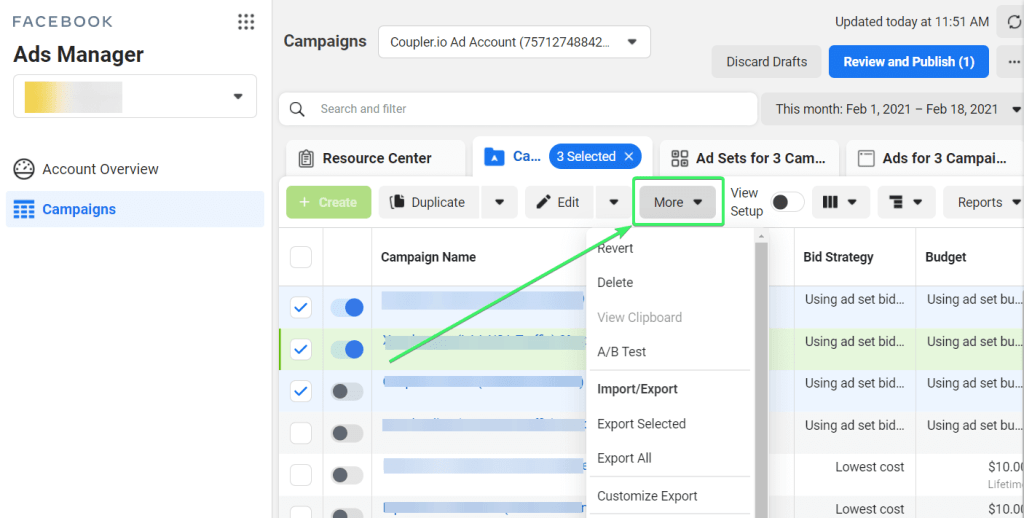
If you’re in the expanded view, you’ll find the export functionality by clicking the More menu.
Once you click All or Selected, choose the file format: Excel, CSV, or textual.
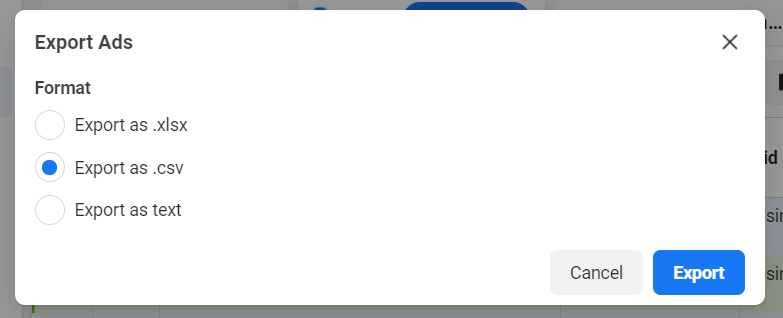
Click Export and the file will be downloaded to your device.
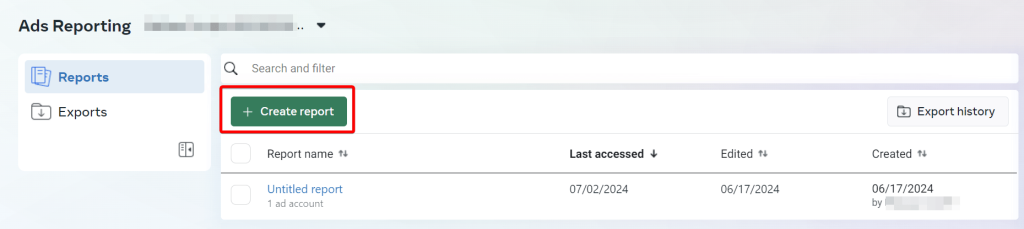
Export reports from Facebook Ads
The Ads Manager also has the Facebook Ads Reporting section where you can create custom reports and export them. Go to this section and click Create Report.
- Choose a layout: pivot table, trend line chart, or bar chart.

- Configure your report, then click Export at the top right of the page.
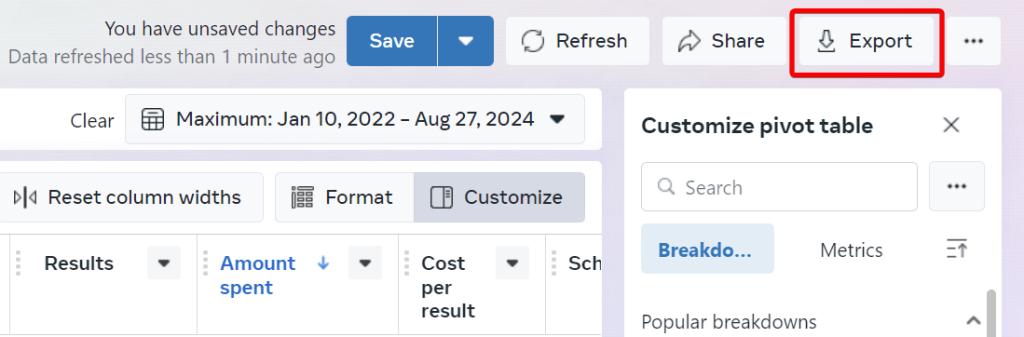
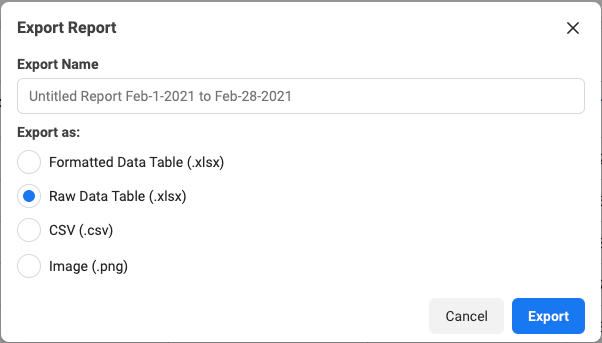
- Name your report, select your preferred format (CSV, PNG, XLS or XLSX), and click Export.
How to export my personal data from Facebook
The most basic export you can do from Facebook is your profile data. Following the instructions below will help you download a copy of your photos, videos, posts, and comments all at once. All of your data can be exported in either HTML or JSON formats. In order to download a copy of your data from Facebook, do the following:
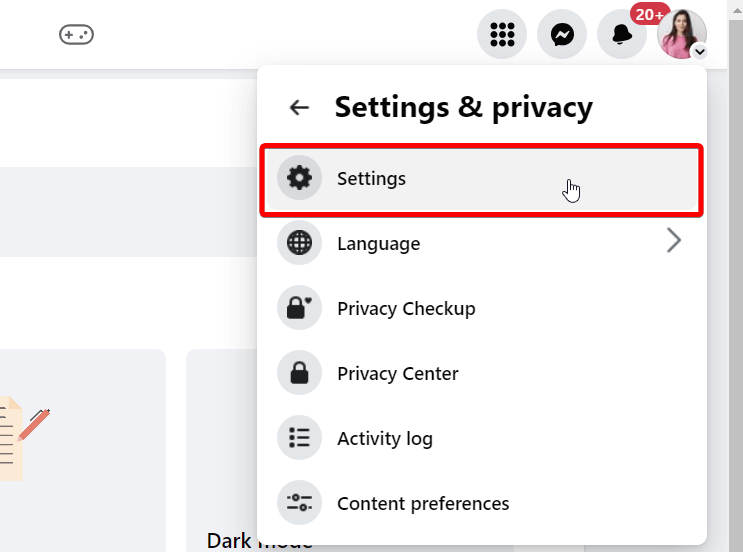
- Click on the ? symbol at the top right of Facebook, or on your image, or jump right into your Facebook Settings.
- Click Settings & Privacy and then select Settings (you will be presented with the screen below).
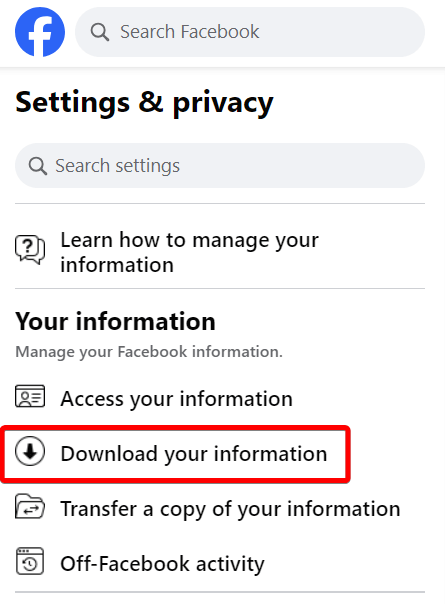
- Scroll down to Your information section on the left panel and select Download your information.
- Click Continue and then configure your export options:
- Choose the information you want: Current Activity or Scheduled. Click Download or transfer information.
- Select your accounts and profiles.
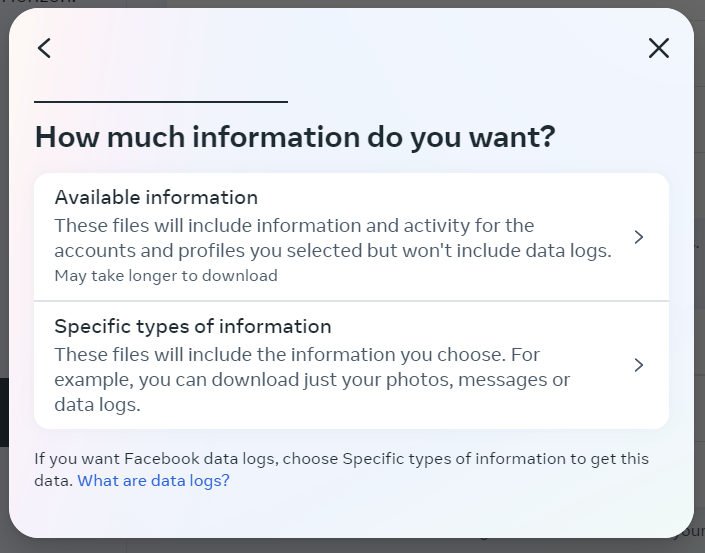
- Choose whether you want available information or specific types.
- Select whether you want to download data to your device or transfer it to a destination. The supported destinations are Google Drive and Dropbox.
- In the next screen, you can select:
- Date range
- Email for notification
- Export file format (HTML or JSON)
- Media quality for your exported photos and videos: High, Medium, and Low.
- Then, click on the Create File button. We suggest selecting specific exports each time so you can have your data available faster.
- As soon as the file is created, you’ll receive an email informing you that the export is complete.
- Once finished, you can access and download the file by clicking the Available copies at the top of the page and clicking the Download button for the requested file. The file will be downloaded as a ZIP archive containing all the selected data in a JSON or HTML format based on your choice.
What personal information you can export from Facebook
In order to keep the size of the file to a minimum when exporting your data from Facebook, choose Specific types of information during your download setup flow.
These types are grouped as follows:
- Security and login information
- Apps and websites on Facebook
- Ads information
- Data logs
Let’s check out the cases for the most common data types users export from Facebook.
How to export my Facebook profile data
Our core Facebook profile data includes account settings, search history, locations, ad topics that are relevant to us, and any other information associated with our Facebook account.
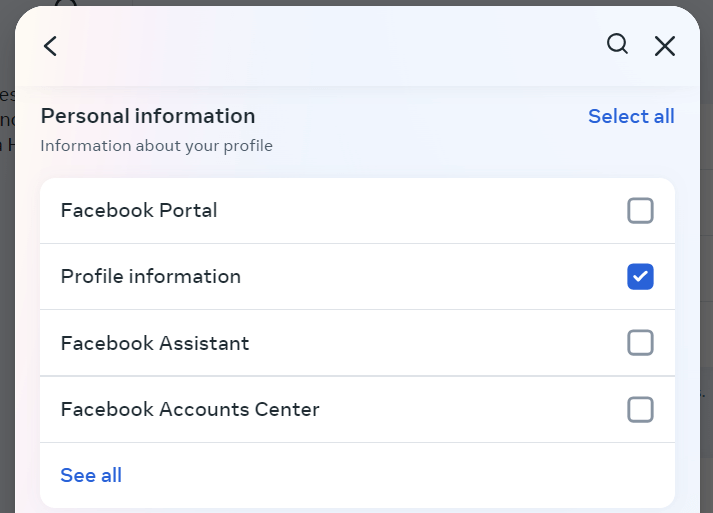
To export all these in a file, you need to follow the above standard procedure. When you reach the step, choose Specific types of information. Scroll down to the Personal information section and select the needed categories. Click See all to expand the hidden ones.
Proceed with the next steps and create your file.
How to export my Facebook Page data
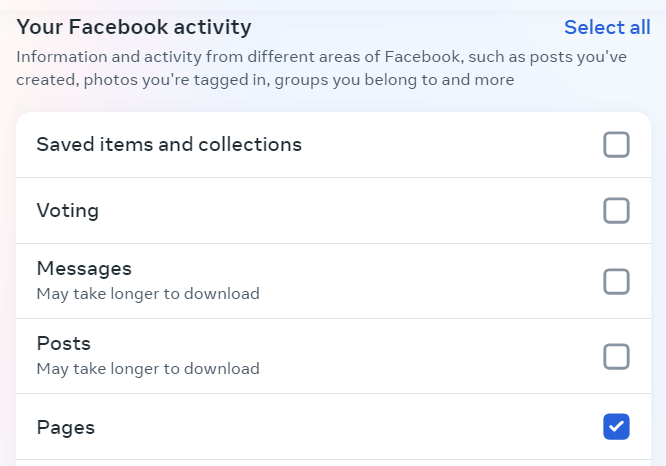
Facebook Pages is a great feature that lets you interact with many users. To export your Facebook pages data for the pages you’re an admin of, you can follow the standard process. Choose Specific types of information. Scroll down to Your Facebook activity, click See all to expand the hidden ones, and select Pages.
Proceed with the next steps and create your file.
How to export my Facebook friends data
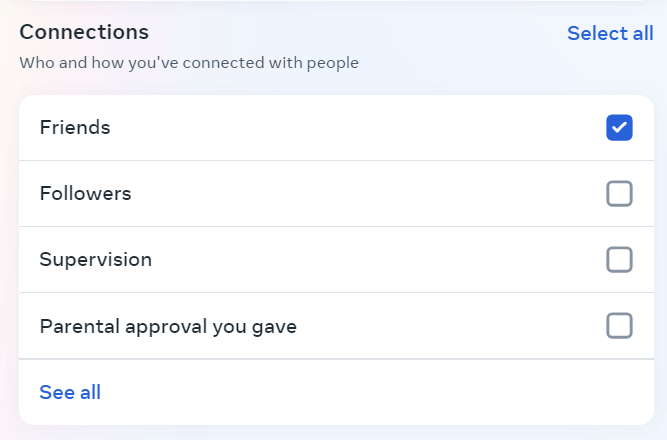
Another useful type of data you can export is your Facebook friends data. It contains information about all your friends, your received friend requests, and the friend requests you rejected. To export your friends’ data, follow the standard procedure, choose Specific types of information, and scroll down to Connections, where you can select Friends.
Proceed with the next steps and create your file.
How to export Facebook comments that I have been tagged in
To download your comments, Facebook has a specific category that includes all comments you’ve posted on your own posts, on other people’s posts, or in groups you belong to. Unfortunately, due to privacy reasons, you cannot export Facebook comments that you have been tagged in as they are not your comments – they belong to people who wrote them.
To export your own comments, you can use the standard procedure. Choose Specific types of information. Scroll down to Your Facebook activity, click See all to expand the hidden ones, and select Comments and reactions.
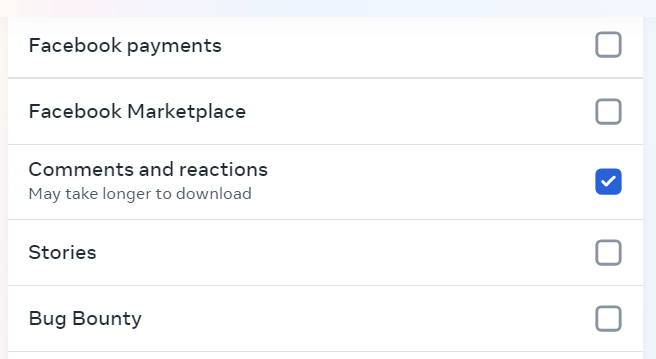
Proceed and create your file.
How to export Facebook posts data older than 30 days
Facebook allows you to select your date range for the export or select the option to export all of your data at once. Please bear in mind that selecting a large period of time or all available information will lead to bigger exports, especially if you are really active on the platform. For example, for active accounts with a lot of posts and media, the size of the file could be dozens of Gigabytes or even a Terabyte, and the time needed for the export will range from several hours to possibly even days. This is critical, especially if you need the exported file sooner rather than later or you don’t have enough space on your computer.
How to export my Facebook photos all at once
For most of us, Facebook can work as a timeline where we share many photos of the events of our lives – trips, a newborn child, or that amazing dish we just cooked for the first time. So, exporting Facebook photos and videos can be very important.
Exporting all your Facebook photos can help you back up and store them on your personal hard drive, and it’s really easy. Choose Specific types of information. Scroll down to Your Facebook activity, and select Posts.
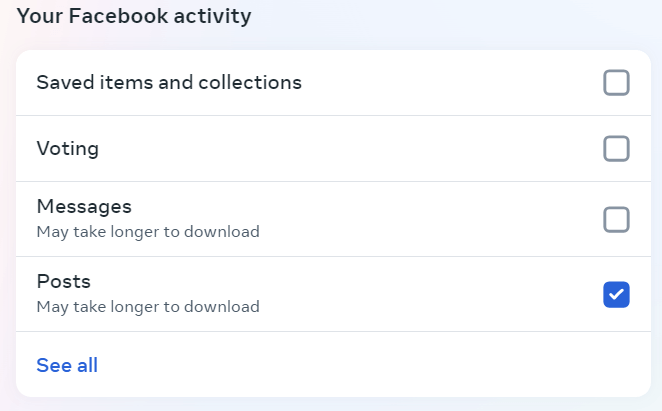
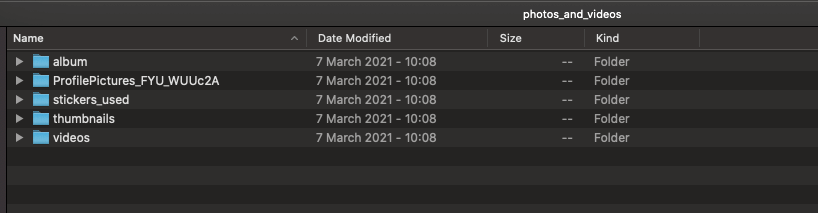
Why Posts, you may ask. All photos and videos will be included in an archive ZIP file that contains your media within their respective folders.
Make sure you select the Media Quality you need. Higher quality means a bigger export file, but you can use your photos and videos for backup or to frame them. Lower quality will result in faster export, but is only suitable if you need to find something quickly and don’t care about quality.
How to export Facebook profile search data
Another great type of information to export is profile search data. Facebook has a log of what you searched through time and that could be useful to know your interests. If you want to find out, all you have to do is choose Specific types of information.
Scroll down to the Logged information section and select the Search category.
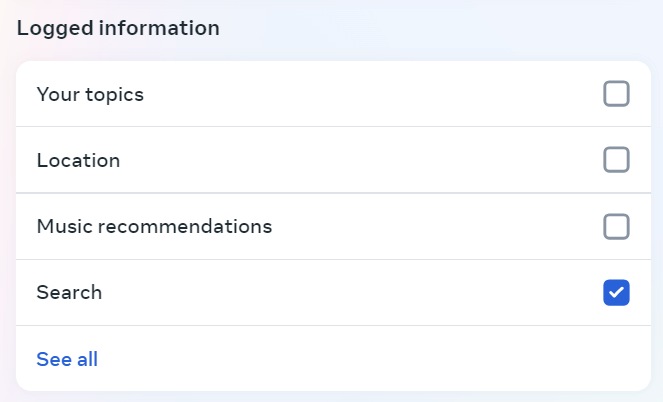
Proceed and create your file.
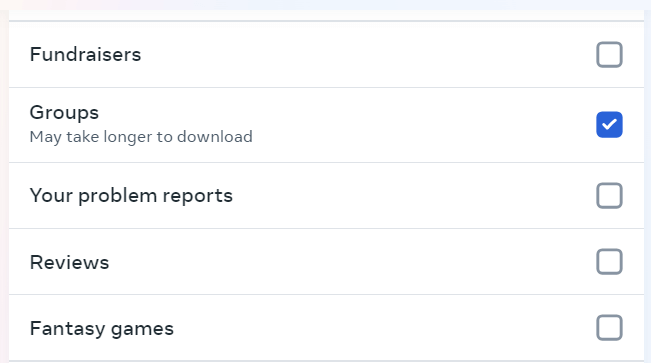
How to export Facebook groups data
Many of us use Facebook groups to connect and share things with a large group of people. Exporting Facebook groups data will help you see what groups you’re part of, what you’ve shared, badges assigned to you, and much more. To export Facebook groups data, you can select the respective category from the list. Choose Specific types of information. Scroll down to Your Facebook activity, click See all and select Groups.
Proceed and create your file.
Can I export Facebook birthday data to Google Calendar?
Facebook can be very helpful for remembering our friends’ birthdays. It saves us from the awkward situation of being busy and forgetting that a friend is celebrating their birthday. Although it would be great to have Facebook birthday events synced with our favorite digital calendar, it is not currently natively supported by Facebook.
Birthday exports were available some time ago, but as Facebook updates its privacy policies, they removed this functionality. Birthdays are personal information, and due to privacy reasons, you cannot sync your connections’ birthdays to your calendar as they may not have approved it.
How to export Facebook analytics data
Facebook Analytics, as a standalone feature, is no longer available. To export Facebook analytics data, you should consider using Page Insights and Instagram Insights. In addition, use these business tools:
- Meta Business Suite to extract insights about your audience, content, and trends.
- Meta Ads Manager to see results for all your Facebook and Instagram advertising campaigns, ad sets, and ads.
- Meta Events Manager to manage Meta Pixel and Conversions API and pull information about actions taken on your website, in your app, and in your physical store.
How to export Facebook data in a certain time zone
Facebook recently announced customizable time zones. This means that you can set and change the time zone of each ad account and have your reporting based on your time zone. All you have to do is:
- Go to your account.
- Click Settings.
- Select your time zone of preference.
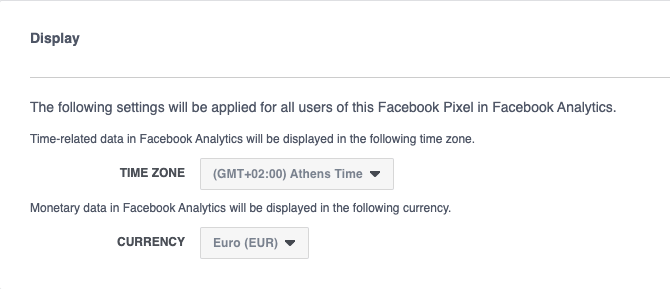
Voila! You now have everything reported in your selected time zone and you can export your reports as needed.
How does Facebook confirm my identity when exporting data?
Before exporting any data from Facebook, it’s important to authenticate ourselves.
When we’re using the Facebook platform, authentication is easy because we have already logged in to our account, thus Facebook has already confirmed our identity. If we want to export data programmatically, we have to create an app for it and receive an access token.
What can I do with my exported Facebook data?
Now you’ve exported all this data, the real question is: what can you do with it?
Well, for personal data, you can review, store (especially photos and videos), or even print some information, such as your conversations. You can watch your photos or videos the way you usually view media. If you choose to export everything in HTML format, you can open all your files with a modern web browser such as Google Chrome, Mozilla Firefox, Safari, or any other of your choice. If you exported posts and comments in JSON format, you have an even better option. You can convert the files to either CSV or Excel format and then upload them to a spreadsheet app such as Google Sheets. Then you can have all your posts and comments in a single page and read them whenever you want.
For business data, you can load it to a spreadsheet app or data viz tool, build a self-updating report or dashboard, and analyze your data. See what campaigns are the top performing, see when your business page had the most reach, what posts were the most popular ones, and what audience is the most active for your business.
