As the projects grow, more and more issues are added to your Jira boards and moved from one stage to another. You add images, and other attachments, pull data from different apps, and connect issues into complex networks that would be rather hard to reproduce if any data was lost. Atlassian’s platform is very stable but it certainly doesn’t hurt to perform a Jira backup so you can sleep better at night.
What are the options to launch the Jira backup process?
It’s not difficult at all to run a backup for Jira Cloud. The question is whether you need it as a one-time activity (for migration purposes, for example) or you would rather generate a new Jira backup at regular intervals (daily, for example). Thus, there are two different approaches:
- You can manually create a secure copy of your Jira data. It’s a good approach that lets you back up different types of data and easily restore it if needed.
- You can automate exports of specific Jira data to spreadsheets or data warehouses using Coupler.io. It is a reporting automation solution to turn raw data into simple reports. The advantage of this approach is that it doesn’t require any coding and takes just a few minutes to set up. You can only pull the data you need and refresh it at a chosen schedule – for example, hourly, Monday to Friday during your working hours.
How to back up Jira Cloud manually?
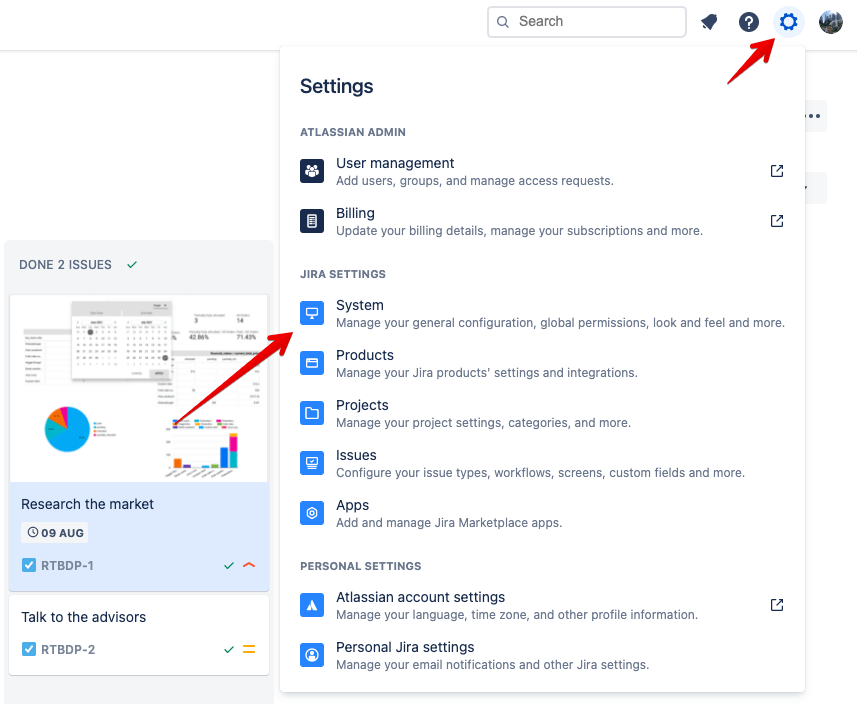
Let’s start with the regular, native approach to back up Jira Cloud. To perform it, click the gear icon in the top-right corner and then choose System from the Jira Settings list of options.
Here, find and choose Backup Manager from the Import and Export menu.
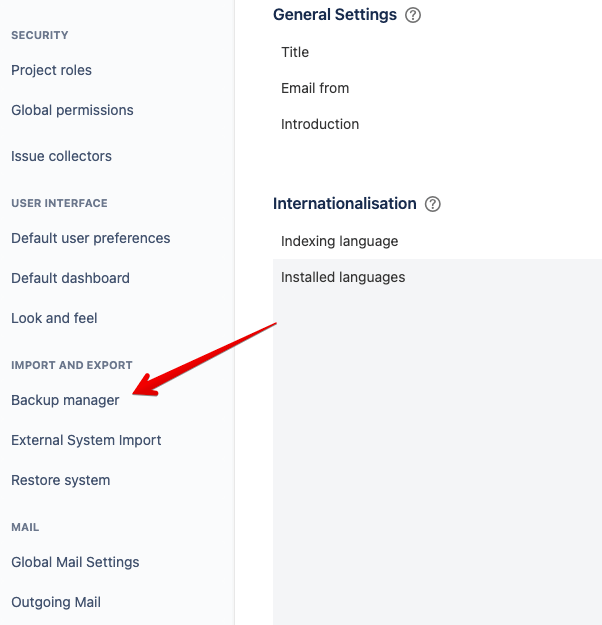
In Backup Manager, you’ll be presented with two choices: Back up for Cloud or for Server.
If you’re creating a secure copy of your data, with a goal of just having a backup, then the first option will be the best. The same is the case if you want to reuse your Jira data elsewhere.
You’ll use the Back up for Server option if you plan to migrate to Jira Server or Jira Data Center. Note that both platforms don’t support next-gen projects, created by default on Jira Cloud. You’ll need to move them into classic projects first and only then back up Jira.
Going back to the classic backup mode, it’s pretty simple. The only thing you need to decide is whether you wish to fetch the media along with your backup. After that, click the Create backup for cloud button.
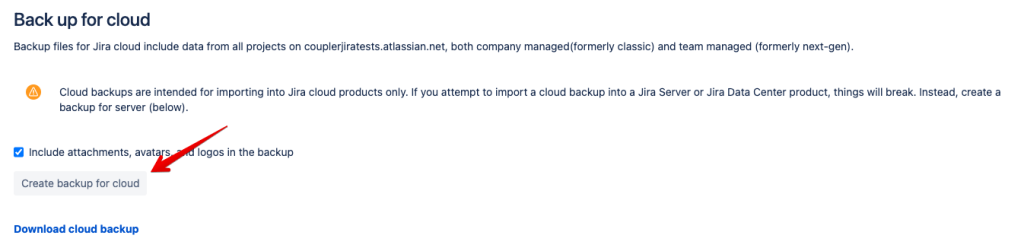
Depending on the size of your database, it may take a few minutes to complete the task. Once it’s done, you can fetch the Jira backup file by clicking on the Download Cloud Backup button. If you lose the saved file, you’ll be able to download it for another 14 days from the same place.
You can perform the backup as often as you want but if you choose to back up attachments, avatars, or logos, you’ll only be able to do it again after 48 hours.
Alternative way to backup Jira content
Rarely do you need to do a backup just once – most commonly you want it to be a routine activity, ideally without any effort on your part. Things get a bit more technical here but they don’t necessarily have to, as you’ll read shortly.
First things first, Atlassian has a number of scripts for Powershell, Bash, and Python that can perform an automated backup of your Jira Cloud. Note, however, that they’re not officially supported and, as such, haven’t been updated since 2019.
Alternatively, you can try a workaround. One of the popular approaches involves cron expressions that create a Jira and/or Confluence backup according to your schedule. We haven’t tested it, so we can’t vouch for its effectiveness but you’re welcome to give it a try.
There’s also another, simpler way of backing up Jira content – we’ll cover it in the Jira automated backup chapter.
Jira automated backup with Coupler.io
There’s also another, simpler way of backing up Jira content using Coupler.io. It lets you automate exports of specific Jira data and freely manipulate the exported data. You can compare what has changed since the previous backup, run advanced calculations, build custom Jira reports, draw charts, load the Jira data onto data visualization services, and a lot more.
You only need to select a desired destination app in the form below and click Proceed. You’ll be offered to create a Coupler.io account for free to get started.
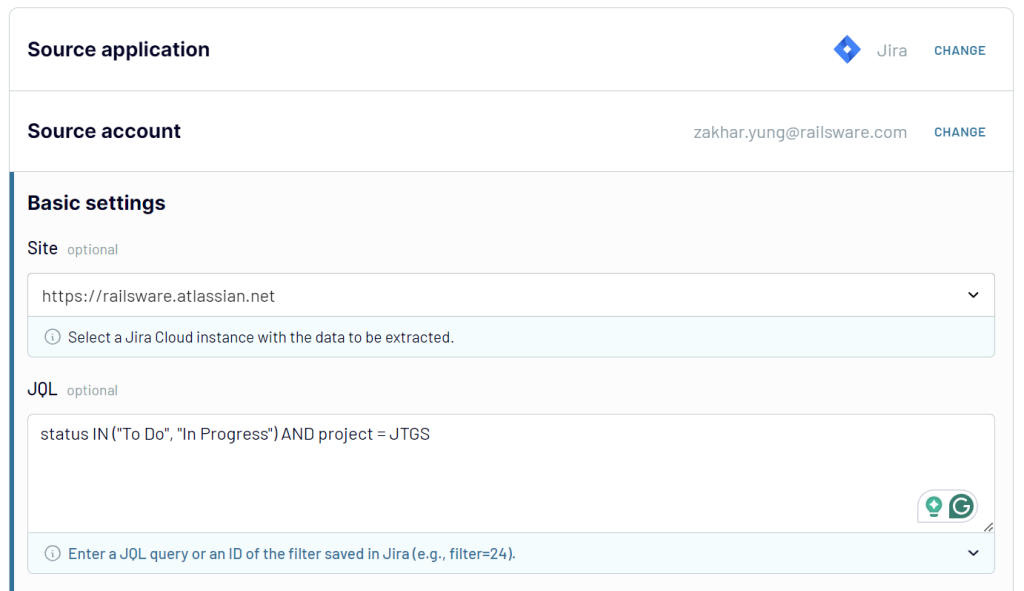
1. Collect Jira data
Connect and authorize your Jira account. If you have multiple Jira Cloud instances, select the one with the data to be extracted. Then enter a JQL query or an ID of the filter saved in Jira for the data to export.
A handy method for generating some custom JQL is within Jira itself. Click the Search box at the top and select Advanced issues search. Here, select any filters you need and click the Switch to JQL button to get the code.
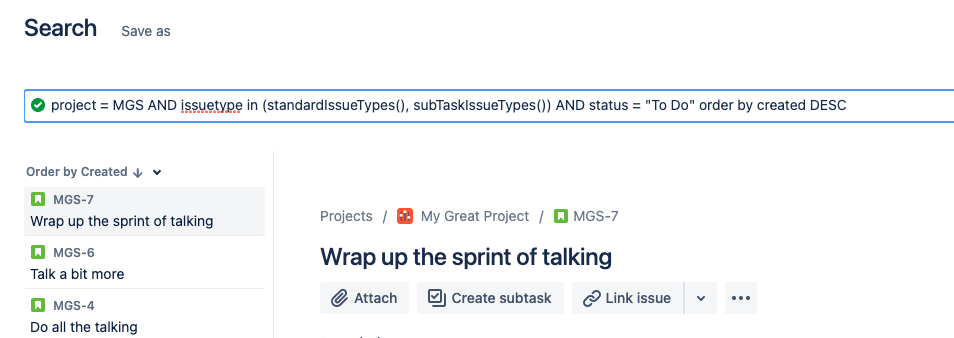
For example, our criteria will be:
status IN ("To Do", "In Progress") AND project = JTGS
You can also decide on the export format: Jira CSV export or Detailed data.
If you have a large organization, it may not make sense to pull all the issues from all boards across the organization. In the same way, you may be interested in only fetching the issues with, for example, “Closed” status.
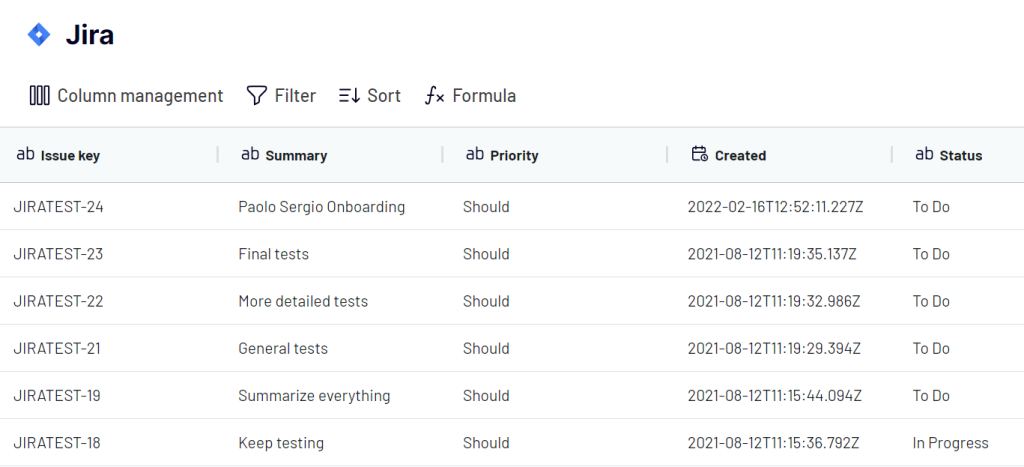
2. Organize Jira data
Before the export, you can preview and transform your Jira data right in Coupler.io:
- Filter and sort data
- Hide, rename, edit, reorder columns
- Add custom columns using formulas
- Blend data from multiple JQL queries, Jira accounts, or even other apps.
Once the data is ready, jump into the Destination section and connect your destination app. You’ll also need to specify where you want to load your Jira data.
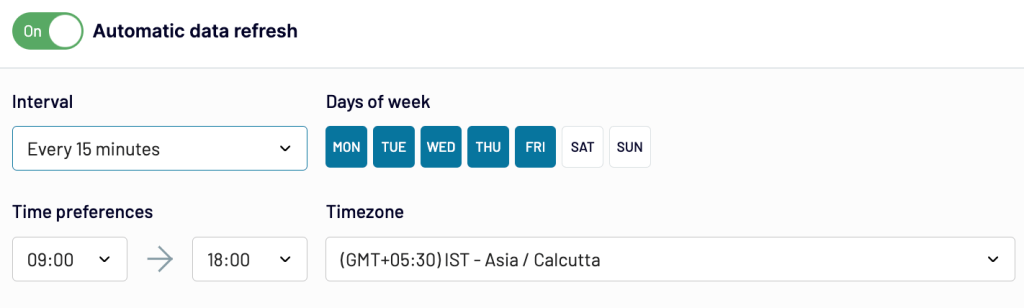
3. Schedule refresh
As the last step, decide on the schedule, according to which the data should be refreshed.
How to back up and restore Jira?
The day may come when you’ll need to restore Jira Cloud and use the backup files you’ve previously created. Here’s how to go about it:
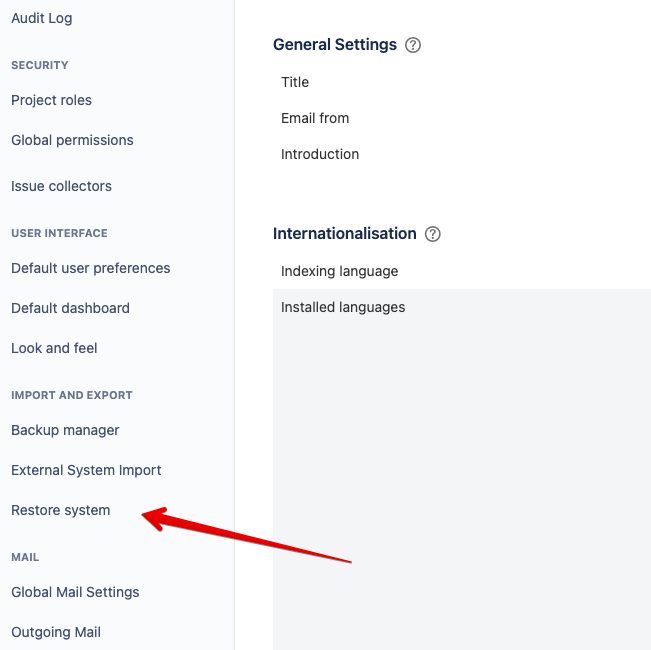
- Click the gear button again in the top-right corner and select System (the same as we did for backup)
- This time, choose Restore system from the Import and Export section.
If you exported manually, as we did above, you should at this point have a .zip file containing two other files – activeobjects.xml and entities.xml – as well as a separate .zip for the media. If you used an alternative way, you’ll want to make sure you have the exact same file format and names before you begin the restoration process.
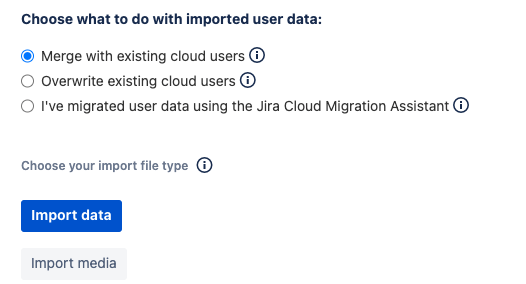
Once you have that done, choose whether you want to merge existing users, overwrite them, or if you’ve already migrated the data. When in doubt, check the help text.
Jira suggests uploading media files separately to avoid timeouts and any possible issues. Don’t worry, you’ll be able to do that before the restoration is finished. For now, import just the main .zip file.
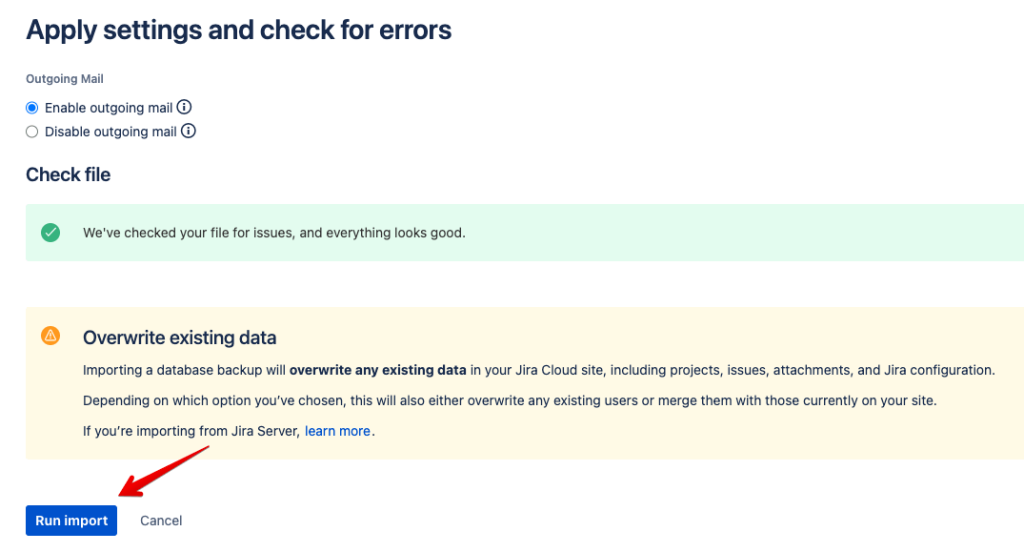
Once the file has loaded, Jira will verify if everything is okay. Press the Run import button if everything went smoothly.
Once the import has been processed, you will be presented with an option to upload the media file. Do it now, test data and media according to instructions, and hit the Grant application access button.
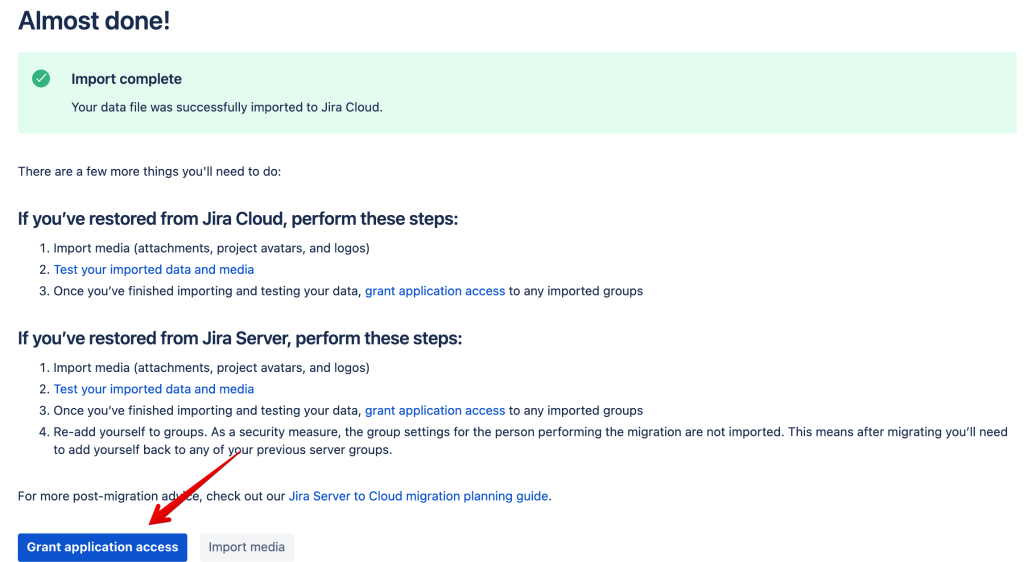
Adjust the access if needed. In any case, your restoration is finished.
Jira backup – frequently asked questions
Pulling the entire system every time you back up Jiral won’t work for everyone – especially if you plan to work with the data. Not only will you fetch lots of stuff you don’t need at the moment, but the import may take quite some time.
For that reason, it’s worth looking at some more specific use cases.
How to backup Jira board?
To back up a Jira board, you can use Coupler.io. Enter a custom JQL query to only fetch the items from a given board. To generate the query, open your board, click on the three-dotted menu in the top-right corner, and select Board settings.
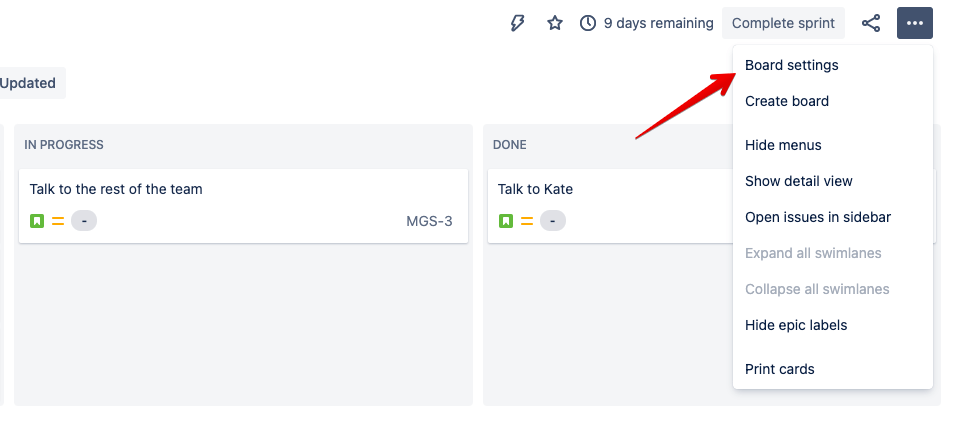
There, click on Edit filter or View filter query if you’ve already created one. On the following page, you’ll see both the JQL query as well as an ID of this particular filter (present in the URL).
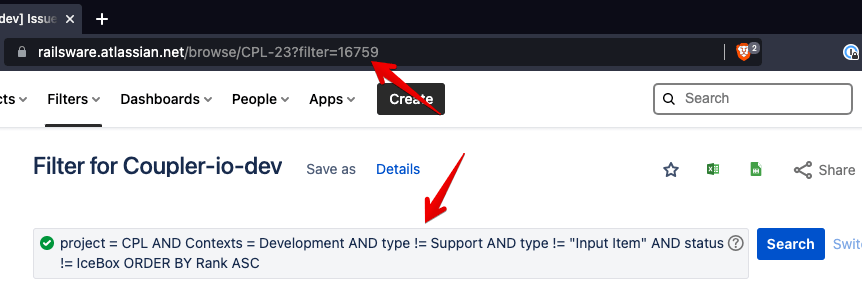
To back up a Jira board, we’ll need either of them. To query for a filter above, we would use the following syntax:
Filter = 16759
Insert either the filter query or the earlier JQL query into the JQL box in your Coupler.io importer and run the importer.
The advantage of using a filter is that if you decide to change a filter, you won’t need to update your importers. The data will be always fetched according to the criteria set in Jira at the time of an import.
If you need to back up several Jira boards, you can wrap their individual queries in brackets and put an OR keyword between them.
How to do a manual backup of a Jira sprint
To fetch a particular sprint, you need to adjust the JQL query of your importer. The simplest way to do it would be with the following syntax:
project = XYZ AND sprint in openSprints ()
This will fetch the current sprint for the project XYZ.
If you wish to fetch a particular sprint, you need to get its ID. Navigate to the advanced search and add Sprint as a filter category. From the drop-down, select the desired sprint (you can even pick future sprints).
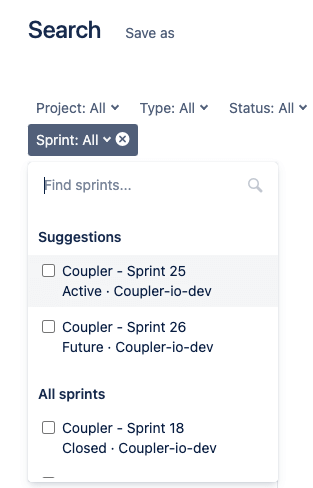
Afterward, press on Switch to JQL as we did before and copy the JQL into your importer.
How to back up Jira with attachments
When pulling data with Coupler.io and JQL queries, attachments are not fetched, sadly. There is, however, a very simple way of backing them up along with your Jira backup.
If you follow the steps we described in how to back up Jira manually, you will recall an option to include attachments, avatars, and logos with a backup. This is precisely what you need to have to fetch every single attachment from your projects.
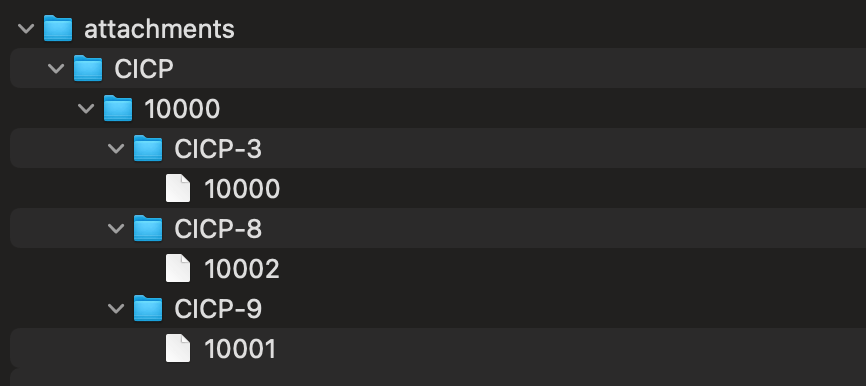
When a .zip file downloads, extract it, and you’ll see the attachments folder. You’ll then see each attachment in the respective folder.
While there’s no easy way to automate the process, make it a habit to download attachments, for example, once a month. If you ever need to restore, you’ll have a fairly fresh version in your files.
When restoring Jira – whether you do it in the classic way or via .csv file(s) – upload the attachments via the Restore system menu, as we discussed above.
How to perform a Jira workflow backup?
When you perform a backup of Jira from within a dashboard, all your workflows are exported and sit inside the activeobjects.xml file. You can also export each workflow separately as .xml from a workflow edit page. However, they won’t be of any use if you need to restore your Jira Cloud. You can only take advantage of it when migrating to another Jira system – for example, Jira Server.
An obvious, but certainly far from ideal, workaround would be to manually re-add the workflows.
There’s also another way – perhaps faster if you work with complex workflows, but also time-consuming. You could export a workflow as a .jwb file, upload it to the Atlassian Marketplace, and import it from there.
The caveat is that you’ll need to host a workflow on your server and have it approved by Atlassian, which could easily take days. So, we only recommend this approach if, otherwise, it would take you hours to reproduce your workflows.
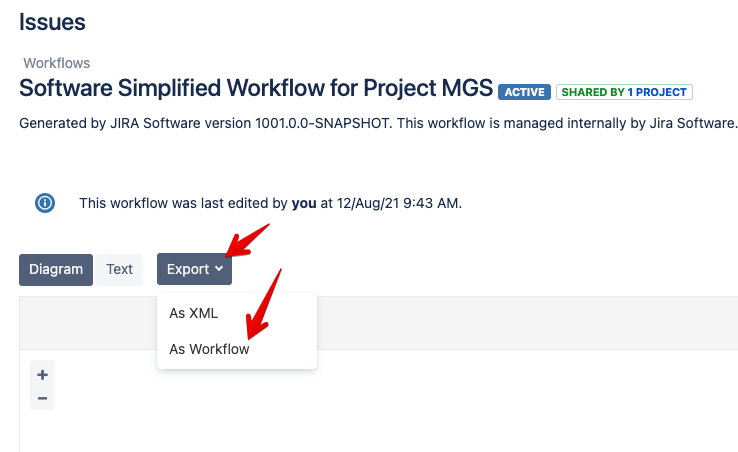
To export a workflow, click the gear icon in the top-right corner and select Issues. From the menu to the left, select Workflows and then View on the one you want to export.
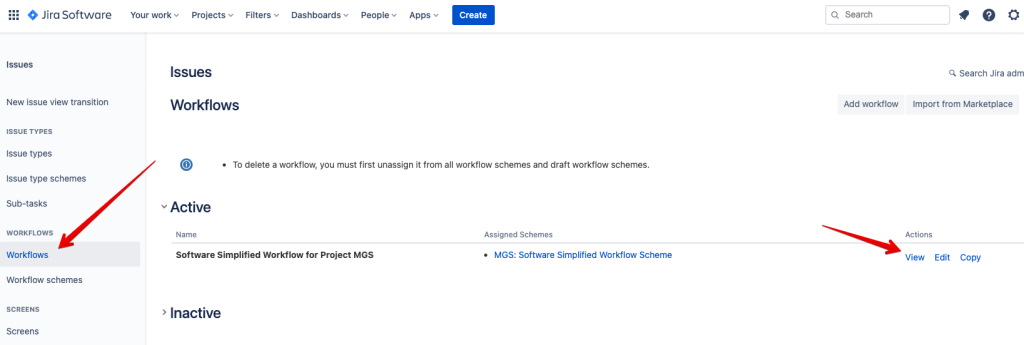
Here, click on Export and choose As Workflow from the drop-down menu.
A file will download. As the next step, you’ll need to create an account on Atlassian Marketplace, submit your workflow, and have it approved. Follow the flow for the specific steps.
Once it’s live, you’ll be able to import it into your Jira instance.
Head back to the Workflows page as we did when exporting a workflow. Click the Import from Marketplace button, find your workflow and follow the wizard to set things up.

How to back up Advanced Roadmaps in Jira (formerly Portfolio)?
The Advanced Roadmaps feature is completely separate from the regular roadmaps present in all Jira Cloud instances. At the time of writing, they’re also difficult to migrate.
When you back up Jira in the classic way, Advanced Roadmaps are not included in the exported file. This is set to change – at the time of writing (August 2021), this feature was in progress and, according to Atlassian’s roadmap, is set to be released in Q4 of 2021.
There may be a way to pinpoint items from a particular Advanced Roadmap, but only once it’s published – only then does Jira convert them into issues. Play around with advanced search filtering and see whether you can generate the right JQL.
Or just wait for a little while – the ability to export them in the classic way seems to be just around the corner.
How to do a Jira activity stream backup?
It could be handy to back up one’s individual activity stream. Unfortunately, it’s not possible at this point. A suggestion has been raised for Atlassian to include such a feature but with no result, as of now.
Of course, a replacement for an activity stream backup is a general Jira backup – of an entire install but also those of particular projects, sprints, or anything else you may need. You could then sort such export by the data and time of the last update, for example, and access the freshest items first. It’s not exactly a replacement for the activity stream but may be useful.
We’ve described some of the use cases earlier in the article, see if something fits.
Why backup Jira Cloud?
The main motivation for running any backups is security. If anything was to happen, you’ve always got a fairly fresh version of your install available. As is the case with virtually any Cloud service, the process of restoring a Jira backup is very straightforward. We’ll get to it a bit later.
A backup is also a must if you plan to upgrade your system or migrate to Jira Server or Jira Data Center. The same is the case if you’ve decided to bid Jira farewell and move your data to a competing service. Loading a Jira Cloud backup may not be as straightforward, but it is certainly easier than re-adding all items manually one by one.
Finally, running regular backups of Jira allows you to use all this data elsewhere. A common use case is to pull Jira issues into Google Sheets or Excel and monitor them from there – track the overall performance, calculate resolution times, manage the team member’s workload, or simply extract precisely the data you need. We’ll also touch on that a little bit later.
Which method to choose for Jira backup?
Using JQL gives you the power to export lots of valuable information from your Jira. Not only you can pull entire projects or roadmaps but can customize the exports in many different ways.
Combine it with a tool like Coupler.io and you’ll have a very easy time backing up precisely the data you need, at the desired frequency and with zero effort on your side.

Automate Jira data export with Coupler.io
Get started for free