To connect Klaviyo to Google Sheets and automate data exports for marketing performance reporting or analytics, you need a Klaviyo API key and Coupler.io. The latter is a data integration platform and AI analytics that provides a Klaviyo data connector to spreadsheets, dashboards, DWHs, and AI tools. It requires no coding skills or any technical background to integrate Klaviyo into Google Sheets.
How to generate a Klaviyo API key?
Coupler.io uses the Klaviyo API to load your data, so a Klaviyo API Key is required to get the Klaviyo data through the API. It works like a password to authenticate the request. To get your Klaviyo API Key, log into your account dashboard and follow these steps:
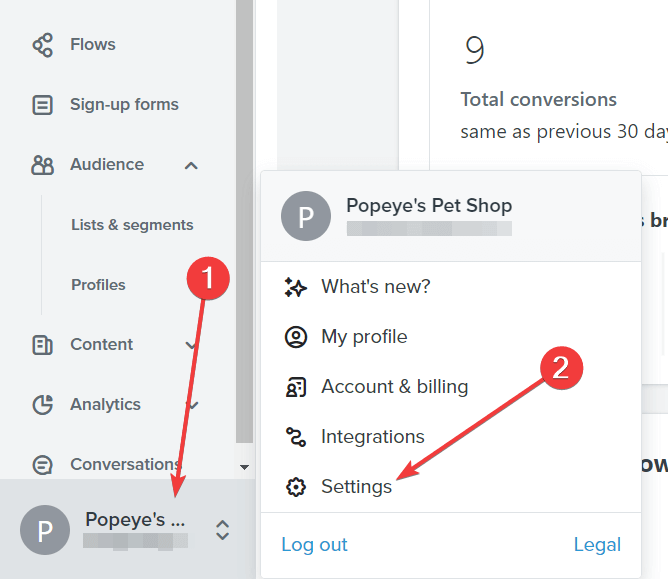
- On the bottom-left corner of the page, click on your profile and go to Settings.
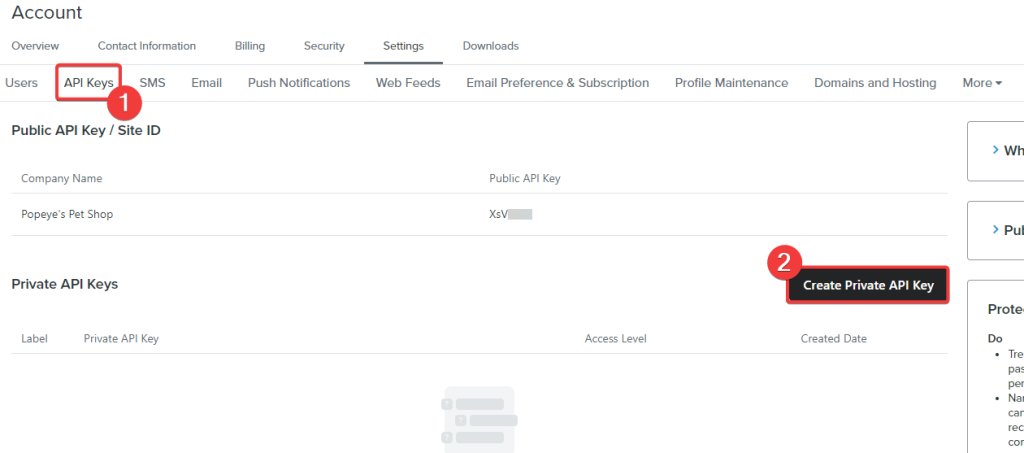
- In the Account Settings, navigate to the API Keys tab, where all your public and private API keys will be listed. We need the private API key to connect Klaviyo to Google Sheets. Click the Create Private API Key button.
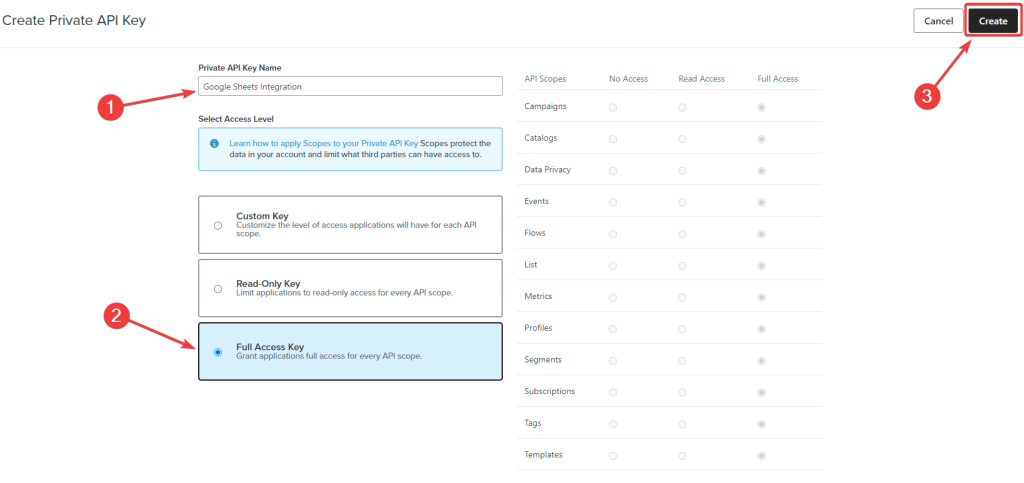
- Next, enter the Private API Key Name and select the Access Level, which will be the Full Access Key in our case. Choose Read-Only Key if you want to just import Klaviyo data into Google Sheets. Finally, click Create to get the Klaviyo API Key.
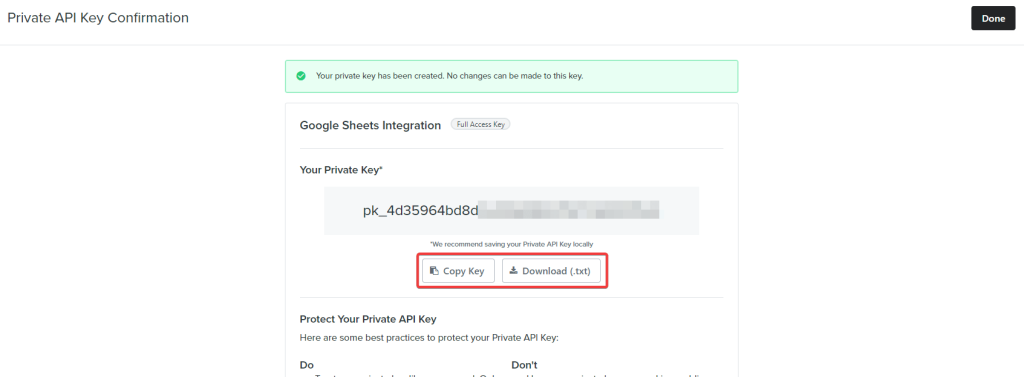
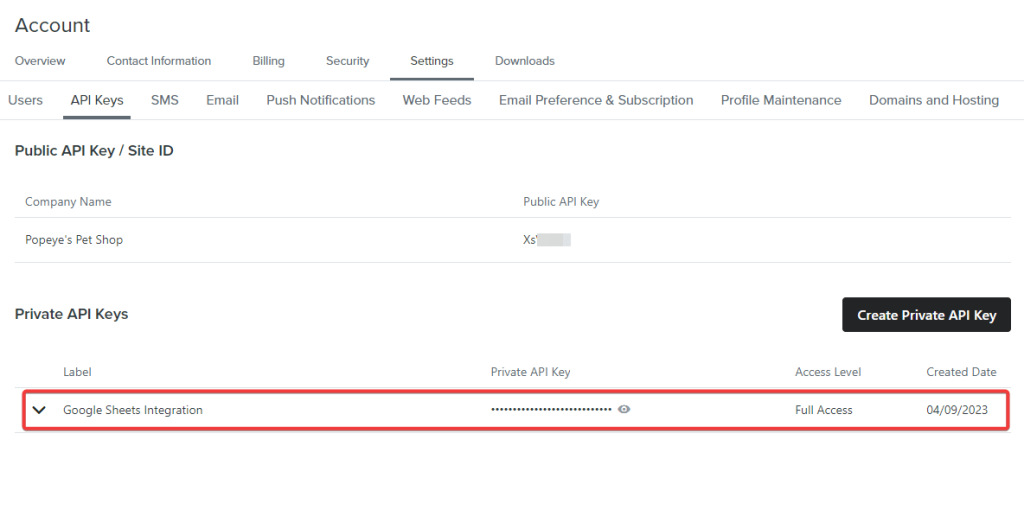
- Your Klaviyo API Private Key will be displayed on the screen. Copy the Key and download it for future use.
- You can also find the generated API key under the Private API Keys section in Settings > API Keys.
Now, we are ready to go for the Klaviyo Google Sheets integration.
How to integrate Klaviyo with Google Sheets using Coupler.io
1. Extract your Klaviyo data automatically
First, click Proceed in the form below to create a Coupler.io account for free and a Google Sheets connector for Klaviyo. No credit card is required.
Then, connect your Klaviyo account by providing your API key.
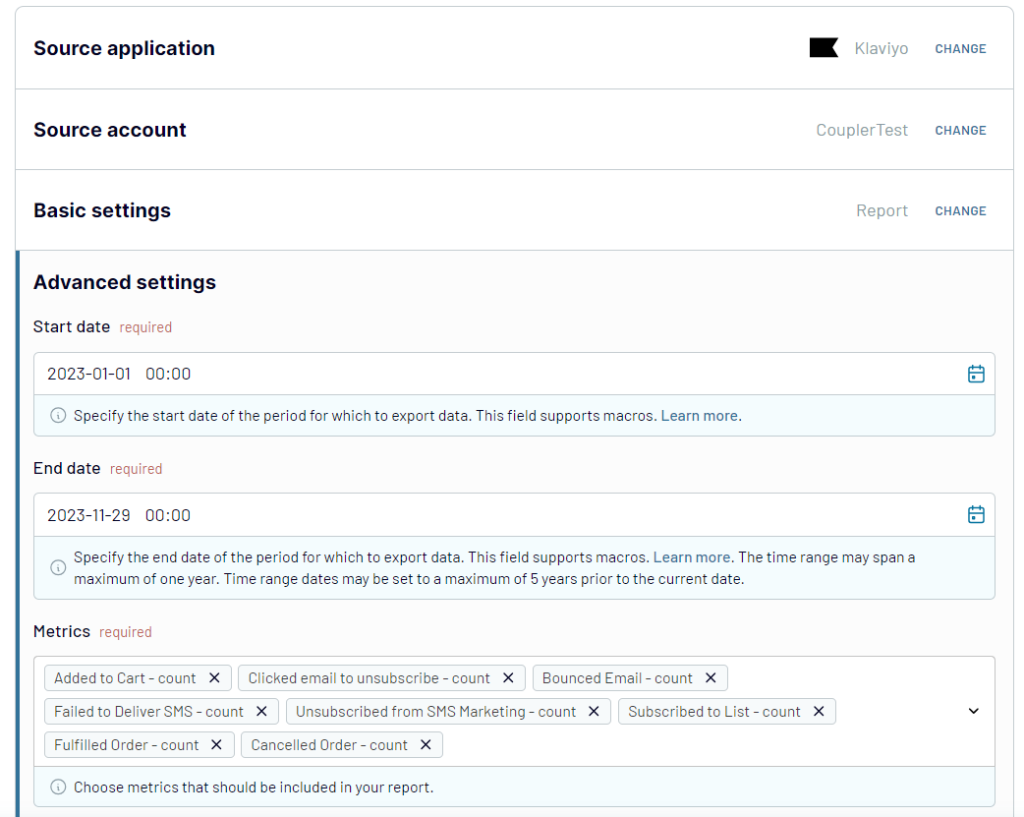
After this, select a data entity: Campaigns list, Profiles list, or Report. For the Report, you’ll also need to specify start/end dates and metrics to include.
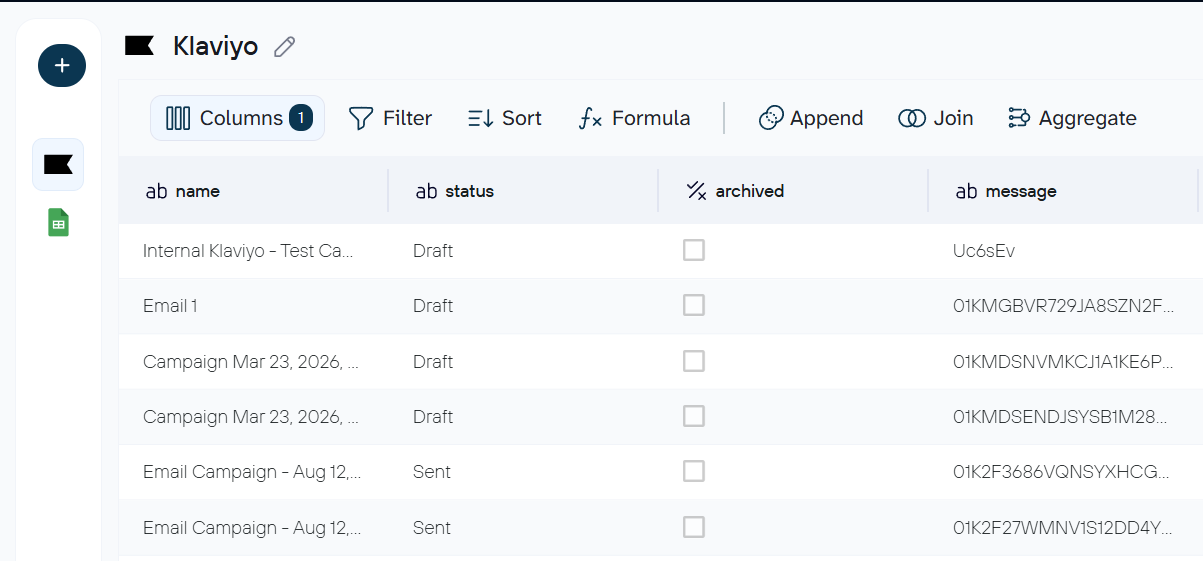
2. Preview and organize your data
In the next step, you can check the dataset that is about to be imported into Google Sheets and organize it to your liking:
- Rename and rearrange columns
- Hide columns you don’t need
- Perform formula-based calculations
- Blend data from several accounts or apps into one dataset
- Sort and filter data
3. Load data and schedule updates
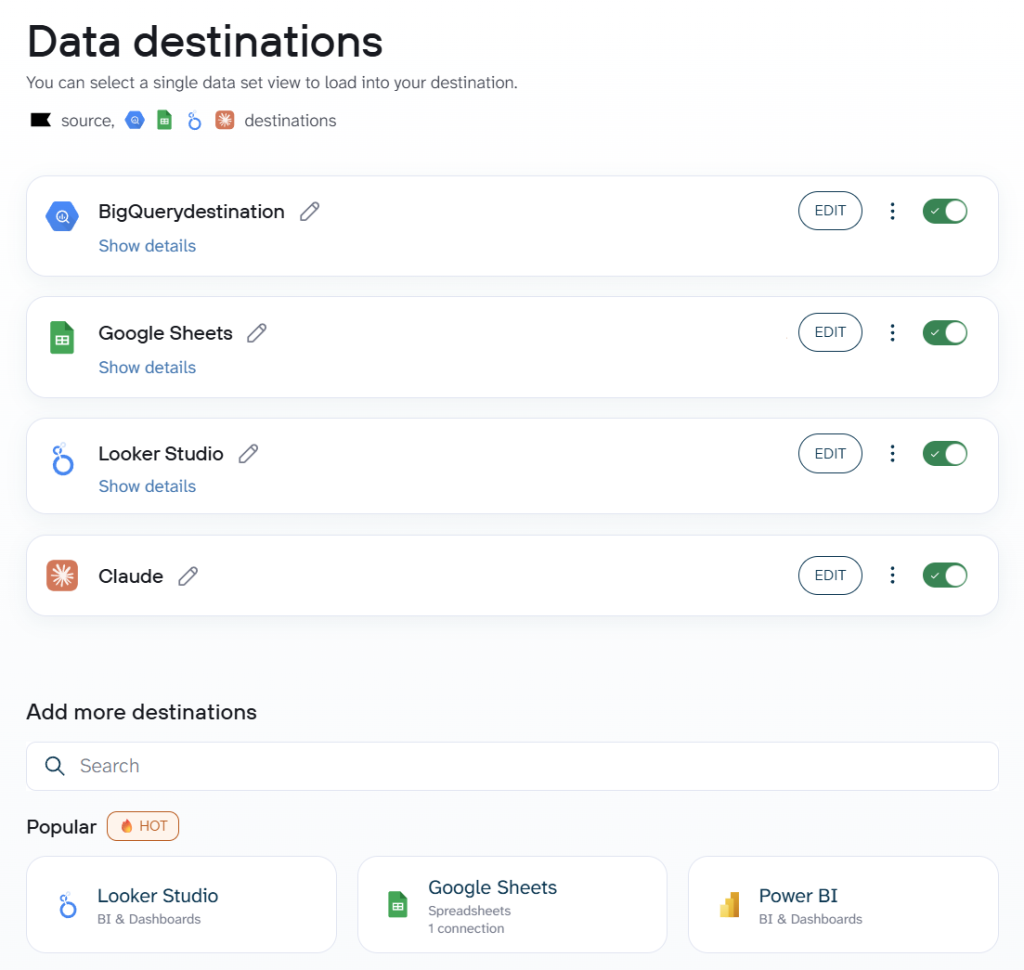
Once this is done, proceed with the next steps and connect your Google Sheets account. You’ll also need to select a spreadsheet and a sheet to load data from Klaviyo.
A special thing about Coupler.io is that it supports multiple destinations for your data flows. This means that the same data from Klaviyo can be connected to Google Sheets, Data Studio, Claude, etc.
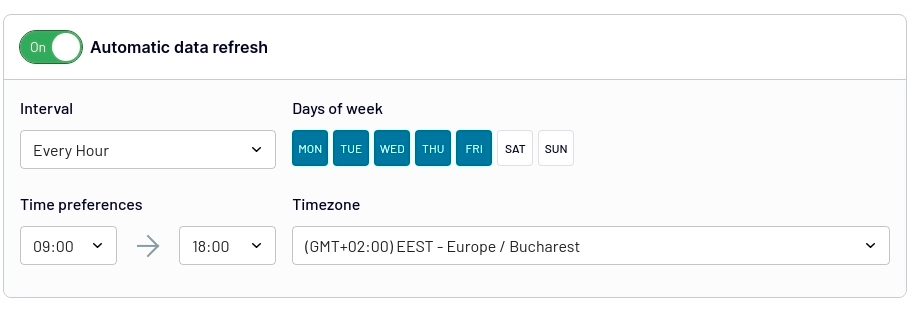
The last thing to do is make your report in Google Sheets self-updating. Specify your preferences for scheduled updates, and Coupler.io will keep refreshing your Klaviyo data in the spreadsheet.
You can schedule updates at intervals of up to every 15 minutes, so data flows into your automated report in near real-time.
4. Bonus step – Talk to your data in AI agent
With your Google Sheets – Klaviyo integration up and running, you can click the AI Agent tab and chat with it about your data.
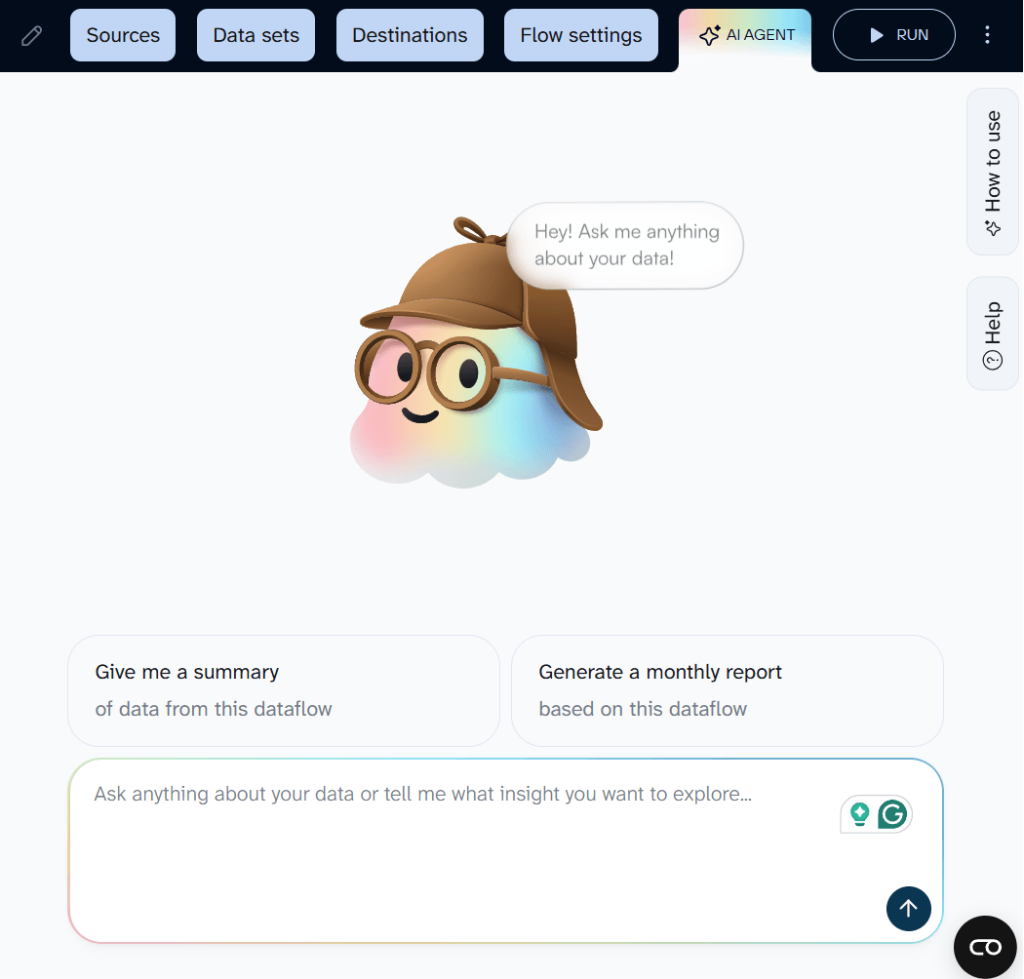
It’s a built-in LLM to analyze your data in a conversational form. So, if Klaviyo data in Google Sheets is more for data sharing and some results demonstration, AI Agent is more for drilling down into insights. Here are some questions you can ask:
Which email flows are cannibalizing each other? Are subscribers who enter the welcome series less likely to convert from the browse-abandonment flow?
Are there specific days or send windows where my flows underperform, and does that vary by segment?
I see a spike in spam complaints on Tuesday sends. Is that a content problem, a frequency problem, or a list-quality problem
The responses will be executed and validated by the Coupler.io Analytical Engine. The Agent will interpret them and provide you with a required response.
Use Coupler.io as an add-on for Google Sheets to load Klaviyo data
Alternatively, you can also install a Coupler.io add-on for Google Sheets – then you will be able to go through the same steps directly from a spreadsheet. Once it’s installed, you can find the add-on on the Extensions tab.
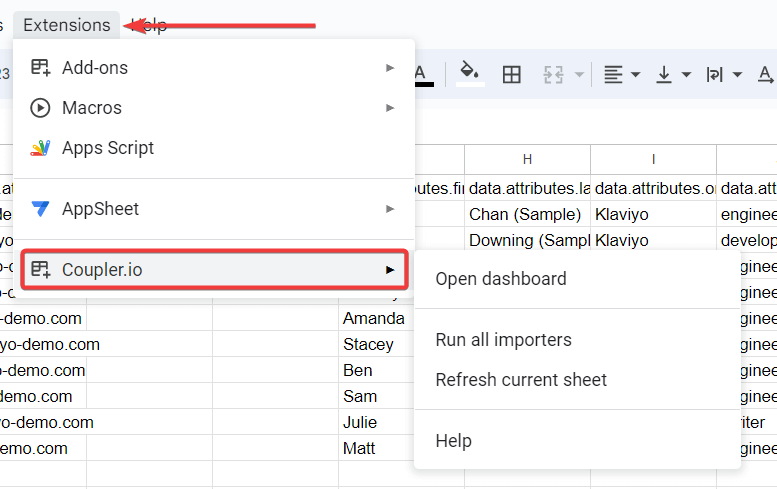
Now you can add, edit, and run data flows from Google Sheets worksheets.
What data you can export from Klaviyo
When you set up a data flow in Coupler.io, you select a data entity that determines which dataset lands in your destination. There are two groups: reports (aggregated performance data over a date range) and core entities (raw records you can filter and transform).
Reports
| Data entity | What it contains | When to use it |
|---|---|---|
| Metrics analytics | Aggregated event data — counts, sums, unique users — for any standard or custom event (“Placed Order,” “Opened Email,” “Clicked SMS,” etc.) | Tracking account-wide activity and growth trends over time |
| Campaign performance report | Performance stats per campaign — delivery, opens, clicks, conversions, revenue — over a selected date range | Comparing campaign results side by side or building a historical performance log |
| Segment performance report | Total members, members added/removed, net changes per segment, with hourly/daily/weekly/monthly breakdowns | Monitoring how audience composition shifts after campaigns or seasonal events |
| Flow performance report | Performance stats per flow — delivery, opens, clicks, conversions — over a selected date range | Evaluating which automated journeys drive engagement and revenue |
| Forms performance report | Views, submits, submit rate, and closures per sign-up form, with the same time-interval options | Comparing lead generation performance across different forms and placements |
Core entities
| Data entity | What it contains | When to use it |
|---|---|---|
| Campaigns | One-time marketing sends — message content, recipient estimates, send status, channel settings | Keeping a running log of everything sent without checking Klaviyo’s UI each time |
| Profiles | Subscriber and customer records — contact info, predictive analytics (churn risk), email/SMS consent history, push tokens | List cleanup, custom segmentation, or joining subscriber data with Shopify/WooCommerce orders |
| Flows | Automated journeys (welcome series, abandoned carts, post-purchase sequences) with automation logic and individual messages | Auditing automation setup or comparing flow configurations |
| Segments | Dynamic audience groups with their defining conditions and rules | Snapshots of how targeting criteria are performing over time |
| Forms | Sign-up form configurations, targeting rules, and submission data | Comparing acquisition performance across multiple forms in a spreadsheet |
Each entity exports as a flat table, ready for formulas, pivot tables, or dashboards as soon as it hits the destination.
Visualize your Klaviyo data with ready-to-use dashboard templates
Integrating Klaviyo with Google Sheets is just the first step. To gain actionable insights from your data, you need proper visualization. Coupler.io offers multiple ready-to-use Looker Studio dashboard templates specifically designed for Klaviyo data. These dashboards automatically connect to your data source and provide real-time insights without any manual setup or design work.
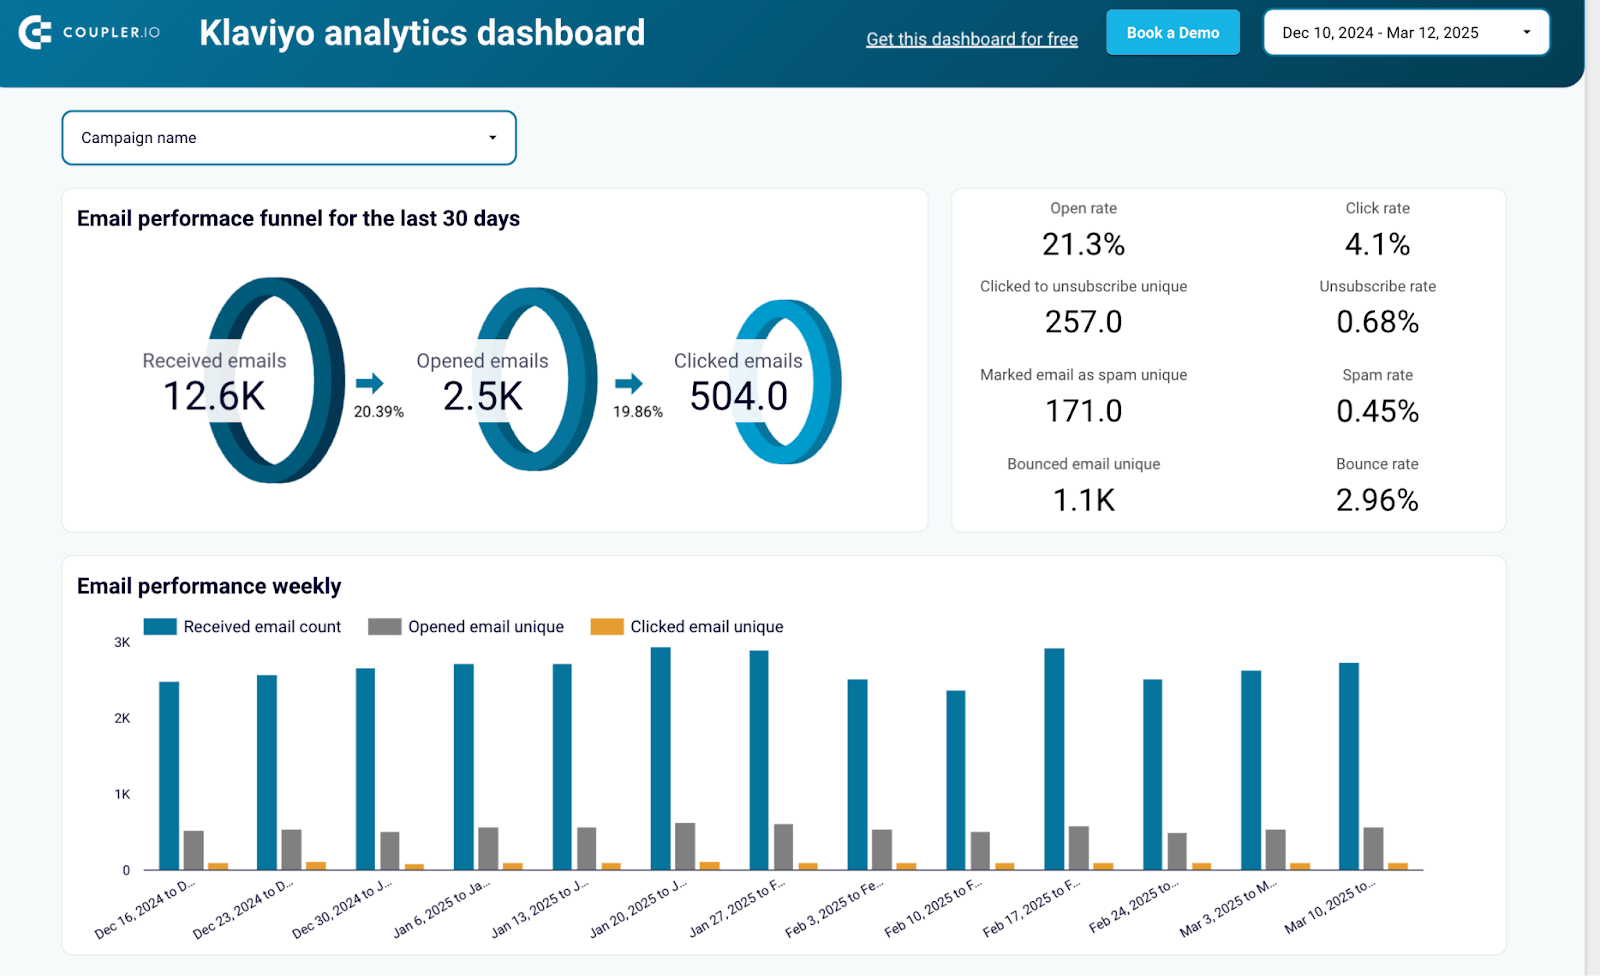
Klaviyo analytics dashboard
This ready-to-use dashboard template helps you monitor and analyze your Klaviyo email marketing performance with intuitive visualizations. Perfect for marketers who want to quickly understand campaign effectiveness without building reports from scratch.
What insights you can get
- Email marketing funnel visualization: See how your audience moves from receiving emails to taking action
- Campaign effectiveness metrics: Compare open rates, click-through rates and conversion metrics across campaigns
- Audience engagement tracking: Monitor how subscribers interact with your content over time
- Performance trend analysis: Identify seasonal patterns and long-term trends in email engagement
- Campaign ROI measurement: Understand which email initiatives deliver the best return on investment
How to use this dashboard
To use this dashboard, simply follow the instructions in the Readme tab to connect your Klaviyo account and load data to the dashboard in Looker Studio. The process is straightforward and requires no technical expertise – just authenticate your Klaviyo account and the dashboard will automatically populate with your data.
Email marketing analytics dashboard template for Klaviyo
This dashboard brings together Klaviyo email data and Google Analytics 4 website data. As a result, it provides a complete picture of how your email campaigns influence user behavior on your website and drive conversions.
Klaviyo email marketing analytics dashboard
 Preview dashboard
Klaviyo email marketing analytics dashboard
Preview dashboardWhat insights you can get
- Email-to-website conversion tracking: See how email engagement translates to website traffic and conversions
- Landing page performance: Identify which pages perform best for visitors coming from your email campaigns
- GA4 integration metrics: Combine email performance data with website analytics for complete attribution
- Campaign traffic analysis: Analyze how each email campaign drives visitors to your website
- Cross-channel performance view: Understand how email marketing fits into your overall digital marketing strategy
How to use this dashboard
When you open this dashboard, check the Readme tab first – it contains all the necessary instructions to connect your Klaviyo and Google Analytics 4 accounts. The dashboard uses direct connectors to pull data from both platforms, eliminating manual exports and providing you with a comprehensive cross-channel view of your marketing performance that updates automatically.
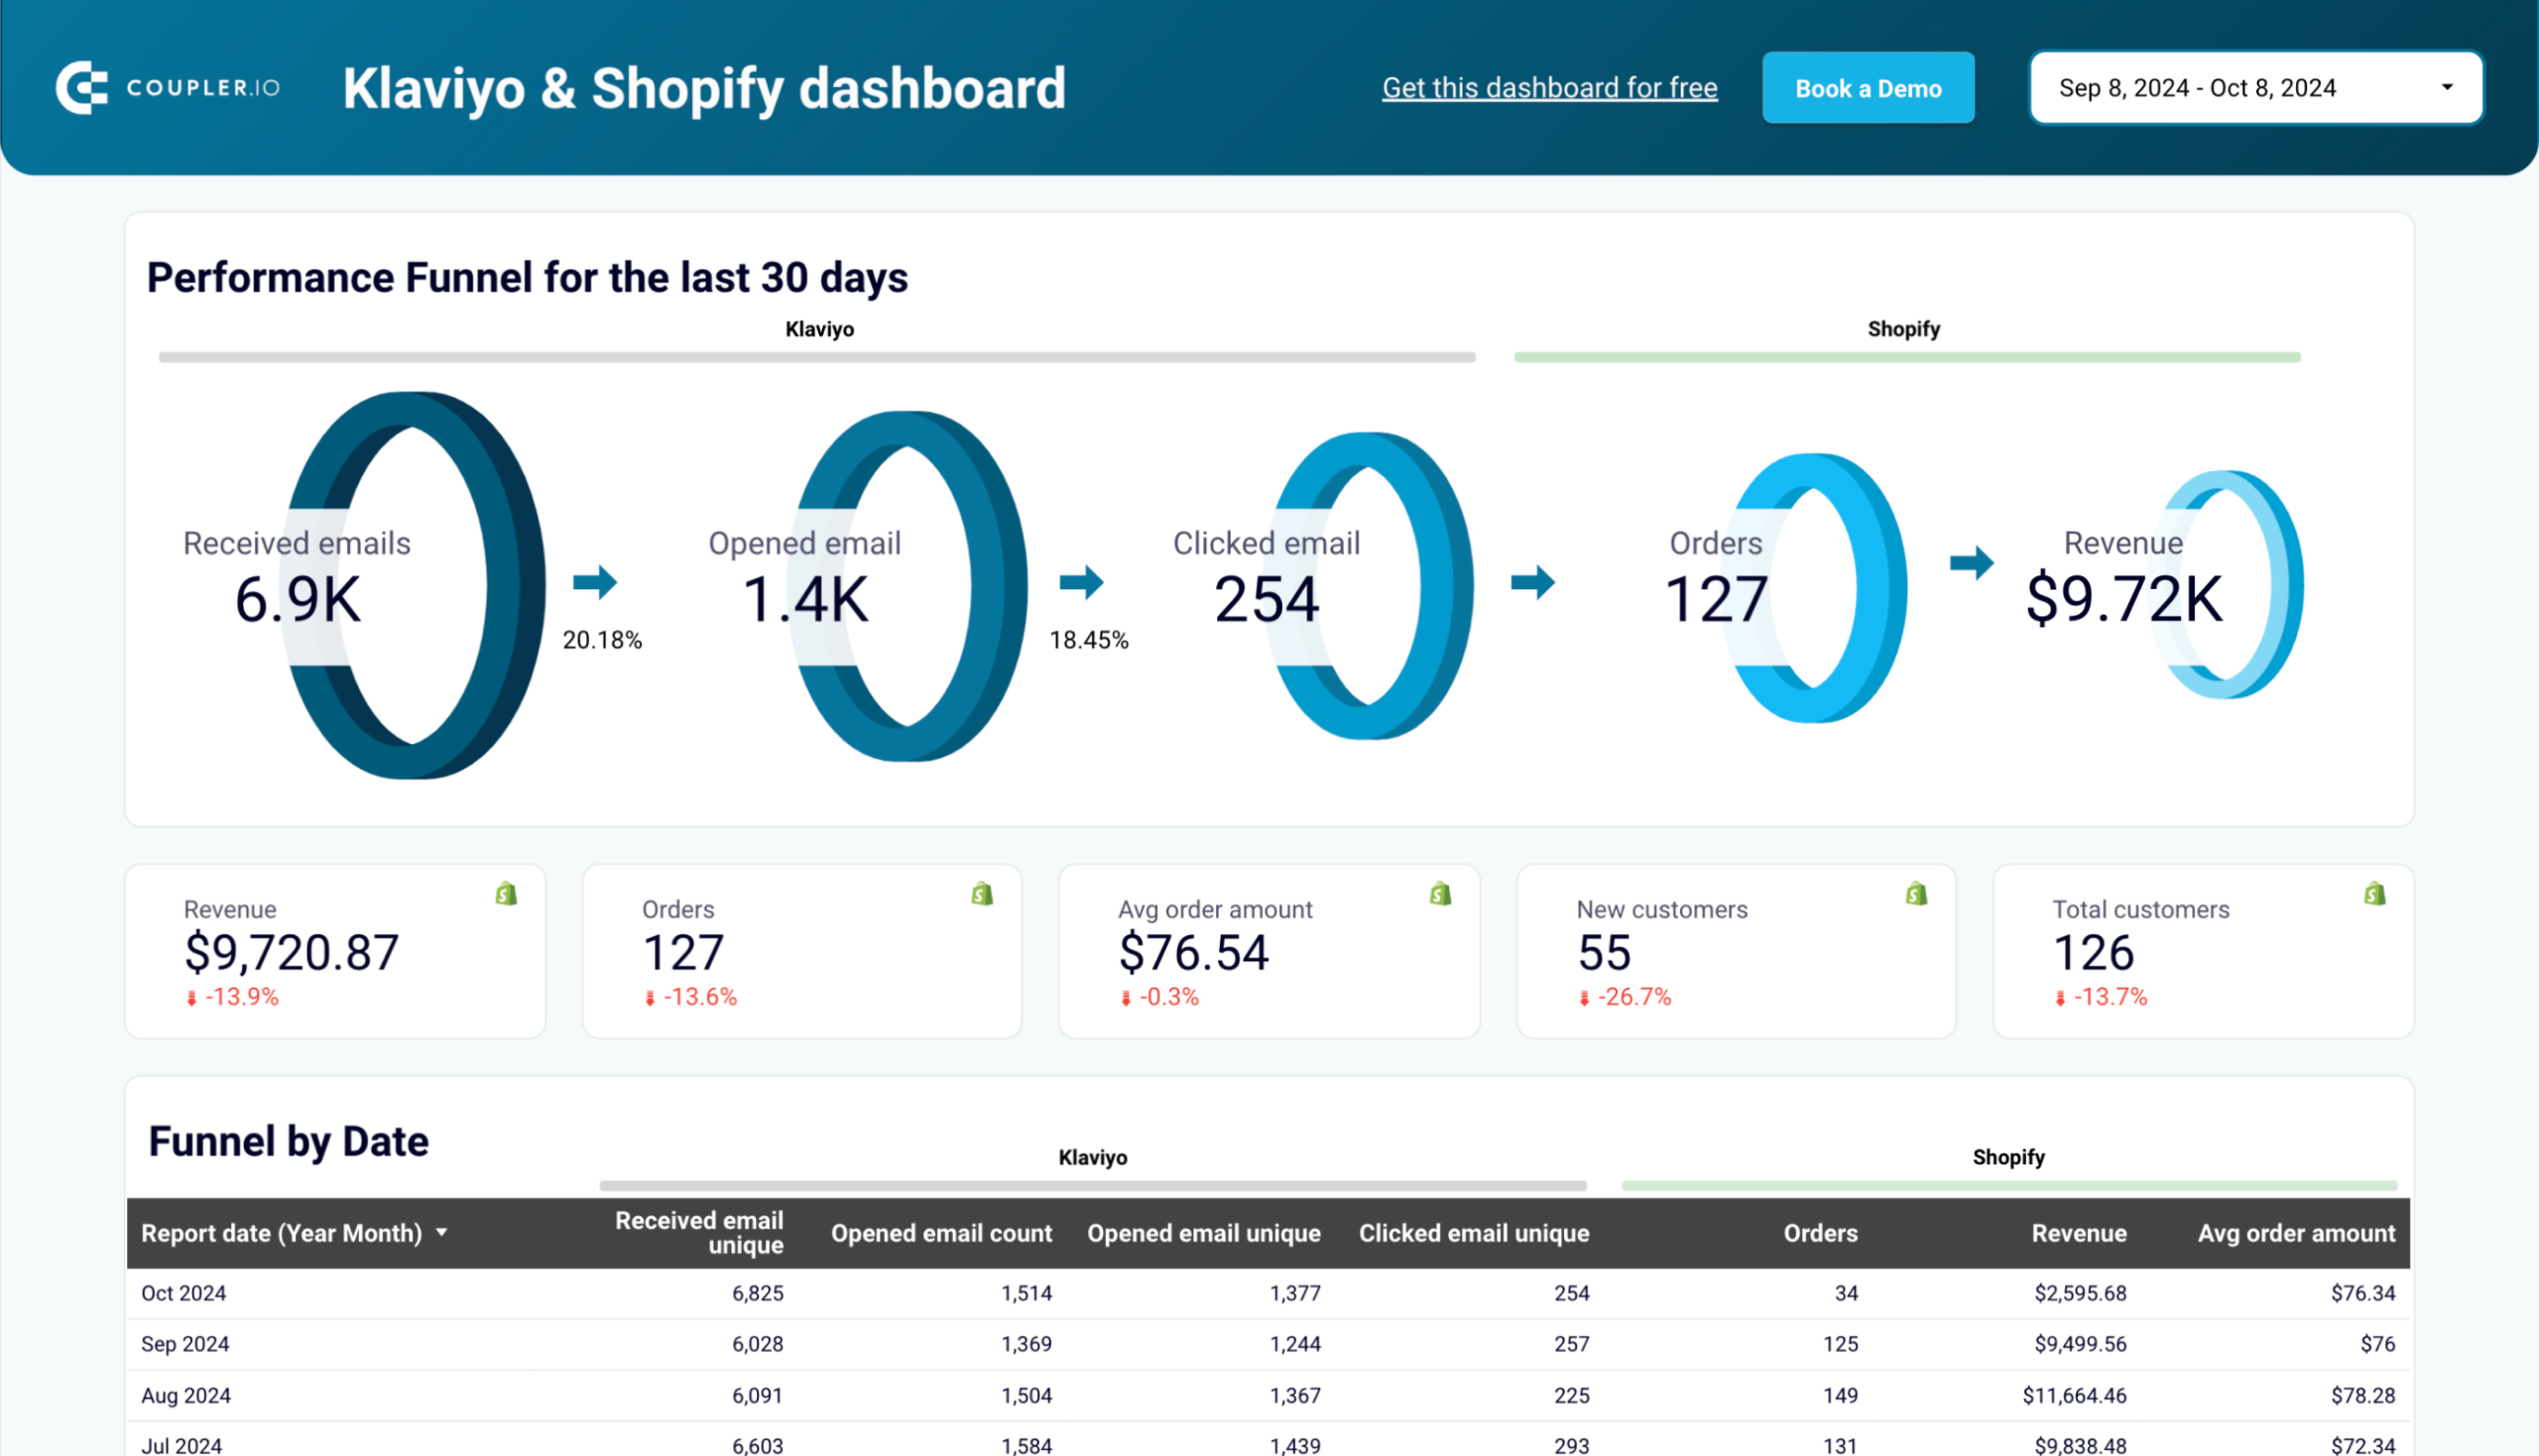
Klaviyo email campaign performance dashboard for Shopify/WooCommerce store
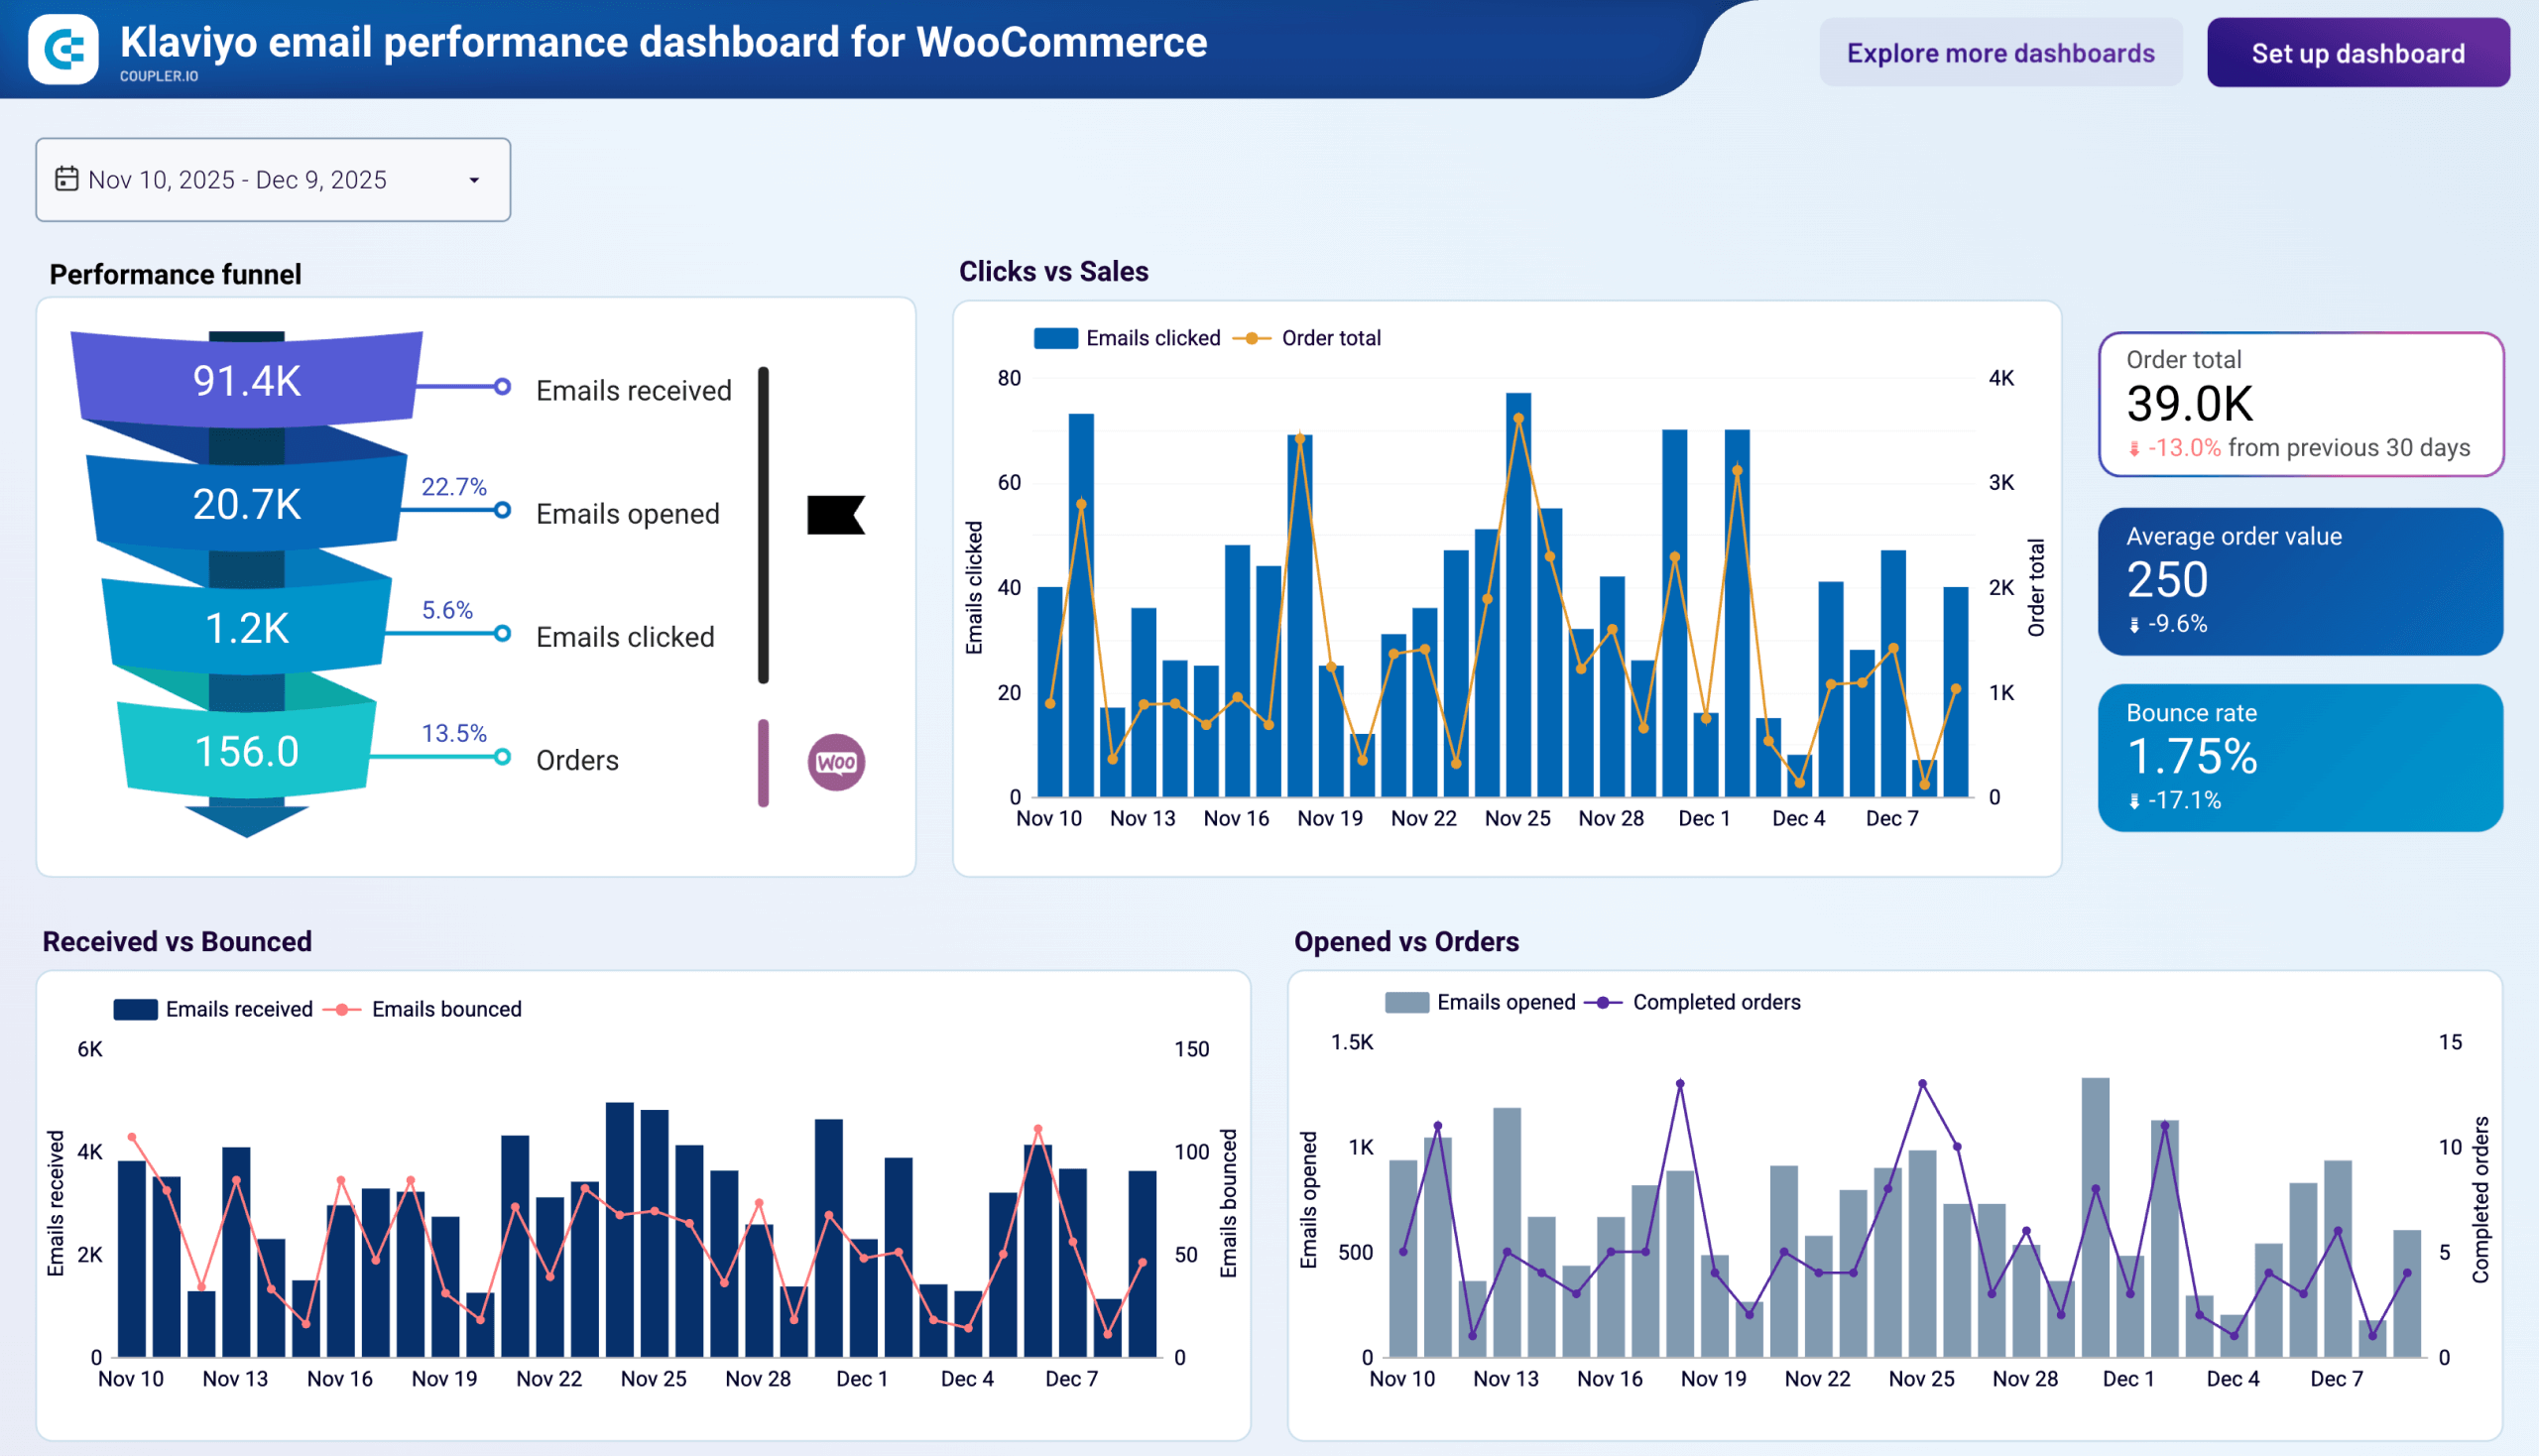
Open rates and click rates only tell half the story. Coupler.io offers a Klaviyo email performance dashboard for Shopify and WooCommerce that adds store order data to the picture. Each version is a separate Looker Studio template that connects to your store platform alongside Klaviyo.
Klaviyo email performance dashboard for WooCommerce
 Preview dashboard
Klaviyo email performance dashboard for WooCommerce
Preview dashboardWhat insights you can get
- Funnel drop-off diagnosis: See conversion rates between delivery, opens, clicks, and orders to pinpoint which stage needs attention first
- Revenue lag detection: Compare daily click volume against daily order totals to find out if purchases happen same-day or with a delay
- List health monitoring: Watch bounce counts alongside delivery volume to catch hygiene problems before your sender reputation takes a hit
- Send schedule optimization: Review open rates by day of the week and shift your campaign calendar toward consistently high-performing days
- Campaign revenue ranking: Sort campaigns by order revenue generated, not just engagement metrics, to see which emails actually move product
How to use this dashboard
Open the template and follow the setup instructions. You’ll connect your Klaviyo account and your store platform (Shopify or WooCommerce) through the built-in Coupler.io connector. The dashboard populates with your data automatically and refreshes on the schedule you set.


Other ways to integrate Klaviyo into Google Sheets
Klaviyo allows exporting data into .csv files, which can be later imported into Google Sheets. This method requires you to repeat the manual export-import process every time you need fresh data. Therefore, it is not feasible if you’re looking to connect Klaviyo to Google Sheets and integrate the data flow.
The best part of Klaviyo is its seamless integration with other platforms. The availability of the API makes it possible to connect it with any other platform or tool. API (Application Programming Interface) is a mechanism that enables communication between two applications through a common protocol.
I’ve already shared how to connect Klaviyo API with Google Sheets using the no-code Coupler.io connector. Google Apps Script is another tech-savvy option. This programmatic method requires the knowledge of Apps Script to pull data from Klaviyo to Google Sheets. Similar to Coupler.io, it also uses the Klaviyo API to integrate Google Sheets (although with Coupler.io, it happens under the hood).
Connect Klaviyo to Google Sheets using Google Apps Script
Google Apps Script is a JavaScript-based language supported by Google Workspace to integrate various applications. You can use the Google Apps Script to call the Klaviyo API, fetch the required data, and import it into Google Sheets.
This method demands high proficiency in the JavaScript language and working with APIs. Let’s say you want to get all the profiles from Klaviyo into Google Sheets. You can follow these steps to do that using Google Apps Script:
- Open the Google Sheet where you want to import Klaviyo data and go to Extensions > App Script.
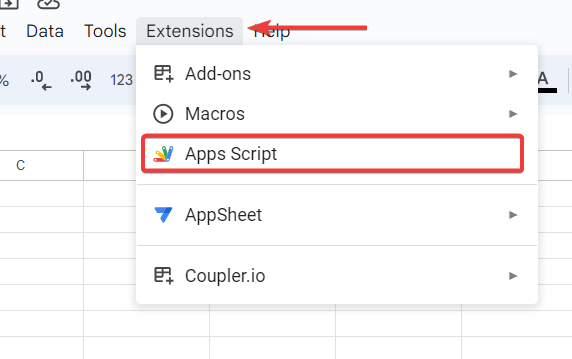
- In the script editor, copy and paste the following code:
function ListProfiles() {
   const API_URL = "https://a.klaviyo.com/api";
   const DATA_ENDPOINT = "/v1/people";
   const API_KEY = "Your_Klaviyo_API Key";
   const response = UrlFetchApp.fetch(API_URL + DATA_ENDPOINT + "?api_key=" + API_KEY);
   const content = JSON.parse(response.getContentText());
   const sheet = SpreadsheetApp.getActiveSpreadsheet().getSheetByName("Sheet1"); // Change Sheet1 to the name of your sheet


  // Create the header row
  var headerValues = ["ID", "Email", "First Name", "Last Name", "Address 1", "Address 2", "City", "Country", "Region", "Zip", "Title", "Phone Number", "Organization", "Updated"]; // the header row values
  sheet.getRange(1, 1, 1, headerValues.length).setValues([headerValues]); // add the new header row


   // Get existing data in sheet
   const dataRange = sheet.getDataRange();


   const values = dataRange.getValues();


   // Loop through Klaviyo data and update sheet
   for (let i = 0; i < content.data.length; i++) {
       const id = content.data[i].id;

       // Check if id already exists in sheet
       let existingRowIndex = -1;
       for (let j = 1; j < values.length; j++) { // Start at 1 to skip header row
           if (values[j][0] == id) { // Column 1 contains the id
               existingRowIndex = j + 1; // Add 1 to account for header row
               break;
           }
       }

       // If id exists, update other details in same row
       if (existingRowIndex > 0) {
           const rowToUpdate = sheet.getRange(existingRowIndex, 1, 1, 14);
           rowToUpdate.setValues([[id, content.data[i].email, content.data[i].first_name, content.data[i].last_name, content.data[i]['$address1'], content.data[i]['$address2'], content.data[i]['$city'], content.data[i]['$country'], content.data[i]['$region'], content.data[i]['$zip'], content.data[i]['$title'], content.data[i]['$phone_number'], content.data[i]['$organization'], content.data[i].updated]]);
       }

       // If id doesn't exist, add new row
       else {
           sheet.appendRow([id, content.data[i].email, content.data[i].first_name, content.data[i].last_name, content.data[i]['$address1'], content.data[i]['$address2'], content.data[i]['$city'], content.data[i]['$country'], content.data[i]['$region'], content.data[i]['$zip'], content.data[i]['$title'], content.data[i]['$phone_number'], content.data[i]['$organization'], content.data[i].updated]);
       }
   }
}
Remember to replace Your_Klaviyo_API Key in the above code with your Klaviyo Private API Key that we generated earlier.
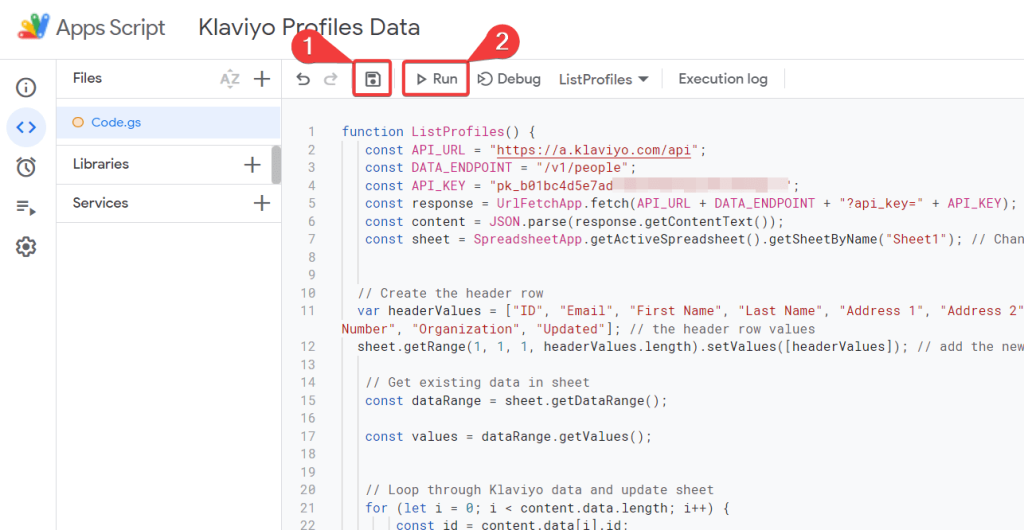
- Next, save the script and click Run to execute the code.
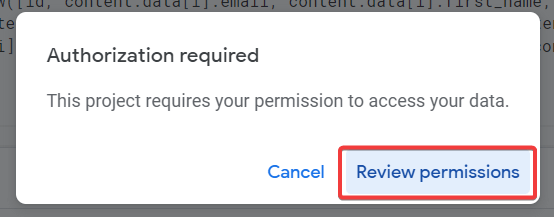
- You may be prompted to authorize the permission to run the script. Click on Review permissions.
- On the Google authorization popup, select the respective Google account.
- Now, a warning message will appear on your screen. Click on Advanced and click on Go to {app name} to proceed further.

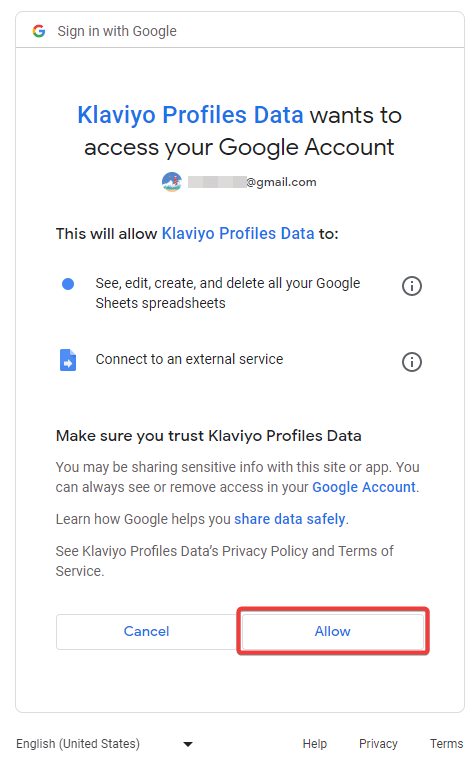
- Finally, click on Allow to grant app script access to your Google account data, which is required to import Klaviyo data to Google Sheets.
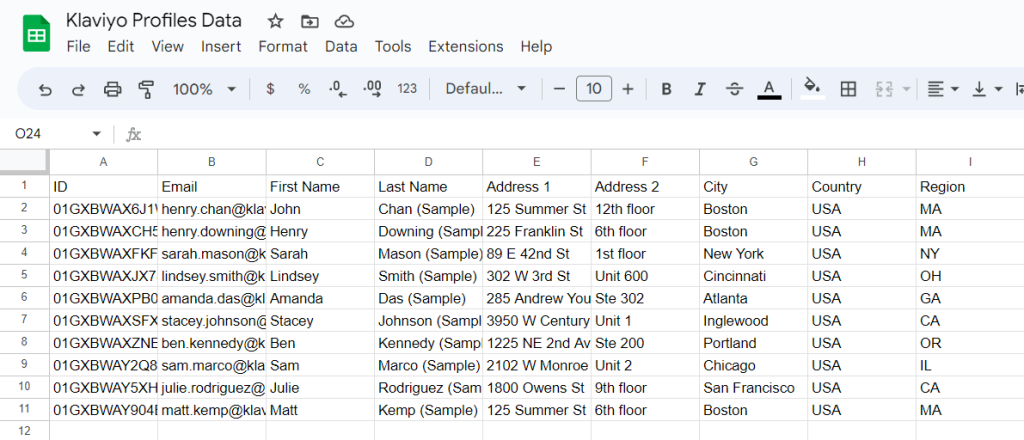
- On successful execution of the script, the required Klaviyo data will be successfully imported to the Google Sheet.
Please note that the above-provided code is just an example of fetching profile data from Klaviyo to Google Sheets. It is programmed to replace the existing data with a fresh one on each run. You may need to modify the code, use different API endpoints, and other functions to retrieve data and make it function as per your requirements.
Once everything looks good, you can configure the Google Apps Script to automate data importing. Let’s see how to do that.
Auto-update Google Sheets from Klaviyo at regular intervals
Google Apps Script supports various event-based triggers to auto-run functions. You can create a time-based trigger to automatically import Klaviyo data to Google Sheets at regular intervals.
Let’s say you want to update Google Sheets every minute for the latest data. You can follow these steps:
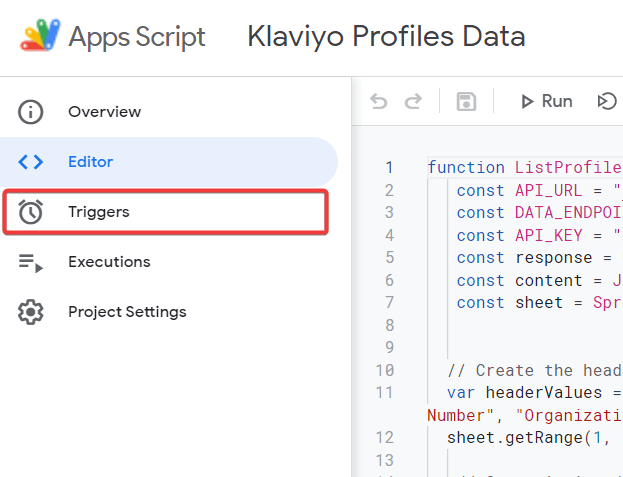
- In the Google Apps Script, click on Triggers in the left-most panel.
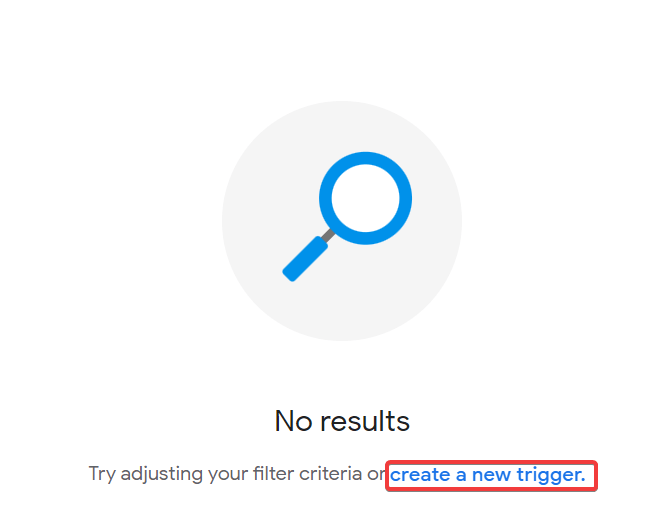
- In the Triggers section, click Create a New Trigger.
- Now, choose the function in the apps script which you want to call regularly.
- Select the event source as Time-driven, the timer as Minutes timer, and the interval as Every Minute.
- Finally, click Save to create the Trigger.
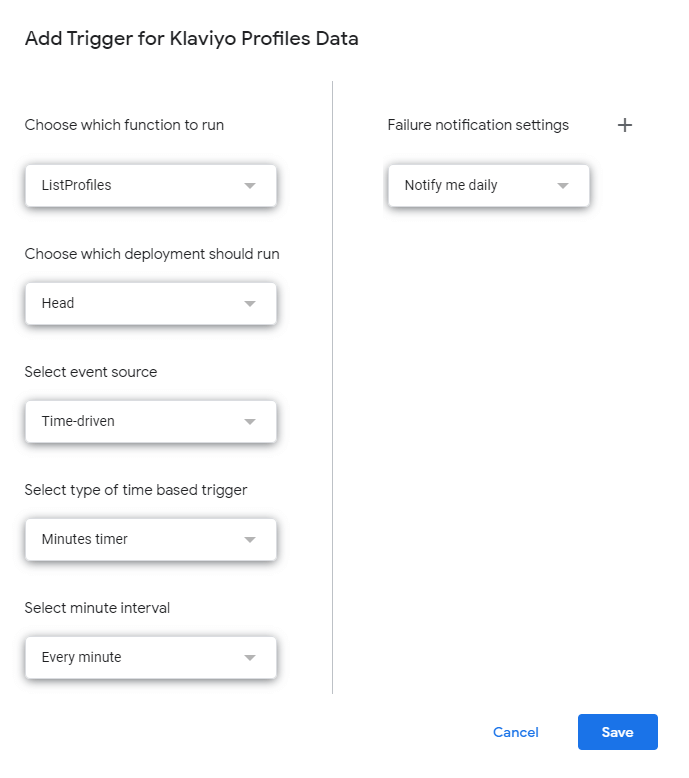
Optionally, you can also choose the frequency to receive notifications in case of apps script failure.
Now, Google Apps Script will run the script at regular intervals to auto-update data in Google Sheets from Klaviyo.
Which is the best method to build a Google Sheets – Klaviyo integration?
Connecting Klaviyo to Google Sheets can help you import data such as profiles, campaigns, and metrics to analyze your marketing performance. In this article, we learned two main ways to integrate Klaviyo into Google Sheets.
Klaviyo Google Sheets integration using the Google Apps Script method requires coding expertise. This can be challenging and is prone to technical errors. Therefore, the best method to connect Google Sheets to Klaviyo is using Coupler.io. The platform automates the integration with minimum technical knowledge. In addition to Google Sheets, you can connect Klaviyo to Power BI and other tools to make the most out of your data.

Automate Klaviyo data export with Coupler.io
Get started for free