An API is a ‘bridge‘ through which one app obtains/sends information from/to another app. This means that you can load miscellaneous data from your source app to your Excel workbook using the REST API. Moreover, you can even schedule data loads via the API to Excel sheet without any VBA coding! Read our guide to learn how you can do this.
How to use API in Excel – options you have
Basically, you have three options to link API to Excel:
- Coupler.io: This data integration platform provides a no-code connector to automate data exports via APIs to Excel on a custom schedule.
- Power Query: You can query data from APIs using Excel’s built-in tool.
- VBA: This is a code-based option that is suitable for tech-savvy Excel users.
Let’s check out each option in action so that you can make the best choice for your needs. For this, we asked Richard, a cryptocurrency enthusiast, to help us.
Richard wants to analyze the growth tendency of the top crypto coins. To do this, he needs to load data from CryptoCompare using their JSON API.
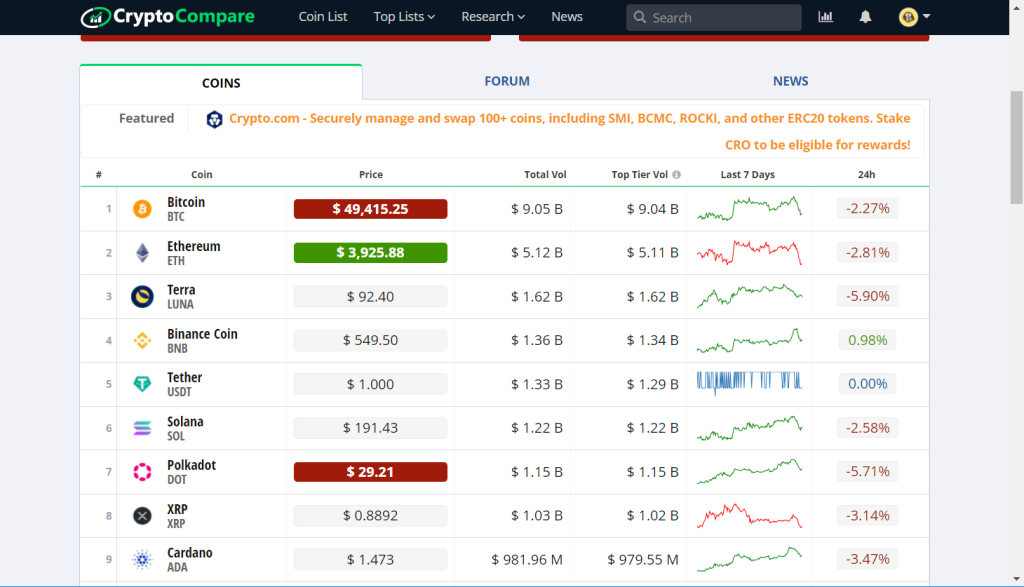
For testing, Richard will use the following API URL that will load data about the price for five cryptocoins: Bitcoin, Ethereum, Terra, Binance Coin, and Tether.
https://min-api.cryptocompare.com/data/pricemulti?fsyms=BTC,ETH,LUNA,BNB,USDT&tsyms=USD,EUR&api_key={enter-api-key}
Note: This API requires authorization, so Richard has already generated a free API key. Explore our list of APIs for marketing and sales.
So, let’s start with the option that allows you to schedule exports via API to Excel.
How to regularly pull API data into Excel with Coupler.io
For scheduled exports of data from API to Microsoft Excel, Richard will use Coupler.io. It’s a data integration and AI analytics platform to connect to multiple sources and load data from them to spreadsheets, dashboards, data warehouses, and even AI tools. You can export data on demand and automate import on a custom schedule, such as every day or every hour.
For Richard’s case, we’ll use the JSON integration with Excel. Let’s see how it works.
Excel API example with Coupler.io
In the form below, we’ve preselected JSON as a source application and Microsoft Excel Online as the destination application. Click Proceed to create a Coupler.io account for free and a new data flow to set up your connection to API. Then complete the following steps to load data from API to Excel sheet.
The form is preset for the export to Excel Online – an Excel file stored in your OneDrive or OneDrive for Business account.
At the same time, Coupler.io enables you to export data to an Excel file (CSV), which automatically downloads to your device. For this, change the destination to Excel Desktop using the drop-down list.
1. Collect data
- Insert the API URL to the JSON URL field. Click Continue.
https://min-api.cryptocompare.com/data/pricemulti
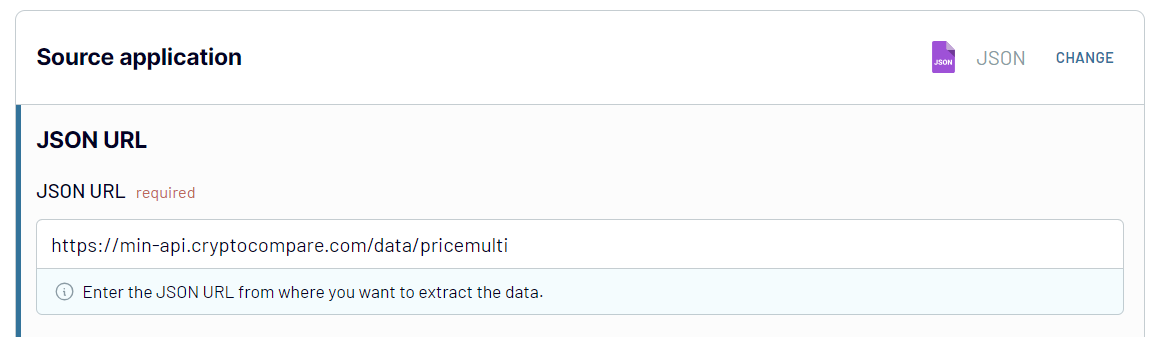
Note: You’ve noticed that this API URL differs from the one mentioned in the beginning. It lacks attached query strings because Coupler.io provides separate fields to specify request headers and URL query parameters. So, Richard will use those to demonstrate how they work.
- Request headers – here, you can apply specific headers to your request, such as Authorization, as Richard did.
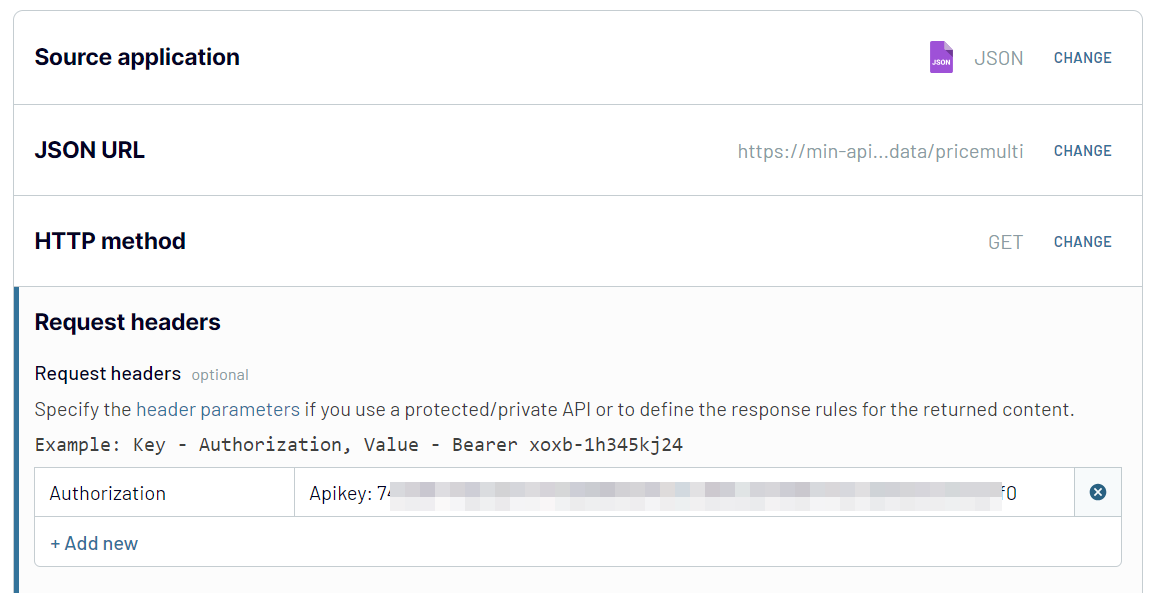
authorization: Apikey {enter-api-key}
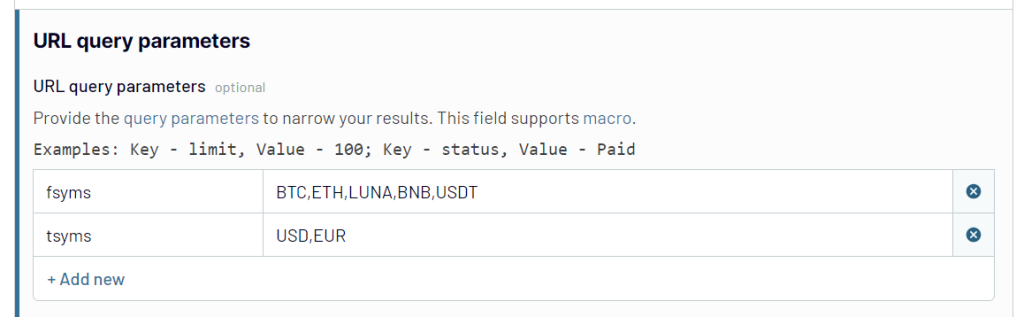
- URL query parameters – this field is for query parameters for your requests to the API. In Richard’s case, he specified the following strings to list cryptocurrency symbols and symbols to convert into:
fsyms: BTC,ETH,LUNA,BNB,USDT
tsyms: USD,EUR
Other fields, Request body, Columns, and Path are optional. You can learn more about them in the Coupler.io Help Center.
Note: You can find information about the parameters used in those fields in the API documentation of your application. Pay attention to the information about API authentication and details of API endpoints – these are usually located in separate sections.
2. Transform data
At this step, you can preview your data and organize it if needed. The transformation options include:
- Hiding, renaming, or editing columns.
- Adding new columns.
- Filtering and sorting data.
- Blending data if you connected more than one data source.
3. Load data and schedule refresh
If you’re exporting data to Excel Online, connect your Microsoft account, select a workbook on OneDrive and a worksheet where the data will be loaded. You can select an existing Excel worksheet or create a new one.
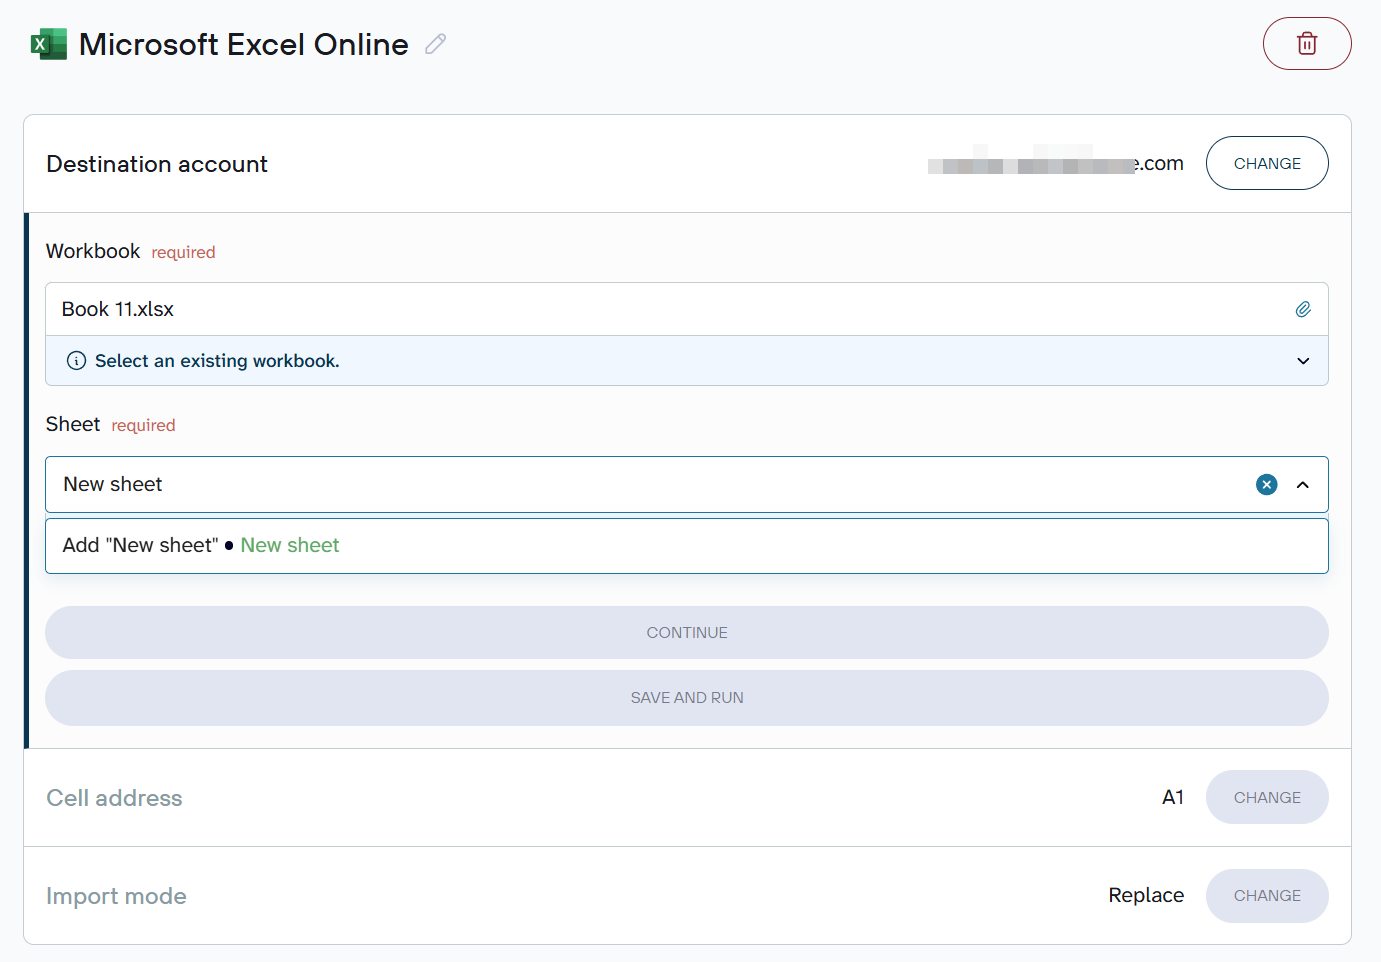
Note: Optionally, you can change the first cell for your imported data range, change the import mode, and add a column that contains the date and time of the last update.
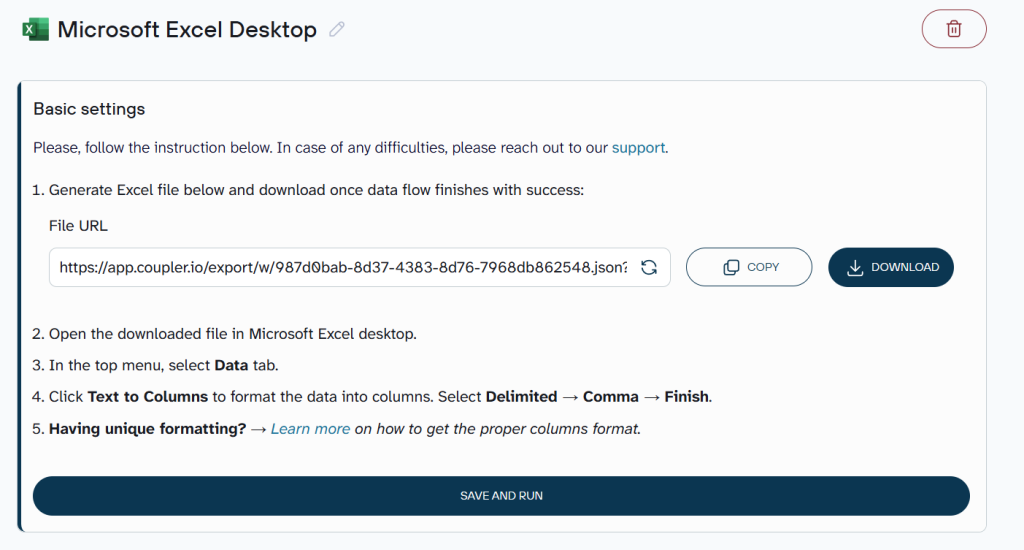
For Excel Desktop, click Generate file and then Download to get your CSV file to your device and open it in the Excel desktop app.
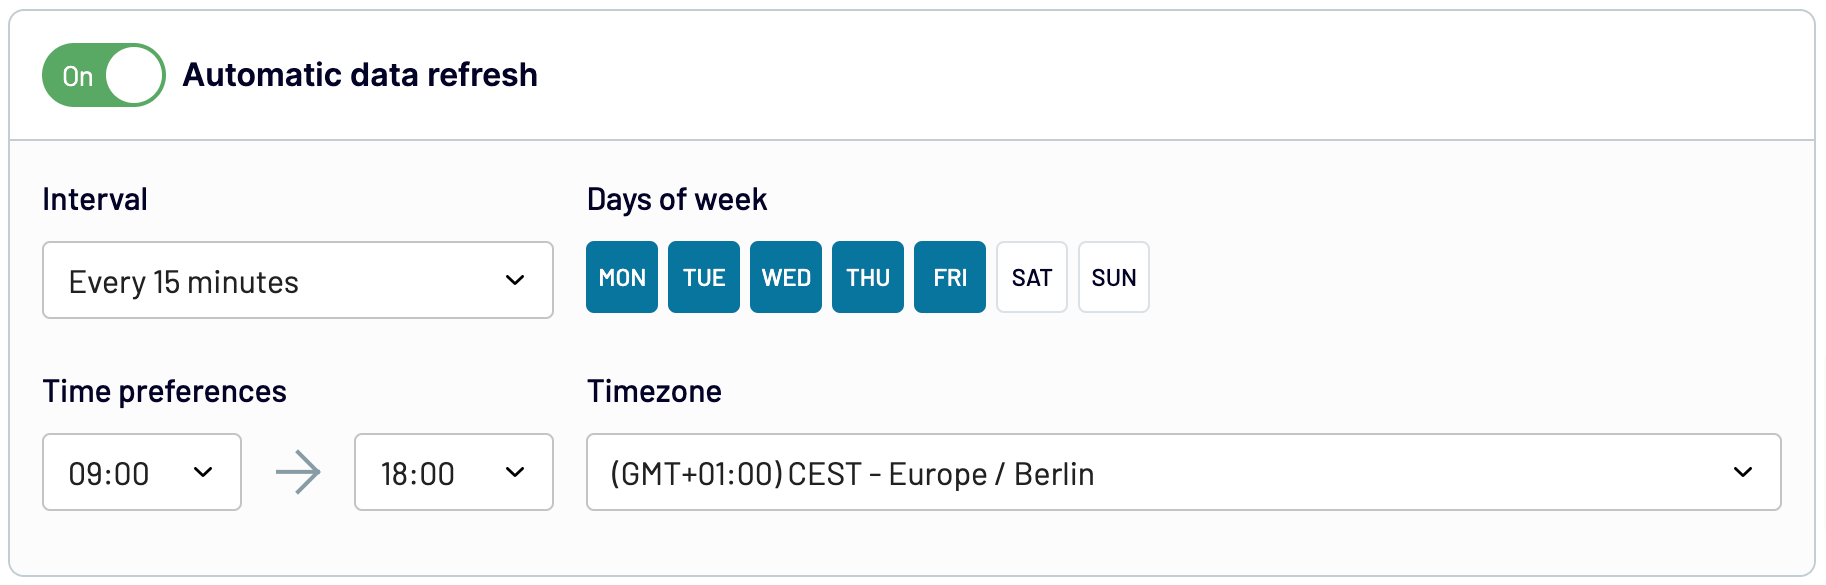
Clicking on Save and Run loads the data from API to Excel right away. But Richard needs to automate this export on a recurring basis, so he needs to complete another step.
Configure the schedule for your JSON importer during the initial setup or at any other time. For this, you need to toggle on the Automatic data refresh and configure the frequency.
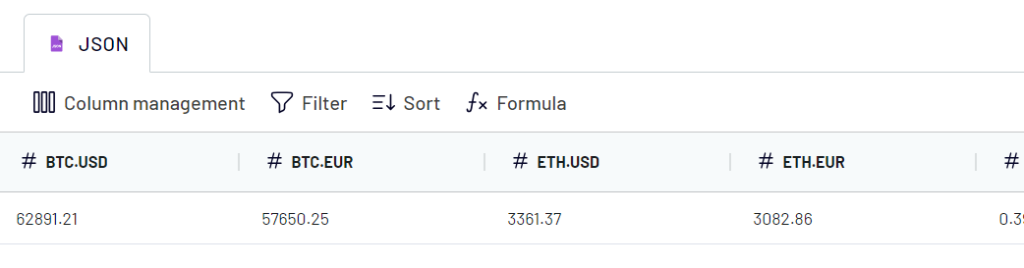
That’s it! Let’s check out the results of the records pulled from API to Excel sheet?
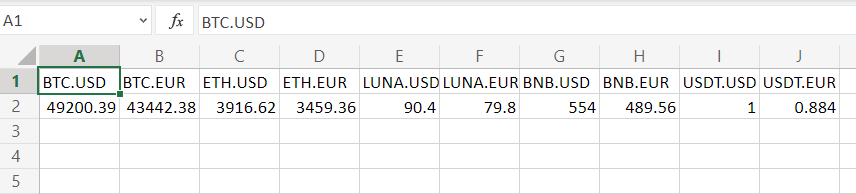
The imported data does not look very neat. Nevertheless, you can create a separate sheet where the data will be transformed to the format you want and link Excel sheets. Therefore, every time Coupler.io refreshes your data, it will be automatically refreshed on the linked sheet.
Connect API to Excel with Power Query
Power Query is a data transformation engine within Excel. As well, it allows you to query data from different sources including REST APIs. Here is what you need to do to link API to Excel.
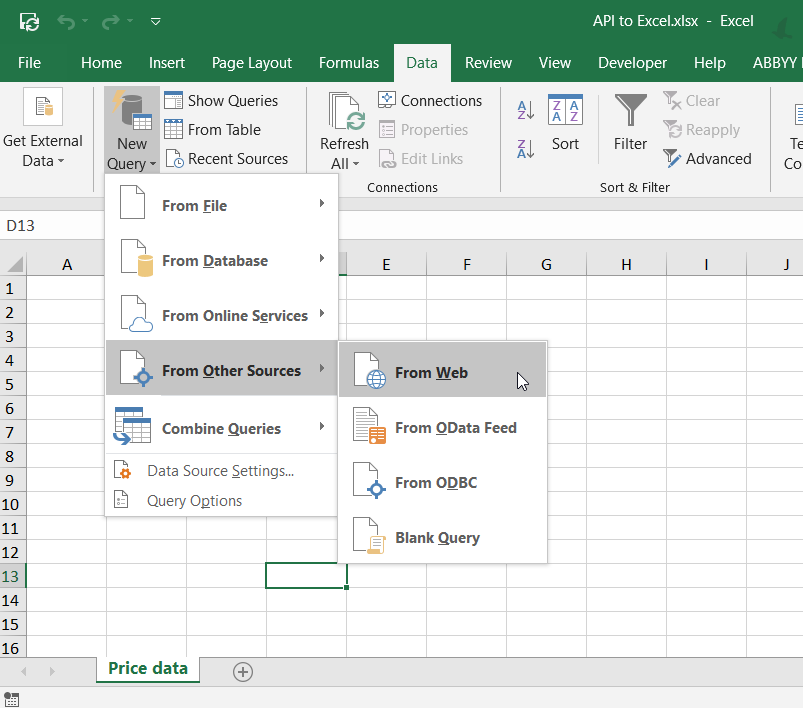
- In your Excel workbook, go to Data => New Query => From Other Sources => From Web.
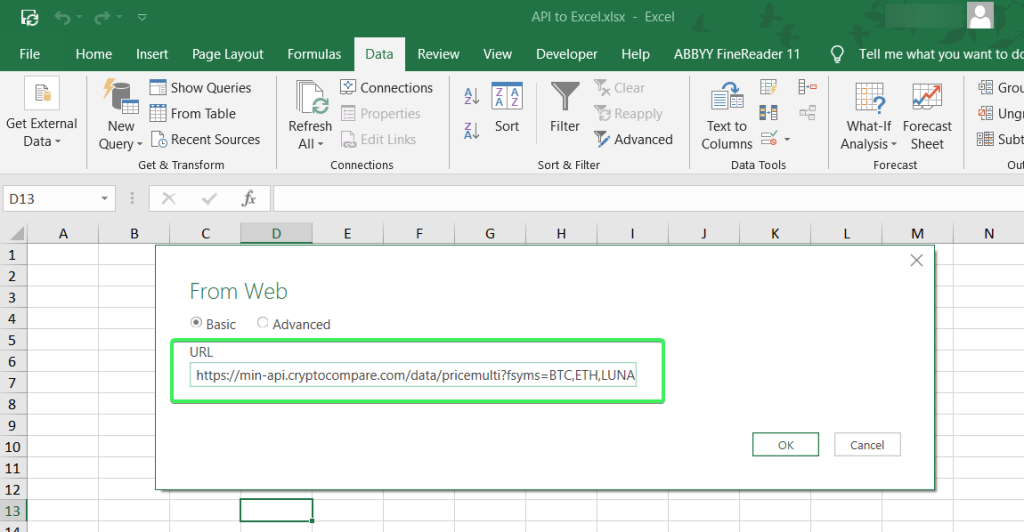
- Insert the API URL and click OK.
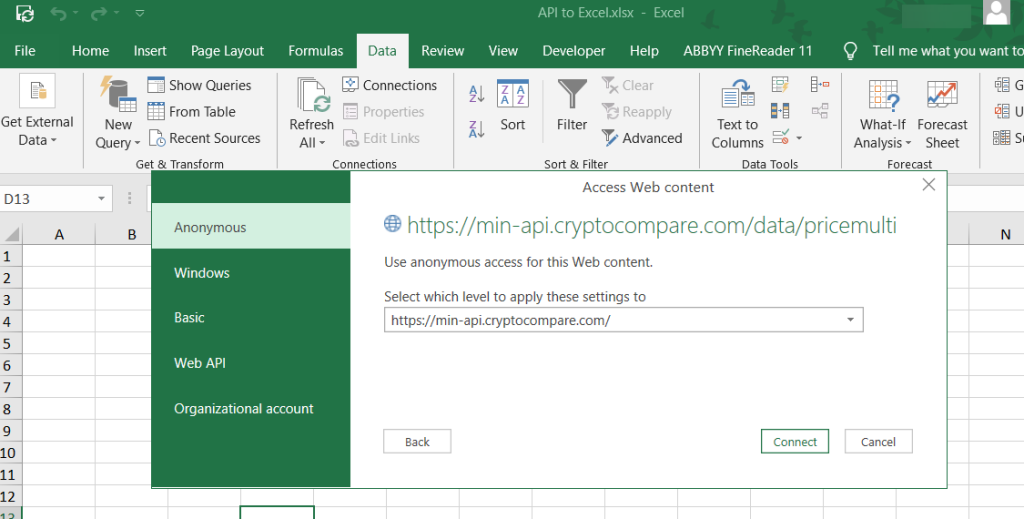
- Choose the web content access. For this example, we can go with Anonymous. Click Connect.
- The Power Query editor will open where you can preview the data loaded from API. Go to the Convert tab and click Into Table.
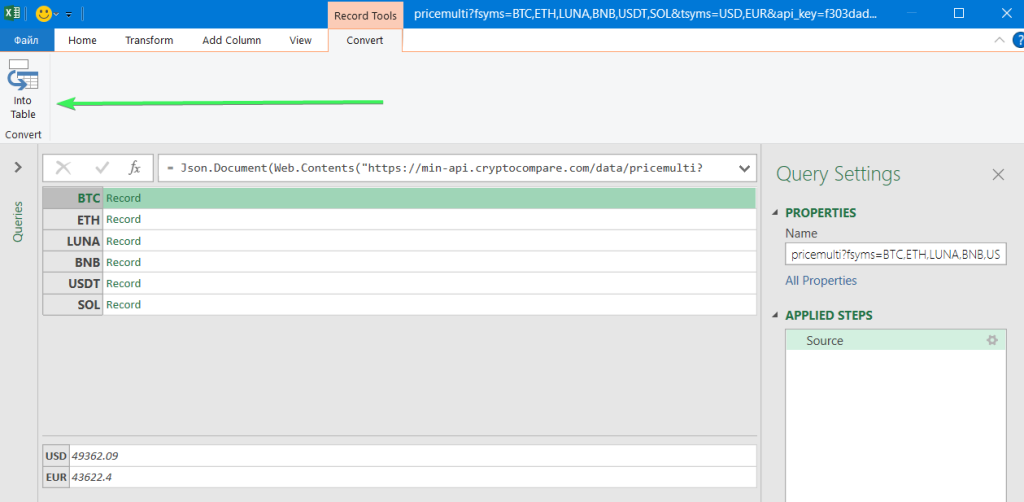
- This will convert the data from API to a table, and you’ll be able to transform it before loading it to the Excel workbook, for example, transposing rows to columns or vice versa.
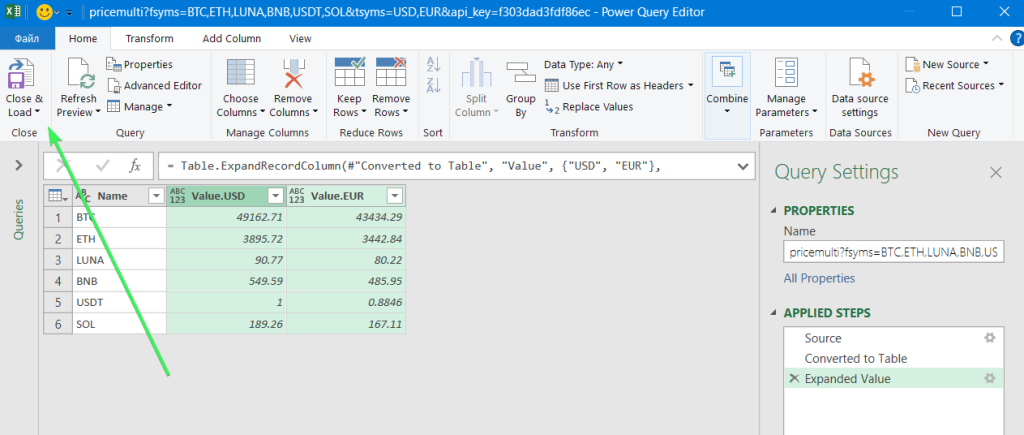
- You see that values in the Value column are hidden. The reason is that you need to select which columns to display. For this, click on the Expand button and select the columns. Click OK.

- Now you see two columns: Value.USD and Value.EUR. When all the necessary transformations are done, click Close & Load.
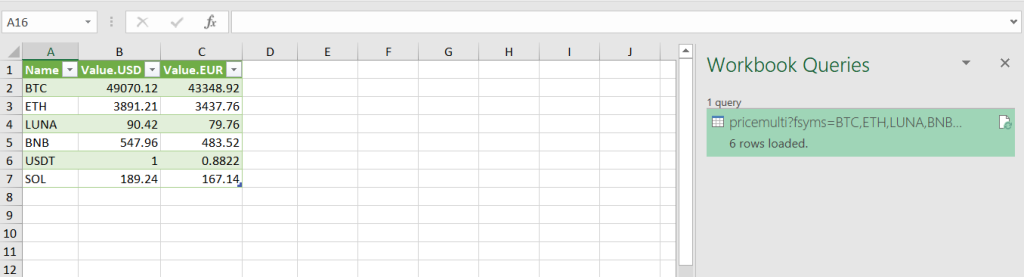
There you go!
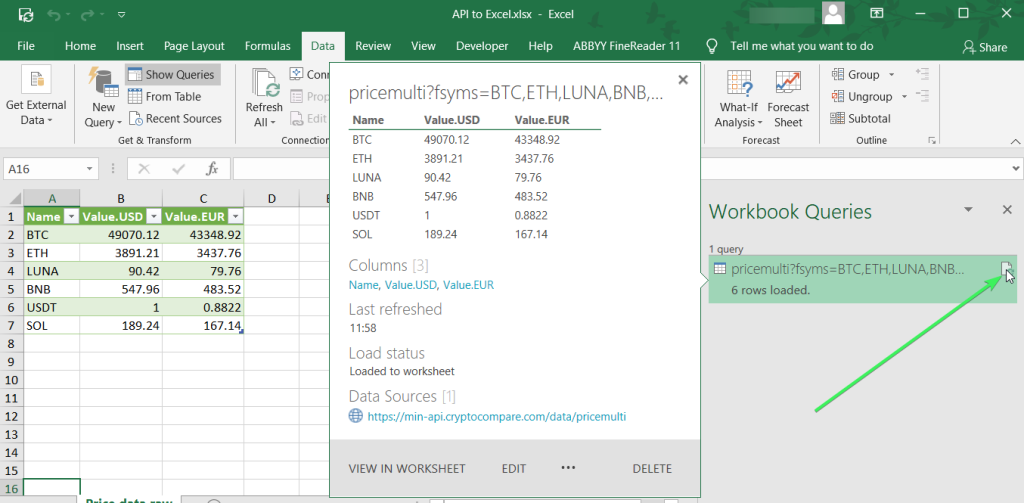
You can also check out the details of your connection.
Can you link API to Excel on a schedule with PowerQuery?
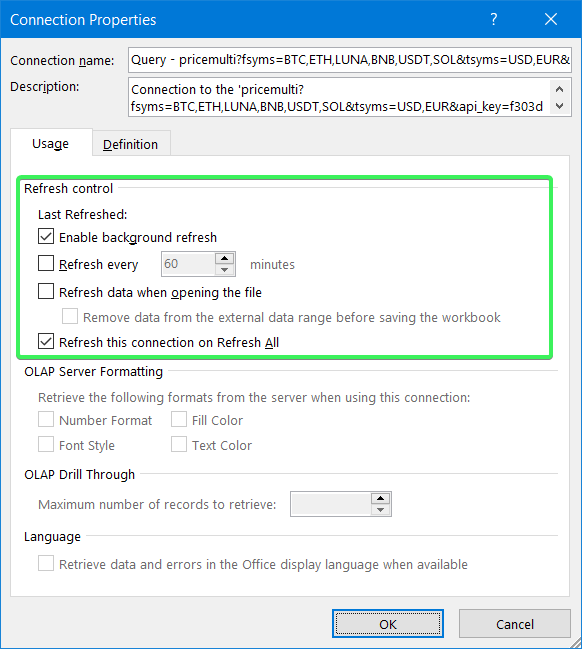
You can refresh data from the API on demand or set up a frequency for the automatic refresh. For this, go to Data => Connections => Properties… and configure the Refresh control.
The Power Query setup looks somewhat intricate because the main purpose of this tool is to transform data. So, it’s better to use Power Query in combination with Coupler.io – your data will go to Excel on a schedule where you can transform it with Power Query as you wish.
How to connect API to Excel using VBA
The answer is very simple – you need to learn VBA and implement your coding knowledge. 🙂 The benefit of a code-based solution is that you can make it custom. This is achievable if you’re proficient in coding and specifically VBA. Alternatively, you can find some templates on GitHub or somewhere else and tweak them. But it is unlikely that you will find a code sample that will cover all your needs.
Which way to connect API to Excel sheet is the best one?
The built-in PowerQuery functionality seems to be the actionable option to link API to Excel. It allows you to grab data and transform it on the go. However, the main drawback of PowerQuery is that it’s only available for the Excel desktop app. If this is not an issue for you, you can go with it.
Who’s going to choose the VBA script to connect API to Excel? This is the way for tech-savvy Excel experts who prefer to create custom functions and integrations for their liking. If you are one of those, then it’s probably your way as well.
The no-code way is the choice of many, including Richard. For his needs with low data volume and infrequent data refresh, he can start using Coupler.io for free and then upgrade to the paid subscription.

Automate data export to Excel with Coupler.io
Get started for free