How to Connect Excel to Google Data Studio (Looker Studio) [2026]

Microsoft Excel is a popular spreadsheet tool used in almost any organization. It indeed offers many powerful data reporting and visualization features, but they may not be enough if you want a unified view from multiple data sources.
This is where connecting Excel to data reporting tools, such as Looker Studio, can help. Google Data Studio (formerly known as Looker Studio) is a cloud-based data reporting and visualization tool offered by Google. It pulls data from a variety of sources and paints beautiful dashboards with real-time reports.
In this post, I’ll cover two possible ways to connect Excel to Looker Studio and automate the data flow.
Methods to import Excel data to Data Studio (Looker Studio)
Excel data can be exported to a .csv file, which can be used as a data source in Google Looker Studio. But, this method does not actually connect Excel to Google Looker Studio. You’ll need to repeat this manual process every time you want to get fresh data.
Looker Studio does not offer any direct integration with Microsoft Excel. To connect Excel to Looker Studio, you will need to use one of these methods:
- A partner connector that offers direct integration. There are Looker Studio connectors that allow you to integrate the two apps easily, even if you don’t have any tech background. For example, an ETL tool offered by Coupler.io connects Microsoft Excel to Google Sheets in minutes and automates data flow without any coding.
- A workaround via Google Sheets. Excel doesn’t have a native connector for Looker Studio, but Google Sheets do. So, you can use this as a workaround – connect Excel to Google Sheets first, and then integrate Google Sheets with Looker Studio using native functionality. This method might be useful for some cases, but you will need to find a way to connect Excel and Google Sheets first. Here are the options:
- A data integration solution. Coupler.io, which we already mentioned, allows you to connect Excel to Google Sheets as well (although the direct integration is a better option). No coding required in this case.
- Python Program. This is a method to connect Excel to Google Sheets using an API in Python script. This requires knowledge of APIs and Python programming language. Therefore, this method is not suitable for business users as you will need a tech professional by your side to create an integration programmatically.
Let’s explore each of the methods to connect and visualize Excel data in Looker Studio.
How to connect Excel to Looker Studio without coding?
Coupler.io is a data integration platform that offers a no-code Excel to Looker Studio connector. It automates the data flow from Excel to Looker Studio at regular intervals so that you don’t have to do it manually. Apart from that, Coupler.io can export data from 400+ other apps and transfer it to Looker Studio, BigQuery, Google Sheets, and Excel.
This is the easiest method to connect Excel to Looker Studio and automate the connection.
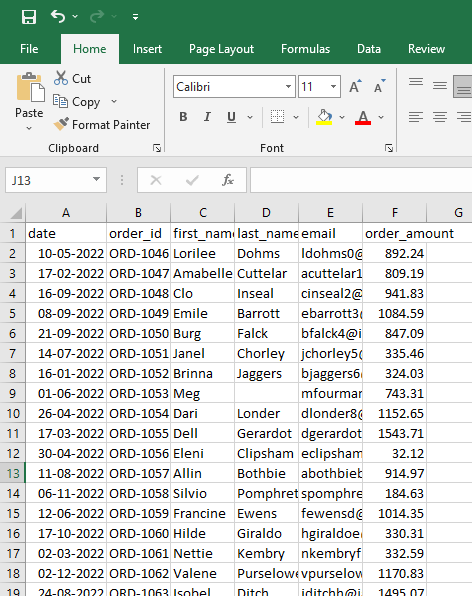
Let’s say you have the following Excel Sheet, which you want to connect with Looker Studio.
Click Proceed in the form below to create a Coupler.io account and a new importer with Microsoft Excel as a source and Looker Studio as a destination.
Configure the following settings:
Source

Click Continue to proceed with the next section.
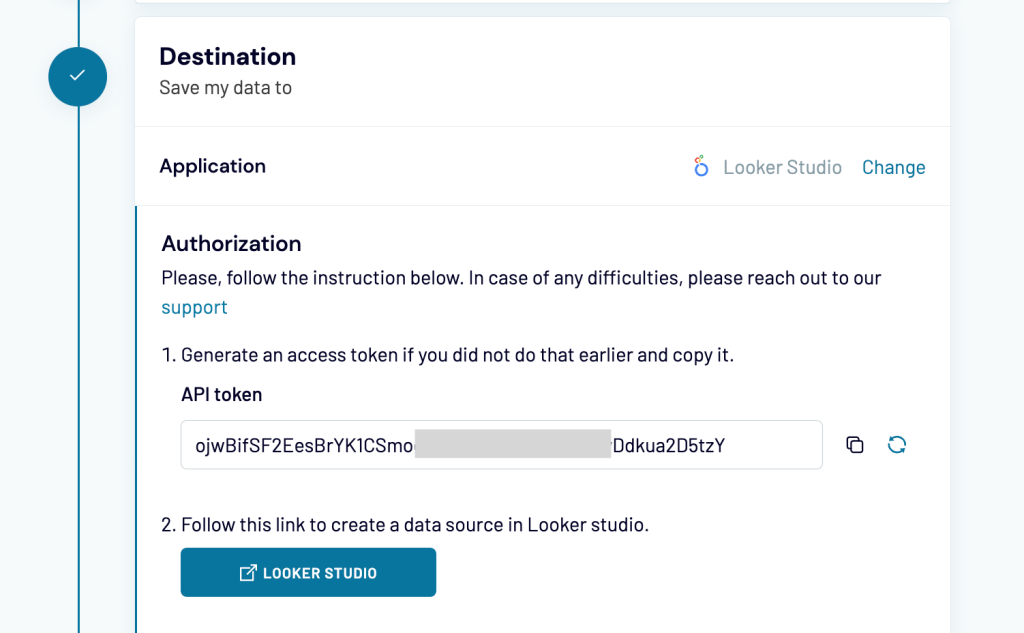
Destination
- Now, let’s connect your Looker Studio account. Follow the instructions in the importer to set up the connection.
- First, generate an API token. Press the Generate button on the right to get a new token and copy it once the token appears.
- Then, move to the second step and press the Looker Studio button.
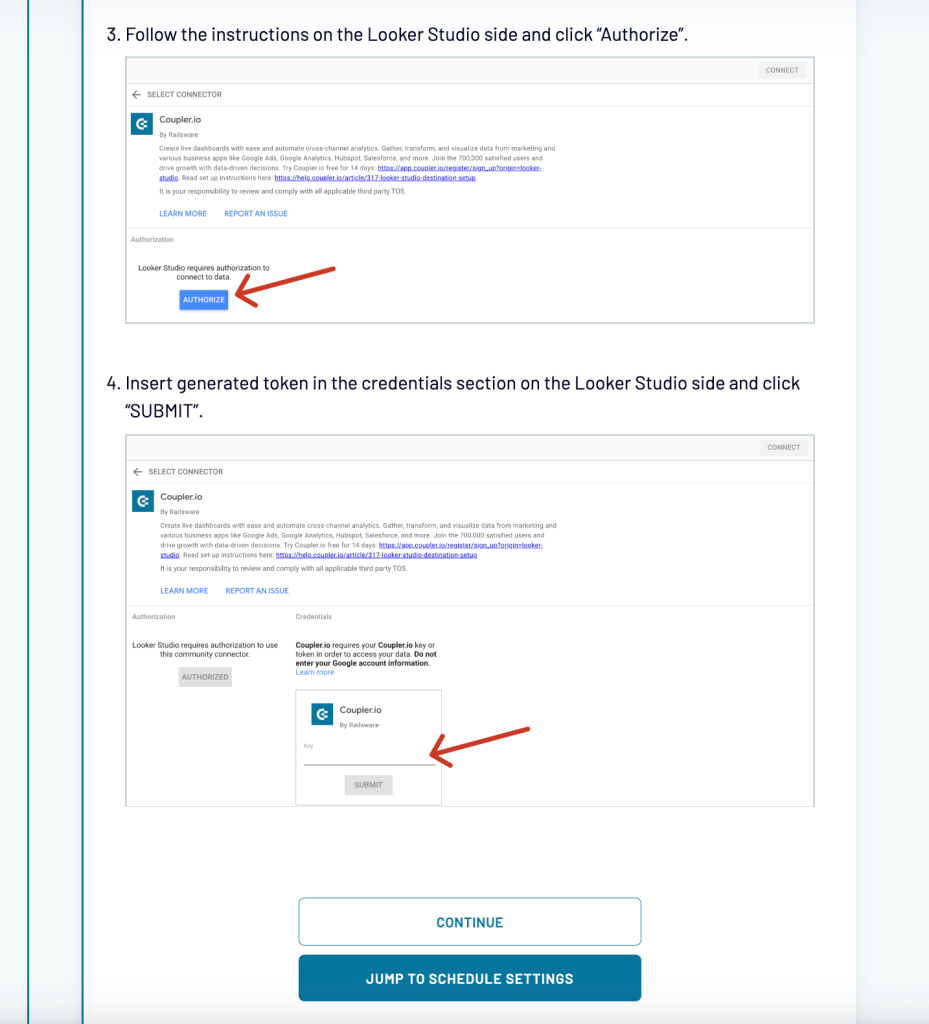
Complete the next steps as described in the importer’s instructions:
- Authorize access for Looker Studio.
- Insert the API token you generated before into the corresponding field.
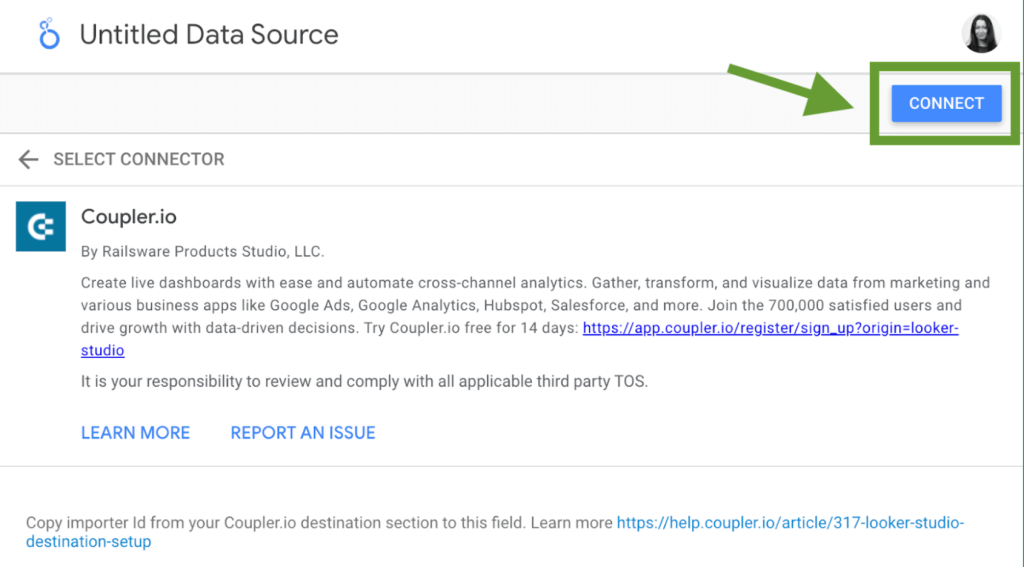
- Then, click Connect in the upper right corner. Your importer will be connected to Looker Studio.
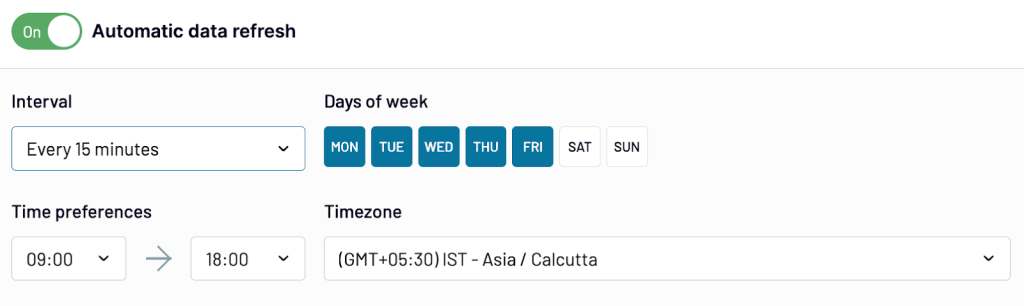
- That’s it! You can now return to Coupler.io to specify the schedule for the updates.
Once Coupler.io finishes the data import, you’ll be notified via a success message on the dashboard.
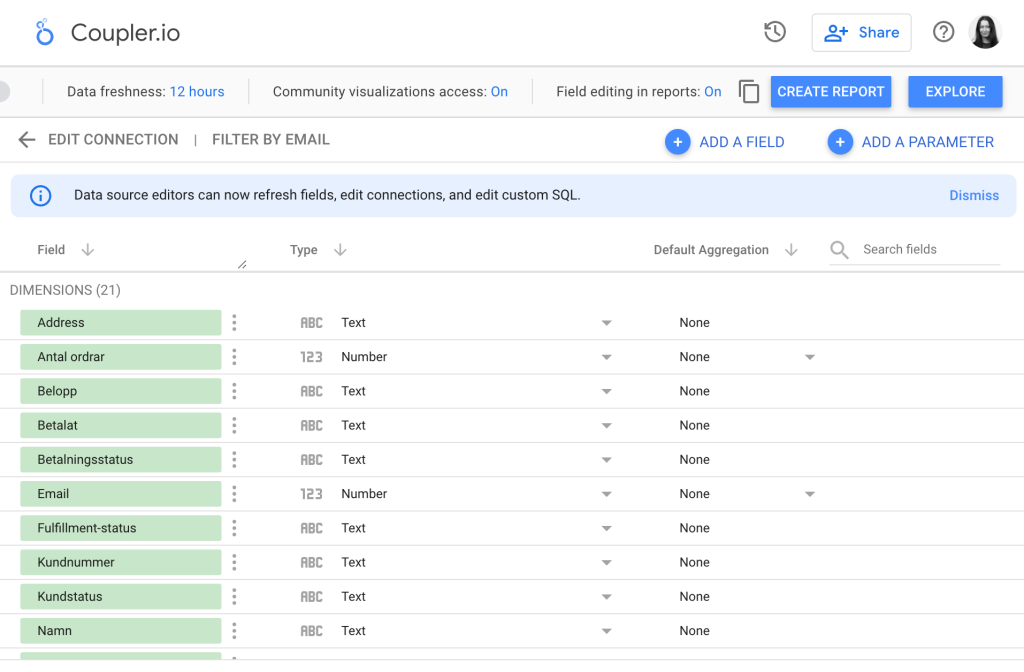
In the next step, you will be able to see the list of fields that are to be included in your Looker Studio report. At this point, you can edit them, change field type, if necessary, and so on. Once everything looks good, press Create Report. That’s it! Now you can start visualizing your data in Looker Studio.
At the beginning of the article, we mentioned that you can connect Excel to Looker Studio via Google Sheets. If you go for this method, you can use Coupler.io to transfer your data from Excel to Google Sheets automatically on a schedule, and then connect Google Sheets to Looker Studio using the native connector. To export Excel to Google Sheets, you need to complete more or less the same steps that we already described for connecting Excel to Looker Studio. But, in this case, you will need to select Google Sheets as a destination for the exported data.
Although such a method might be useful in some cases, we recommend opting for direct integration – this will be a simpler, easier, and faster way.
How to visualize Excel data in Looker Studio programmatically?
If you don’t want to use a third-party solution to connect Excel to Looker Studio (either directly or via Google Sheets) – then, you can do this programmatically.
Google Sheets API can be used to connect Excel to Looker Studio via Google Sheets. This method demands high technical skills and knowledge of the Python programming language. It consists of two steps. First, you will need to integrate Excel and Google Sheets, and after that, you will need to connect Google Sheets to Looker Studio using native functionality.
Follow these steps to connect Excel to Google Sheets and visualize its data in Looker Studio:
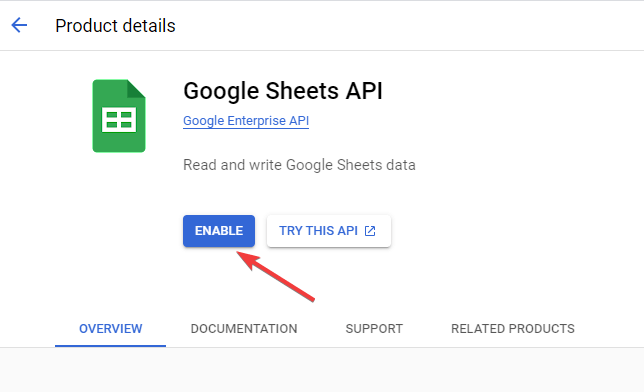
- Enable Google Sheets API: In the Google Cloud Console, click the top-left hamburger symbol to open the menu, and navigate to APIs and Services > Library. Search for Google Sheets API, and enable it.
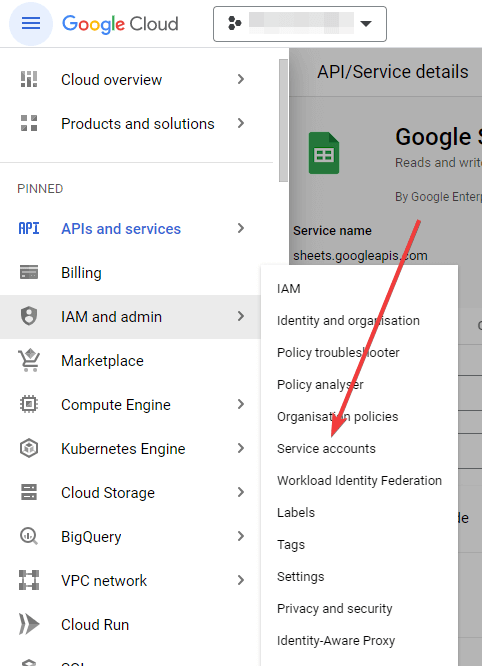
- Create a New Service Account: Now, in the left navigation menu, go to IAM and Admin > Service accounts.
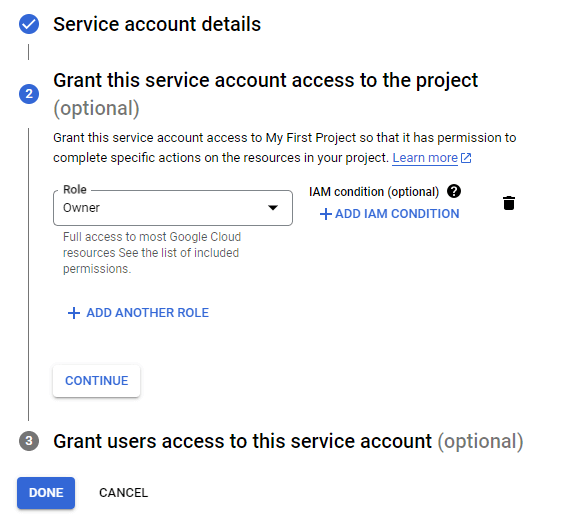
- Create a new service account, fill up the required details, and choose Owner as the Role to get full access. Finally, click Done to save the service account.
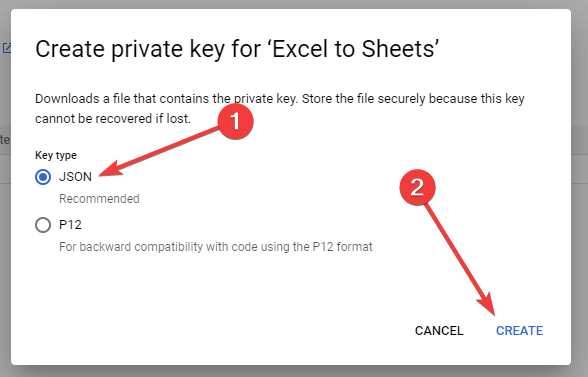
- Create a Private Key: Open the freshly created service account, go to the Keys tab, and Create a New Key for it. Select JSON as the Key type and click Create to download the Key.
- Save the JSON Key safely on your computer and proceed with the following steps.
- Install Required Python Libraries: You need to install certain Python libraries required to connect Excel to Google Sheets. Open the the command prompt, and install them by running the following command:
pip install gspread pandas oauth2client
- Finally, make an API request from the Python script to export Excel to Google Sheets. For example:
import gspread
import pandas as pd
from oauth2client.service_account import ServiceAccountCredentials
# Set the scope and credentials
scope = ["https://spreadsheets.google.com/feeds", "https://www.googleapis.com/auth/drive"]
creds = ServiceAccountCredentials.from_json_keyfile_name("path/to/key.json", scope)


# Authenticate and access the Google Sheets API
client = gspread.authorize(creds)
sheet_name = "Data from Excel"
sh = client.create(sheet_name)


# Share the spreadsheet with your Google account
sh.share(’example@gmail.com', perm_type='user', role='writer')

# Read the Excel file into a DataFrame
excel_file = "path/to/source/file.xlsx"
excel_data = pd.read_excel(excel_file)

# Create a new worksheet in the Google Sheets file
worksheet = sh.add_worksheet(title="Sheet1", rows=len(excel_data), cols=len(excel_data.columns))

# Append the rows from the DataFrame to the worksheet
for i, row in excel_data.iterrows():
    worksheet.append_row([str(cell) if isinstance(cell, pd.Timestamp) else cell for cell in row])

print("Excel file uploaded to Google Sheets successfully!")
In the above code, replace the following:
path/to/key.jsonwith the path of the JSON Key that you downloaded earlier.path/to/source/file.xlsxwith the path of the Excel file that you want to connect to Google Looker Studio.example@gmail.comwith the Google account email, which is associated with Looker Studio.
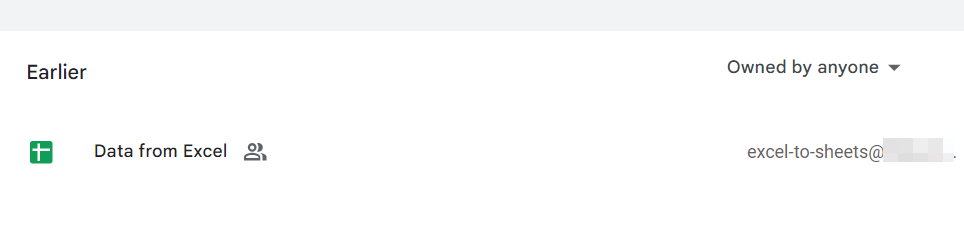
On successful execution of the code, the above script will create a new Google Sheets file. It will also be shared with the defined Google account email. You can find it shared in the Google Sheets Home.
You can use this Google Sheets file created by Python to visualize Excel data in Looker Studio. Now, in order to synchronize the Excel data with Looker Studio in real-time, you’ll need to code another program that sends API requests to update data at regular intervals. This can be too technical! ?
Furthermore, if you’re working with a large dataset, you’ll need to modify the script to break the data update into multiple chunks. Therefore, you’ll need a technical expert by your side if you decide to connect Excel to Looker Studio using this method.
What’s the best way to connect Excel to Looker Studio?
Connecting Excel to Looker Studio can accelerate data reporting and analytics for your business. In this article, we discussed different ways to connect Excel to Looker Studio. The fastest and easiest method is to use a dedicated data integration platform, Coupler.io, to link the two apps with a direct connector.
Another option is to use a workaround and connect Excel to Looker Studio via Google Sheets as an in-between link. But to do so, you will need to either use a partner Looker Studio connector for this as well, or export Excel to Google Sheets programmatically.
The programmatic method to visualize Excel data in Looker Studio is a bit tricky to implement and requires additional scripting to synchronize the data at regular intervals.
On balance, the Coupler.io ETL tool is the best method to import Excel data to Looker Studio. It offers easy connection and automates the data flow between the apps. If you are considering other data viz tools, see our article on how to connect Excel to Tableau.
Furthermore, it seamlessly integrates with 60+ other data sources for automated data reporting.
For example, you can connect Klaviyo to Looker Studio and more. So, try it out for your project!

Automate data export with Coupler.io
Get started for free