If you usually copy data and paste it into your Excel workbook, then you’ve got to the right place. I’m going to elaborate on how you can import data to Excel from websites, apps, databases, and other sources for which Ctrl+C and Ctrl+V are not an option.
Methods to import data to Excel
Apart from the already manual copying and pasting, there are two main methods to load data from external sources to Microsoft Excel:
- Power Query – it is a multi-purpose tool to load and transform data from databases, cloud apps, and other sources. Power Query is also used in Power BI, while in Excel it is mostly known as the Get & Transform module.
- Excel integration by Coupler.io – it is a data integration platform to automate data import from your data source to Excel. Coupler.io supports over 400 business apps that you can export data from and load it to Excel Online or Desktop.
Automated data import to Excel with Coupler.io
Coupler.io offers Excel integrations to import data from marketing tools, CRM apps, spreadsheets, databases, accounting software, and even APIs. You can automate data flow on a custom schedule and transform your data before loading it to Excel.
In addition, you can choose between two options for Excel as a data destination:
- Excel Online – export data to an Excel file stored in your OneDrive or OneDrive for Business account
- Excel Desktop – export data to an Excel file (CSV), which automatically downloads to your device.
How to import data to Excel on a schedule
The flow is pretty simple. Select the needed data source in the form below and click Proceed. The form is preset for the export to Excel Online. Feel free to change the destination to Excel Desktop using the drop-down list.
You’ll be offered to sign up for Coupler.io for free with no credit card required. You can do this using your Microsoft account. After that, complete three steps:
- Configure the connection to your data source. You will need to either select a report, a set of metrics or specify a spreadsheet, etc.
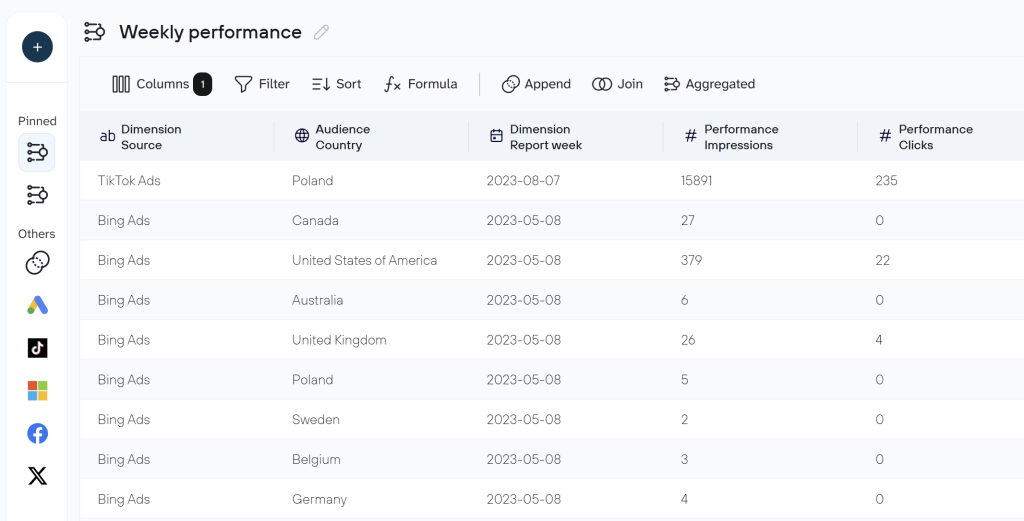
- In the next step, you can organize your data by using filters and transformation options. Moreover, Coupler.io allows you to import data from multiple sources and combine it into a single view (append or join data). Here is what it may look like:
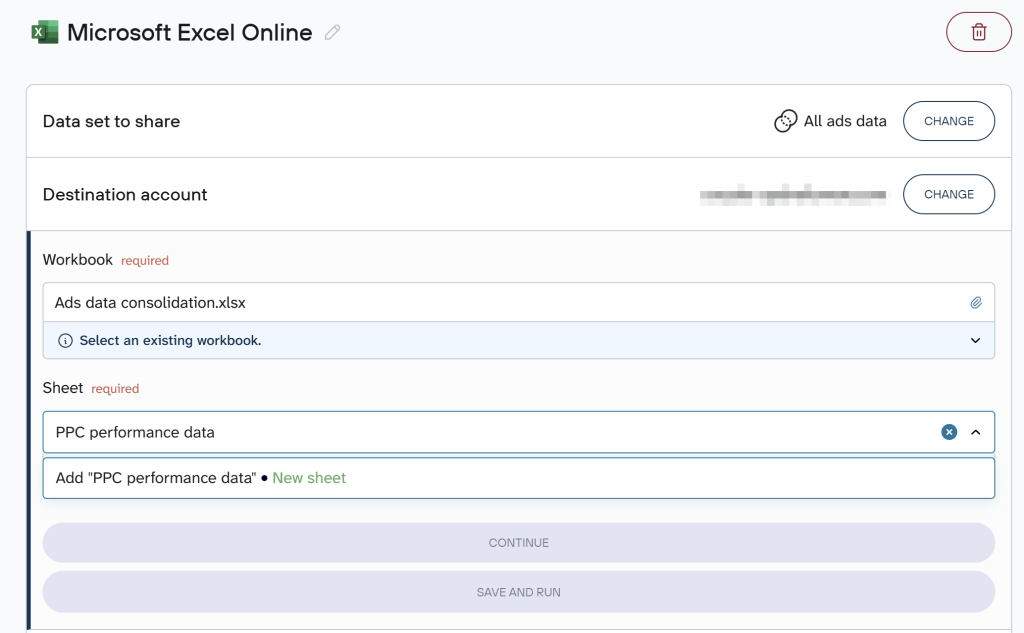
- To load data to Excel, connect your Microsoft account and specify a workbook and a worksheet for your data. Actually, you can create a new worksheet by typing in a new name
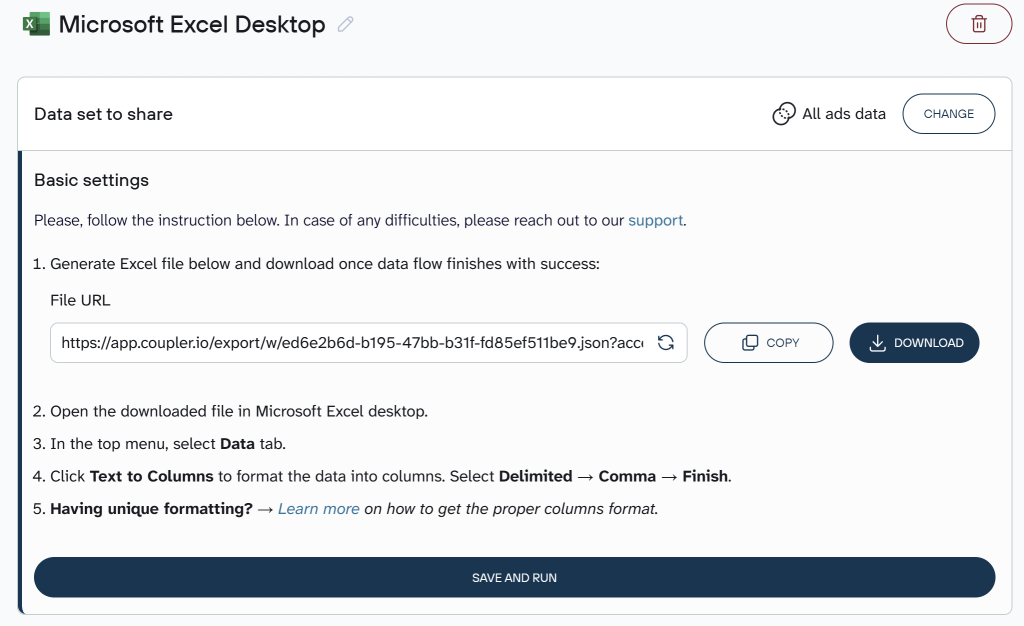
However, if you’re importing data to Excel Desktop, click Generate File. After that, you’ll be able to download a CSV file with your data and open it in Microsoft Excel desktop.
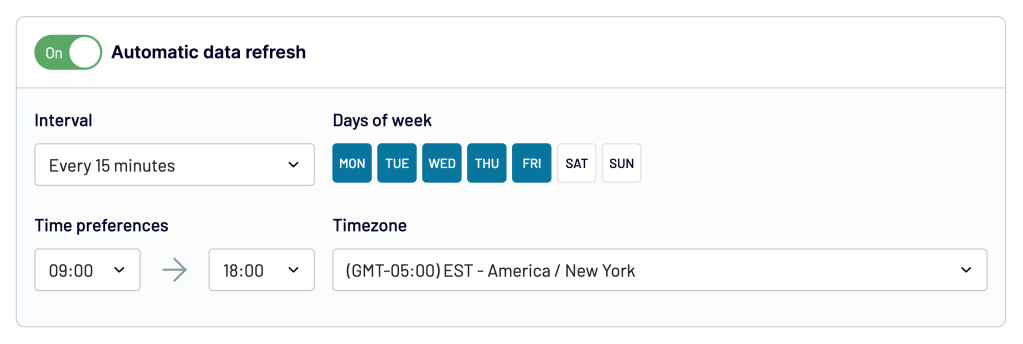
The final step of the setup flow is automation. Enable the Automatic data refresh and schedule imports of your data to Excel.
Another benefit of using Excel integrations by Coupler.io is that you can import data to and export data from Excel. This way you can synchronize workbooks as a replacement to the Workbook Links functionality.
How to import web data to Excel
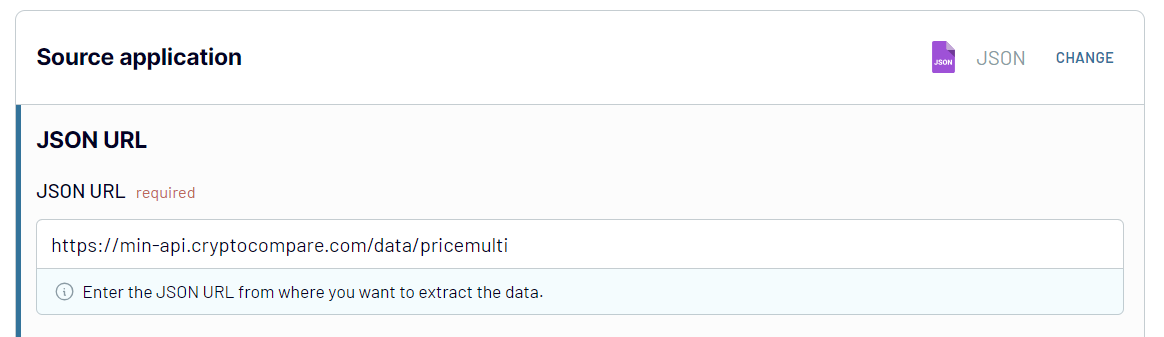
In addition to ready-to-use Excel integrations, Coupler.io allows you to create custom ones by connecting to JSON APIs. You only need to click Proceed in the form below and set up your connection to the API as follows:
- Insert the API URL to the JSON URL field. Click Continue. For example:
https://min-api.cryptocompare.com/data/pricemulti
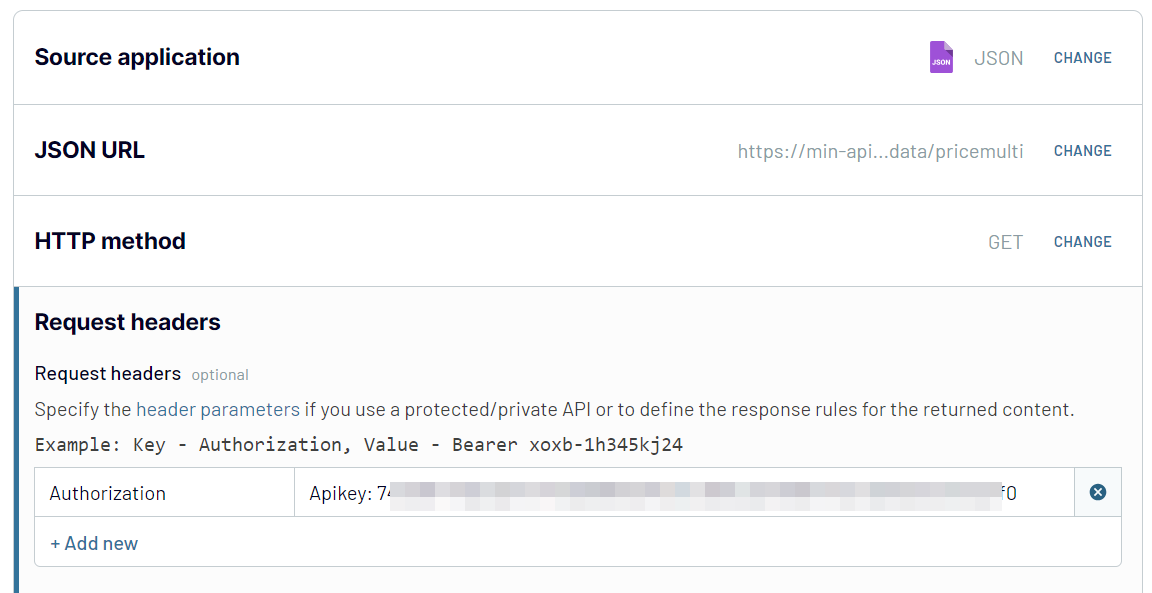
- Request headers – here, you can apply specific headers to your request. For example, here is the Authorization header:
authorization: Apikey {enter-api-key}
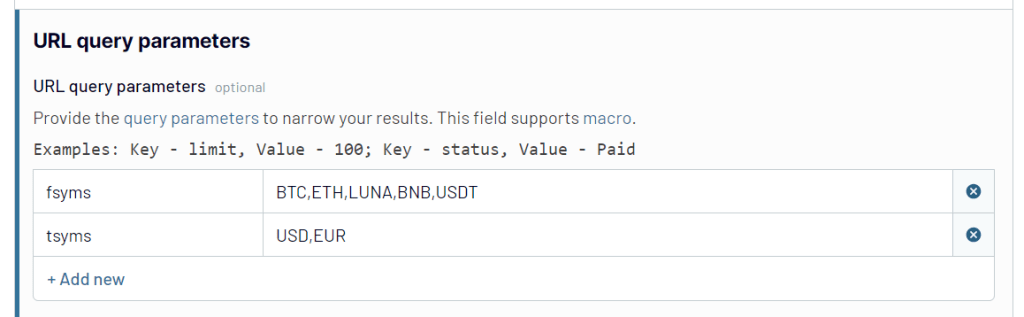
- URL query parameters – this field is for query parameters for your requests to the API. For example:
fsyms: BTC,ETH,LUNA,BNB,USDT
tsyms: USD,EUR
Other fields, Request body, Columns, and Path are optional. You can learn more about them in the Coupler.io Help Center.
The rest of the setup flow is the same. You can also learn more about importing data from API to Excel.
What sources you can connect to Excel
Coupler.io supports over 400 business apps, the data from which you can export to Excel. Here is a brief excerpt of them
| Category | Apps/Tools |
|---|---|
| CRM and sales apps | HubSpot, Intercom, Pipedrive, Salesforce |
| Ecommerce apps | Shopify, WooCommerce |
| Email tools | Mailchimp, Klaviyo |
| Files and tables | Airtable, Google Sheets, Microsoft Excel, CSV, Dropbox, OneDrive, JSON |
| Finance and accounting software | QuickBooks Online, Xero, Stripe, Harvest |
| Marketing apps | ActiveCampaign, Amplitude, Google Analytics, Campaign Monitor |
| PPC platforms | Amazon Ads, Apple Search Ads, Google Ads, Microsoft Ads (Bing Ads), Pinterest Ads, Quora Ads, Snapchat Ads, X (Twitter) Ads, Facebook Ads, Instagram Ads, LinkedIn Ads, TikTok Ads |
| Social media apps | Facebook Page Insights, Facebook Public Data, Instagram Insights, Instagram Public Data, LinkedIn Company Pages, TikTok Organic, Vimeo Public Data, YouTube |
| Project management tools | Asana, Trello, Jira, Harvest, Clockify, Calendly, Google Calendar, Slack |
| Survey apps | Typeform, Delighted, Wufoo |
How you can import data to Excel using Power Query
The Power Query allows you to get, transform, and load data to Excel from the web, databases, ODBC, and other sources. Let’s explore how it works in the example of two data sources: web and database.
How to import data from HTML to Excel
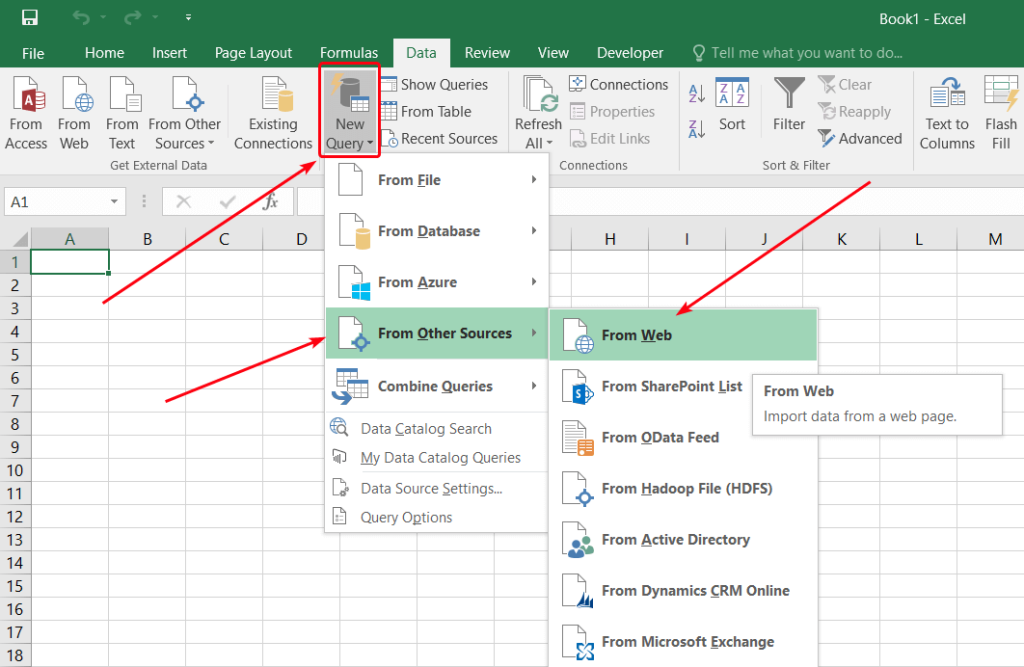
- To import data from a web source, on the Data tab, select New Query > From Other Sources > From Web:
- Enter the web page URL and click OK:
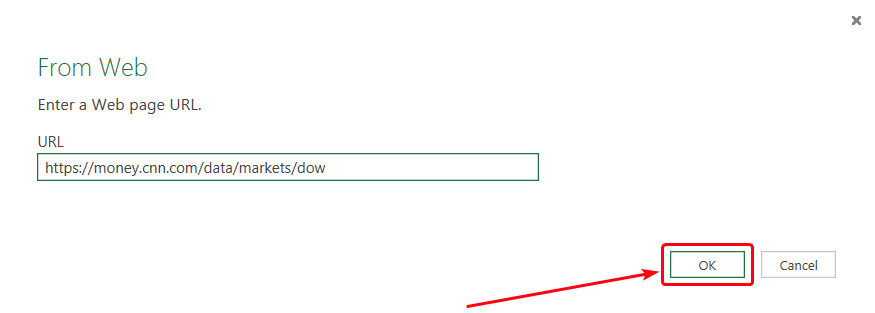
Excel will look for tables on the page.
- In the Navigator window that opens, select the table that you want to import:
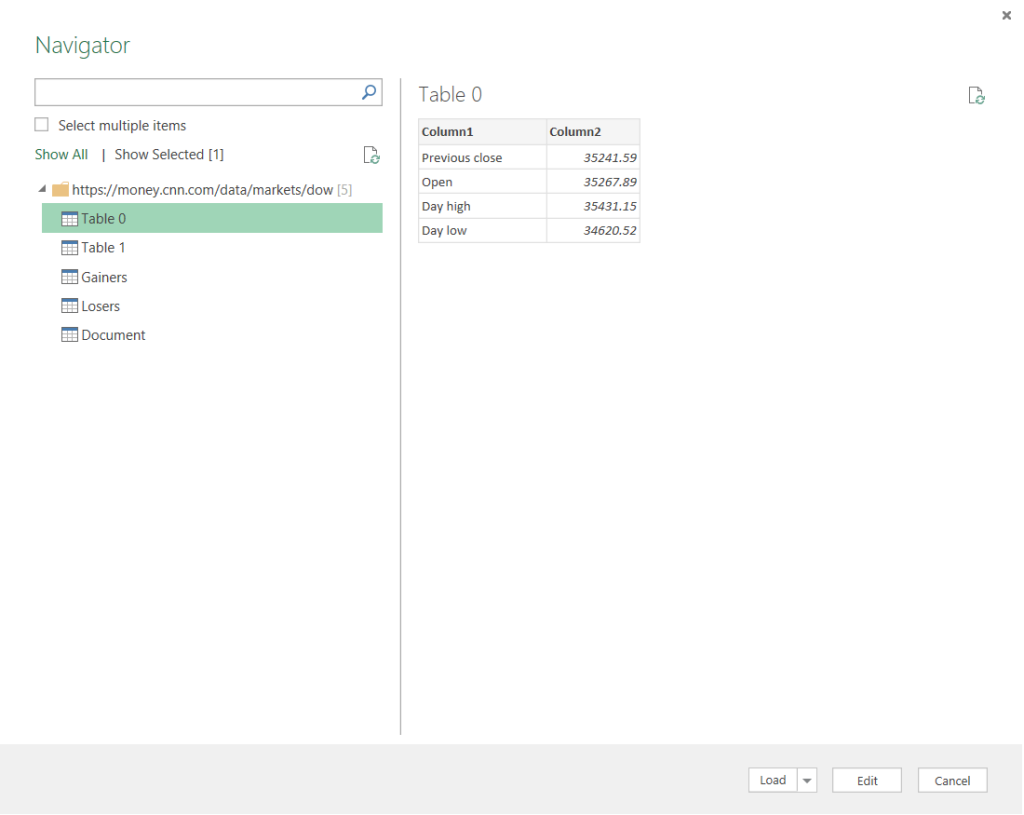
Use the Select multiple items checkbox if you want to import several tables. Click Load when you are ready to start the import.
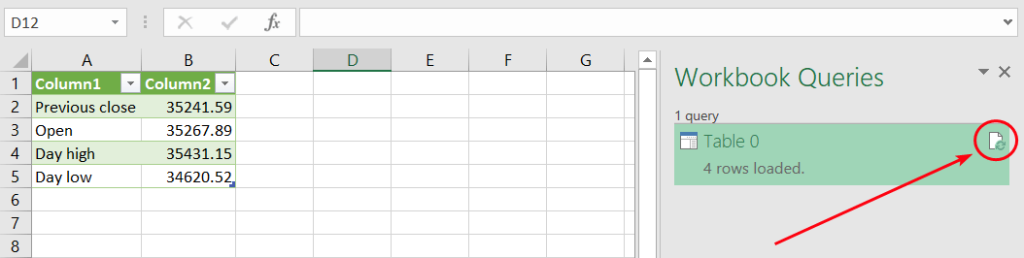
- Excel will insert the imported table into the current worksheet. You can refresh data by clicking the refresh button in the Workbook Queries task pane:
How to import data from SQL server to Excel
If your data is stored in databases at an SQL server, the simplest way to make it accessible to a wide spectrum of users is to export it to Excel. You can use Power Query for that.
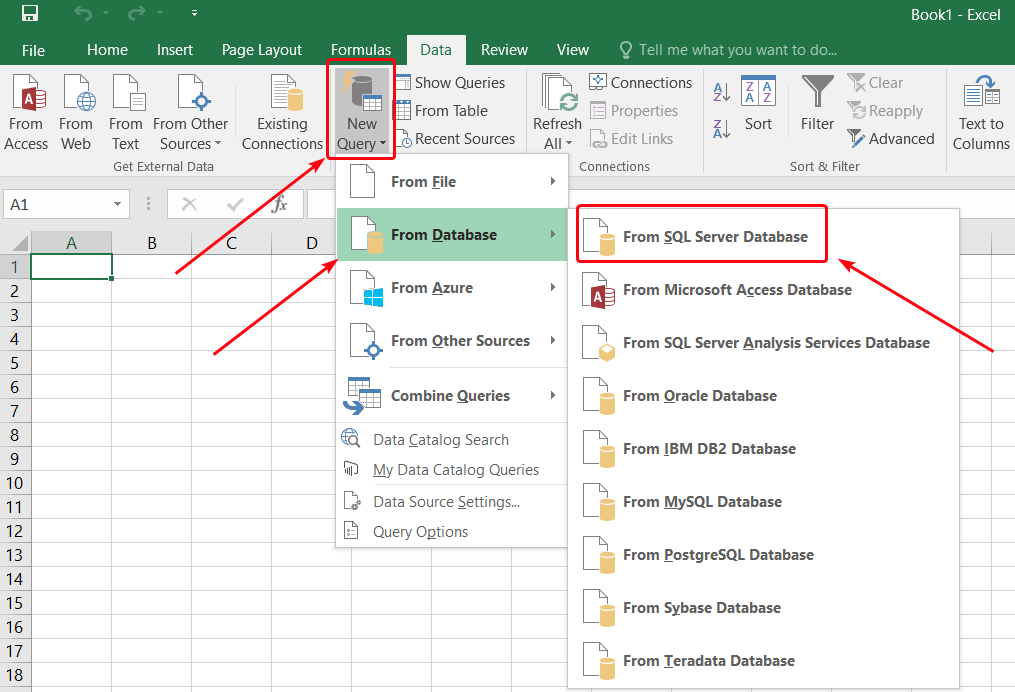
- In the Data tab, select New Query > From Database > From SQL Server Database:
- Specify the name of the server and the database (or you will be able to specify it later):
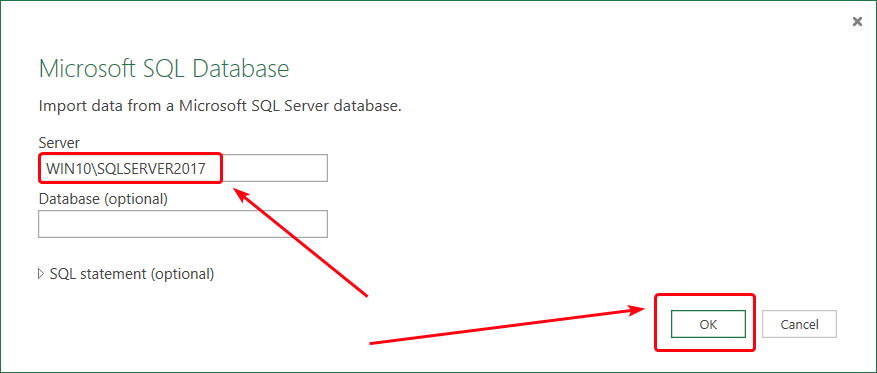
You can also provide an SQL statement to narrow the range of exported data.
- Choose to use your current window credentials to access the database, or provide the username and the password. Click Connect.
- In the next window, select the database and tables that you want to export.
- Select the name for the new data connection file, and then click Finish.
- In the next window, you can select where to insert the imported data. Select Existing worksheet and provide the cell address, if needed.
The data will be imported and pasted into the worksheet.
If you use SQL Server Management Studio (SSMS), there is a feature for exporting data to various destinations, including Excel spreadsheets.
- In Object Explorer, right-click the database with the source data, and then select Tasks > Export Data.
- In the SQL Server Import and Export Wizard window that opens, click Next.
- Select SQL Server Native Client 11.0 in the Data source drop-down box.
- Select Use Windows Authentication in the Authentication area, and then click Next.
- In the Choose a destination window, specify Microsoft Excel as the destination, browse to the target file in the Excel file path, and select the output file format.
- In the next window, you can choose to write a query for data export. If you want to copy the tables without changes, just click Next.
- The list of tables available for export will be displayed. Select the tables that you want to export. In the Destination column, you can specify the name of the worksheet for each table.
- In the Save and Run Package window, select Run immediately and click Next.
- Make sure that all parameters are correct, and then click Finish.
The selected data will be exported to the Excel workbook. When the wizard finishes all the tasks, click Close.
How to import data from Google Sheets to Excel
With Coupler.io
Coupler.io lets you import data from Google Sheets to Excel without any coding or workarounds required. You only need to click Proceed in the form below and sign up for Coupler.io for free. Use your Microsoft or Google account for that.
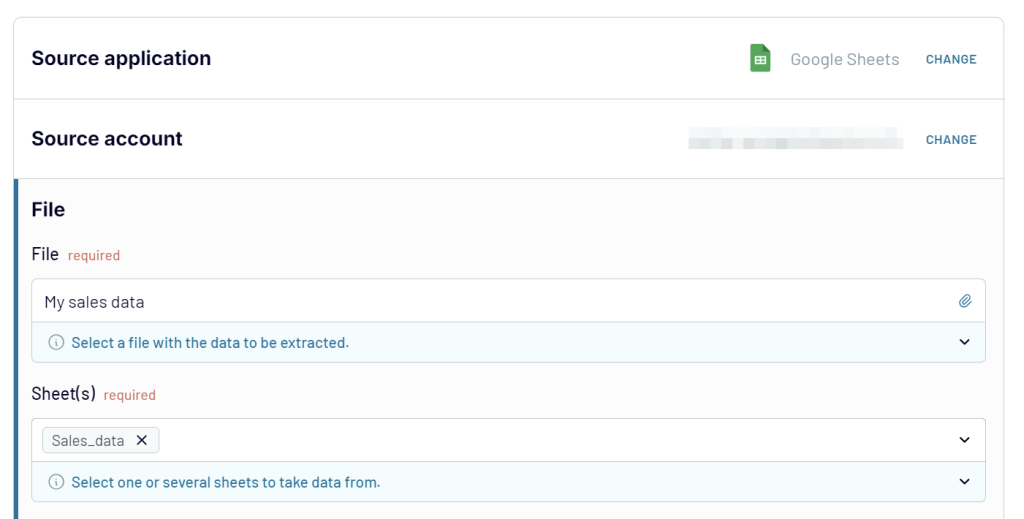
1. Collect data from Google Sheets
Connect your Google account and select the workbook and the sheet that you would like to export data from. For the latter, you can select several sheets if you want to combine data from them into a single view.
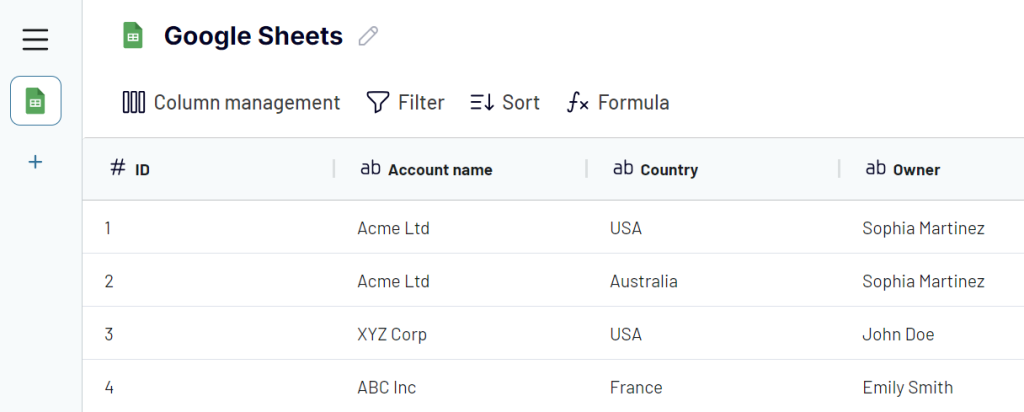
2. Transform data
In the next step, you can transform your Google Sheets data before loading it to Excel. This includes:
- Hide, rearrange, edit columns
- Add new columns
- Filter and sort data
- Blend data from multiple Google Sheets files or even other sources.
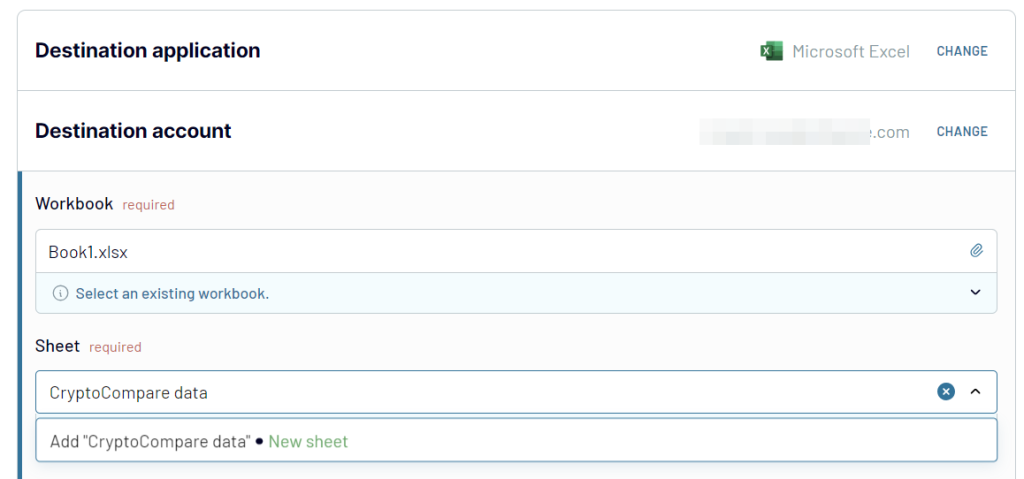
3. Load data to Excel
Go to the Destination setup, connect your Microsoft account, and select the workbook and the worksheet for your data. If you want to create a new worksheet, just type its name:
Run the importer to import data from Google Sheets to Excel right away. For recurring exports, toggle on Automatic data refresh and configure the desired schedule. This way, you’ll keep the workbook and the spreadsheet synchronized.
Import data from Google Sheets to Excel as HTML
The second option is to use the built-in data import feature of Excel:
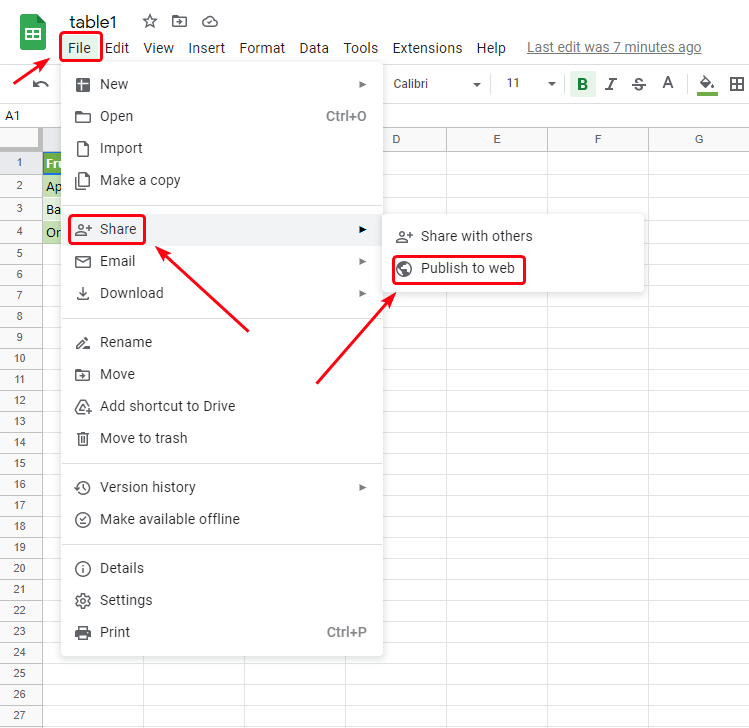
- In your Google spreadsheet, go to File > Share > Publish to web:
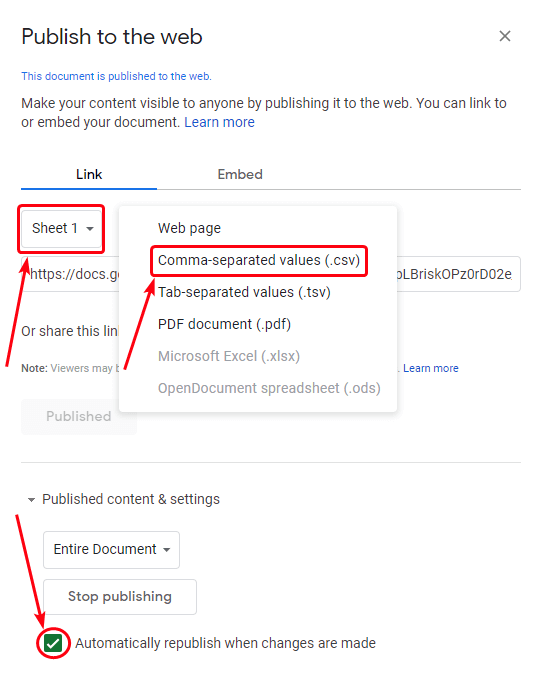
- Select the sheet that contains the table, and specify Comma-separated values (.csv).
If you want the data in Excel to be updated when the Google sheet is changed, select the Automatically republish when changes are made checkbox:
- Press
Ctrl-Cto copy the link. - Go to your Excel workbook and perform the steps described in the section about importing data from HTML above.
If you choose the second option, keep in mind that your data will become accessible to others. If the information is confidential or sensitive, using Coupler.io is preferred.
Import data from other sources to Excel
How to import data from a text file to Excel
The tables can also be stored in plain text. Such files are similar to regular text files with the only exception that commas have a special function there — they separate cells from each other. The format is called CSV — comma-separated values.
Excel can open .csv files directly. The content of such a file will be rendered as a table. If you edit a CSV file in Excel and then try to save it, you will see the following warning:
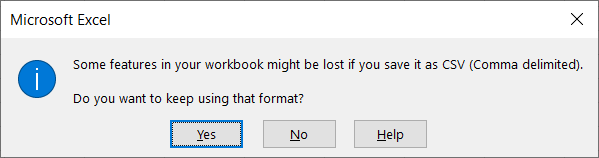
Click Yes if you want to continue using this file as CSV in the future. If you click No, the Save as dialogue will be opened, where you will be able to select the format and the destination for the file.
There are other delimiters that can be used to store tables in text format: tabs, pipes (‘|’), spaces, semicolons, etc. To open such files with Excel, instead of trying to open them directly, use the Power Query function.
- Go to Data > New Query > From File > From Text.
- Select the text file and click Import.
- The Query Editor window will open. Make sure that the table looks good and click Close & Load:

The imported table will be inserted into your current worksheet.
How to import data to Excel from PDF
If your tables are in PDF, but you want them in Excel, you can try to import them.
- Go to the Data tab, and then select New Query > From File > From PDF.
- Select the tables that you want to import in the Navigator window, and then click Load.
The tables will be extracted from PDF and pasted into your Excel workbook. If you don’t have the From PDF option on the menu, you can use the following workaround to import data from PDF into Excel:
- Copy the table text in the PDF file by selecting it and pressing
Ctrl-C. - Open Microsoft Word and press
Ctrl-V. - Check if Word managed to render the text data correctly:
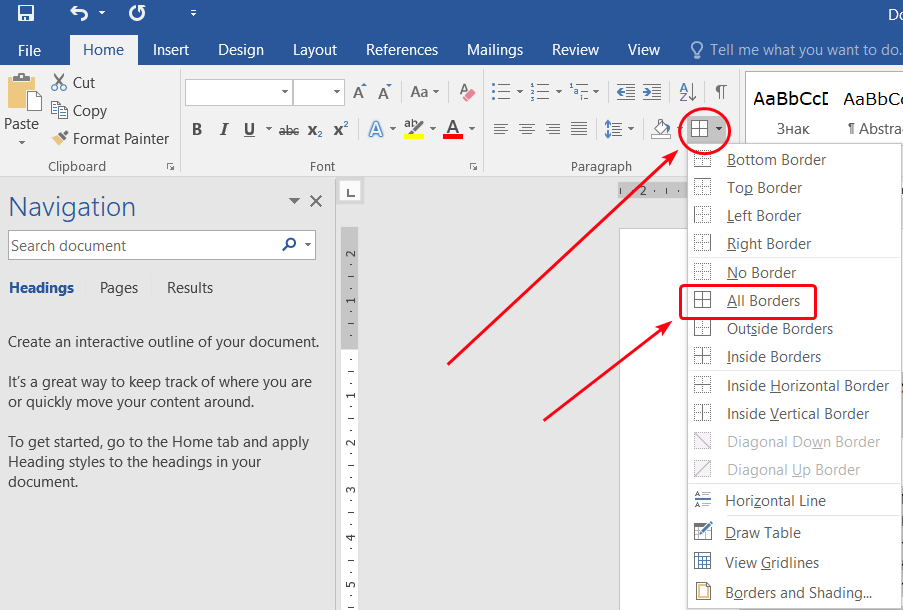
- Press
Ctrl-Ato select everything. - On the Home tab, click the table menu, and then select All borders:
- Press
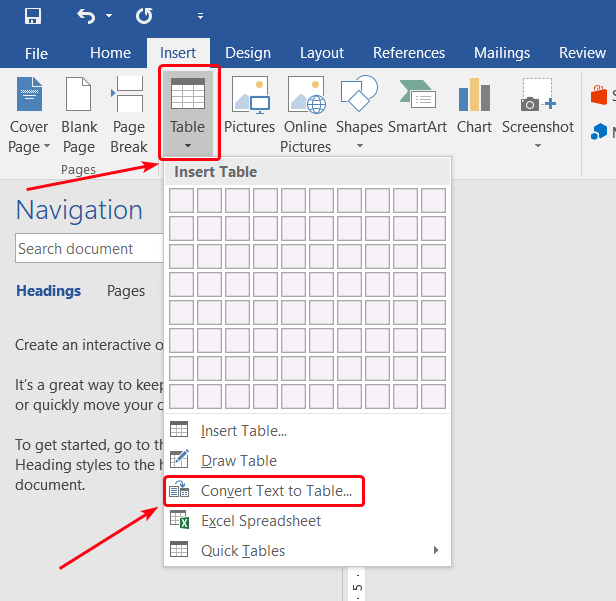
- If the table looks good, proceed to the final step. Otherwise, go to the Insert tab, and then select Table > Convert Text to Table:
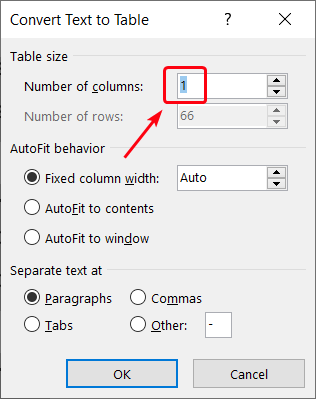
- Specify the number of columns in the original table, and then click OK:
- Copy the entire table, go to Excel, and press
Ctrl-V.
The table will be inserted into the current worksheet. If you opt for this workaround, no automatic data synchronization will be available.
How to sync data between Excel files
If you want to transfer data from one Excel workbook to another, copy-pasting is a good option. But that will not work if you want to keep the data up-to-date with the other file. There are several ways to sync data between Excel files.
You can use formulas for that. To fill a cell with data from another Excel workbook:
- Make sure that the other workbook is open.
- Select the cell to sync, then click the Formula Bar and type
=.
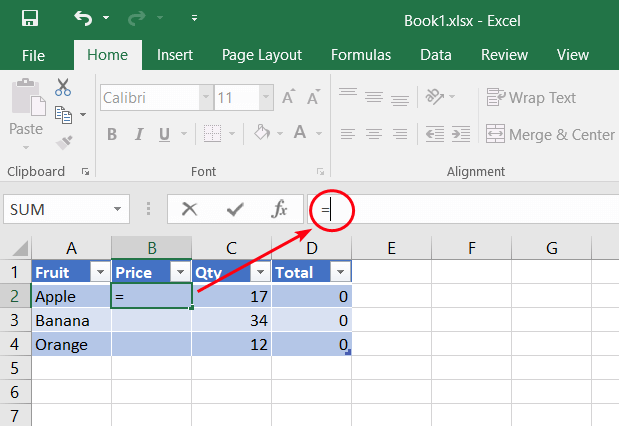
- Switch to the other workbook, click the cell that you want to import data from, and press Enter.
Excel will switch you back to the first workbook and fill the cell with the synced data. If the content of the cell in the other workbook changes, the synced cell will be updated.
If you see #REF! in the synced cell, it means that the other workbook is not open. Open it to enable data synchronization. Try another method if you are not comfortable with the formula bar.
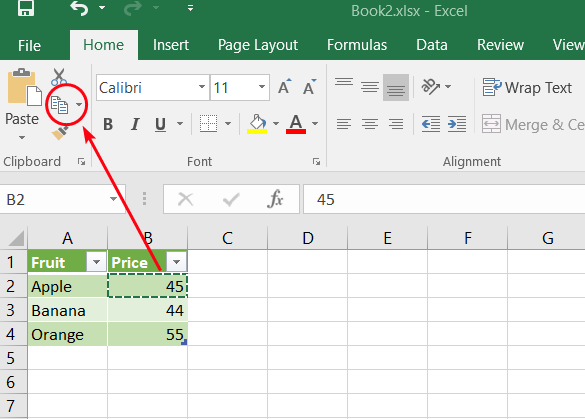
- In the source file, i.e. the workbook that you want to import data from, select the cell, and then click Copy or press
Ctrl-C:
- Switch to the target workbook, select the cell, and then select Paste > Other Paste Options > Paste Link.
The formula for that cell will be filled with the link to the source cell in the other workbook.
There are many other options for syncing Excel data that you can learn in our guide on linking Excel files.
Besides the standard Excel features, Coupler.io allows you to import data from Excel to Excel and synchronize your data in a more flexible way. Try it yourself right away.
Discover many other sources for importing data to Excel
Excel is a preferred option for many people when it comes to processing data. Any calculations can be done with the help of Excel formulas, while Excel macros leave much space for all kinds of automatization. But not all the data is stored in the form of spreadsheets. There are plenty of systems and tools for data collection and management.
Thankfully, Excel is extremely flexible in terms of data importing. You can bring virtually any data to Excel by importing it from various sources. If you didn’t find a good solution in this article, discover other Microsoft Excel integrations to pick what fits your needs best. For example, you can take a look at our article on ClickUp export to Excel to discover how Coupler.io can help you with analysing your project data.