Automation is a constant running activity to provide highly efficient results without human intervention. Once you design workflow automation, the tool will continuously do its job of saving your important time. This time could rather be utilized on business improvement that may require human efforts.
With Pipedrive, you can automate everyday repetitive tasks, such as sending emails, follow-ups, scheduling calls, and many more. You can have workflow automation for all such tasks to keep your leads warm. Pipedrive workflow automation can be configured in ways where once a deal/contact is created or reaches a certain stage in the pipeline, the tool will perform the action that you set it for. And this is just a start, wait till you explore more.
In this article, we show you how automation saves lots of time, literally! And how you can do it using Pipedrive workflow automation.
How to automate processes in Pipedrive
Let’s learn the basics of Pipedrive workflow automation. Like every automation activity, there are two events on which you can create workflows in Pipedrive. These events are a part of an ‘If-then’ equation.
- Trigger event – We need the ‘If’ event to trigger the automation.
- Action event – Whenever the ‘If’ event occurs, the next event will occur and perform the ‘then’ action.
For example, If a new deal is created, then send an email to the associated person’s email address.
How to create Pipedrive workflow automation?
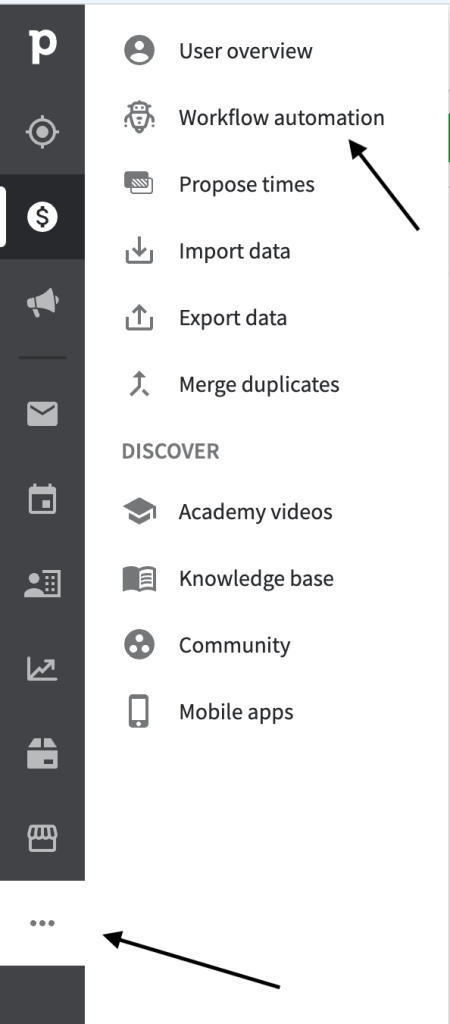
To create workflow automation, go to the home page and find three dots on the left side at the bottom. Now, click on Workflow Automation.
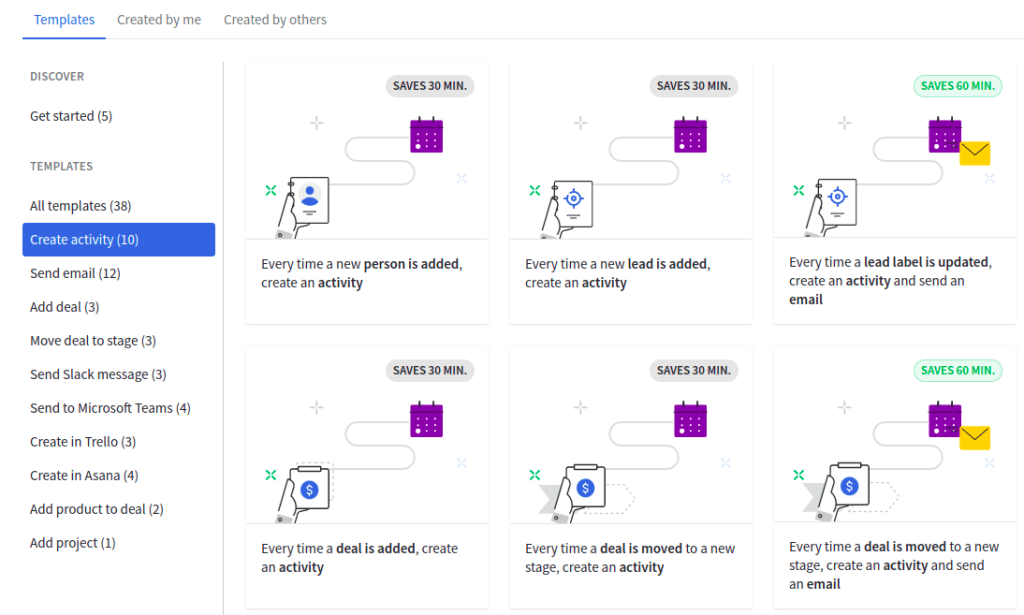
The workflow automation page includes multiple templates for you to tweak them as per your needs.
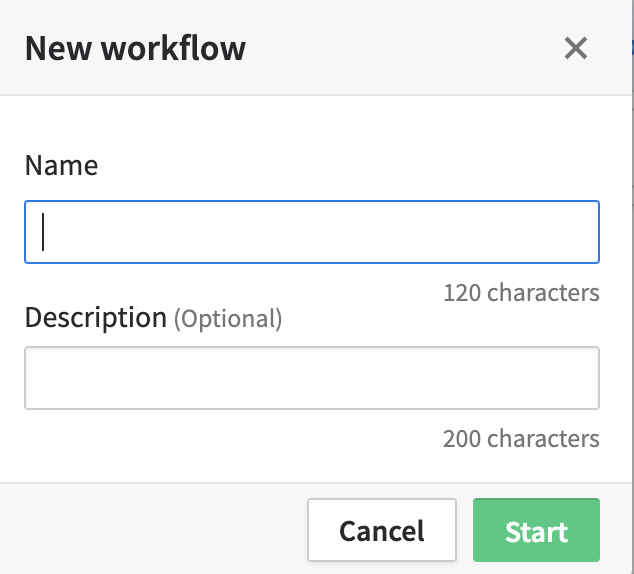
You can design a workflow from scratch to fit your requirements. To create a custom workflow, click on Add custom workflow button. A pop-up will show up asking you to name the workflow with an optional description. Once you’re done naming the workflow (you can edit it later), click on the Start button.
Now, click on the Add Trigger button to start designing your workflow.

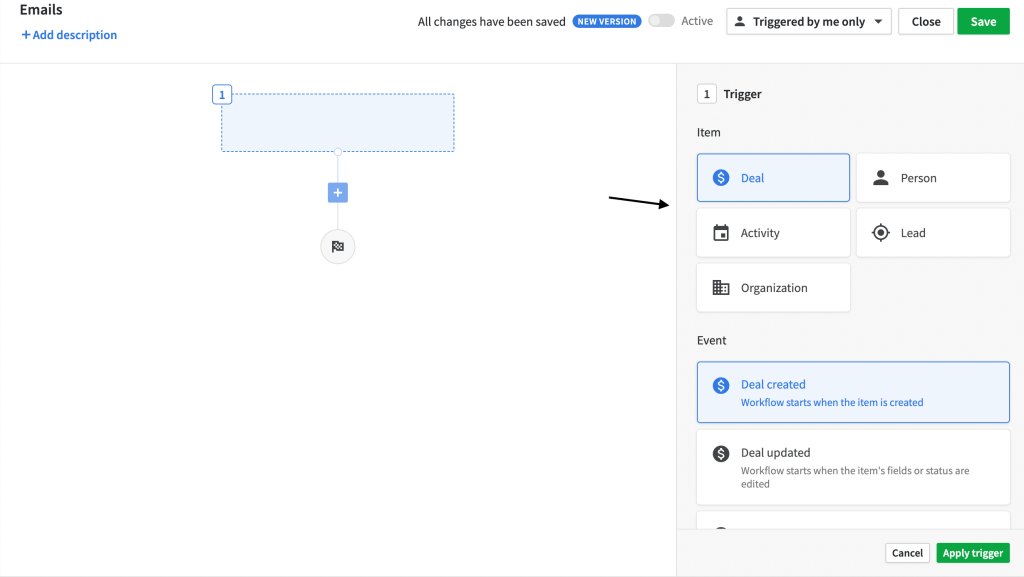
You will now be directed to a sidebar to select the item and event to trigger your automation workflow.
To successfully create a trigger, you need to choose one among five items – Deal, Person, Activity, Lead, and Organization. Selecting one among these five will lead you to choose an event out of these – Created, Updated, or Deleted. Click on the Apply trigger button when you’ve chosen both – an item and an event.
Now, it will lead you to another page where you need to put in your conditions. These conditions are basically to decide under what situations you want to trigger your event. For example, a condition Deal > is > Bates Foods deal. This means that the action will be performed each time the deal is Bates Foods deal.
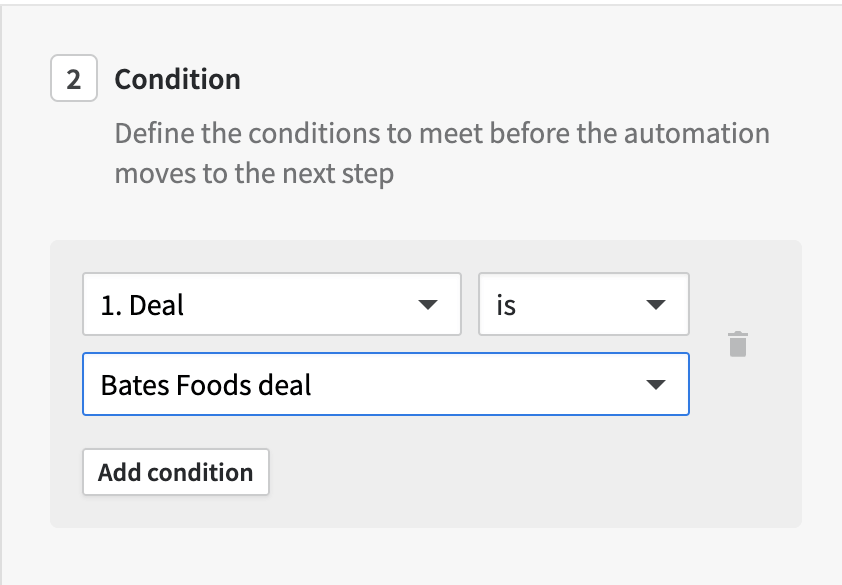
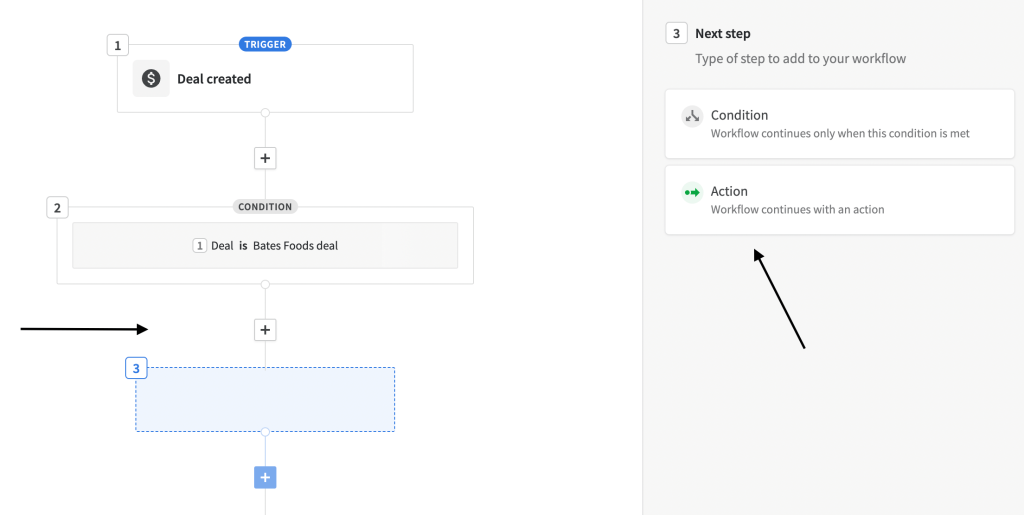
You can add more than one condition to one workflow. Once you’ve added condition(s), click on the Apply conditions button. Once they are set up, we need an action that follows the trigger. This action can be set up by clicking on the + button. Another sidebar will open to set your action event.
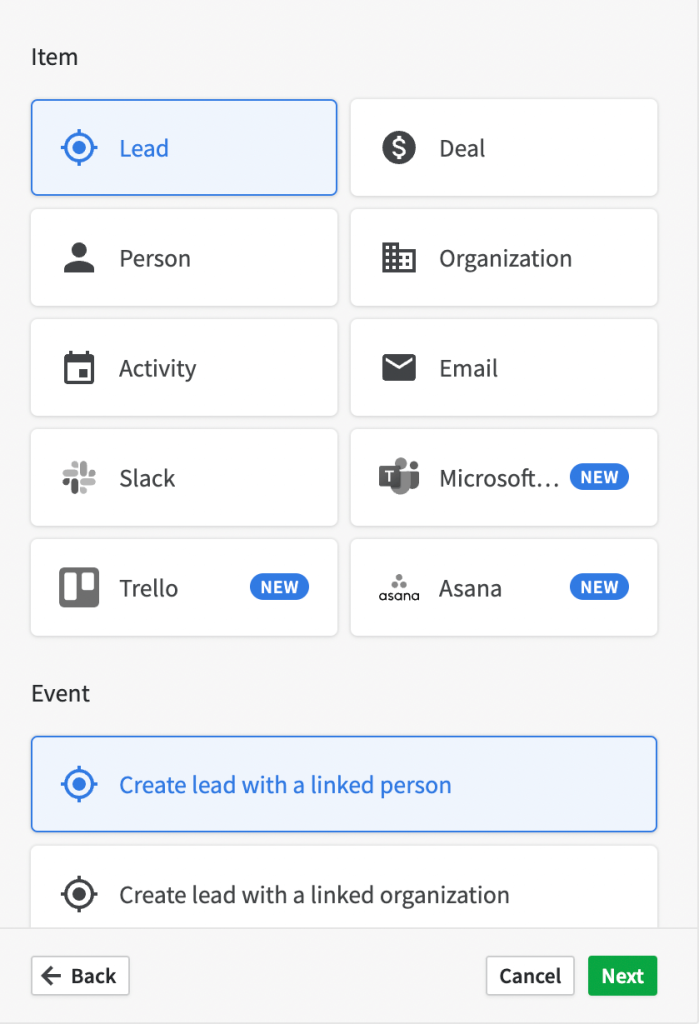
To add an action, you will again need to choose among items – Deal, Activity, Person, Lead, Email, or Organization. There are software integrations that can also be selected as items. Pipedrive offers integrations such as Slack, Microsoft Teams, Trello, Asana, and more. To configure an action, you need to select an item and event as per what action is to be performed once the automation is triggered.
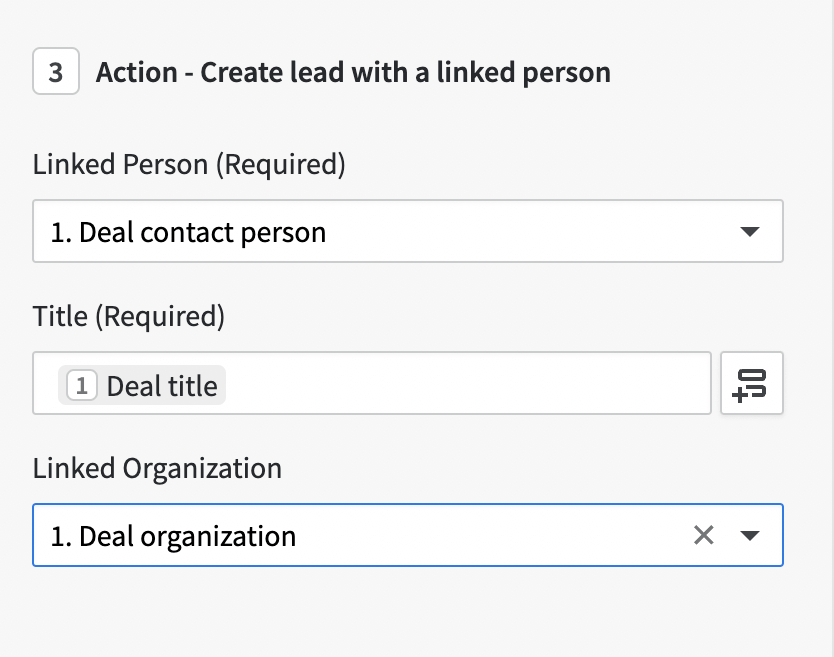
For this workflow, the required fields are Linked Person and Title. To modify it further as per our requirement, we can select other fields like Linked Organization, Value, Currency, Currency, Owner, Labels, and Visible to.
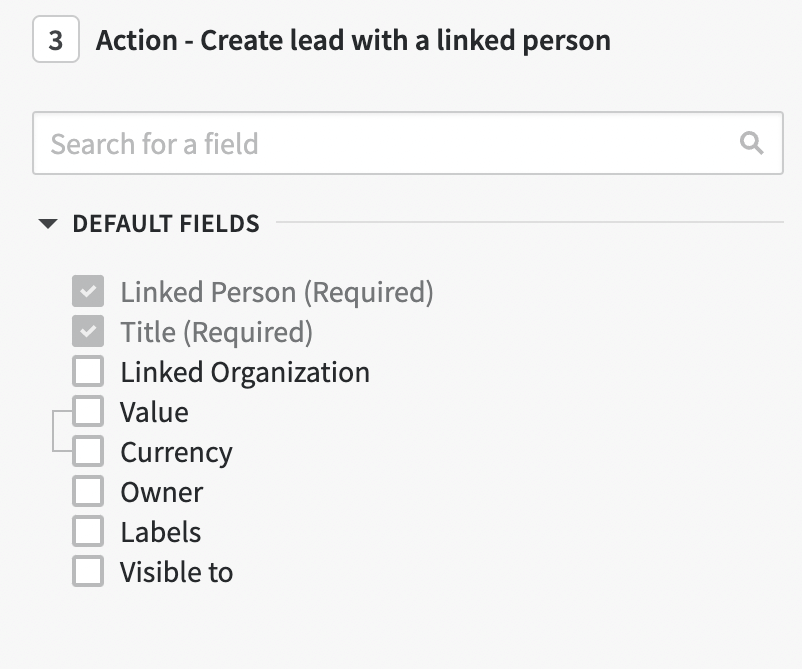
The next step is to configure your action. Here, the action is to Create lead with a linked person, which includes Linked Person as Deal contact person, Title as Deal title, and Linked Organization as Deal Organization. This means when the action is triggered, the workflow will create a lead with a person/contact linked to it.
Voila, your workflow automation is ready! You can add multiple actions to your workflow which will be performed in a stepwise manner. However, multiple actions will be performed based on the triggers only. If a condition for step two did not meet the trigger criteria, the automation will perform the step three action once the trigger condition is met for it.
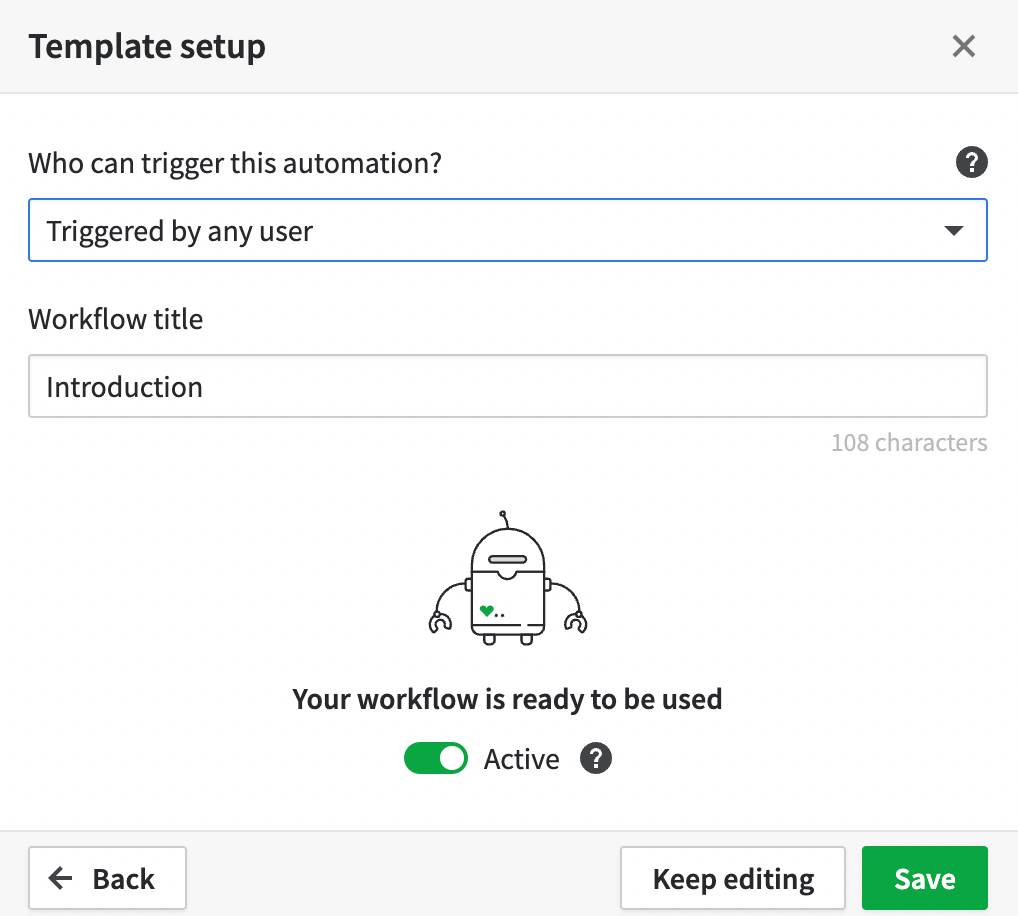
Click on Save to finish designing the workflow. You can also allow others to trigger the workflow by selecting Triggered by any user from the dropdown at the top right of the workflow.

Pipedrive workflow automation examples
Each workflow saves much of your time and effort. Here, we show you some workflow automation examples and how to design them.
Automate the exchange of emails in Pipedrive
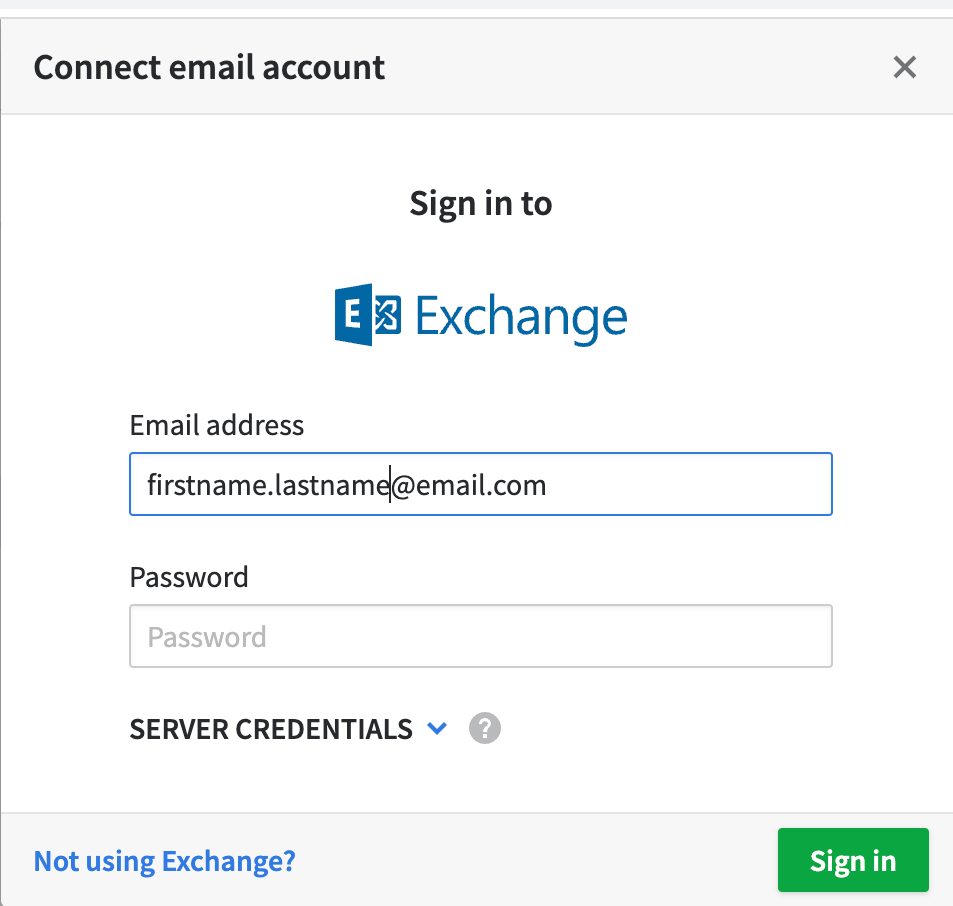
Pipedrive allows easy email integration using an in-built feature called Email Sync. You can sync your work email which enables sending and receiving – basically managing all your emails directly through Pipedrive. Although Email Sync is compatible with all email providers, here we show you how to connect it with Microsoft Exchange.
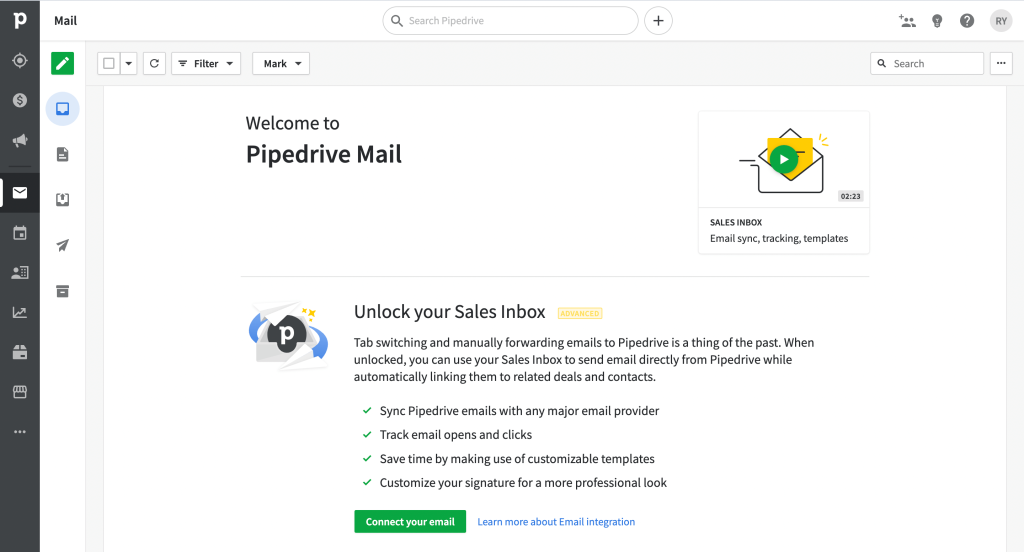
To sync your work email with Pipedrive, all you have to do is go to Mail and click on Connect your email.
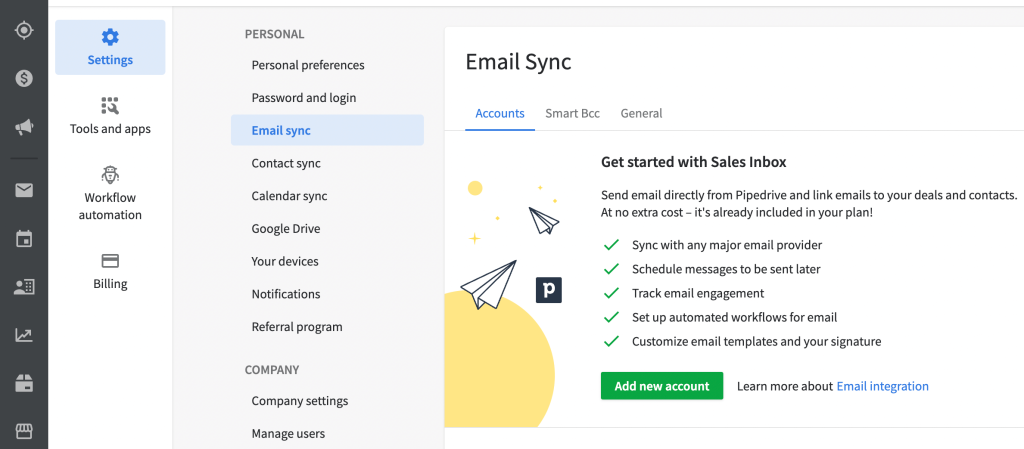
It will take you to another page where you can add your work email by clicking on Add new account.
Enter your work email address and password to give Pipedrive access to your email.
Allow permissions to give access to Pipedrive based on your requirements and your Email Sync is finished.
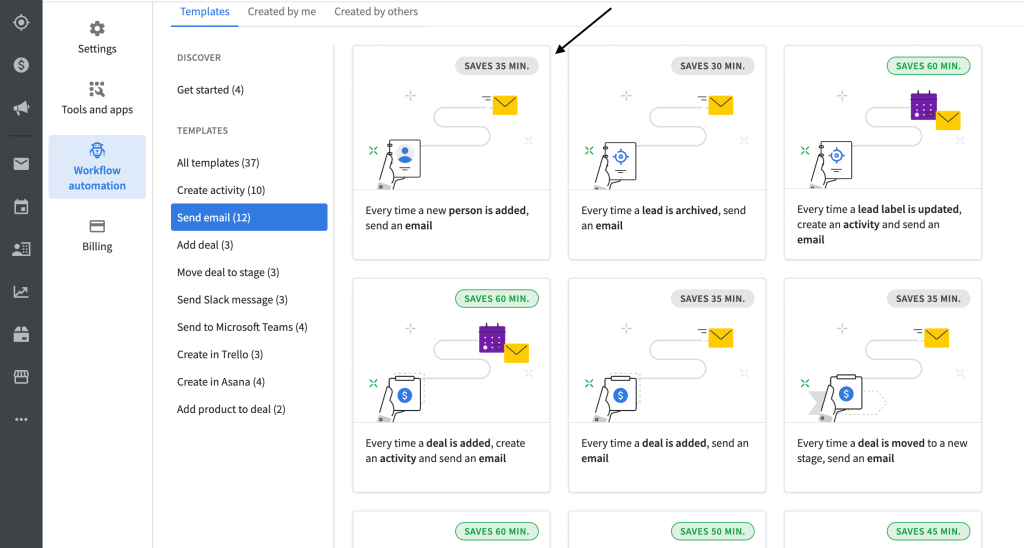
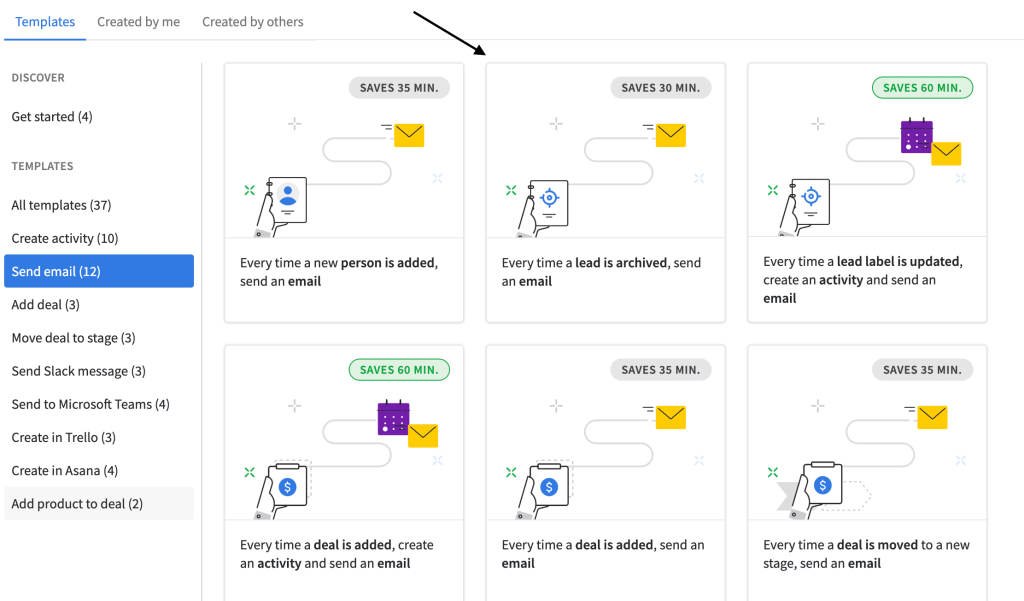
We, now create a workflow to send an email each time a new deal is created. Go to three dots > Workflow Automation. For our example, we are selecting a pre-made template shown below which saves 35 minutes.
Note: If you’ve not already synced your emails, this is where it will ask you to connect your email.
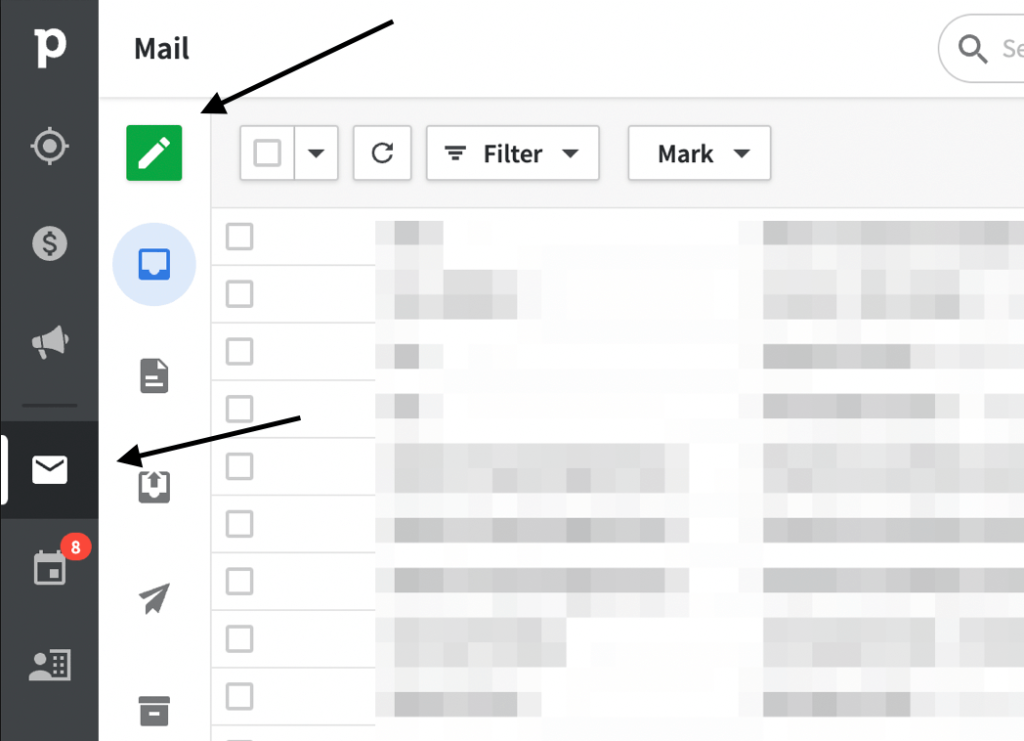
Once you select the template, another pop-up will occur which is to do trigger and event configuration for your automation. To configure the event section, you will have to create an email template for your workflow automation. To create a custom email template, all you have to do is go to the Mail page. You will find it on the left sidebar. Now, click on the green button to compose an email.
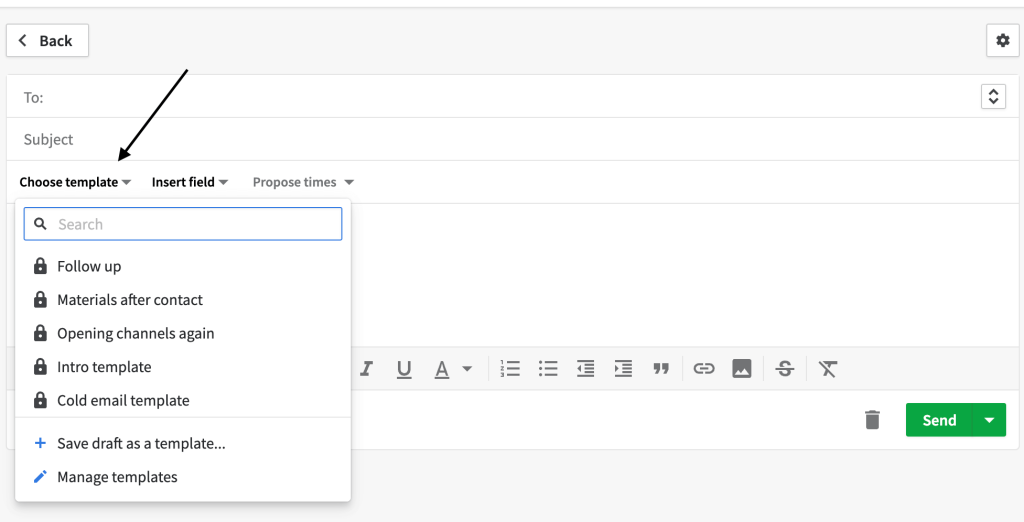
You will need to click on Choose template to select a suitable template from the drop-down as per your workflow.
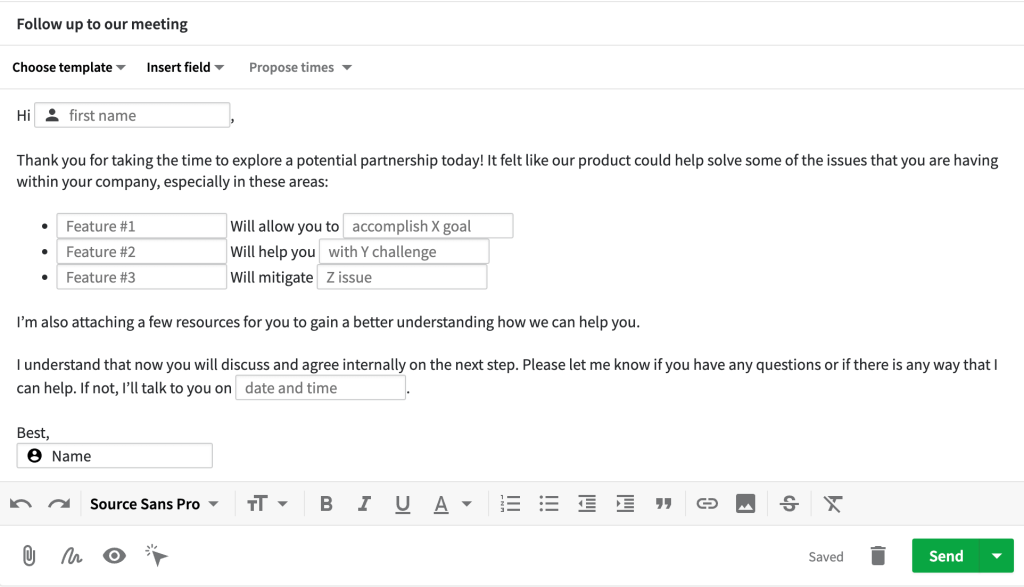
Here’s an example of a Follow up email template. You can also modify the contents of the email templates here.
Moving ahead, let’s get back to our workflow. For this example, the trigger configuration is Customer. This means every time a person is added with the label Customer, it will trigger the workflow.

For email configuration, we need to select some fields like who we want to send the email to, the email template, and more.
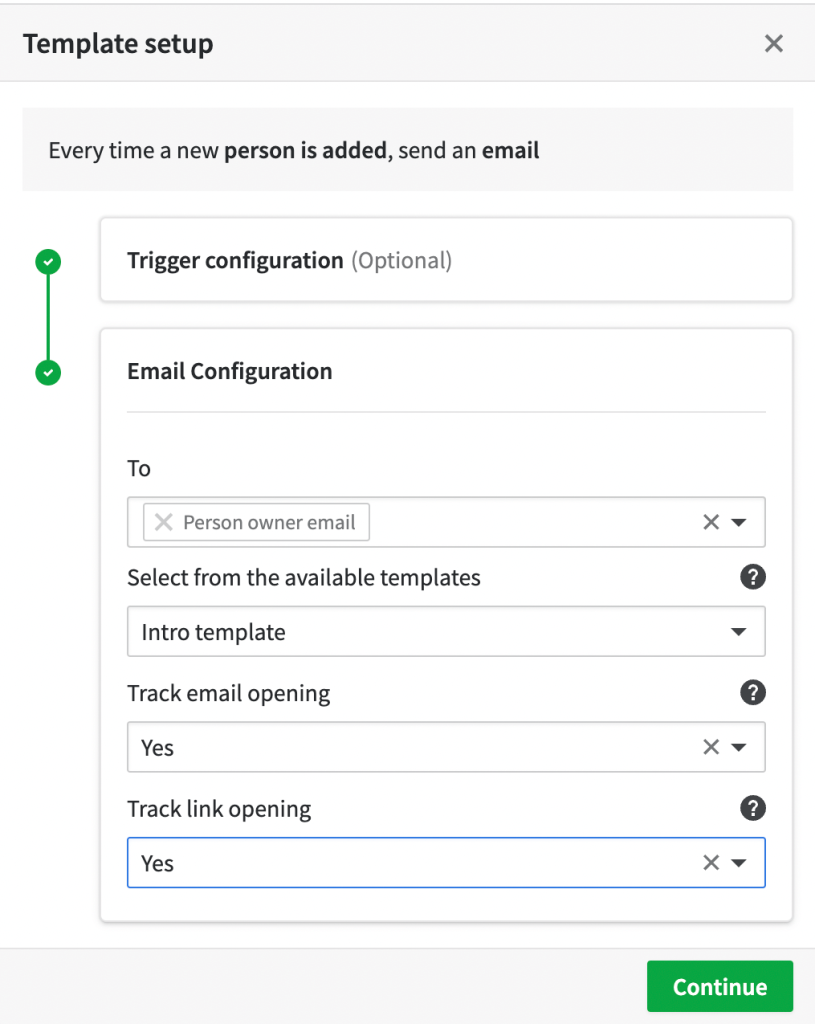
Here, we have created this workflow automation that will send Intro emails to any person added with the Customer label. The next step is to do the final setup where you allow others to trigger the automation, and give a title to this workflow. Click on Save to finish.
How to automate emails in Pipedrive?
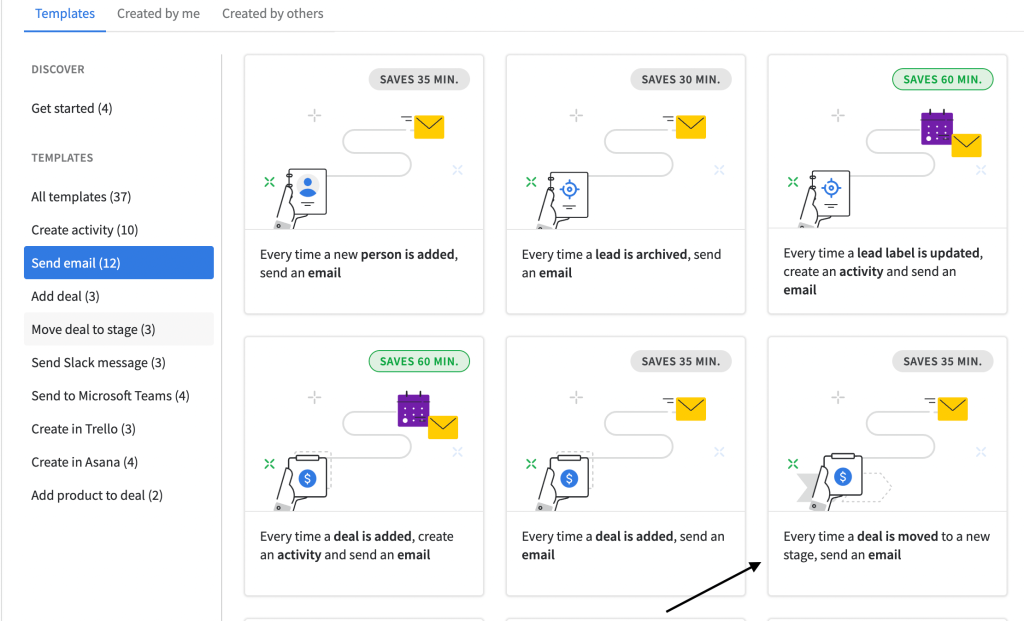
Now, let’s create workflow automation for sending emails each time a deal is moved to a certain stage in the pipeline. For this, we are going to use a template shown here.
A Template setup pop-up will occur again to begin configuring the trigger and event.
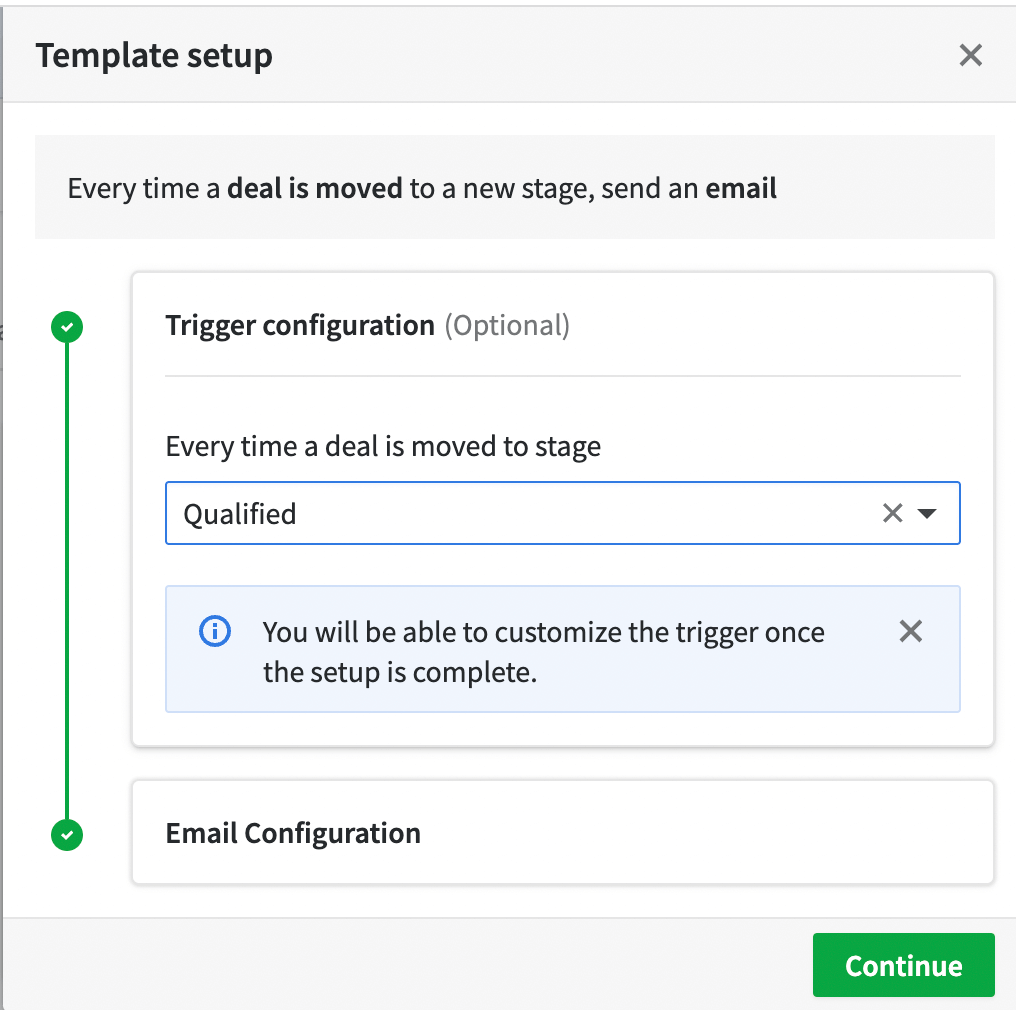
Afterward, all you have to do is configure the trigger as per your requirements. Here, we have set it to Qualified. The workflow will send a follow-up email once the lead has moved to the Qualified stage in the pipeline.
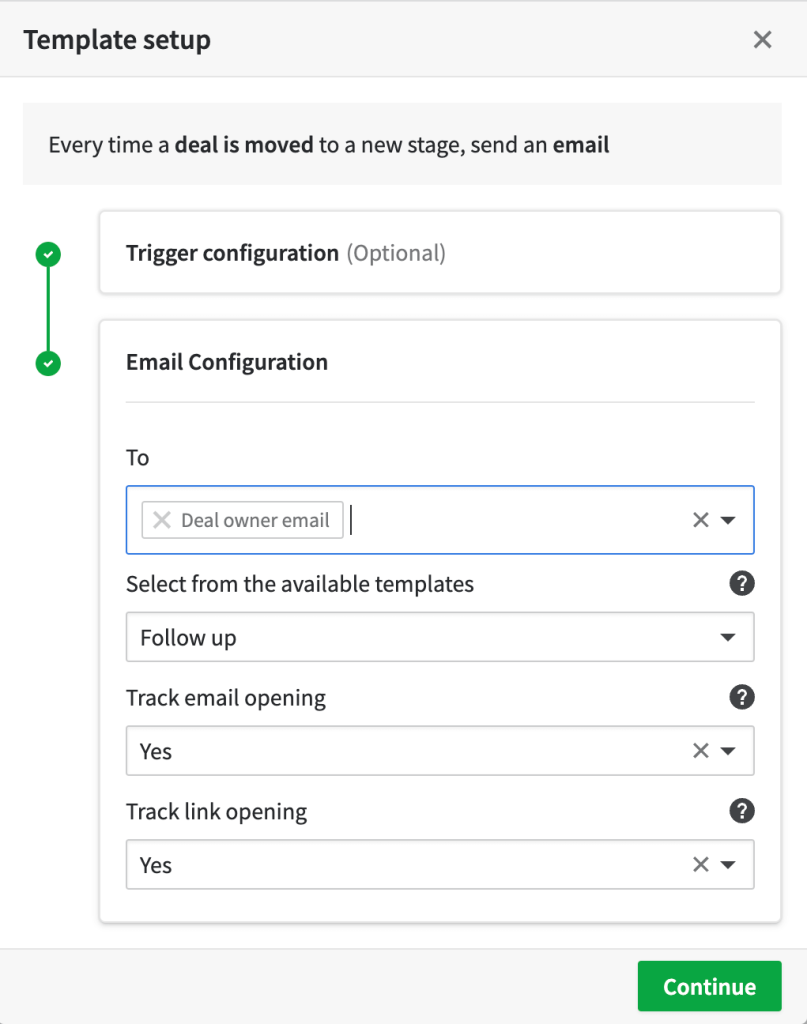
You can track how users are interacting with your emails by selecting Yes from the dropdowns of Track email opening and Track link opening. The next step is to name the workflow and select who is allowed to trigger this automation and click Save.
Similarly, you can design more workflows to send different types of emails based on pipeline stages.
How to get Pipedrive to automate follow-ups?
There are times when we need to send emails to deals/leads to follow up and speed up the sales process. In such cases and many others, it’s great to have workflow automation to send follow-ups.
To design follow-up workflow automation, let’s select another template that will automatically send follow-up emails to archived leads.
Select the appropriate template and set it up. Here, for trigger configuration, we are going to select Warm and Cold to send follow-ups to.
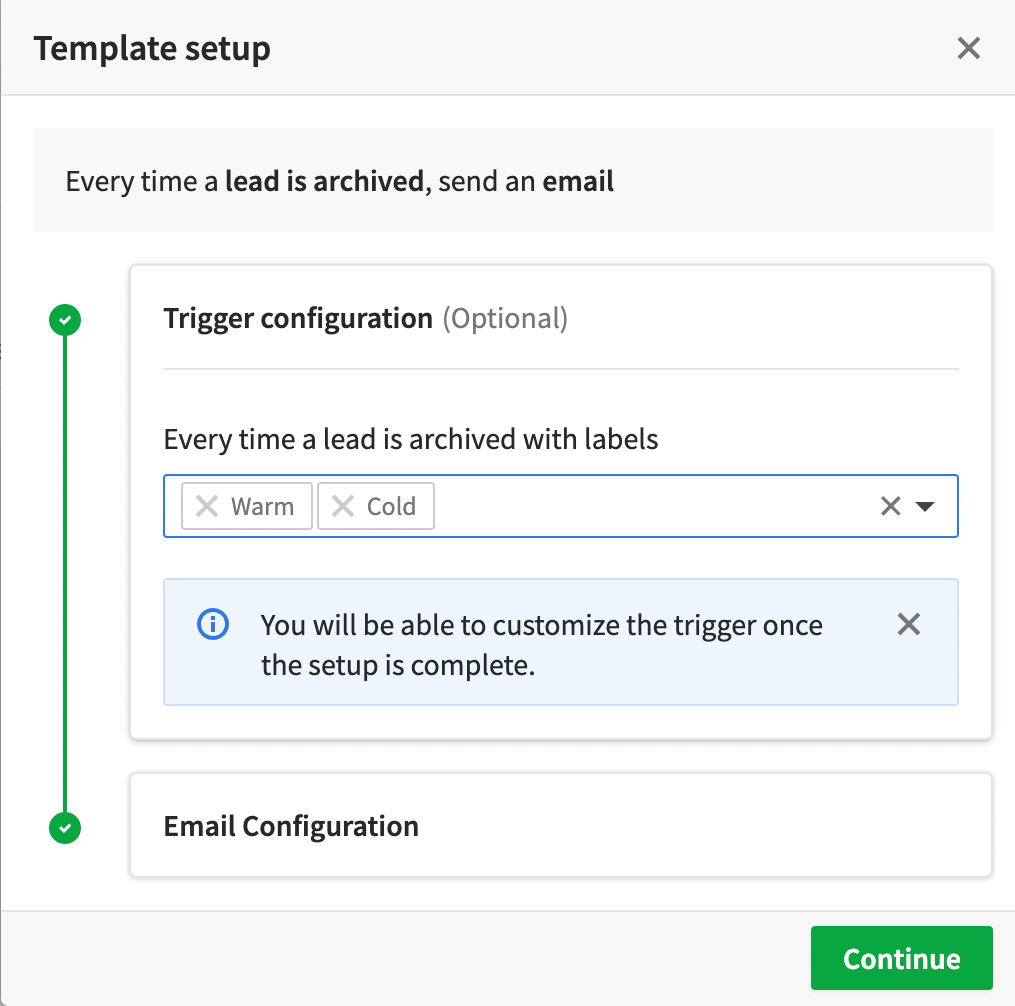
And for Event Configuration, we need to select To field and write the email in the body (no email template here). To track it, it’s best to select Yes from the dropdown menu of Track email opening.
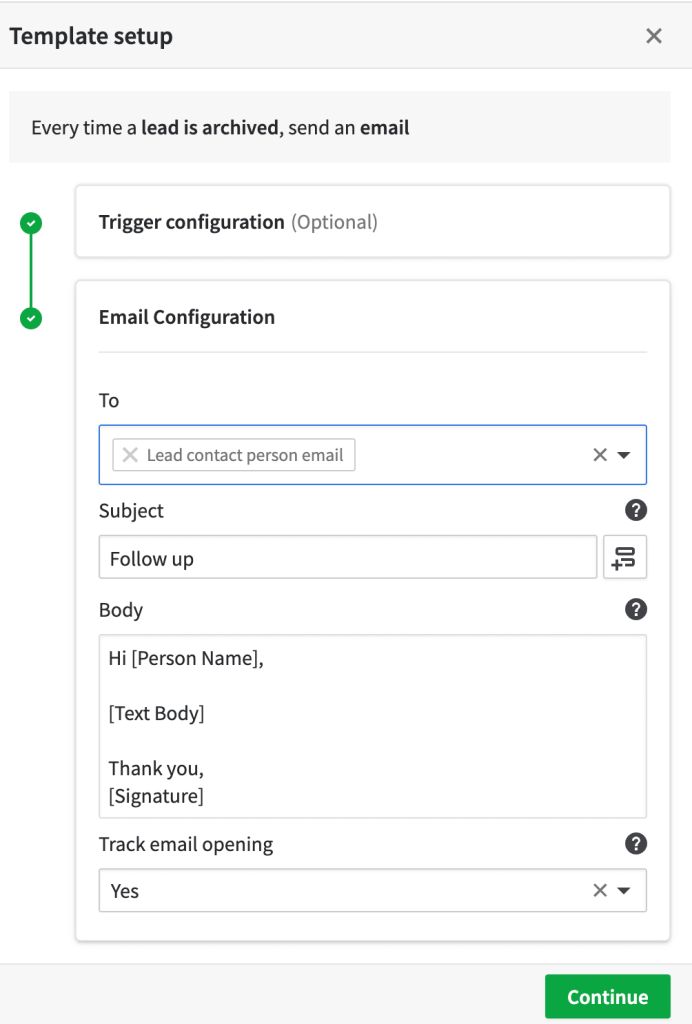
Click on Continue to finish setting up the workflow, followed by who can trigger the workflow and name it.
Set frequency for follow-ups with Contacts Timeline
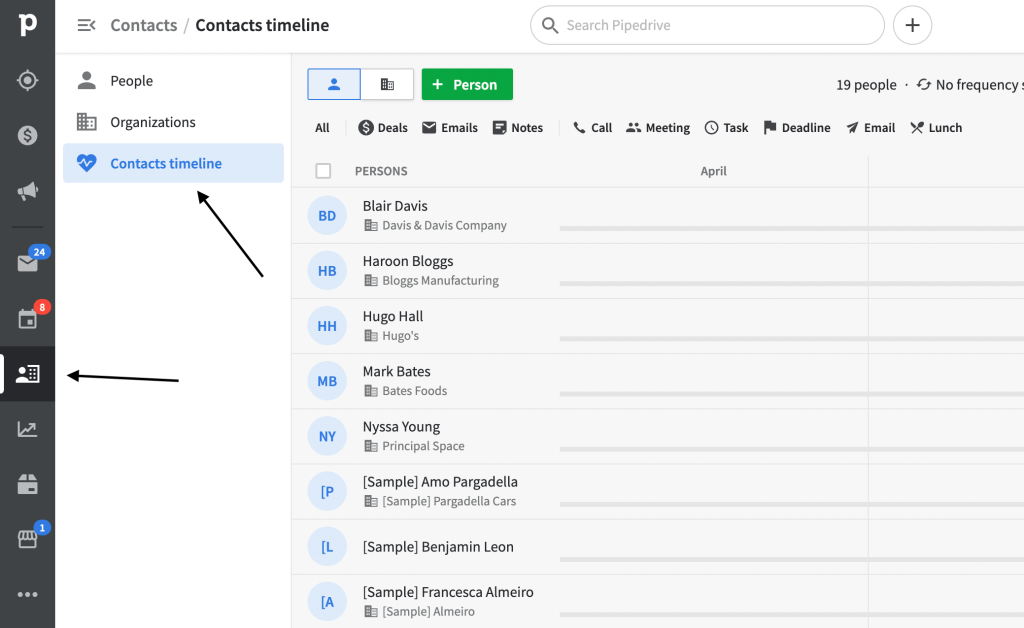
Sales reps usually need to continue following up with their leads to keep a track of the sales stages. In such scenarios, they need streamlined tools to make follow-ups easier. Pipedrive has a useful feature called Contacts Timeline to ensure follow-ups are done in a periodic manner. It helps you manage and nurture relationships with customers.
The Contacts Timeline page is a list of people/organizations. It allows you to set a frequency to send timely follow-ups. To set a frequency, all you have to do is go to the Contacts page and click on Contacts Timeline.
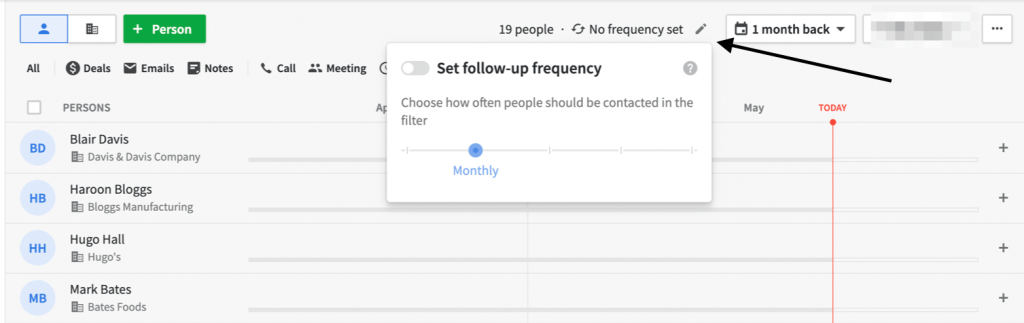
From here, you will see the No frequency set button on the top right. When you click on the edit button, it will open a pop-up where you can select the Set follow-up frequency. The frequency can be set to Weekly, Monthly, Quarterly, Biannually, and Annually. Once you set the frequency, it will send automated follow-up emails in a timely manner.
You can also filter your contacts to select a bunch of contacts whom you would like to follow up with. To do this, just go to the Contacts Timeline page and filter your contacts at the top right. These filters separate your contacts based on your selection. Suppose, if you want to follow up with people not contacted within the last month, you can use the filter shown below. There’s an option to create your own filters.
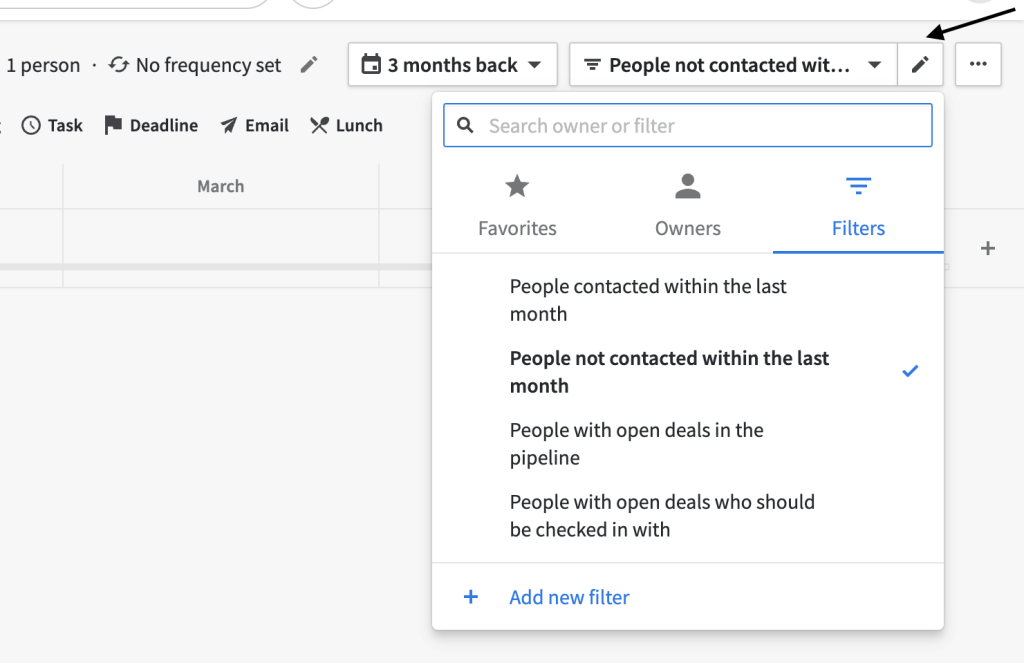
If you wish to create a new filter, you can click on the Add new filter. This filter can be tweaked as per your specific requirements.
Send Pipedrive automated text messages
There are many text messaging apps in the market. One of the most used and popular is Twilio. With Twilio, you can send automated messages to individual contacts and bulk messages to subgroups, or the whole database. Follow these steps to install and set it up.
- Pipedrive’s marketplace offers lots of software integrations, you will find Twilio on their marketplace. All you have to do is click on Install Now and authorize permissions to Twilio. This will take you to another page leading up to creating an account with Ulgebra. You can use your email for this.
- The next step is authorizing Twilio Account SID and Auth Token, which can be obtained by clicking on the Get here button. And finally, click on Authorize Now.
- To further enable it, you will need to integrate your phone number by clicking on Add Number.
- Lastly, create/manage your templates to send messages to your leads/customers.
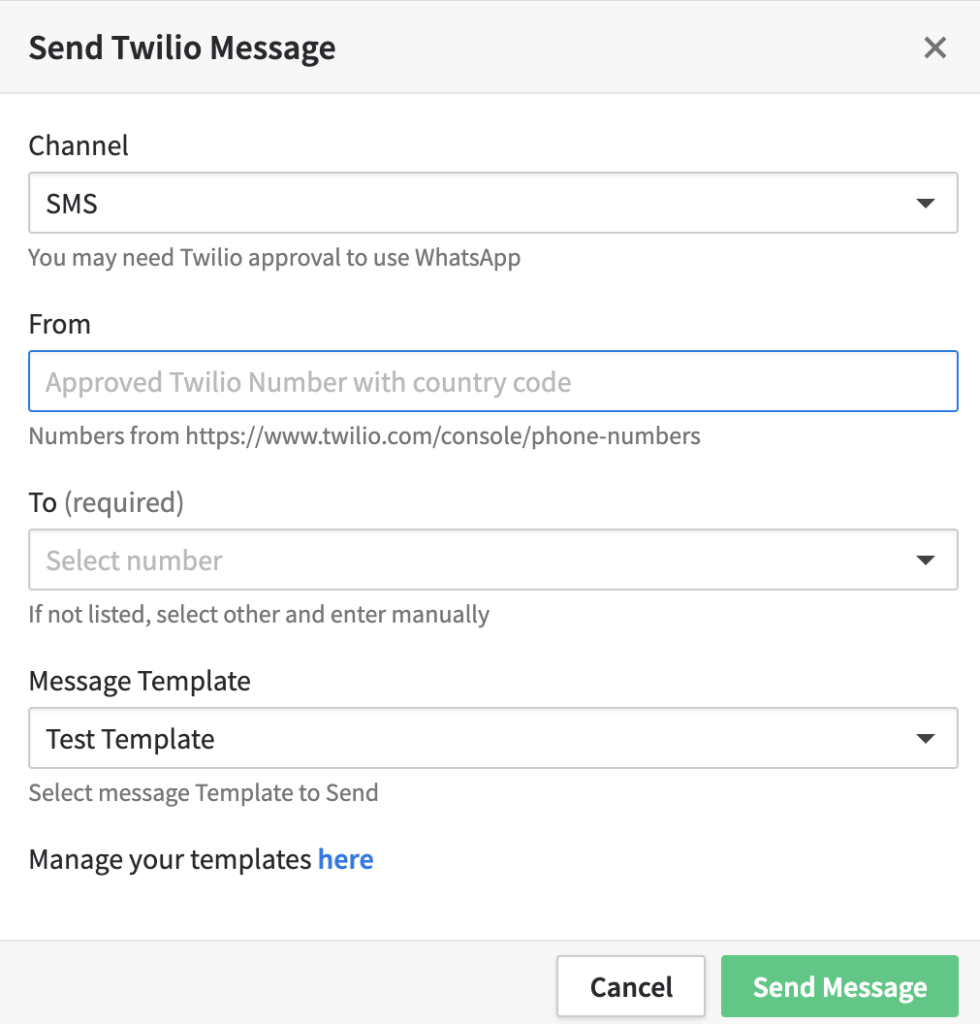
To send messages to one contact, go to Contacts Timeline, and open any of your contacts. Click on the three dots on the extreme left top and select Send Twilio Message.
This leads to another pop-up to configure the message. Here, you will need to add some fields like Channel, From, To, and a Message Template. If you don’t wish to create a template, you can type in your message in the Message box, as well. You can also manage your templates. Once done, hit the Send message button.
Sending bulk messages is fairly easy, too. Go to Contacts Timeline and select the number of contacts you want to send messages to. You can use filters too. Click on the three dots and select Send Twilio Bulk Message.
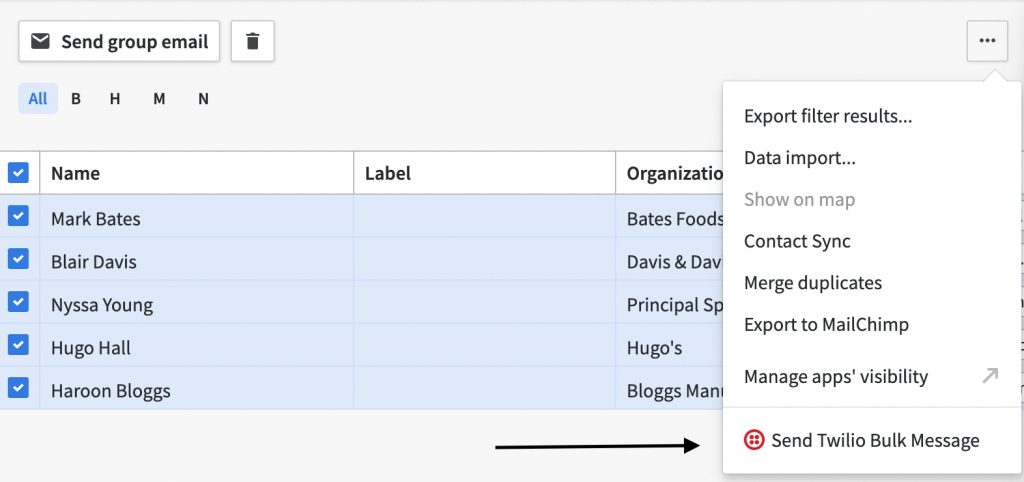
Other steps are similar to sending messages to individual contacts. Fill in all the fields and click on Send Message.
Automate importing data from Pipedrive
You can import data to Pipedrive from a spreadsheet or other software and import data from Pipedrive to Excel, CSV, Google Sheets, and BigQuery. The latter can be easily automated with a few clicks, so you won’t have to spend your time on a manual routine.
The idea is that you connect Pipedrive to a third-party integration tool, Coupler.io, which lets you load information about your deals, leads, activities, and other entities to one of three destinations: Google Sheets, Excel, and BigQuery.
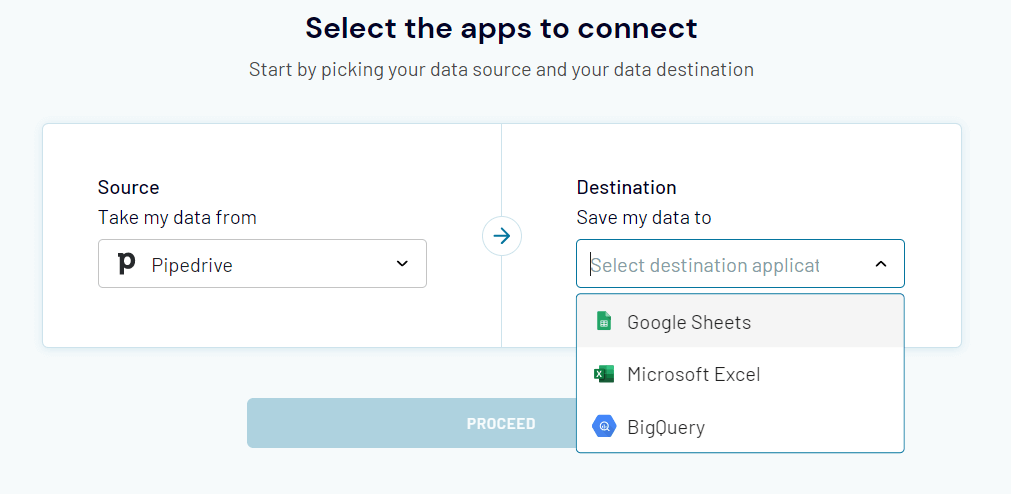
Coupler.io is a no-code solution to automate exports of data from Pipedrive and other sources, including HubSpot, QuickBooks, and others.
The Pipedrive integration by Coupler.io allows you to automate exports of different data entities from Pipedrive on a custom schedule, for example, every hour or every 15 minutes. This is especially useful for reporting or analytics. For example, if you build a self-updating dashboard featuring different metrics in Excel, you can connect Pipedrive to Excel. This will ensure that your dashboard always contains the latest records.


Pipedrive workflow automation limit
It’s important to learn about the limitations of workflow automation to make a better decision before designing workflows. There are four different plans in Pipedrive, each with different workflow limitations.
- Essential – No active workflows.
- Advanced – One user can have 30 different active workflows.
- Professional – One user can have 60 different active workflows.
- Enterprise – One user can have 100 different active workflows.
You can have ten actions associated with one workflow. In a one-minute window, one unique trigger can occur only once for a workflow.
Although one company account can have many workflows, there’s a limitation to their execution. In a window of ten minutes, one workflow can run a maximum of 5,000 times.
Suppose, you have designed a workflow to send out welcome emails to new contacts. Your workflow will send out emails to these new 5,000 contacts (not more than that) all in only 10 minutes. Similarly, if the same company account wants all their workflows to run at the same time, there’s a limitation of a maximum of 10,000 times in ten minutes.
Optimize business processes with Pipedrive workflow automation
Pipedrive workflow automation improves daily processes and enhances productivity by automating business processes such as manual data entries, updating fields, managing emails, marketing activities, etc. This eventually leads to employee satisfaction and generates more money for the business. Let’s look at some of the processes which can be simply automated.
- Sales and Marketing – It’s tiresome for sales reps to do timely follow-up emails and calls to get winning leads. Pipedrive workflow automation can effortlessly save this time. It allows you to touch base with leads from time to time, saving human efforts.
- Finance – A clear example of saving human errors is creating workflow automation which will approve budgets or sign off expenses only when a trigger is met. This way no one needs to keep sending emails with documents attached back and forth. Also, it’s a brilliant way to ensure accountability is maintained, too.
- Business Communication – Missed deadlines due to lack of business communication is a major bottleneck when it comes to human efficiency. Automation will keep each team member updated with the newest information which clearly eliminates risking deadlines.
Usually, business processes can get staff exhausted with all the manual work they have to do. The creative nature of people and innovation dies out with it. It is fair to say that automation doesn’t only save time but it also speeds up manual processes. The more time staff has on their hands, the more they’re inclined towards exploring and conceptualizing business ideas. Automation also ensures there are lesser errors and better communication while high-priority tasks are achieved seamlessly. Remember, doing less is more!