You already use Xero to run your finances. Now imagine having always-up-to-date financial dashboards in Power BI without spending hours on CSV exports, writing scripts, or paying for complex enterprise tools. And it doesn’t have to involve expensive add-ons or writing code from scratch. Imagine opening Power BI and seeing your latest Xero figures already waiting:
- aged debtors highlighted
- cash position crystal clear
- trends popping off the page
Or maybe you just want a reliable one-click refresh instead of starting from zero every week.
The good news is that people are already doing this every day with Coupler.io. In this article, you’ll discover how to connect and automate your Xero to Power BI data flow in minutes to get a clear view of your business performance without coding.
How to automate Xero to Power BI with Coupler.io
With Coupler.io, you can set up finance automation to ensure that Power BI dashboards are always refreshed with Xero data. Connect Xero to Power BI with two options:
- Xero for detailed transactional data (invoices, payments, bank lines) → perfect for deep custom dashboards.
- Xero Reports for instant financial summaries (Profit & Loss, Trial Balance, budgets) → ideal for fast executive views.
To connect Xero to Power BI, click Proceed in the form below and sign up for a free Coupler.io account, no credit card required:
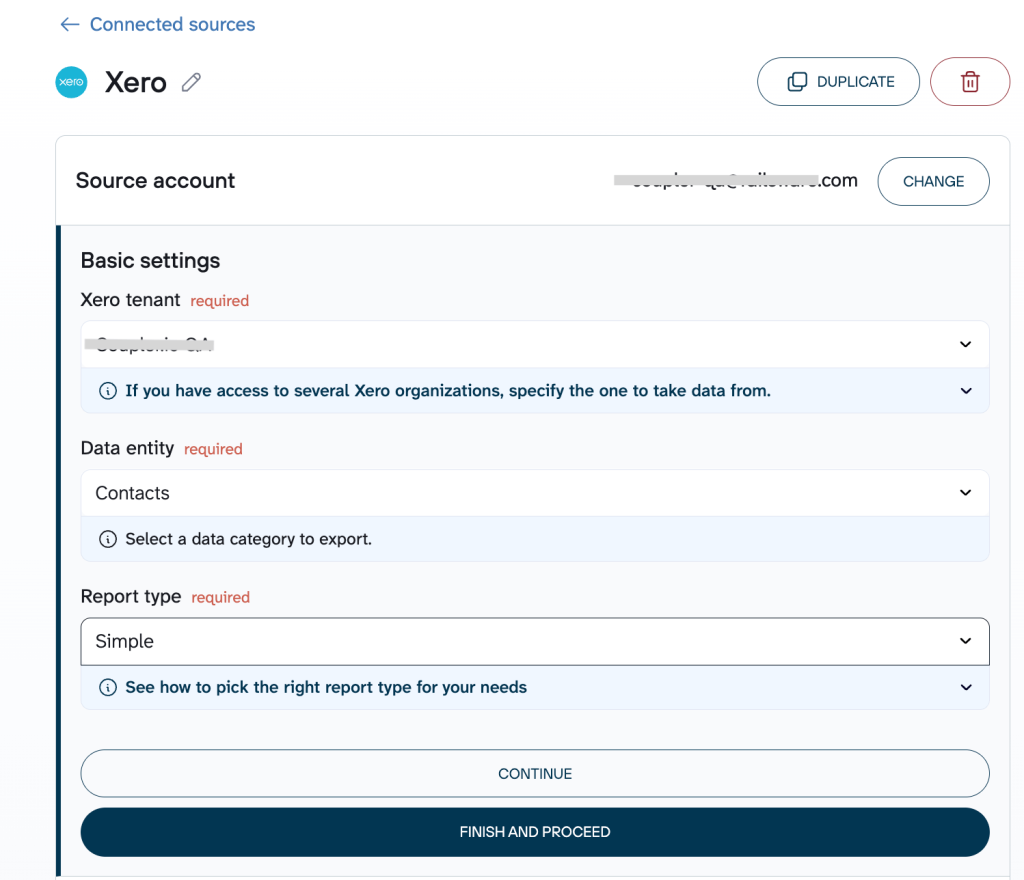
Step 1: Connect your Xero account
To start, connect your Xero account, select the tenant, and the report type.
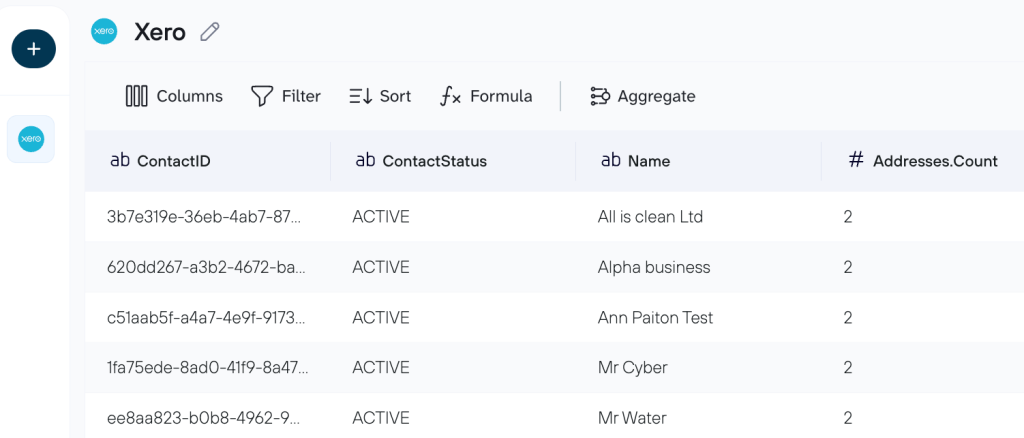
Step 2: Organize your Xero data before exporting it to Power BI
Raw Xero data often comes with extra columns, detailed transaction-level noise, or formats that don’t perfectly match your reporting needs (like cleaning up irrelevant fields or building custom financial metrics). In this step, Coupler.io lets you transform the data easily, namely:
- Hide or remove unwanted columns (e.g., drop internal IDs, notes, or less-relevant fields like “Tracking Category” or “Contact Email” if you’re focusing on core financials like Invoice Number, Date, Amount, Status, and Account Code)
- Rename or rearrange columns (e.g., rename “LineAmount” to “Net Amount” and move “Date” or “Contact Name” to the front for better readability)
- Filter rows or sort the data (e.g., filter to show only invoices from the last quarter, exclude draft/voided statuses, or sort by “Amount Due” descending to highlight overdue receivables first)
- Aggregate values (e.g., count invoices per “Contact” to track customer order frequency)
- Add calculated columns (e.g., create “Profit Margin” = (Revenue – Cost) / Revenue for items or services)
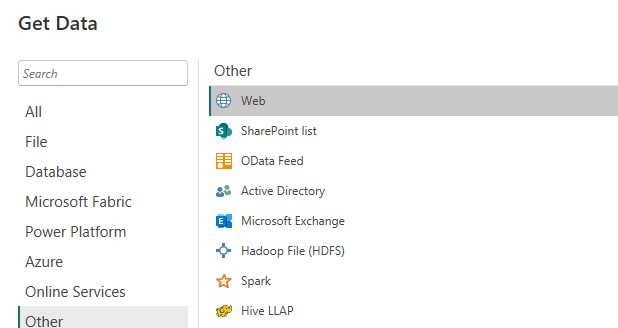
Step 3: Connect your Power BI account
To automate your Xero data export to Power BI, go to Power BI Desktop and select Get Data > Other > Web.
In Coupler.io’s Destination tab, follow the instructions to generate and copy the integration URL.
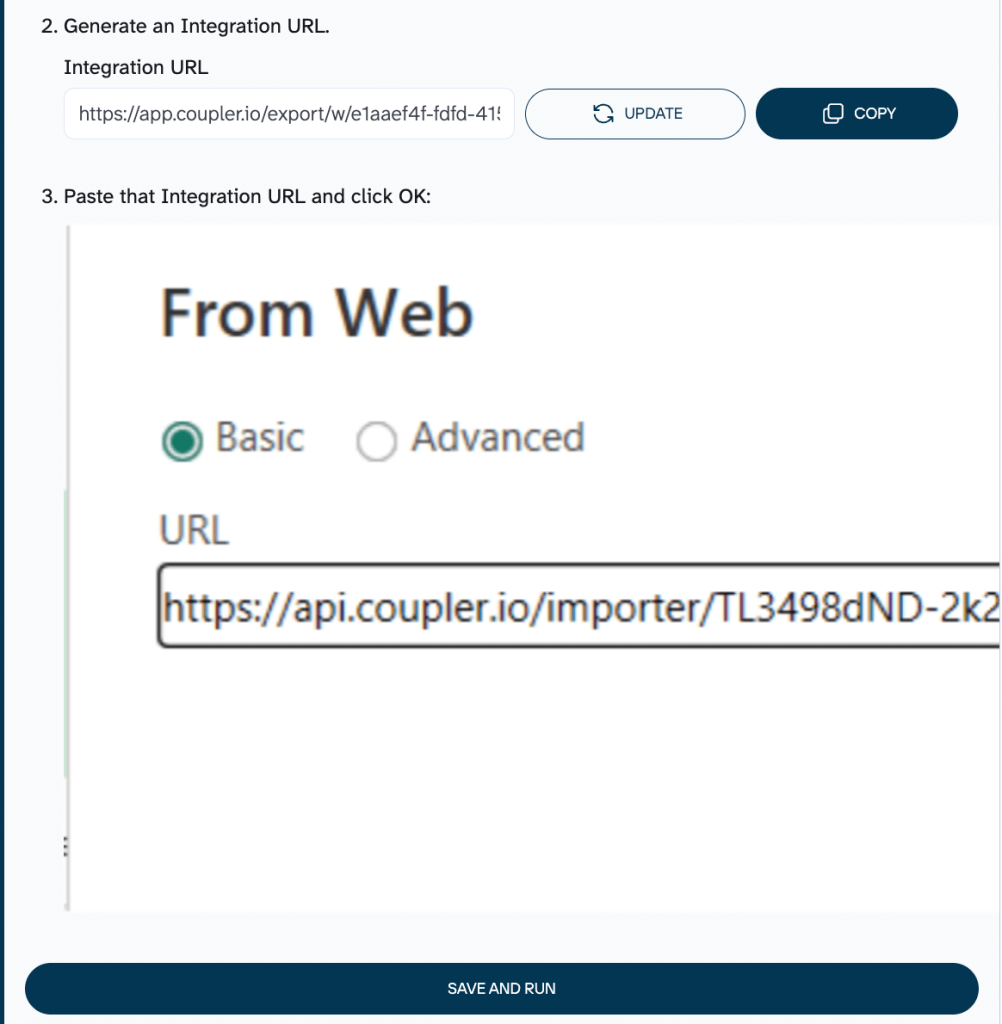
Paste the integration link, and Power BI’s Power Query Editor pops up with a live preview of your Xero data. From here, you can clean things up or reshape the data exactly how you need it before loading it to Power BI.
Step 4: Set automated data refresh
Turn on automatic data refresh to keep your Xero reporting updates running without manual work.
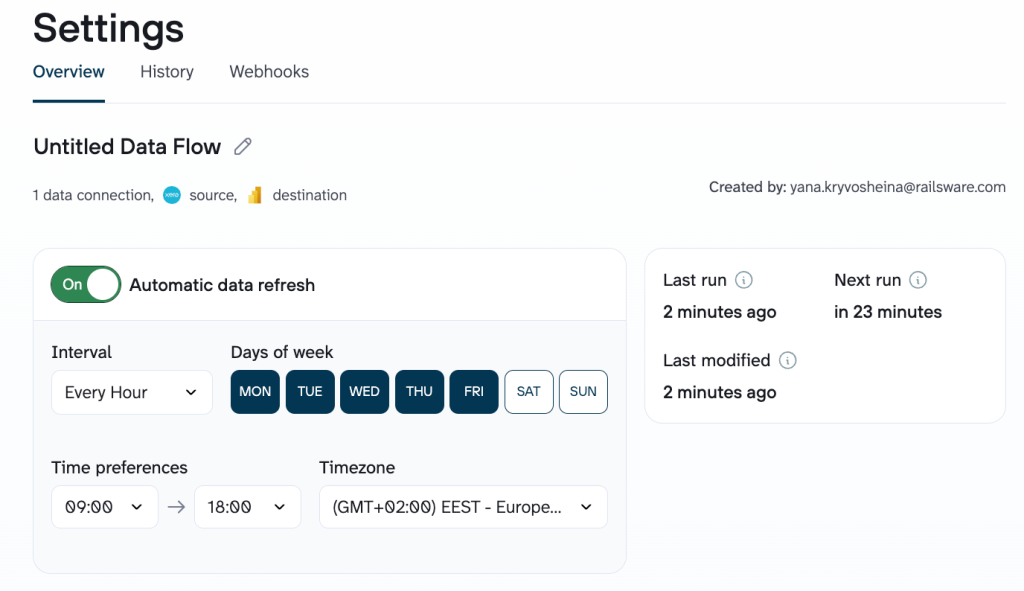
Make sure you click Save and Run. Only then will your automated data export from Xero to Power BI be enabled.
Automate reporting with Coupler.io
Get started for freeWhat data can you export from Xero?
The following data types are available in the Xero source app
Quick-start Xero data set templates
To help you get started faster, Coupler.io provides pre-built data set templates for Xero. These templates come with your Xero data already structured, combined where relevant (e.g., joining transactions with contact details or account information), and organized for immediate analysis in tools like Power BI.
Examples from the available templates include:
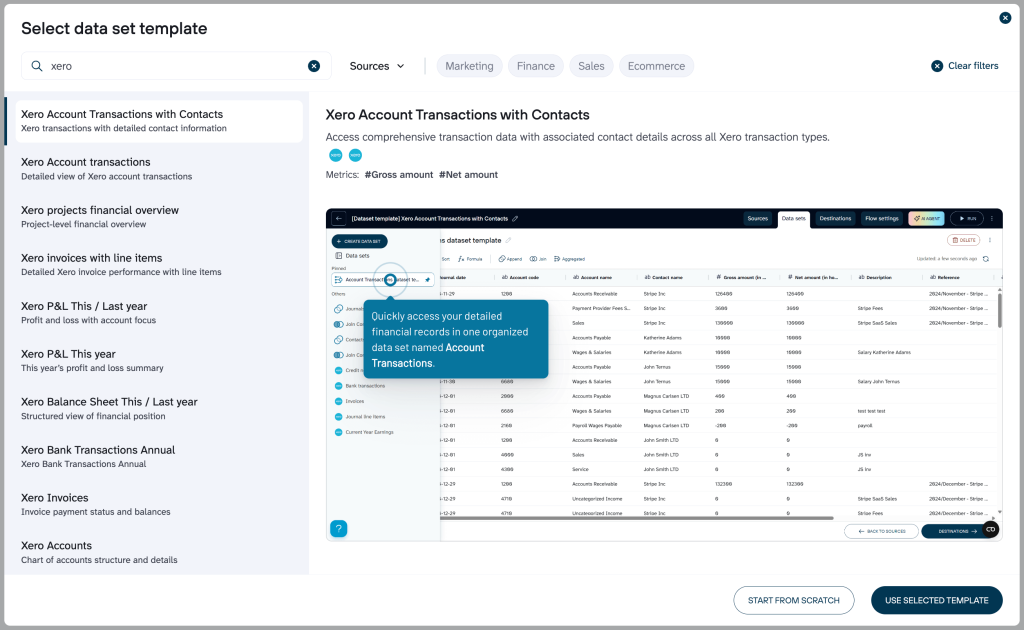
- Xero Account Transactions with Contacts: Detailed transactions across all types, joined with full contact information (e.g., customer/supplier names) for comprehensive views of financial activity linked to parties involved.
- Xero Projects Financial Overview: Project-level financial summary, aggregating costs, revenue, and profitability by project.
- Xero Invoices with Line Items: Detailed invoice data, including line-item breakdowns for performance analysis per item, customer, or period.
- Xero P&L This / Last Year: Profit and loss focused on accounts, with comparisons across periods for year-over-year insights.
- Xero Balance Sheet This / Last Year: Structured balance sheet views showing financial position with period comparisons.
- Xero Bank Transactions Annual: Annual overview of bank transactions for cash flow and reconciliation tracking.
You can select a template, connect your Xero organization, and quickly generate a ready-to-use data set to build reports and visualizations without starting from raw tables. To access a data set template for Xero, create a new data flow and select the “Start with template” option.
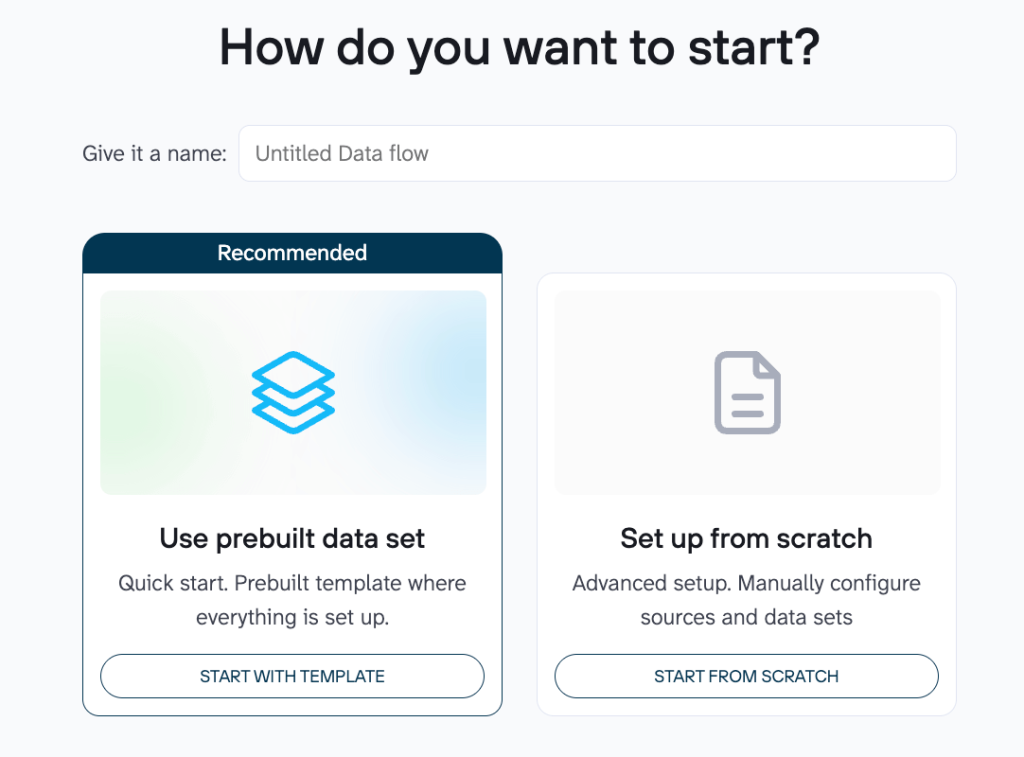
Search for “Xero” in the bar, browse the available templates, pick one that matches your needs, and continue to configure it with your Xero connection.
Can you automatically pull Xero reports to Power BI using Coupler.io?
Xero Reports pulls aggregated data using Xero’s standard templates (e.g., monthly P&L totals, weekly expenses, account summaries, budget comparisons).
Click Proceed in the form below to start:
After that:
- Connect Xero account
- Choose report
- Transform (if required)
- Load to Power BI
The setup is similar to the one described in the previous section.
The following report types are available in the Xero source app
Key challenges for Xero users and how Coupler.io solves them
Getting your Xero data into Power BI might feel like more hassle than it’s worth. Here’s how integration with Coupler.io directly tackles the biggest roadblocks Xero users face when building scalable, automated dashboards in Power BI.
❗Pain point 1: Hours wasted on manual exports
✅Solution: Set up fully automated refreshes so Xero data flows into Power BI on autopilot (e.g., daily or hourly).
❗Pain point 2: Hard to combine Xero with marketing, sales, or e-commerce
✅Solution: Connect 400+ sources natively and blend finance, marketing, and sales data in one pipeline for unified Power BI dashboards.
❗Pain point 3: API limits and surprise costs from poorly optimized custom scripts
✅Solution: Organize and filter your data set in a way to export only the data you need and stay well within Xero’s rate limits, which also minimizes long-term API costs.
❗Pain point 4: Expensive multi-organization reporting
✅Solution: Manage 1 or 50+ Xero organizations from a single account, which enables consolidated reporting without enterprise pricing.
❗Pain point 5: Limited AI-enhanced insights
✅Solution: Use Coupler.io’s AI Agent — a conversational assistant that lets you chat with your data in plain language. Ask questions naturally (e.g., “Show me profit trends by customer”), get instant answers, explanations, and visualizations directly from your fresh Xero (and blended) data.
Other ways to connect Xero to Power BI
Coupler.io was built to solve exactly these Xero + Power BI challenges with minimal effort. However, if you want to explore DIY options, the alternatives below rely on manual exports or custom API integration.
How to manually send data from Xero to Power BI
Manual export is a basic, simple, no-cost way to move data from Xero to Power BI. However, it’s not ideal for regular use because it requires repeating the same steps every time you want updated numbers. You have to export files manually from Xero, import them into Power BI Desktop, and later redo everything when data changes.
This method can be useful when:
- You’re doing a one-time or very occasional analysis (e.g., once a month or quarter).
- You only need a small amount of data or a specific report just for now.
- You’re testing Power BI visuals with sample Xero data before deciding on automation.
Step1: Download Xero data
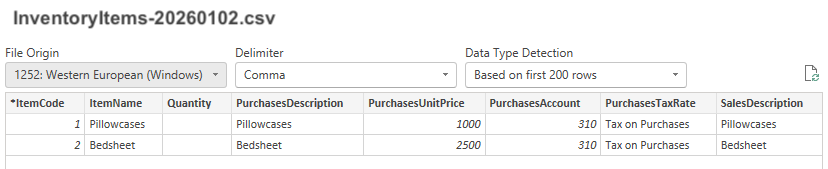
- In your Xero account, select the data category (e.g., Products and services)
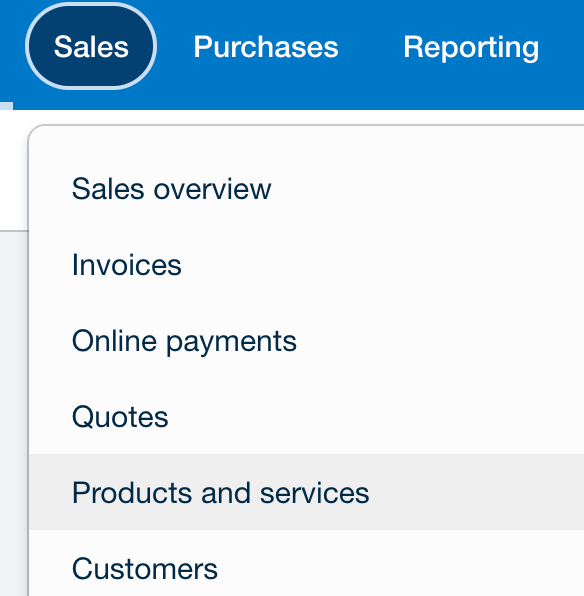
- Go to the Business tab, choose the data you want to export, click Export, and choose the format (CSV or PDF). This way, you’ll save the selected data to your device.

If you want to export Xero reports:
- Open the Reporting section dropdown and select the report you need (e.g., Balance Sheet).
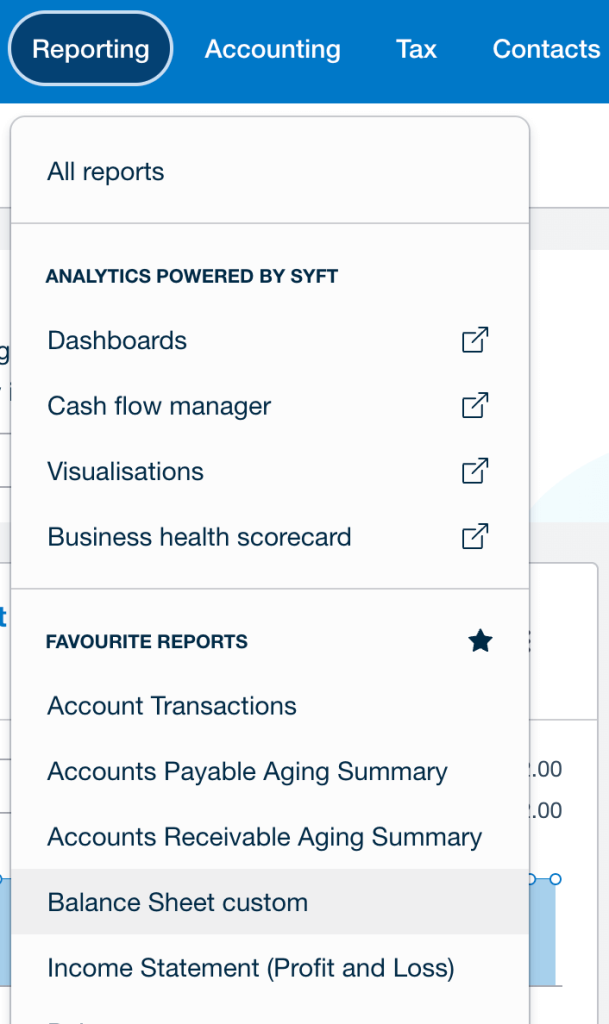
- Select the necessary options and click Update to save.

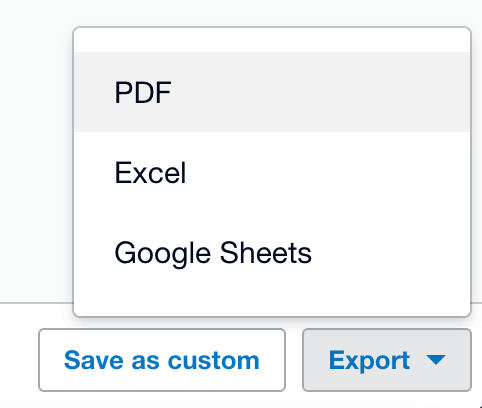
- Click Export at the bottom-right of the page to download the file to your device. Select the Excel format to be able to upload the file later to Power BI.
Step 2: Upload data to Power BI Desktop
- Go to your Power BI desktop and select Get Data from the menu bar.
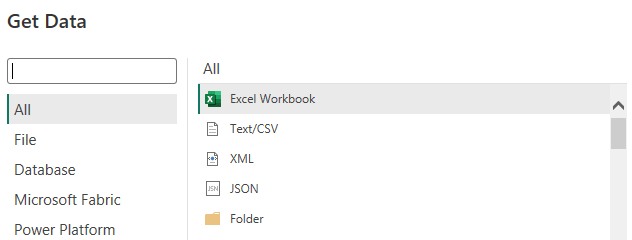
- Select the Excel or CSV file you want to upload and click Connect. You’ll see a preview of the data model.
- Click Close & Apply in Power Query Editor to load your dataset to Power BI, where you can create a report.
How to make a custom integration with Xero API
If you’re comfortable with some technical work, you can connect Xero to Power BI using the Xero API directly. Here’s a breakdown of the process:
First, generate the endpoint URL and get an access token. Then, write a script (in Python or another language) to pull data from the Xero API and load it into a database. Finally, connect that database to Power BI using one of its built-in connectors.
Note: Although a custom Power BI connector is entirely free and allows for customization, it can be complicated.
Here’s an overview of the key steps for working with the Xero API:
- Go to developer.xero.com and log in using your regular Xero credentials. If you don’t have one yet, create a New App (this gives you the credentials needed for API access).

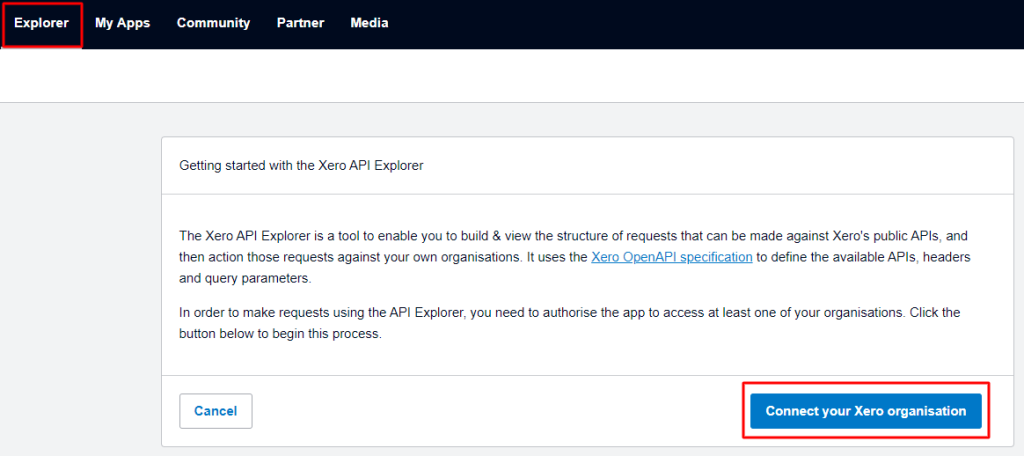
- In the API Explorer, click Connect your Xero organisation.
- Grant permission to allow access to your organization. After that, choose an API (usually the Accounting API), select an Endpoint (for specific data like invoices, payments, etc.), and pick an Operation (e.g., “Get Payments” to retrieve payment details). For reports, switch to the Reports endpoint and choose the report type under Operation (e.g., “Get Report Trial Balance”).
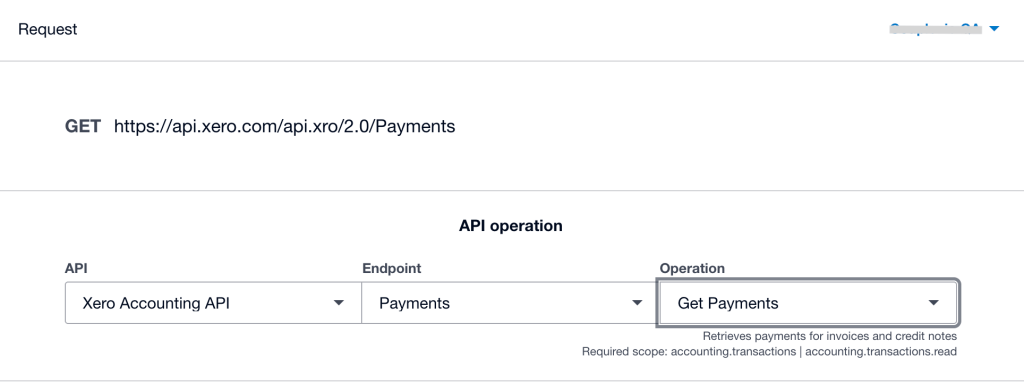
- Once selected, the tool generates the full URL for that request; just copy it.
Access token for authentication
- Go to My Apps > Configuration in your Xero developer portal to view your app’s connection details.
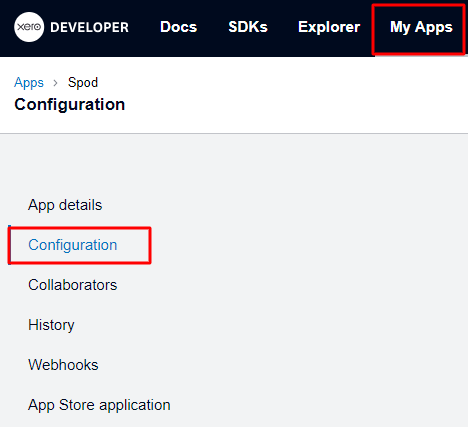
You’ll find your Redirect URL, Client ID, and Client Secret here — these are essential for the next steps.

- Open your browser and go to Xero’s authorization page using a URL like this:
https://login.xero.com/identity/connect/authorize?response_type=code&client_id=YOURCLIENTID&redirect_uri=YOURREDIRECTURI&scope=openid profile email accounting.transactions&state=123
- Replace the placeholders with your actual values:
- YOURCLIENTID → your app’s Client ID
- YOURREDIRECTURI → the exact redirect URL you set in your app configuration
- scope → add the permissions you need (e.g., accounting.transactions for invoices/payments)
- state → optional random string for security (recommended to prevent attacks)
After you approve access, Xero redirects back to your redirect URI and adds a temporary authorization code (e.g., ?code=xxxxxx) to the URL.
- Make a POST request to Xero’s token endpoint:
POST https://identity.xero.com/connect/token
The header:
authorization: "Basic " + base64encode(client_id + ":" + client_secret)
Content-Type: application/x-www-form-urlencoded
Request body:
grant_type=authorization_code
&code=xxxxxx
&redirect_uri=https://myapp.com/redirect
- Send it — the response will give you:
- An access token
- How long it lasts (usually 30 minutes)
- A refresh token (if you requested the offline_access scope)
- Tokens are short-lived for security, but you can refresh them automatically using the refresh token.
For a full, detailed walkthrough (including refresh steps and best practices), check out Xero’s official guide: Authorization Code Flow.
Once you have the access token, use it in your script (Python, Node.js, etc.) to pull data from the Xero API and load it into a database. Then head back to Power BI, connect to that database, and start visualizing your Xero data.
An ultimate checklist on whether Coupler.io is the best choice for your Xero + Power BI reporting
To better understand how to upgrade your financial data visualization, let’s do a quick reality check whether Coupler.io is the perfect no-fuss solution for you right now.
- Do you need to combine Xero data with data from other apps (like Google Ads, Shopify, Stripe, HubSpot, QuickBooks, etc.) in the same report?
→ Coupler.io excels at this with seamless blending across 400+ sources.
- Do you want your Power BI dashboards to refresh automatically (no manual updates ever)?
→ With Coupler.io, you can set scheduled auto-refreshes so your reports stay fresh without manual effort.
- Do you manage or report on multiple Xero organisations/tenants?
→ Coupler.io allows you to connect and consolidate data from multiple Xero accounts into unified models for consolidated P&L, balance sheets, cash flow, and more.
- Are you a non-tech-savvy user who wants a no-code solution?
→ Coupler.io is built for everyone: simple clicks, no scripting, no API headaches.
- Do you want to start immediately, no credit card required, and see real results in the next hour?
→ Coupler.io allows you to sign up for free (no card needed), try its full set of features during the trial, connect Xero in minutes, and build your first automated dashboard fast.
If you answered yes to most (or all) of these, Coupler.io is likely your best, easiest path to reliable, automated Xero-to-Power BI reporting. The built-in Xero connector by Coupler.io makes it possible to have fresh data in Power BI in minutes.
Automate Xero to Power BI reporting with Coupler.io
Get started for free