Mailchimp started as an email marketing platform, but it has since grown into a lot more. With its acquisition of Mandrill and a push into marketing automation, it has become an all-in-one email platform that many can’t imagine running marketing without.
One of the reasons for their success is Mailchimp workflows – an intuitive and effortless means to automate various processes inside and even outside the platform. Learn how they work and how to set up efficient workflow automations with our guide.
What is a workflow on Mailchimp?
Workflows are a part of every business and organization. They’re a sequence of tasks performed in a specific order, in a manual or automated manner. The former is particularly useful as they effectively save lots of time and have the power of creating truly magical customer experiences.
Automated workflows typically rely on triggers – specific actions that need to occur for a workflow to be initiated or for it to proceed to the following stage. For example, when someone subscribes, a welcome email is automatically sent to them.
Workflows can be equipped with a schedule, templates, and any other conditions determining how exactly a workflow should be executed.
One field where workflows are particularly useful is emails. Mailchimp takes advantage of it and offers an intuitive tool for setting up Mailchimp workflow automation in a matter of minutes.
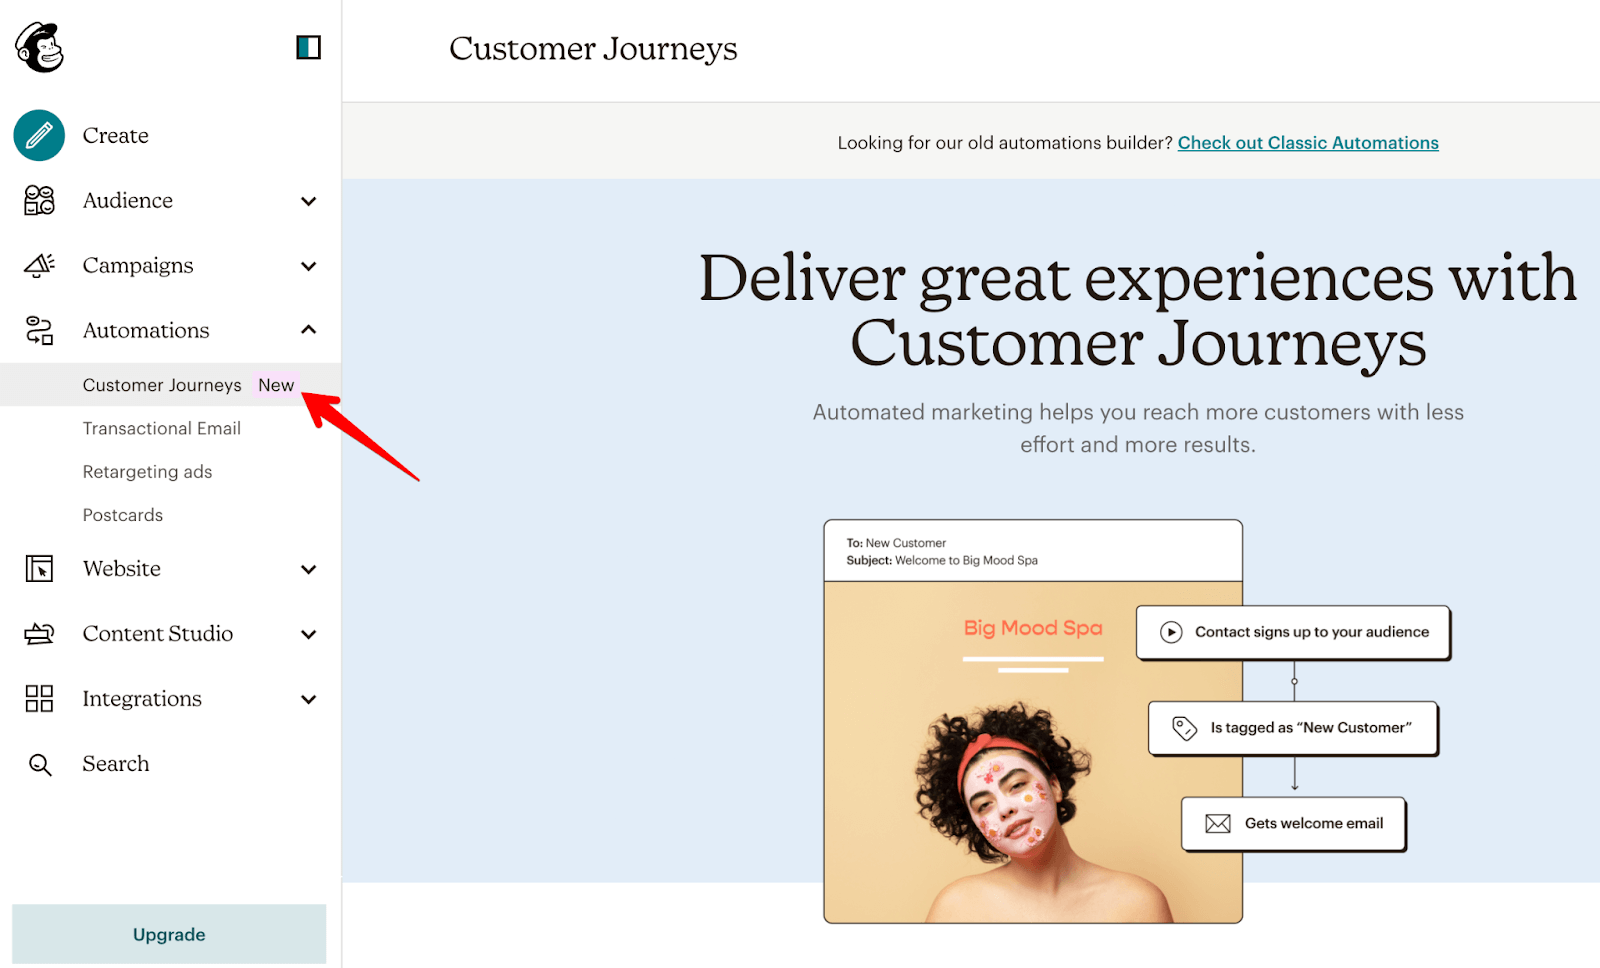
The basic set of workflow automations (referred to as Classic Automations) is available at Automations -> Customer Journeys.
Here, you can take advantage of a number of templates or build a workflow from scratch.
This is, however, just the tip of the iceberg when talking about automated workflows on Mailchimp. Mailchimp offers hundreds of integrations that can automate numerous other workflows. It could be syncing data between platforms, exporting campaign stats to a dashboard, automatically publishing ads or content, and a lot more.
You’ll find the most common integrations in the aptly named Integrations tab in the menu. Many more are available in the Mailchimp Marketplace and even outside of it.
Mailchimp workflow examples
Mailchimp workflows can be as simple as “if someone subscribes, send them an email.” They can also feature dozens of conditions and hundreds or more possible outcomes. The sky and your imagination are the only limits.
The standard set of templates lets you:
- Send a welcome email to new contacts and follow up two days later.
- Re-engage shoppers that haven’t bought from you in 90 days.
- Reach out to the owners of abandoned carts with several emails.
- Send a sequence of emails when a specific tag is manually or automatically assigned to a contact.
- Dispatch another series of emails after a successful sale aimed to create repeat customers.
You can customize each of these Mailchimp workflows. For example, you could increase the gap between emails or add one more template to be sent at the end of a workflow. You could also adjust the triggers, and, for example, follow up only on leads that opened an initial email.
We’ll describe the workflow creation process in the later chapter.
As was said earlier, workflows can be much more complex than that and can take advantage of various other apps integrated with Mailchimp.
Here’s an example of a workflow that won’t take long to build and is virtually impossible to replace with manual work.
- A customer abandons their cart in your Shopify store.
- If their cart value is above $1,000, they’re added as leads to Salesforce and assigned to a specific sales rep.
- An automated, personalized email from Mailchimp is sent to them six hours later.
- If they don’t respond within 24 hours and don’t finalize their purchase, a tag is assigned to them, and a sales rep is pinged to reach out to them personally.
- If their cart value is $1,000 or less, they’re added to a custom segment of contacts in Mailchimp.
- 6 hours later, an email is sent to them, offering an incentive if they finalize the purchase.
- Depending on how they interact with the email, further actions unfold, e.g.:
- If they opened an email, clicked the link, and still failed to finalize a purchase, a personalized “can we help you?” Mailchimp template is sent to them four hours later.
- If they opened an email but did nothing else, a follow-up is pushed to them 6 hours later.
- If there were no opens, the follow-up is sent 24 hours later, after which they’re added to a Facebook Ads campaign targeting this particular audience.
- If their cart value is above $1,000, they’re added as leads to Salesforce and assigned to a specific sales rep.
The benefits of Mailchimp workflow management
There are plenty of reasons for using workflows in Mailchimp and hardly any disadvantages to doing so. The most common pros include:
- More efficient work
Automations take care of many tedious processes that humans shouldn’t be forced to do. Things like sending follow-up emails or tagging leads when specific criteria are met can be easily automated without any harm to the process.
Delegating such stuff to the algorithms lets employees focus on a more holistic overview of the process and more ambitious tasks. All of that makes people feel happier and more accomplished at work.
- Easier to reach customers
Targeted and timely emails are often a key to converting a lead to a paying customer. It doesn’t matter if it’s a day or night, weekday or not; Mailchimp workflows can dispatch emails precisely when the recipients are most likely to interact with them.
What’s more, templates can be personalized with numerous available merge tags. With a bit of effort, you can make them look genuine and, at the same time, create personalized experiences that touch on the things that recipients care about. It just has to yield positive results.
- Errors are less likely
Even the most attentive person will eventually make mistakes when processing large chunks of data. It could be mistyping one’s name, a wrong value typed into a spreadsheet, or an irrelevant email sent to the wrong contact. It’s inevitable.
Automated workflows are much less prone to making such mistakes. Of course, they still require thorough testing and monitoring. Different edge cases must be considered before any advanced workflow is deployed, but they’ll consistently outperform humans in the long run.
Mailchimp custom workflow automation
The number of Mailchimp workflow automation templates is limited. Luckily, everyone can create custom templates with ease. Here’s how to go about it.
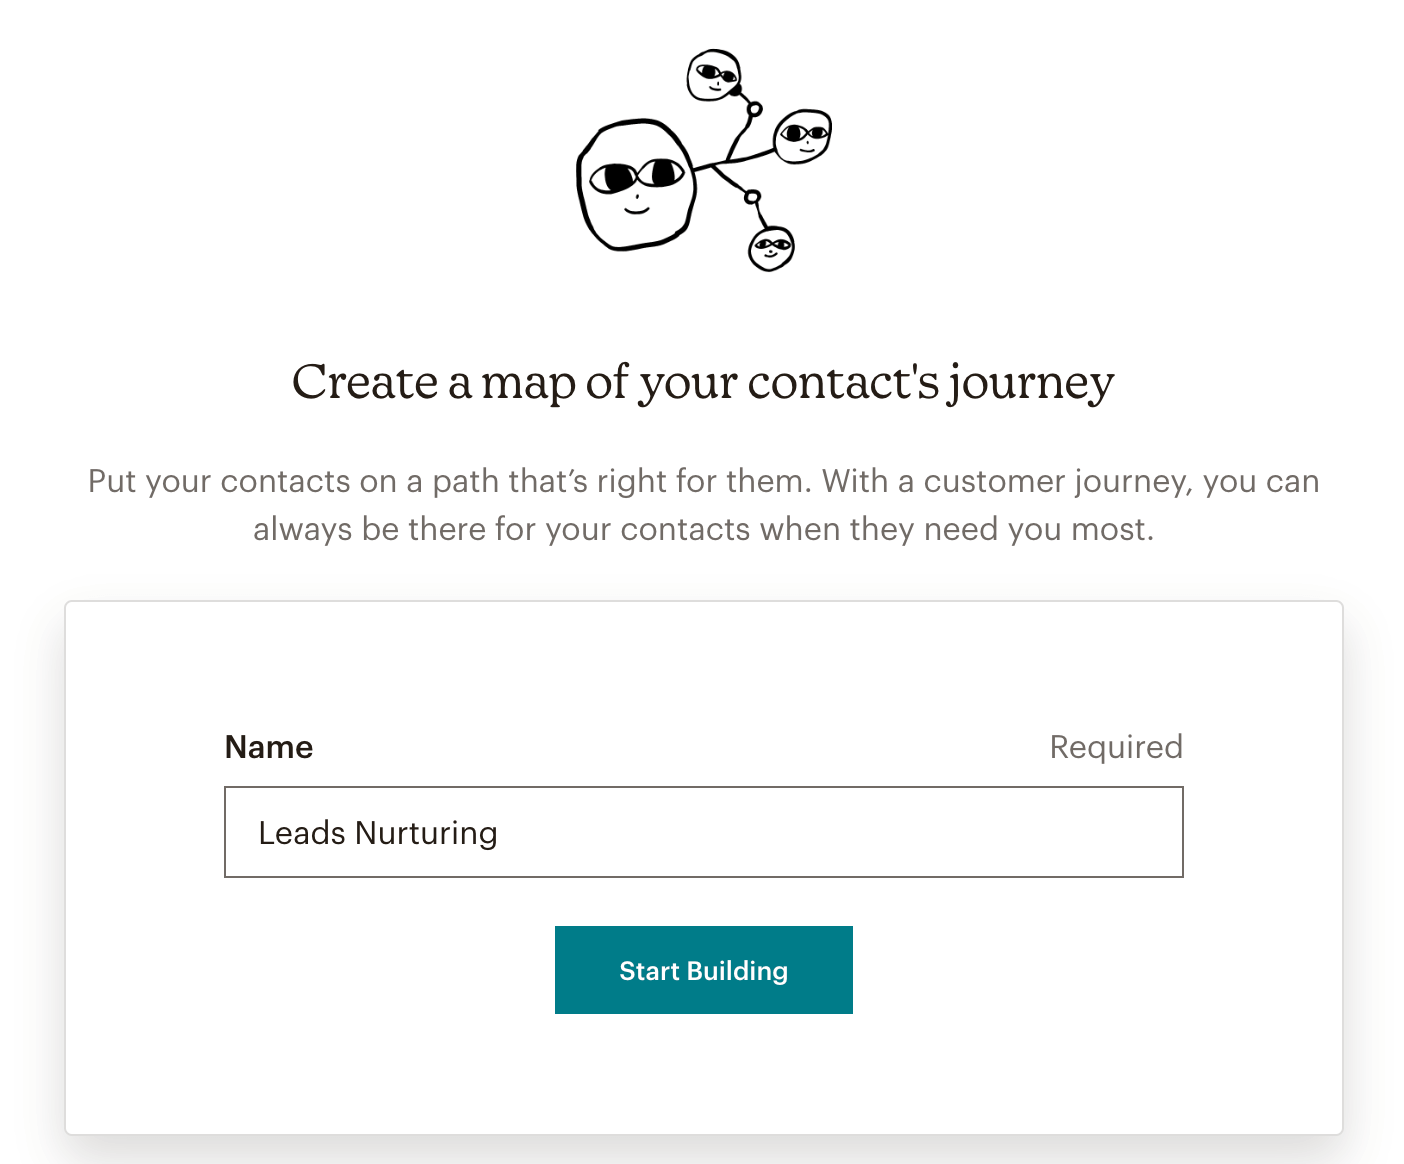
- Nowadays, automated workflows in Mailchimp are referred to as Journeys. To create one, go to Automations -> Customer Journeys and hit the Create Journey button in the top-right corner. Give it a name.
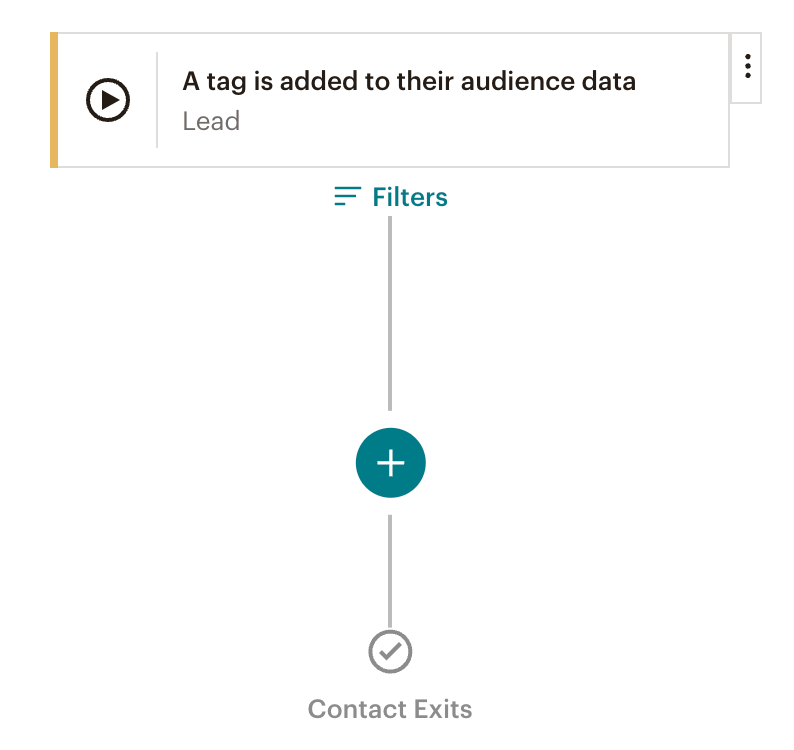
- In our workflow, we want to nurture our leads a bit. In other words, every time we tag a contact with a “Lead” tag, we want a particular email sequence to be launched for these contacts.
- Every workflow has a starting point, meaning a trigger that will initiate it for select contacts. We can further customize it with filters to, for example, apply the workflow only to a specific customer segment, but we’ll skip it this time.
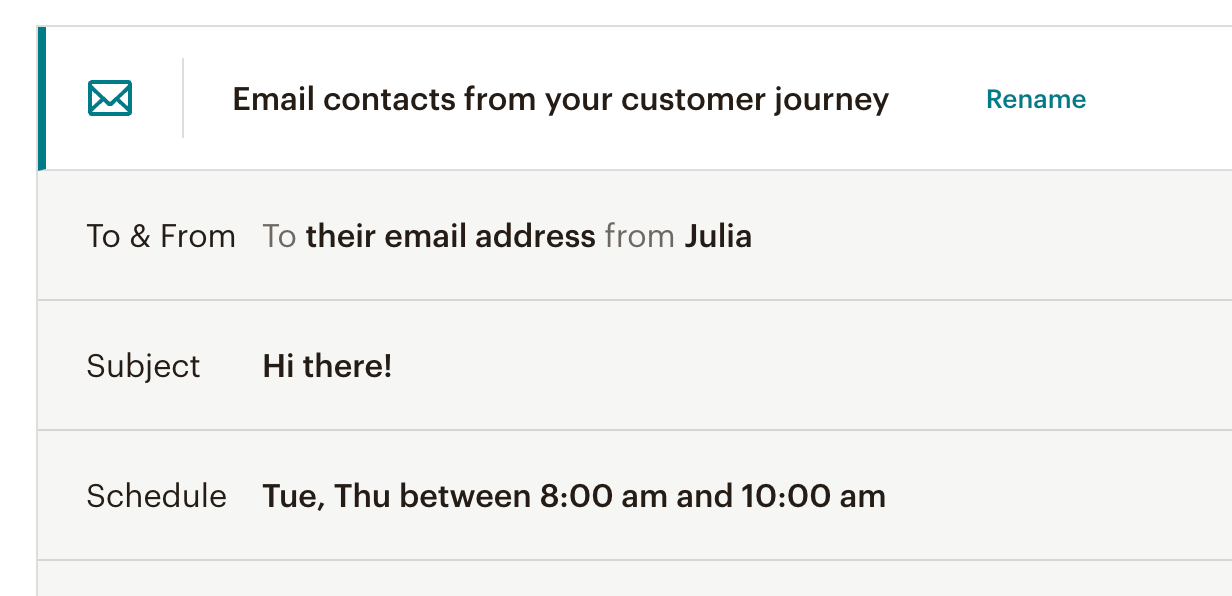
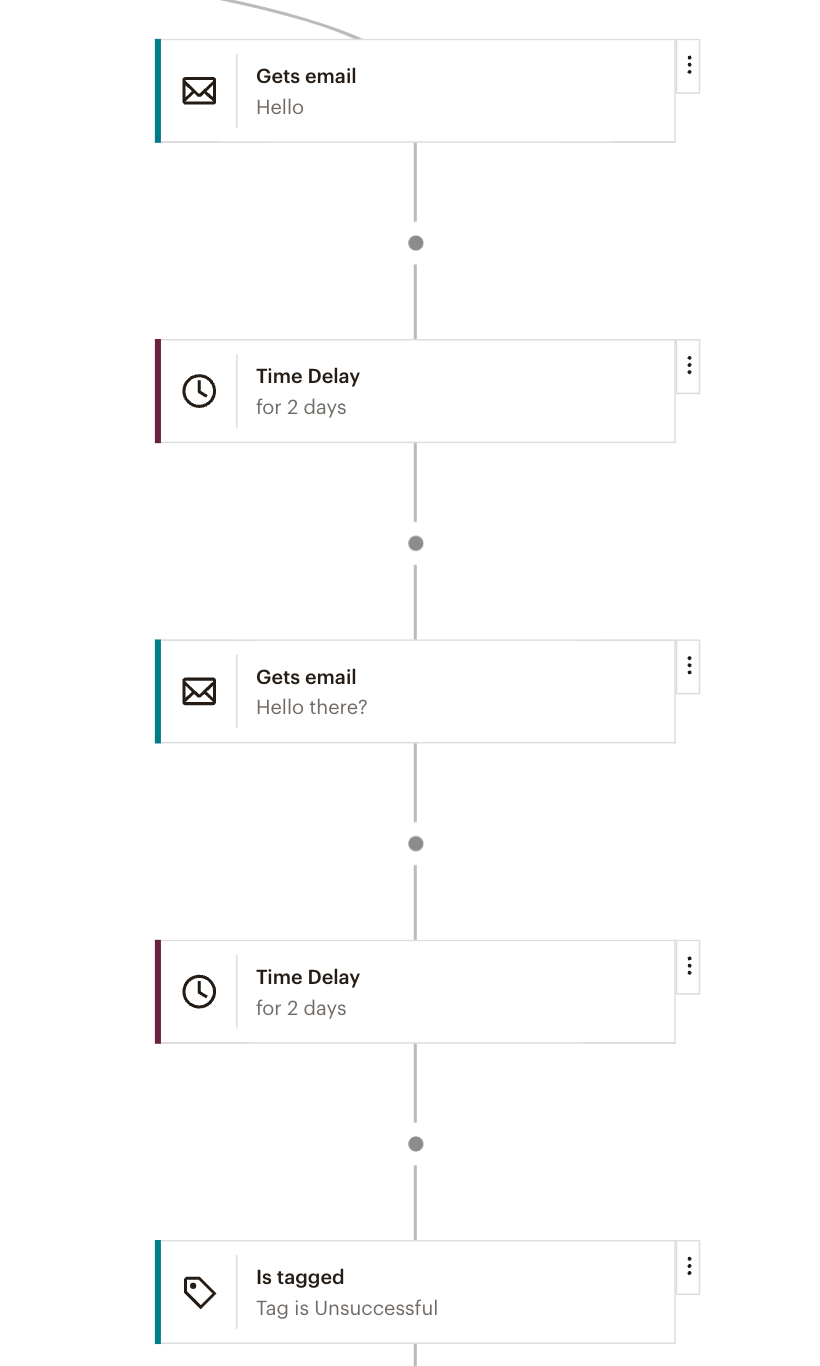
- Once the starting point is set, we can decide what should happen next. We can either select a rule or program for a specific action to be performed if the condition above is met. Since we’re nurturing leads, sending them a welcome email is a good idea. We can either choose to send it right after a tag is added or at a specific time. For example:
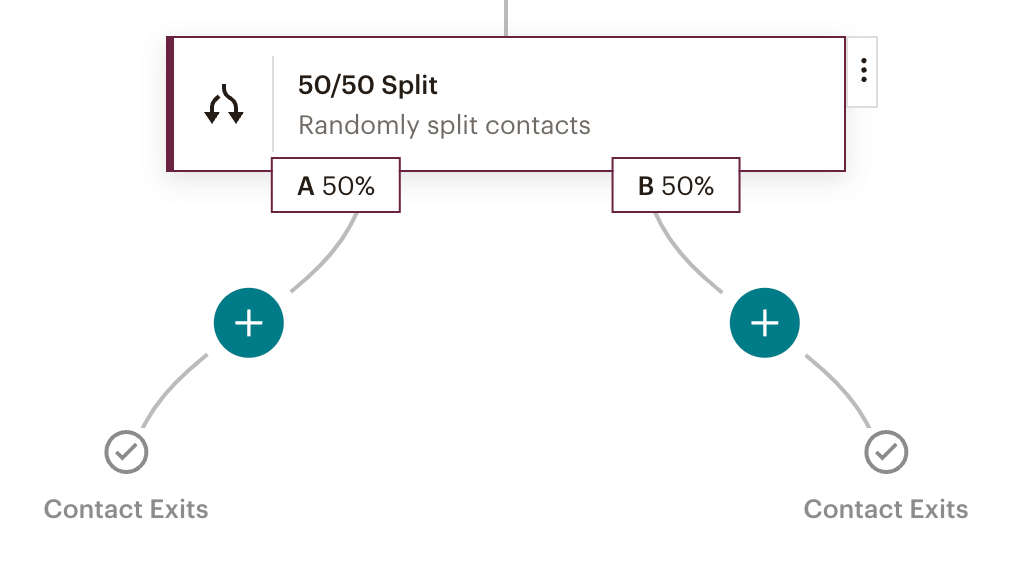
- Now it’s time to set some more triggers to customize the outcome for different recipients. But since we’re not sure what approach will work best, we can add a 50/50 Split to the workflow for some A/B testing. This way, we’ll randomly push our leads through two separate funnels and see which one converts better for us.
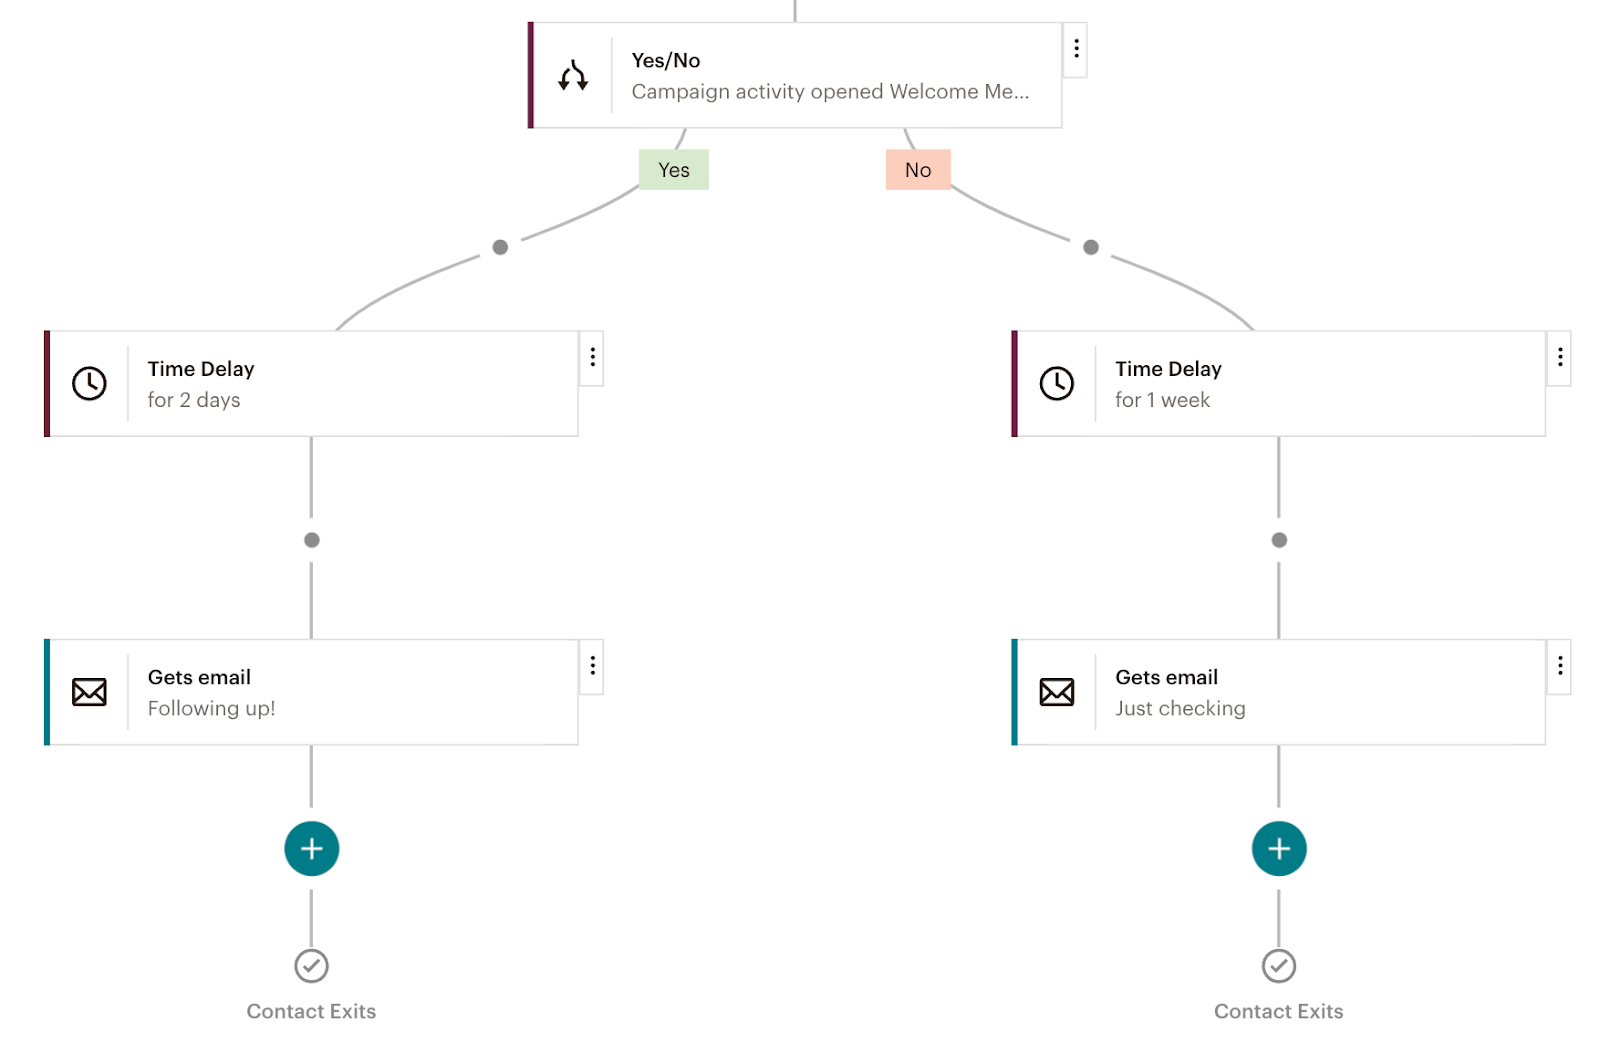
- In the left-most funnel, we choose to wait for a day and then check whether a person opened our initial email. We set up a classic If/Else rule and:
- Send a follow-up email two days later if they opened an initial message.
- If they haven’t, we wait for a week and then send them a different template.
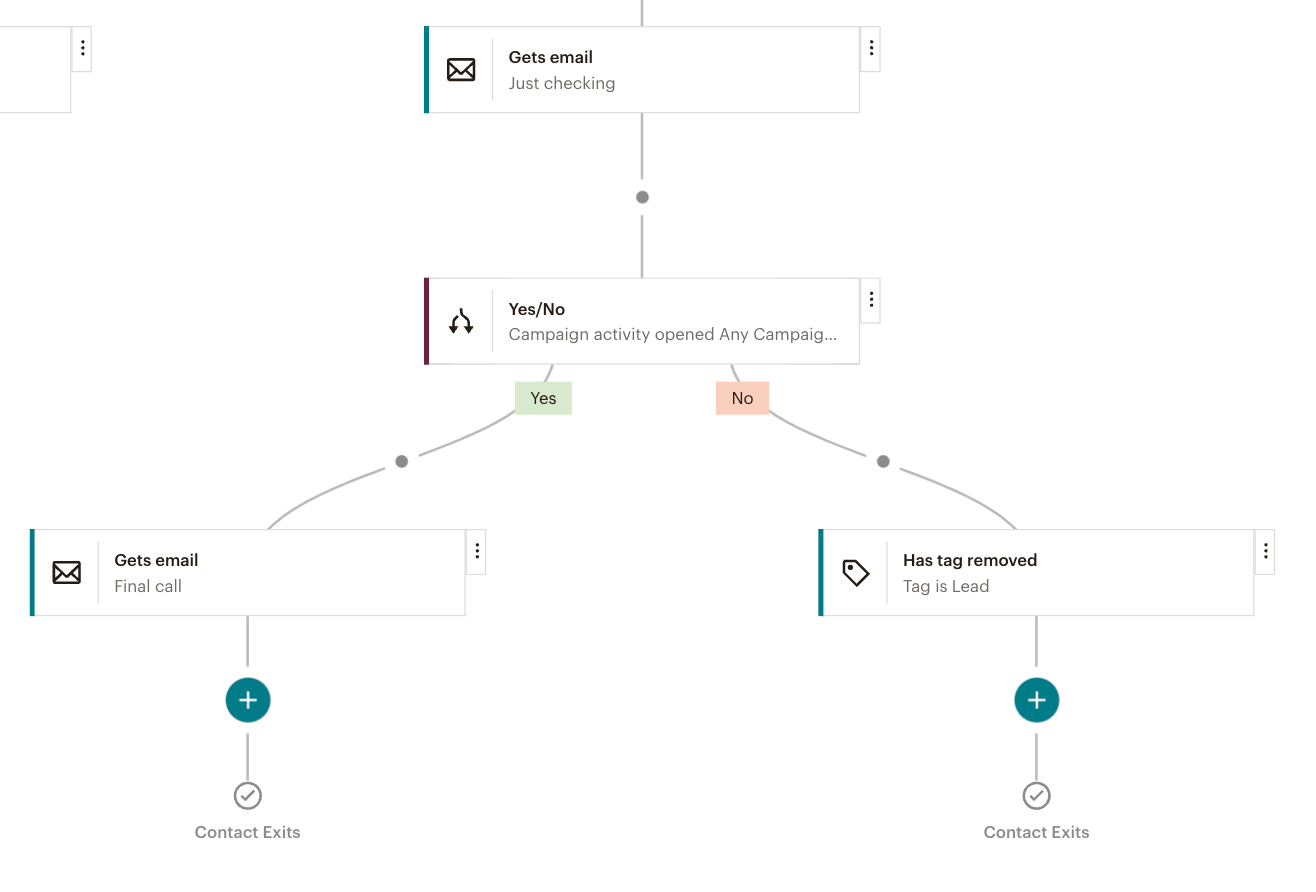
- We can further expand either path by adding more rules and actions. For example, we’ll check one more time if a lead opened our email. If so, we’ll send them a final message from a sequence. If not, we’ll remove a tag to their name and stop bothering them again – clearly, they were not as prospective as we hoped they would be.
- Earlier on, we split our audience 50/50. Perhaps with the other half of our leads, we’ll try a less conditional approach. Once tagged as unsuccessful, we’ll continue nurturing these leads differently – with ads, maybe?
The more rules you add, the more possible outcomes, and the more extensive the workflow becomes. Sift through it before the launch and analyze every possible path your contacts could take.
Monitoring the Mailchimp workflow automation
Once a workflow is launched, it’s essential to monitor it from day one and improve it on the go. In Mailchimp, every workflow has its individual report showcasing its key stats.
The workflow reports are mixed up with the campaign reports and are available via Campaigns -> Reports. You can filter them from the rest of reports by using the Automations filter.
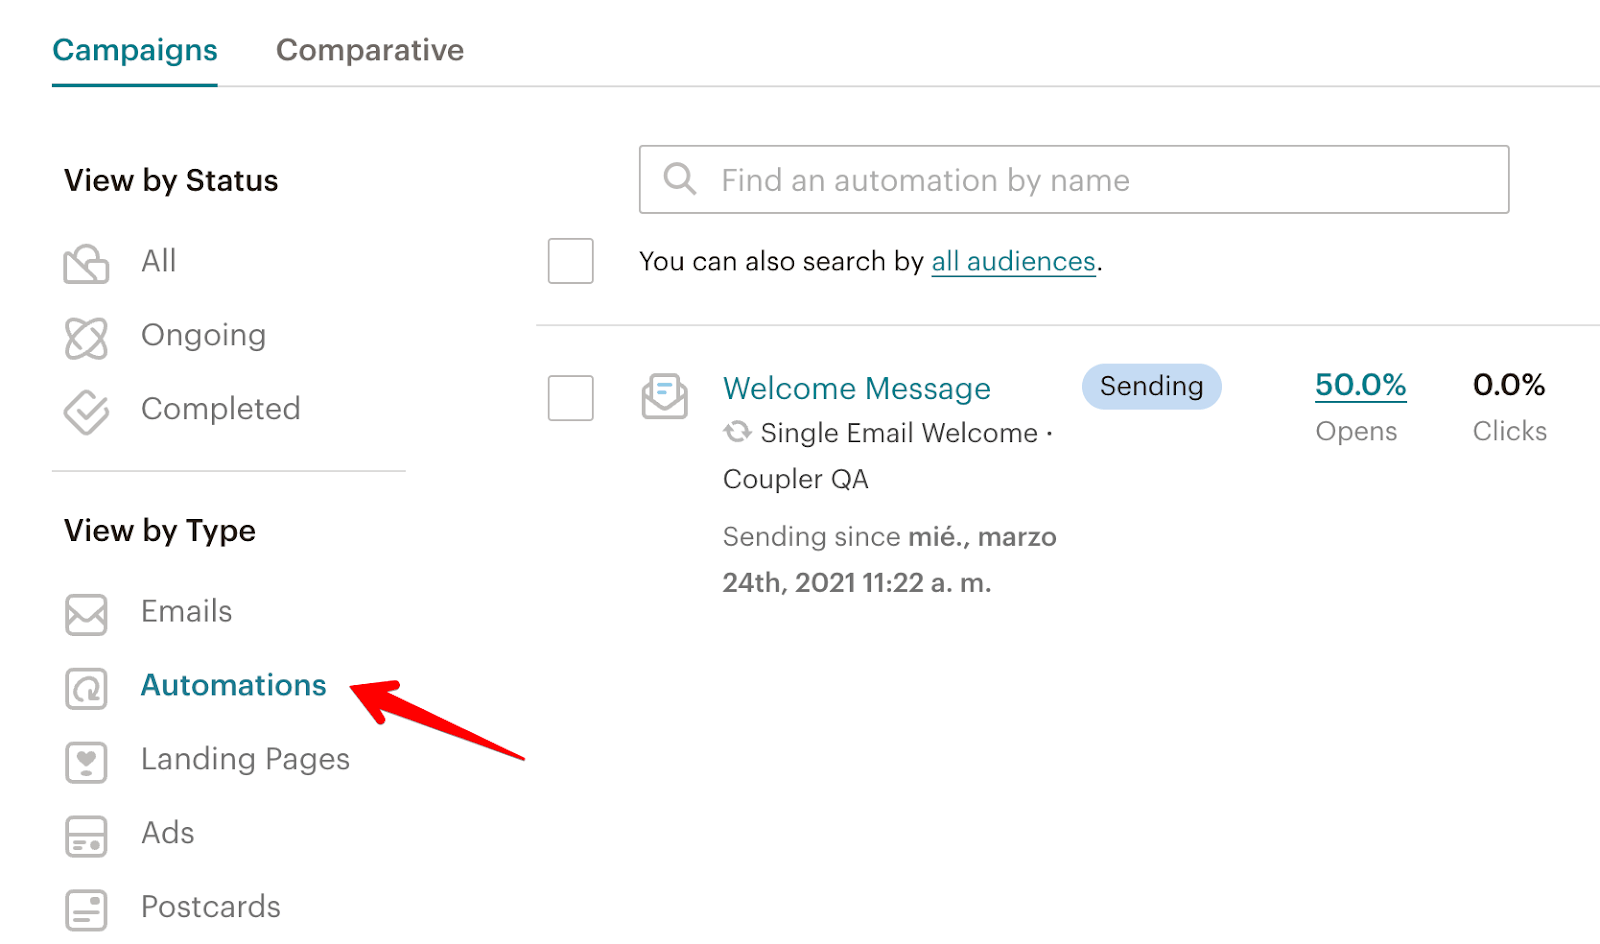
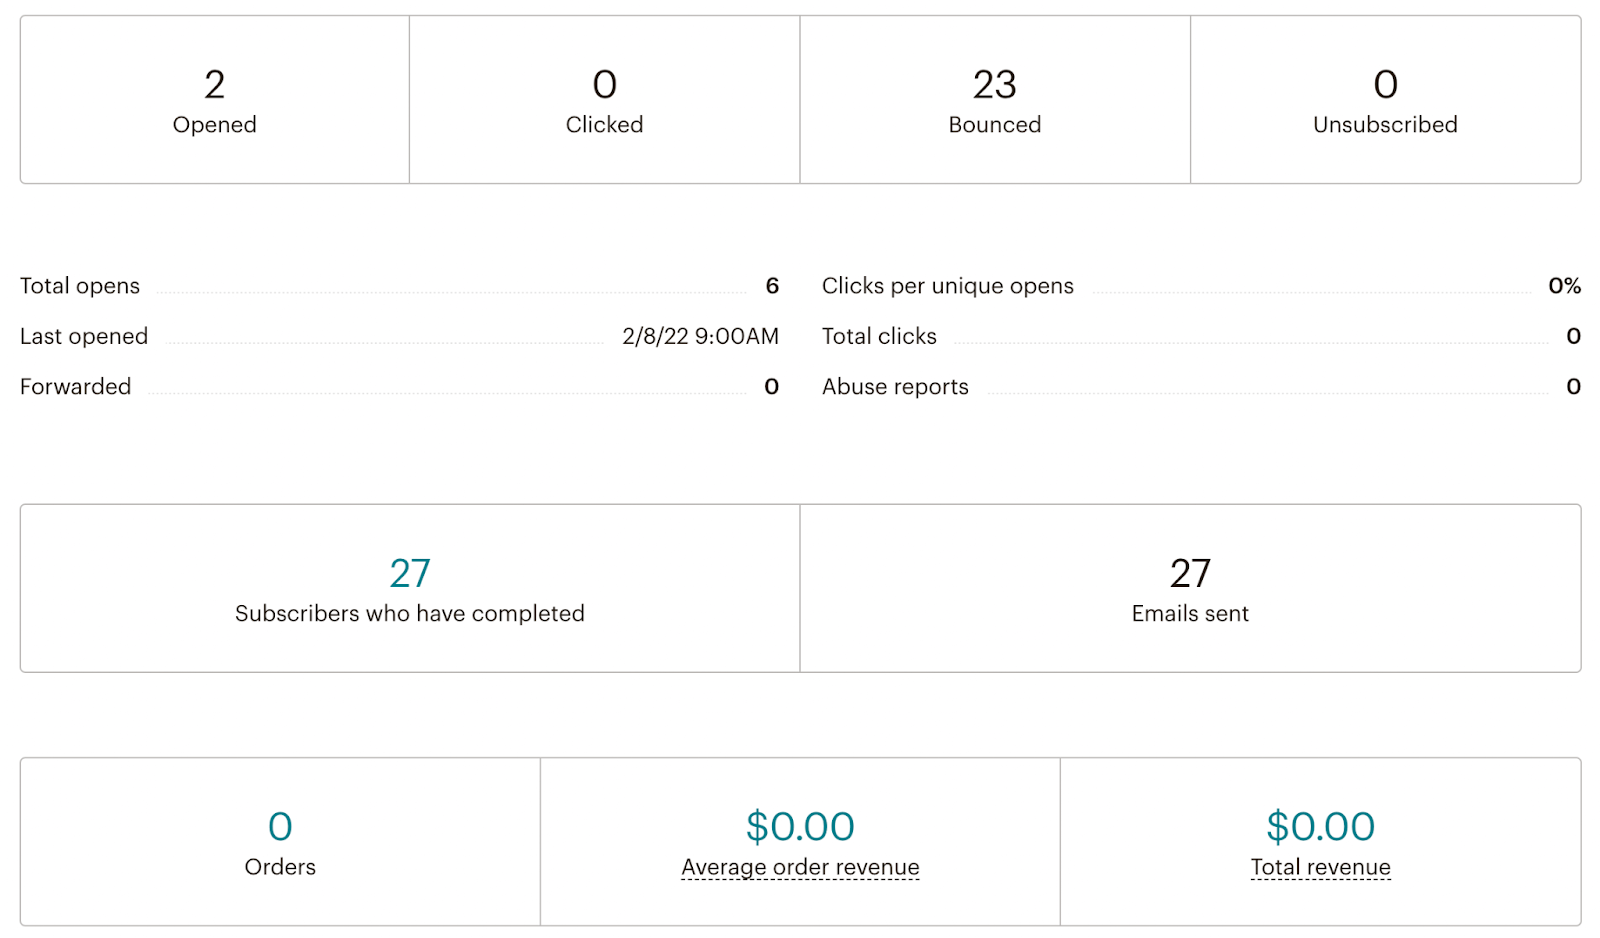
The report page shows basic stats, such as the number of emails opened, clicked, bounced, and unsubscribed contacts.
Further, you can see stats related to conversions, leads that completed a funnel, and the financial gains that the campaign has driven.
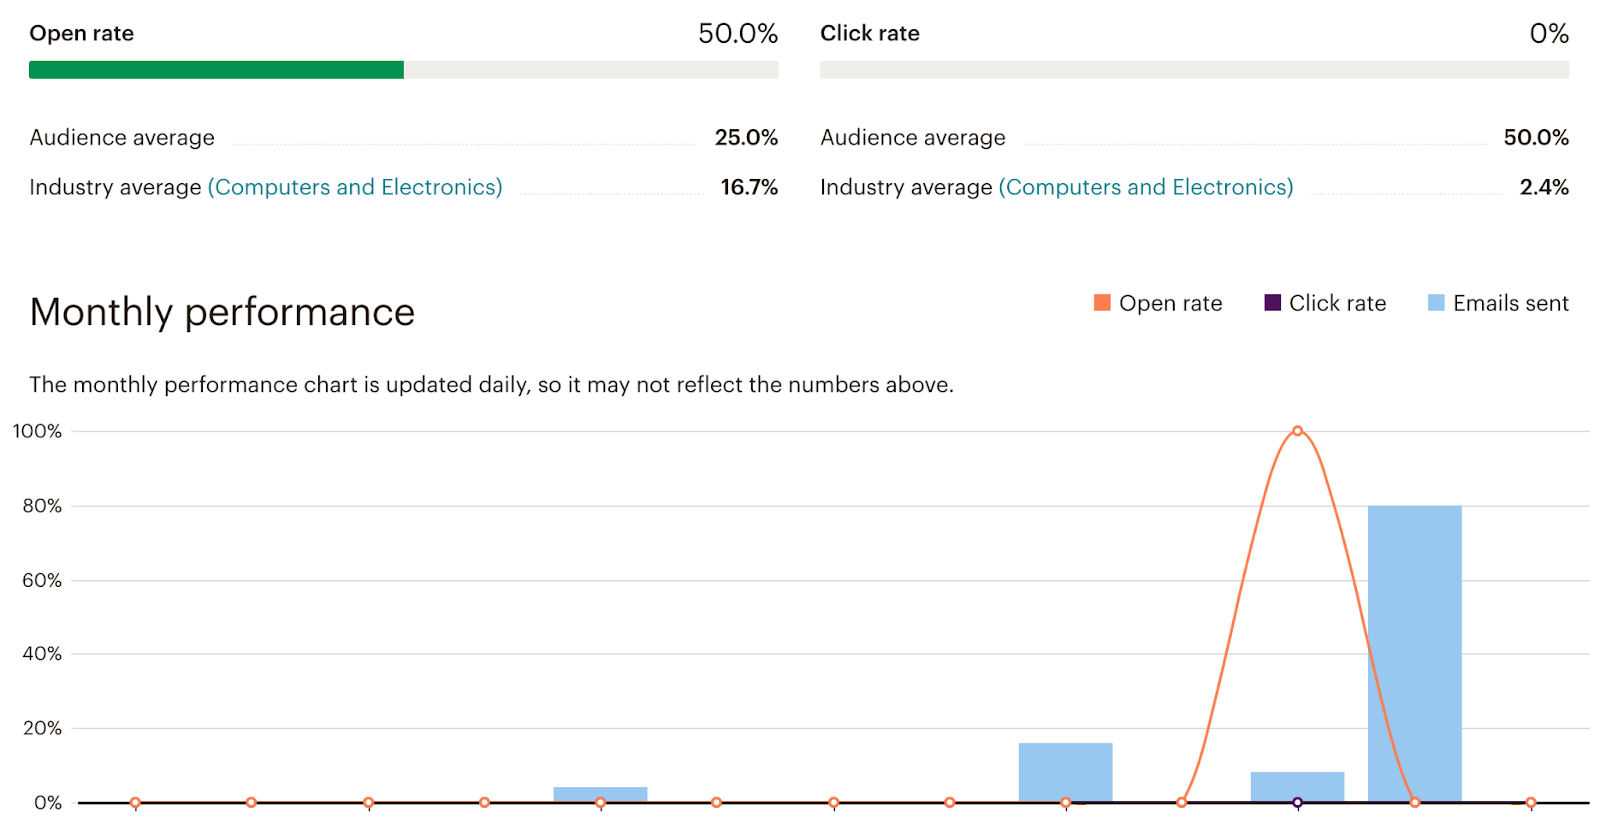
Further, you can view the open and click rate, as well as the audience and industry averages. You also see the monthly performance charts and stats for each message in a sequence.
Ultimately, you can drill down on each message and see its individual, detailed Mailchimp analytics.

Advanced workflow automation in Mailchimp – what else is possible?
There’s plenty you can automate with Mailchimp workflows.
Mailchimp features a handy workflow builder with virtually no learning curve. You can freely add conditions, customize templates to be sent, and experiment with different approaches. Five standard templates are also available out of the box, and so are the extensive Mailchimp reports for each automation.
Workflow automation doesn’t just end there, though. There are countless integrations available for building advanced workflows. These include online stores (Shopify, Magento, Drupal, etc.), advertising platforms (Google, Facebook, Instagram, etc.), and the likes of QuickBooks, Salesforce, and Stripe, just to name a few.
What kind of workflows you can build is only up to you and your imagination.